- 1. Resolve compatibility issues
- 2. Update your OS
- 3. Create a new admin account
- 4. Run the copy of your app’s .exe file
- 5. Scan your PC for malicious software
- 6. Disable your Proxy or VPN
- 7. Clear the cache and cookies in your web browser and reinstall the problematic app
- 8. Update Windows Store
- 9. Turn on the Sideload apps option
- 10. Update your drivers
- 11. Turn off SmartScreen
- 12. Declutter your drive
- 13. Use System File Checker
- 14. Fix your registry
- 15. Perform a clean boot

‘A winner never stops trying’
Tom Landry
Things do not always go as planned. For instance, a coveted app may fail to start on your PC and therefore bring disappointment and sadness. Although this might seem quite a drama, we are adamant that there is no need to despair: there are plenty of proven ways to fix This app can’t run on your PC Windows 10 error – all you need is to have a little patience.
So, it is time to get your app up and running:
1. Resolve compatibility issues
To begin with, let’s make sure you are trying to run the appropriate version of the program in question. The catch is, if you have 32-bit Windows, you can’t run 64-bit applications on your computer.
To check which version of Windows you are running, use the instructions below:
- Press the Windows logo key + I shortcut on your keyboard.
- The Settings app will open. Navigate to System and select About.
Now that you know which versions of the OS and the CPU you have, check the app you wish to launch on your computer – you might need to switch to its 32-bit version.
On the other hand, you can upgrade to the 64-bit version of Windows 10. You can do that for free. The thing is, the 64-bit version allows you to use both 32- and 64-bit apps.
If you wish to make the switch, your processor should be 64-bit capable and you should have 64-bit drivers for your hardware (Auslogics Driver Updater can update all your drivers to their latest versions in just one click).
Now you can perform an upgrade:
- First and foremost, back up your files – you do not want to lose them for good, right? Use a cloud solution or an external storage device for this purpose. Besides, you can move your data to another laptop.
- Go to the Microsoft website, download the Windows 10 media creation tool, and run it on your PC.
- Once on the Windows 10 Setup screen, navigate to the Architecture section and select the 64-bit (x64) option from the drop-down menu.
- Restart your PC. Boot from your media and opt for Custom install. Your current version of Windows will be overwritten.
- Skip the product key screen. Then follow the on-screen prompts. Your 64-bit Win 10 will activate itself automatically.
Now you can run your app – whichever its version is.
2. Update your OS
But what if your Windows 10 is 64-bit and yet unwilling to let your app work? The chances are your OS needs updating. Here is what you should do in a case like this:
- Click on your Windows logo icon in the lower left corner.
- Then select the gear icon.
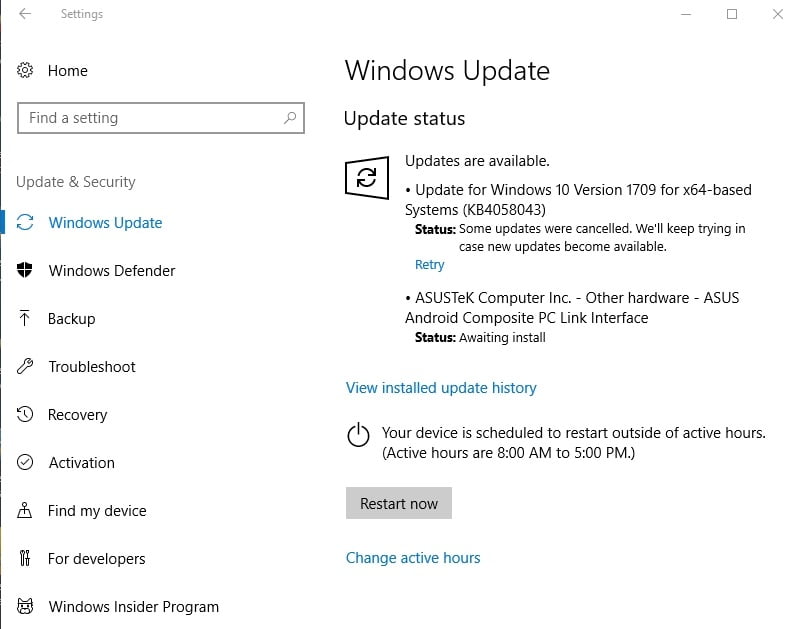
- The Settings app will open. Click on Update and Security.
- Once in Windows Update, check if there are any suggested updates on the screen. Let them come through.
![Update your OS to resolve the app issues on your PC.]()
- If there are no updates available at the moment, click on the Check for updates button – your Windows 10 will search for the latest improvements, developments, and patches from Microsoft online.
We hope updating your OS has helped you fix This app can’t run on your PC Windows 10 error.
3. Create a new admin account
If your Win 10 is up to date and yet the error persists, we recommend you to create a new admin account, since your current one might be corrupt. Follow the instructions below:
- Press the Windows logo key and I simultaneously.
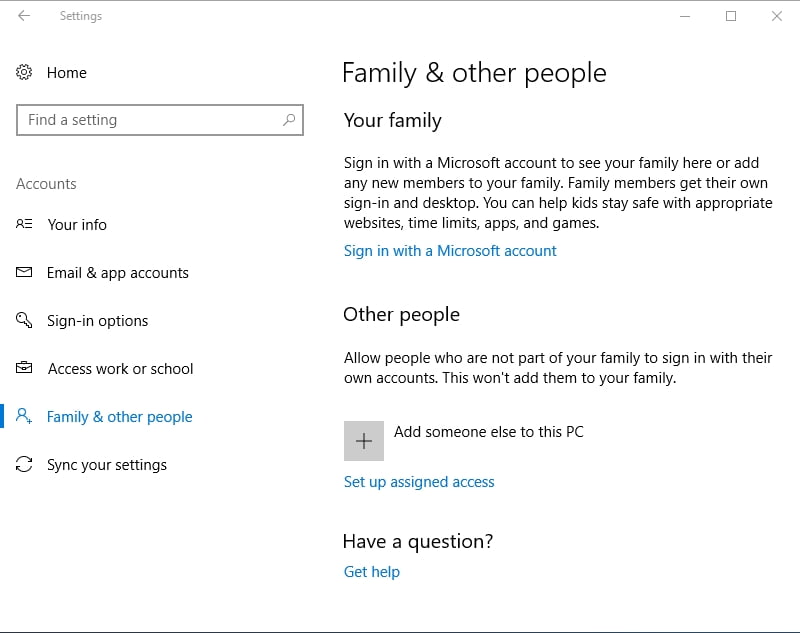
- Now that you are in the Settings app, proceed to Accounts.
- Move to Family & other people and go to Other people.
![Create a new admin account to fix your problematic app]()
- Click the Add someone else to this PC option.
- Choose I don’t have this person’s sign-in information.
- Then select Add a user without a Microsoft account.
- Enter login credentials for your new admin account.
- This account will become available in Other users.
- Select your new account and click on Change account type.
- The Change account type window will open.
- Select Administrator from the drop-down menu on the screen.
- Click OK to confirm your changes.
Now you can switch to your new account by clicking on your account picture/icon in the start menu and providing the username and password. Your app should run now.
4. Run the copy of your app’s .exe file
This simple and yet effective trick has helped many Windows 10 users fix the problem in question. What you need to do is locate the .exe file of the app you want to fix, copy this file, and then launch the copy. The app is supposed to work fine now.
5. Scan your PC for malicious software
No luck so far? In such a situation, consider conducting a full system scan: there is a chance your computer is malware-infected – especially if other malware infection symptoms are present.
For this reason, you can use the built-in Windows Defender to scan your PC:
- Click on your Windows logo icon. Locate the Settings gear. Click on it.
- Select Update & Security and click on Open Windows Defender.
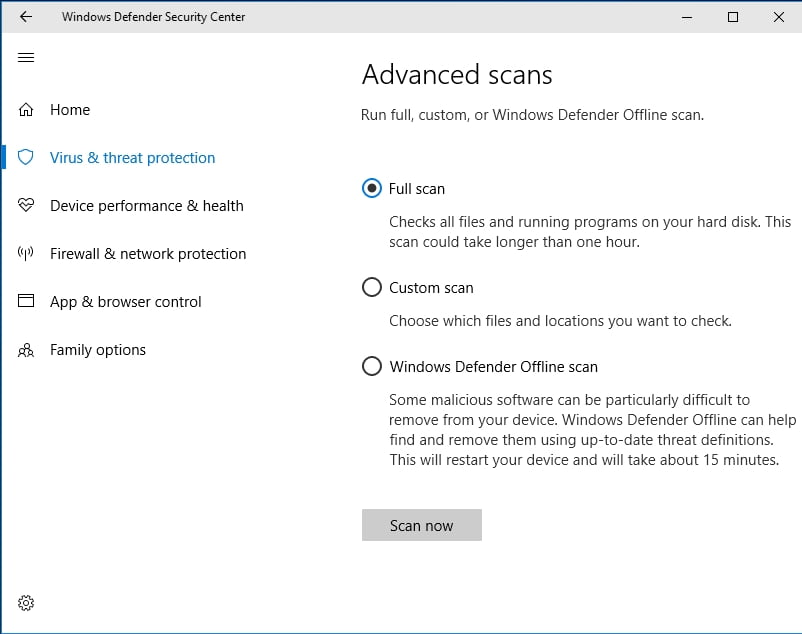
- In Windows Defender Security Center, locate the shield icon in the left pane and click on it.
- Go to Advanced scan. Select Full scan from the menu.
![Scan your PC for malware with Windows Defender. This may get your apps up and running.]()
With that said, you are free to use a third-party solution to purge nefarious entities from your PC. In this regard, you are welcome to install Auslogics Anti-Malware: this powerful tool will scan every nook and cranny of your Windows 10 and remove any suspicious items or entries found. In addition, this utility can work in tandem with another security solution, which is a great way to make your PC protection actually unbreakable.
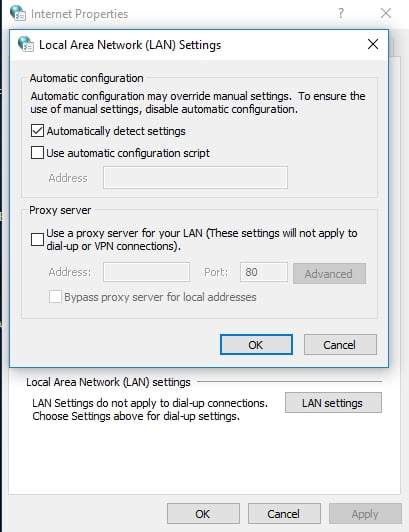
6. Disable your Proxy or VPN
The point is, your Proxy or VPN settings might be blocking your connection to Windows Store.
To disable your Proxy, do the following:
- Open your Start menu and click on Control Panel.
- Click on Internet Options and go to Connections.
- Locate LAN settings. Uncheck Use a proxy server for your LAN.
![Disable your proxy and see if this has fixed your app issue.]()
- Confirm your changes.
Here is how you can disable your VPN connection:
- In your Start Menu, locate the Control Panel tile and click on it.
- Enter Network and Sharing Center.
- In the left pane, locate Change adapter settings and click on this link.
- Locate your VPN connection. Right-click on it and select Delete.
Relog into your account and try to launch your problematic app.
7. Clear the cache and cookies in your web browser and reinstall the problematic app
Your browser’s cache and cookies might be behind ‘This app can’t run on your PC’ in Windows 10, since they might have corrupted the download of the app which struggles to run. Therefore, we recommend you to perform a browser cleanup and install the app from scratch. Here is what you should do if your browser is
Microsoft Edge:
- Open your Edge browser.
- Click on the star icon in the top right corner.
- Then click on the clock icon.
- Select the Clear all history option.
- Then you should check the following options:
- Browsing history;
- Cookies and saved website data;
- Cached data and files.
- Finally, click Clear and close your browser.
Chrome:
- Open your Chrome browser and navigate to its bar.
- Type: chrome://settings/clearBrowserData into the bar.
- Once on the ‘Clear browsing data’ window, configure your browser to delete the following data:
- Browsing history;
- Download history;
- Cookies and other site data;
- Cached images and files.
- Select All time as Time Range.
- Click on Clear data and exit the browser when the process is complete.
Opera:
- Open the browser and click on the Opera icon.
- Enter Settings and proceed to Privacy and security.
- Select ‘Clear browsing data…’ and choose ‘The beginning of time’ from the ‘Obliterate the following items from:’ menu.
- Select the following:
- Browsing history;
- Download history;
- Cookies and other site data;
- Cached images and files.
- Click Clear browsing data.
- Close your browser.
Firefox:
- Open Firefox and go to the History menu.
- Click Clear Recent History.
- In the ‘Time range to clear:’ menu, select Everything.
- Navigate to Details and click the down arrow next to it.
- Select all items and then click on Clear now.
- Close your browser.
Now you should uninstall your app completely and remove its leftovers. After doing that, download the app on your computer, carry out the installation, and launch the software. It should run like clockwork now.
8. Update Windows Store
If a Windows app can’t run on your computer, your Windows Store might be having issues. We recommend you to update it straight away to eliminate bugs and glitches:
- Go to your Start menu and open the Windows Store app.
- In the top right corner, locate the icon that looks like three horizontally aligned dots.
- Click on it and select Downloads and updates. Then click on Get Updates.
After updating your Windows Store, uninstall the problematic app (see the link in the previous fix), and download it again. Install the app on your PC and see if you can open it.
9. Turn on the Sideload apps option
Your system might be configured to allow only Windows Store apps. Thus, if a third-party piece of software struggles to run on your PC, it might be blocked on the grounds of its origin.
As such, let’s allow sideload apps on your computer:
- Press the Windows logo key and I simultaneously.
- The Settings screen will open. Go to Update & security.
- In the left pane, navigate to and click on For developers.
- In the Use developer features menu, check the Sideload apps option.
Now exit your settings app and see if your issue has been resolved.
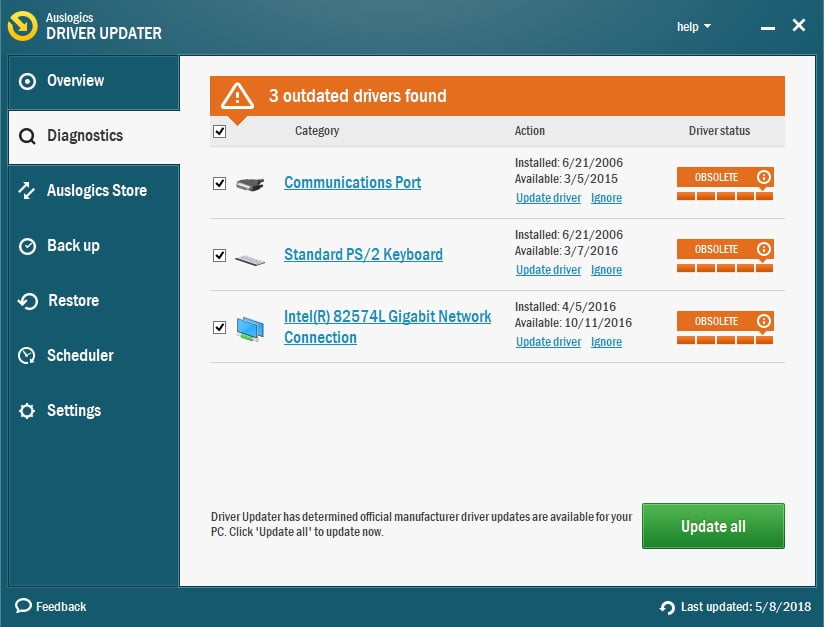
10. Update your drivers
And yet no success? Then your problematic app might be having trouble communicating with the hardware involved in its functioning. Such a problem usually stems from out-of-date or faulty drivers, and there is a very high chance of that being your case.
To update and repair your drivers, you can use the built-in Device Manager tool:
- Press the Windows logo key + X shortcut and select Device Manager from the list.
- Locate the device which driver needs updating and right-click on it.
- Click on Update Driver. Then select Search automatically for updated driver software.
![Update your drivers automatically via Device Manager]()
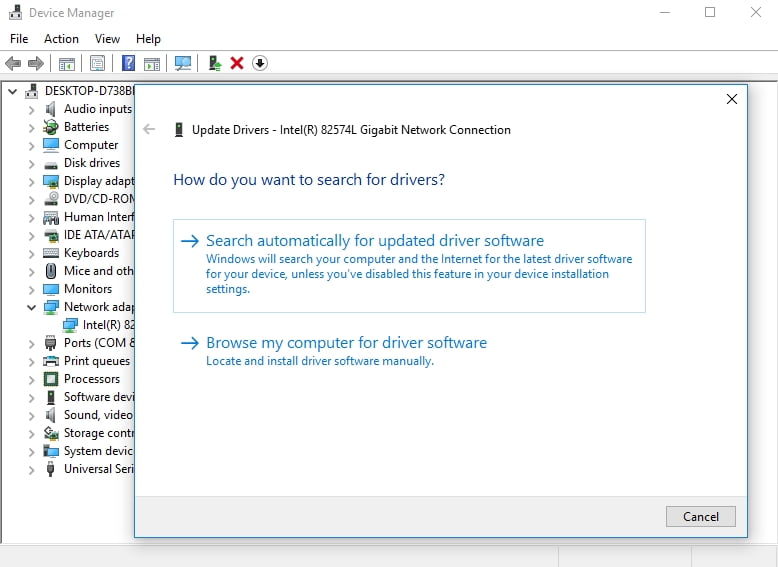
If Windows 10 fails to find a new driver for your device, you are free to search for it yourself – just make sure you know what you are looking for, since installing the wrong driver may complicate matters even further.
However, the easiest way of getting all your drivers back on track is by using special software to automate the process. For instance, Auslogics Driver Updater will need no more than just a click of yours to provide all your devices with the latest manufacturer-recommended driver versions.
11. Turn off SmartScreen
Since phishing scams and malware are getting more and more sophisticated, it goes without saying that you need reliable tools to protect your PC against the threats in question. The SmartScreen feature is a case in point. However, it can prevent certain apps from running on your computer. In a situation like this, temporarily disable SmartScreen and see if your app can run after that manoeuvre:
- Open the Search box by simultaneously pressing the Windows logo and S keys.
- Type smartscreen into Search. Select App & browser control.
- You will be taken to Windows Defender Security Center.
- Navigate to the Check apps and files section and select the Warn option.
- Confirm this action as an administrator.
If this has solved your issue, report the problem to the app’s vendor or make sure to switch on your SmartScreen every time you close the software in question, since your security is paramount.
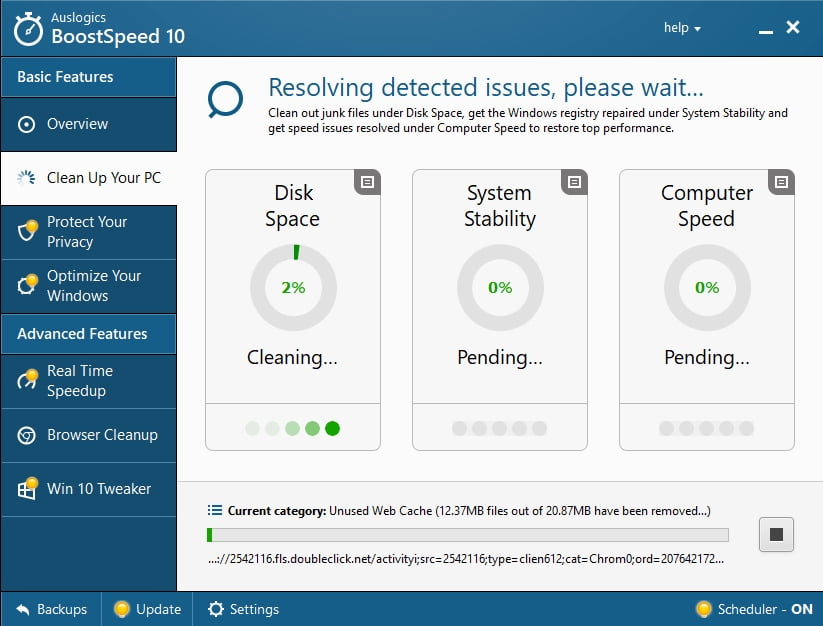
12. Declutter your drive
Your apps may fail to run due to the junk accumulated on your computer. If your drive is cluttered with temporary files and folders, your PC becomes sluggish, unresponsive, and prone to error, which means your disk needs a thorough cleanup.
The Disk Cleanup app will come in very handy under such circumstances:
- Press the Windows logo + S shortcut on your keyboard to invoke Search.
- Type Disk Cleanup and run the tool by selecting it from the list.
- Select the disk that needs cleaning. Click the ‘Clean up system files’ button.
Another effective way to declutter your PC and free up some valuable disk space is to use a third-party utility. For example, Auslogics BoostSpeed will wipe all kinds of junk off your system, enhance your privacy, and ensure the smooth and fast performance of your computer.
13. Use System File Checker
If you have made this far, it is time to check your Windows 10 for system file corruption. Utilize the System File Checker tool for this purpose:
- Press the Windows logo key + S shortcut ant type cmd into Search.
- Right-click Command Prompt and select Run as administrator.
- Type sfc /scannow into the Command Prompt window.
- Let the scanning process finish and exit Command Prompt.
- Restart your PC for file replacement to take place on boot.
Now check your app. If it can work now, then corrupted system files were to blame for the issue.
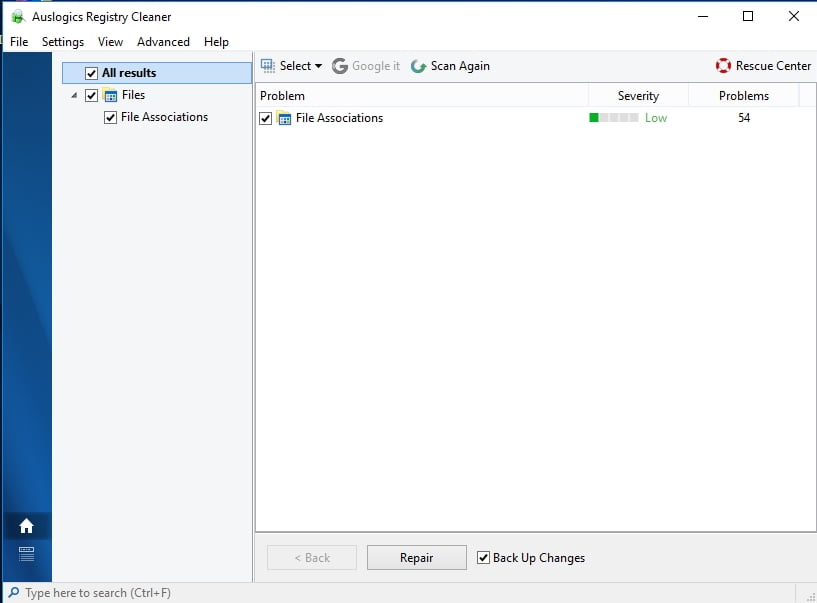
14. Fix your registry
The error ‘This app can’t run on your PC’ might be rooted in your system registry: if it’s corrupt or damaged, your apps become unstable and turbulent. To fix them, you should scan and repair your Windows Registry, which requires deep technical expertise and exceptional cautiousness. Since human beings are prone to error, it is a wise idea to employ reliable software such as Auslogics Registry Cleaner. This tool will clean and tweak your registry with surgical precision. By the way, this product is 100 % free, no strings attached.
15. Perform a clean boot
If all the above solutions have failed to fix your issue, there might be a software conflict involved. To identify and solve it, you might need to clean boot your system.
These are the steps to take in order to enter a clean boot state in Windows 10:
- Hit the Windows logo key + S shortcut on your keyboard.
- Type msconfig into Search and press Enter.
- Go to the General tab. Navigate to Selective startup.
- Move to the Load startup items panel and clear it.
- Navigate to the Services tab. Go to the Hide all Microsoft services panel. Clear it.
- Save your changes. Then restart your computer.
Now that your PC is in a clean boot state, check the app. If the problem persists, check what programs and services are currently enabled – the culprit is among them. If clean booting your Win 10 has ironed the problem out, enable the items that you have previously turned off – turn them on one at a time to see which one is responsible for the malfunction.
Hopefully, you have managed to fix This app can’t run on your PC Windows 10 error. And we strongly advise you to keep your apps up to date to avoid software problems in future.
Have our tips proved useful?
Do you have any ideas on how to fix apps that refuse to run on Windows 10?
We are looking forward to your comments!


 Done! Great to see you among our subscribers!