![[SOLVED]“Your PC or Mobile Device Doesn’t Support Miracast” in Windows 11](png/device-doesnt-support-miracast.png)
One of Windows 11’s most popular features is Miracast support. This feature helps you connect your devices wirelessly. This can be particularly handy; however, you may get the “Your PC or mobile device doesn’t support Miracast” error in your Windows 11 PC.
There are lots of reasons why the Miracast error occurs. It may be due to incorrect Wi-Fi settings, display driver issues, outdated network drivers, etc.
This guide will show you a list of possible fixes to help you solve the Miracast error in Windows 11.
If you don’t know how to fix the Miracast error in Windows 10, check out this article:‘This device doesn’t support receiving Miracast’ [Fixed]
Let’s dive right in!
First, Make Sure Your Device Supports Miracast
Check if your device is Miracast-compatible before you start fixing the problem. To check if your device is compatible with Miracast, open the wireless display settings by pressing the Windows key and “P” together.
You’ll get a message on the screen if your device doesn’t support a wireless display. That also shows that your device isn’t compatible with Miracast. However, if your device lists different devices to connect, it’s Miracast-compatible.
How to Fix the “Your PC Or Mobile Device Doesn’t Support Miracast” Error in Windows 11
Miracast is built-in to Windows 11, so most modern computers can stream media wirelessly. So, the Miracast error is probably the result of a misconfiguration or a glitch. You must verify that the Wireless Display option is enabled to fix it.
Moreover, if you’re having problems with your display, try updating your drivers with Auslogics Driver Updater to the most recent version. Finally, if none of these methods work, try the below steps:
Related: How to download and install Windows 11?
Solution 1: Connect the Devices to the Same Wireless Network
- To activate Wi-Fi, select the Wi-Fi icon at the bottom-right toolbar.
- Choose the Wi-Fi icon and tap it.
- Connect to the wireless network.
- Get the other device and connect to the same Wi-Fi network.
The Miracast feature requires the Windows 11 PC and the compatible monitor to be connected to the same Wi-Fi network. You can now test to see if this resolves the issue with Miracast not working.
Solution 2: Update Your Network Drivers
Here’s how to update your network drivers:
- Right-click on the “Start” menu.
- Click on Device manager.
- Double-click to expand the “Network adapters” section.
- Then, right-click on the Wi-Fi adapter and select “Update driver.”
- After, click on “Search automatically for drivers.”
Windows will begin scanning for network drivers and, if it finds any, will recommend their installation.
If your computer’s NdisVersion is too old, this method can assist. After you upgrade your network driver as described above, you may be able to solve the Miracast Windows 11 not working problem.
Solution 3: Run a Troubleshooter
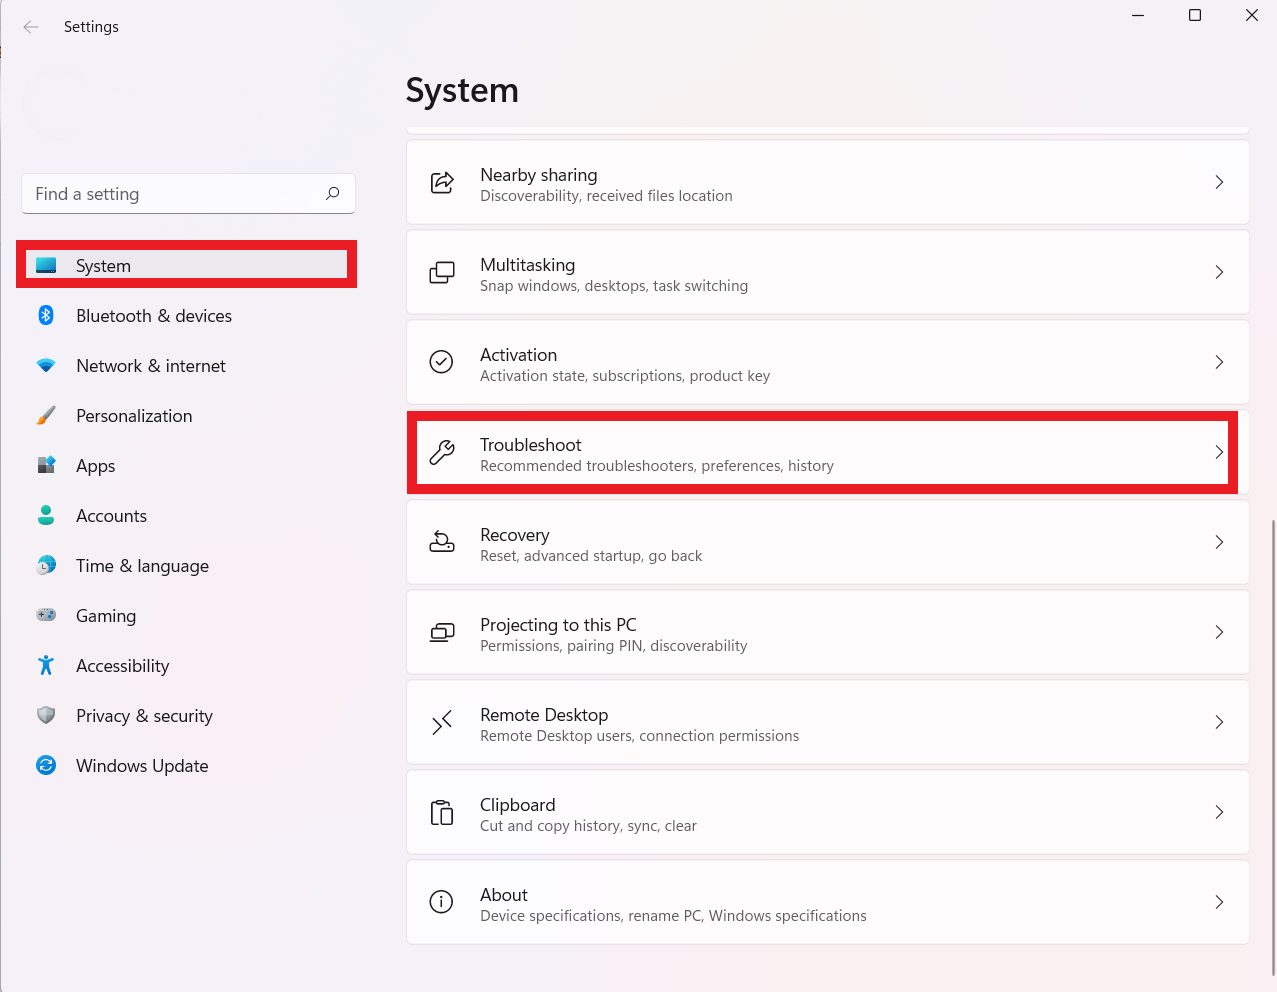
- Open the Windows Settings by pressing the Windows key and “I” together.
- Select Troubleshoot.
![Your PC or Mobile Device Doesn’t Support Miracast Error]()
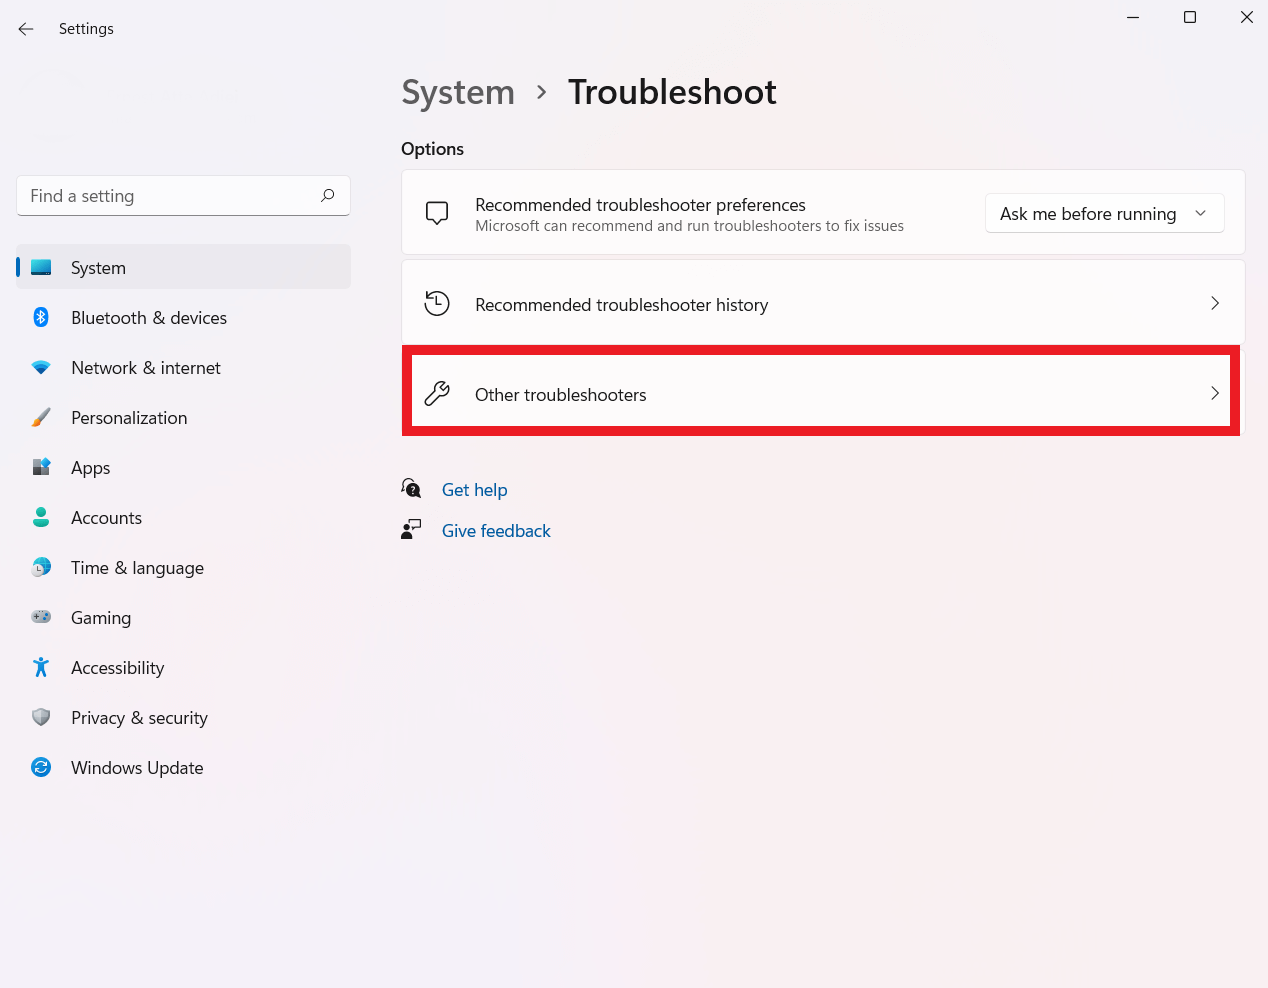
- Click on “System” and choose “Other troubleshooters.”
![Your PC or Mobile Device Doesn’t Support Miracast” Error]()
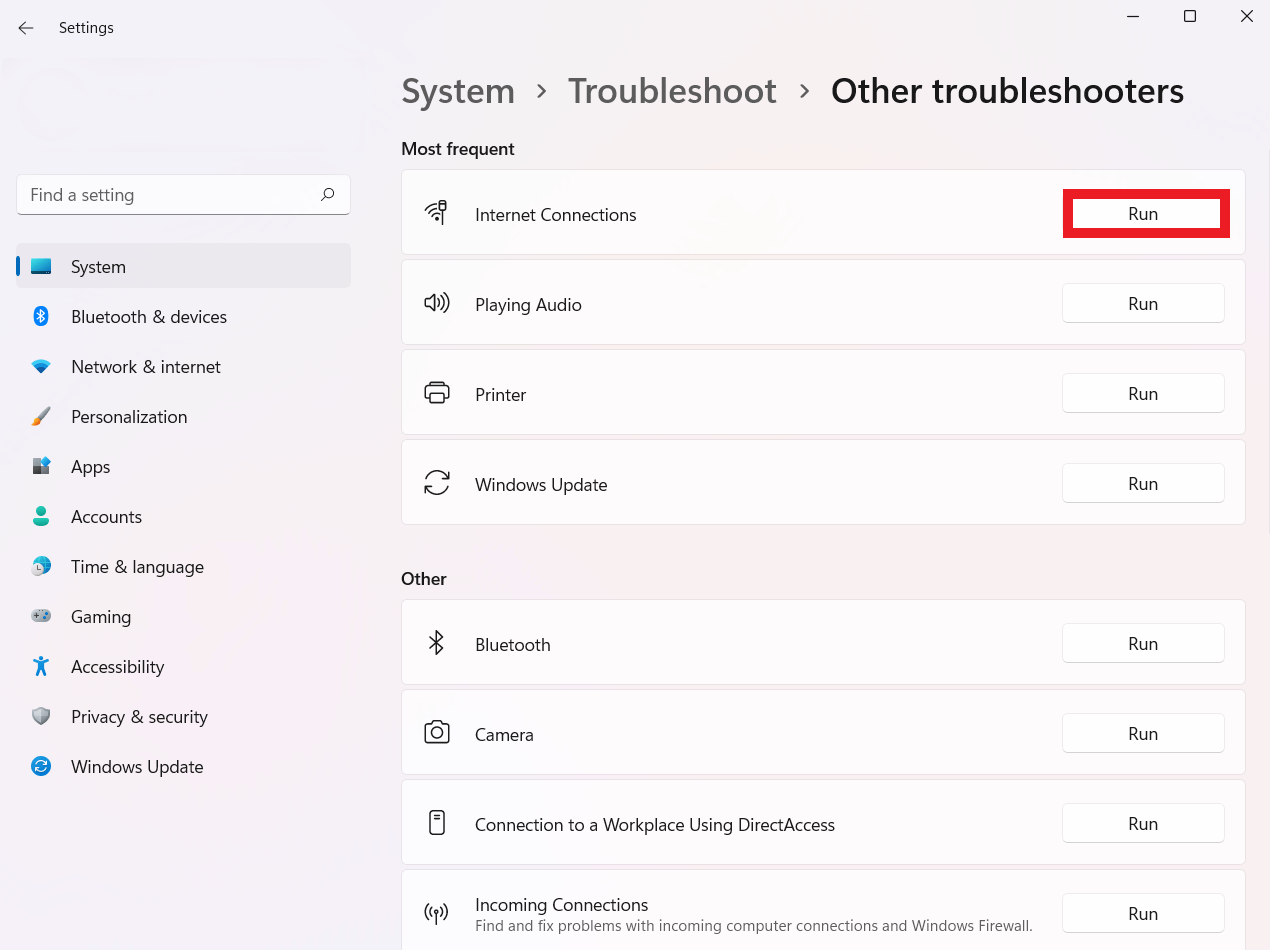
- Click “Run” beside “Internet Connections.”
Similarly to previous Windows versions, Windows 11 includes an in-built troubleshooter that you can use to address various PC-related issues.
If you’re having issues with Miracast on your Windows 11 computer, you can launch the Connection Troubleshooter and see if it helps.
Solution 4: Be Sure Your Windows Firewall Is Set Up Properly!
The adapter may fail to establish a connection with the source device if Windows Firewall blocks the connection. You can temporarily disable the Windows Defender Firewall to see if that’s causing the Miracast error.
Allowing the Wireless Display to get past the firewall should fix the issue if that’s the case.
Here’s how to disable the Windows Defender Firewall:
- Open “Settings” by pressing Windows + I.
- Click on “Privacy & Security” in the left pane.
- Click on Windows Security.
- Click on “Firewall & Network Protection.”
- Click on the “Public network (active)” profile.
- Switch off the Microsoft Defender Firewall.
When you disable the firewall, try to connect to the wireless display and check if the Miracast error is fixed. If yes, enable the Windows Defender Firewall and follow the below steps:
- Press Windows and “R” to open Run.
- Open the control panel by typing “control.”
- Go to “System and Security.” Then, “Windows Defender Firewall” in the Control Panel.
- Click on “Allow an app or feature through Windows Defender Firewall.”
- Next, click on “Change Settings.”
- Search for “Wireless Display.” Then, search for “Private and “Public.”
- Then, find the “Connect app” and make sure it’s allowed in both “Private” and “Public” networks.
- Save the changes by clicking OK.
Solution 5: Reinstall or Update the Display Drivers
Like corrupt network drivers, outdated display drivers can cause problems in Miracast. To solve this problem, you have to install or update your drivers in Windows 11. Here’s how to proceed:
- First, open the search menu and type “Device Manager” in the search bar.
- Expand the “Display Adapters” option in “Device Manager.” Then, right-click on “Intel(R) UHD Graphics” and select “Update Driver.”
- Select the “Search automatically for drivers” option from the Windows pop-up.
- After, check if Miracast is working properly.
If it doesn’t work, you have to reinstall the display adapters. Follow the steps below to that:
- Open the “Device Manager” again and double-click on the “Display Adapters” to expand.
- Then, right-click on “Intel(R) UHD Graphics” and select the “Uninstall Device” option.
- Scan for hardware changes from the Action tab and restart your PC to apply the changes.
Solution 6: Reset Windows 11
- Go to Windows settings by clicking the Windows logo and “I” together.
- Click on “Recovery.”
- Click on “Reset PC” under the “Recovery” options.
- Choose the type of factory reset you want.
- Follow the steps and click on the reset button.
Note: You should only reset your PC if none of the above methods worked. Also, this is only one of the numerous ways to reset your computer. So, choose the one that’s ideal for you.
Furthermore, your PC will restart several times during the reset process. However, that shouldn’t alarm you, as this is part of the reset process.
Which Devices Support Miracast?
Because it has become a standard in the industry, you can find Miracast on numerous devices. Miracast capability was first introduced in Windows 8.1 and is now included in all versions of Windows, including Windows 11.
Miracast is limited to screen mirroring on mobile devices. However, on a Windows PC, you can use an external display device like a TV, monitor, projector, or even another computer as an additional display.
Google used to offer Miracast support in Android, but they removed the feature in Android 6.0 Marshmallow. But, even though Android doesn’t have Miracast support, it’s still available on devices from different manufacturers.
So, you have to check your device’s documentation or contact the manufacturer to know if it supports Miracast.
Final Thoughts
This guide has given you a list of tried and true troubleshooting methods to fix the “Your PC or mobile device doesn’t support Miracast” error. You can go through each step to find the one that works for you.
However, if you still keep getting the error message even after all the methods outlined in this guide, consider using a third-party screen mirroring program. That can help you, especially if you use it for professional work.


 Done! Great to see you among our subscribers!