
You may decide to partition your hard drive for a variety of reasons. Whether you need exclusive space to store sensitive data or dual-boot Windows, the steps are easy. This article will show you how.
It is necessary to partition a new hard drive after installing it. Your hard drive cannot be used by the operating system or yourself to store data until it is partitioned and formatted. When you section a part of the drive via partitioning, you make it available for use by the OS.
What Is Partitioning?
When you partition a drive, you divide it into two or more parts called partitions. A partition in Windows is also called a volume. The operating system treats each partition as a distinct drive. It assigns different volume letters to distinguish one volume from another.
Many new PCs are already partitioned out of the box. There is the C drive, which everyone is already familiar with, and a small D partition as well. The latter volume stores recovery files Windows can use when a problem occurs.
When Can I Partition a Hard Drive?
In most cases, you can just continue to use your computer the way it is. splitting the main storage drive into multiple portions isn’t something you should do without a good reason.
If you’re trying to clean-install Windows, you don’t need to spend time partitioning your drive manually. Windows will do that automatically during the installation process.
Even if this isn’t the reason, you shouldn’t be in a hurry to partition your drive. Perhaps you wish to put some sensitive files into a separate space from your main ones to avoid the possibility of tampering etc. In that case, you can consider bespoke third-party solutions like VeraCrypt, move the files to the cloud, an external hard drive, or use BitLocker to encrypt them.
It is understandable to partition your drive if you wish to install another operating system like Linux on the PC. You can also split your storage to put Windows files and personal files in separate volumes. This way, you won’t lose your files if you install Windows again since it will only use its allocated volume for the installation. You must however consider the overall capacity on the drive when making the decision about how much space to allocate to each partition you create.
If you’re hell-bent on partitioning your drive then you can read on for the easy guide. Unlike what you might think, the process is relatively simple and takes only a few minutes.
How to Partition a Hard Drive
You don’t need any extra tools to split your drive. Everything required is already on your computer.
But—first things first—do you have enough free space on your drive?
This is an important factor for you to consider. There is no point trying to partition your drive if it is almost or completely full already. You certainly can’t partition non-empty space on Windows.
It is better to check your available storage space before you proceed. Simply open File Explorer and click This PC on the sidebar. Check your C drive. You’ll know whether you can proceed or if you either need to free up space or install a drive with more space.
If you’d like to free up space, you can do that yourself. Open File Manager and explore the contents of your PC. You can delete files and programs you no longer need.
For a faster process, consider installing Auslogics BoostSpeed. This all-purpose system optimizer has a cleaning feature that lets you remove junk files and unneeded files instantly.
Either way, think about what you need the extra partition for and how much space is required. Once you’re satisfied that splitting the drive won’t unduly affect future use, you can move to the next stage.
The next stage is of course backing up important files. Partitioning a drive shouldn’t pose risks to the data already in it but you can never be too careful.
Open Disk Management
We need to open Disk Management to begin the process. This is the utility on Windows that handles disk-related tasks.
You can open Disk Management in the following ways:
- From Control Panel: Network and Security > Administrative Tools > Computer Management > Disk Management.
- Via diskmgmt.msc: Open Command Prompt, PowerShell or the Run box and execute the diskmgmt.msc command.
- Via the Power User Menu: Press Windows Key + X and select Disk Management.
Shrink Your Drive
When Disk Management opens, you’ll be shown a list of drives and their partitions like in the image below.
If you installed a new drive, you may get a Initialize Disk popup window asking you to choose a partition style for the drive. The rule is to select GPT for drives of 2TB or greater and MBR for drives lesser than 2TB.
Locate the drive you wish to partition in the lower half of the Disk Management window and select it. If it is a new drive, it will probably be labelled Unallocated. This means it hasn’t been formatted (and cannot be used).
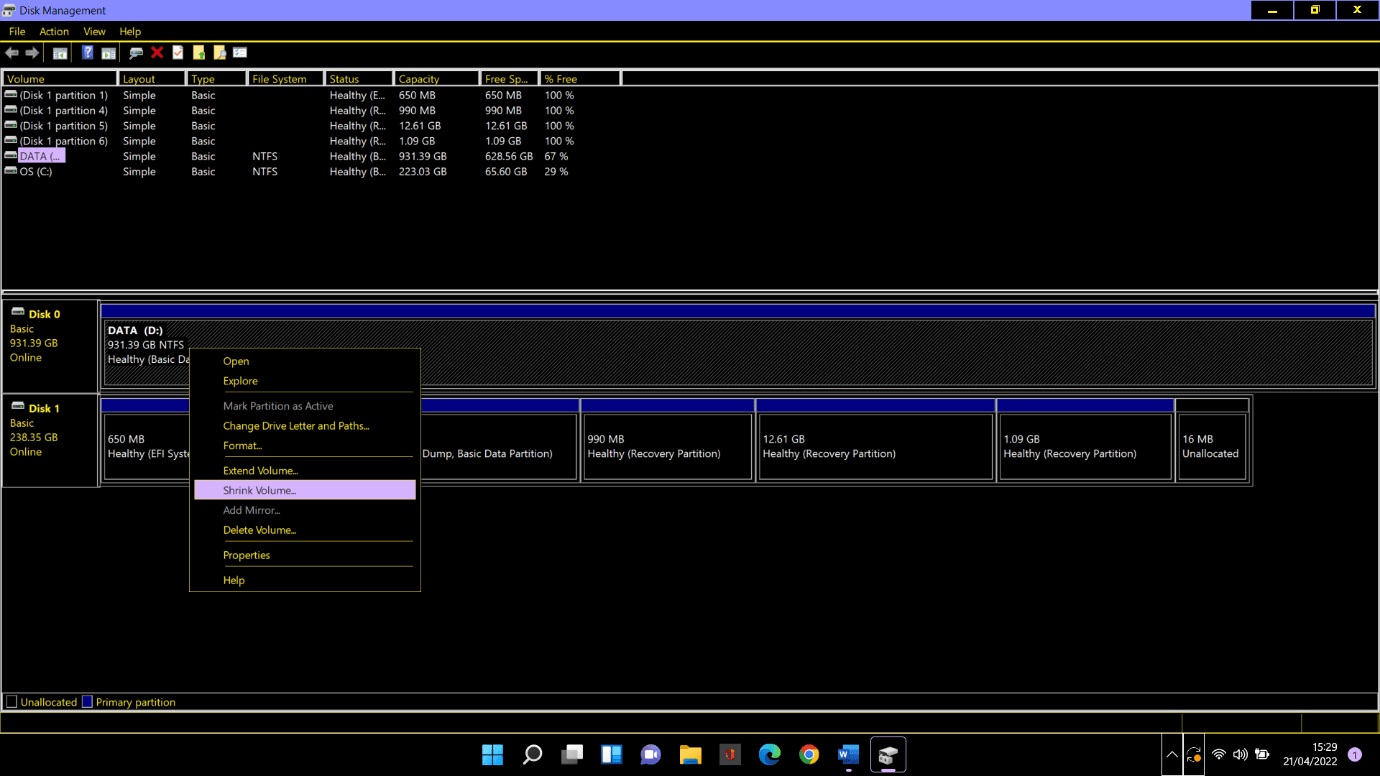
Things are a bit more complicated if you want to repartition an existing drive. If a part of the space is already partitioned, you will see Unallocated next to that partition. However, if the partition uses all the available space on that drive, you will need to shrink the partition first. Here’s how to repartition a hard drive:
- Right-click the drive and select Shrink Volume.
- On the Shrink dialog box, note the total space available to shrink. Then enter the amount of space you want to create in MB (Note: 100000 MB =100 GB) and click the Shrink button.
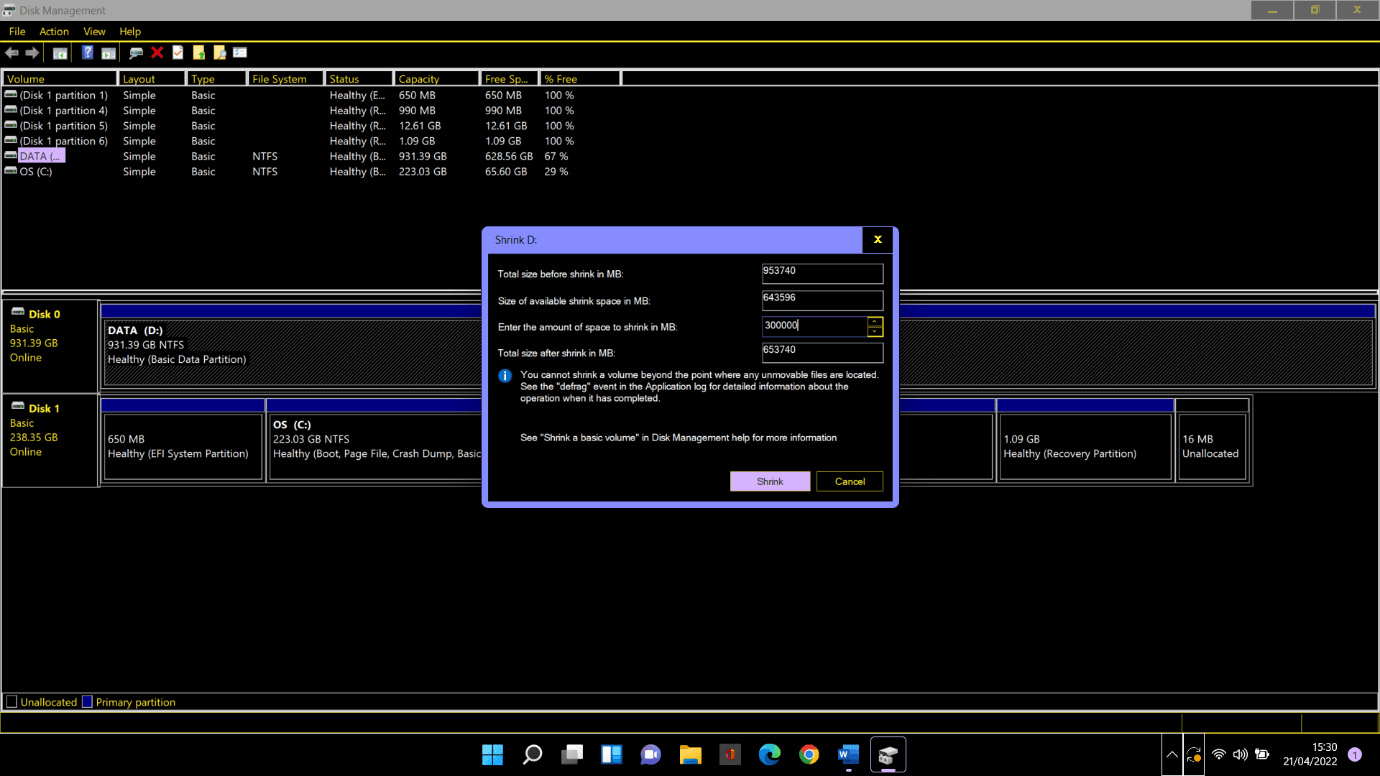
- Windows will create an unallocated partition. It might take a while depending on how much space you freed up. Once it is done, you will now see Unallocated beside the partition on the existing drive.
Partition Your Drive
Now that you have the space you need, we can begin creating the partition properly.
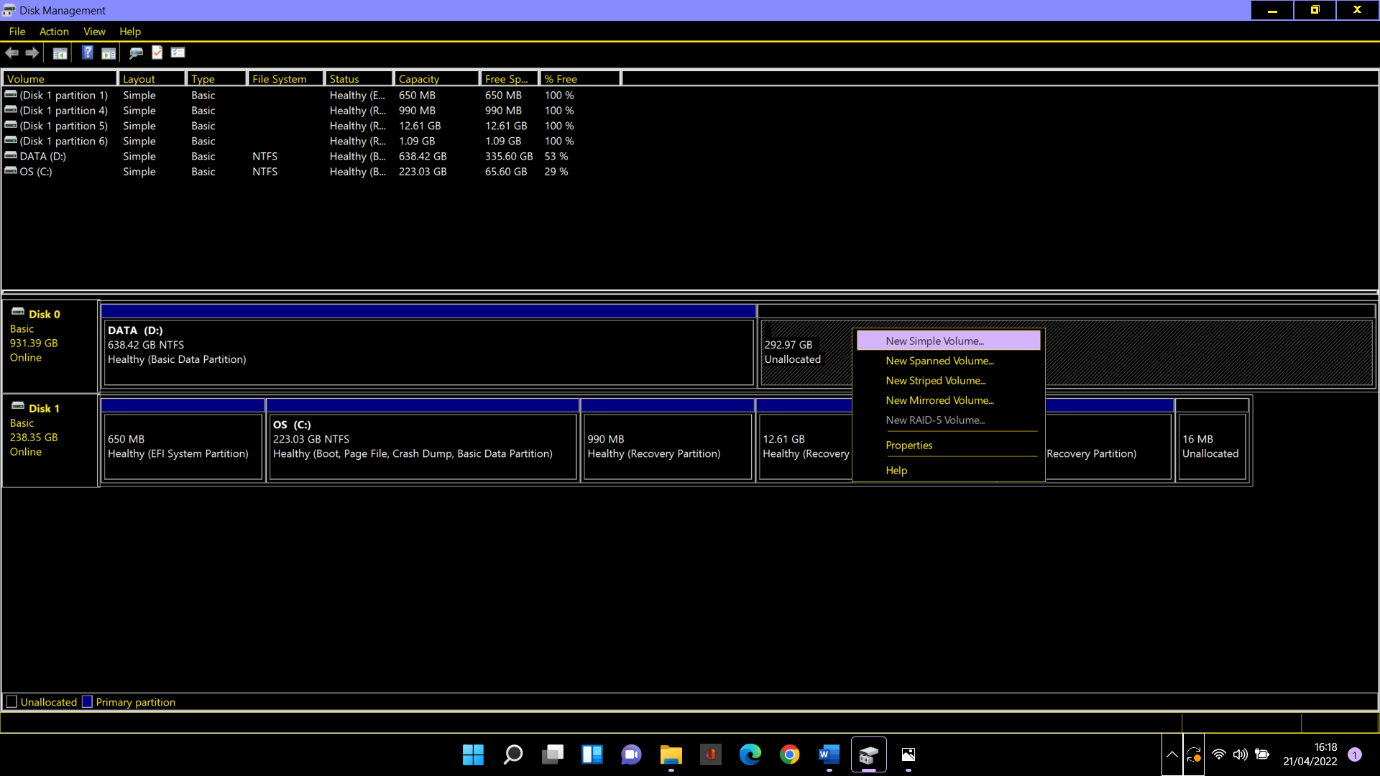
Step 1. Right-click the unallocated space and select New Simple Volume.
Step 2. When the Simple Volume Wizard window shows up, click Next.
Step 3. If you want to use all the free space for the new partition, click Next on the Specify Volume Size window. If not, type the amount of space you need then click Next.
Step 4. Click Next on the Assign Drive Letter or Path window. Windows will automatically give your partition a letter label. You may manually change the assigned letter if you like. You cannot however use a letter that’s already in use (like C).
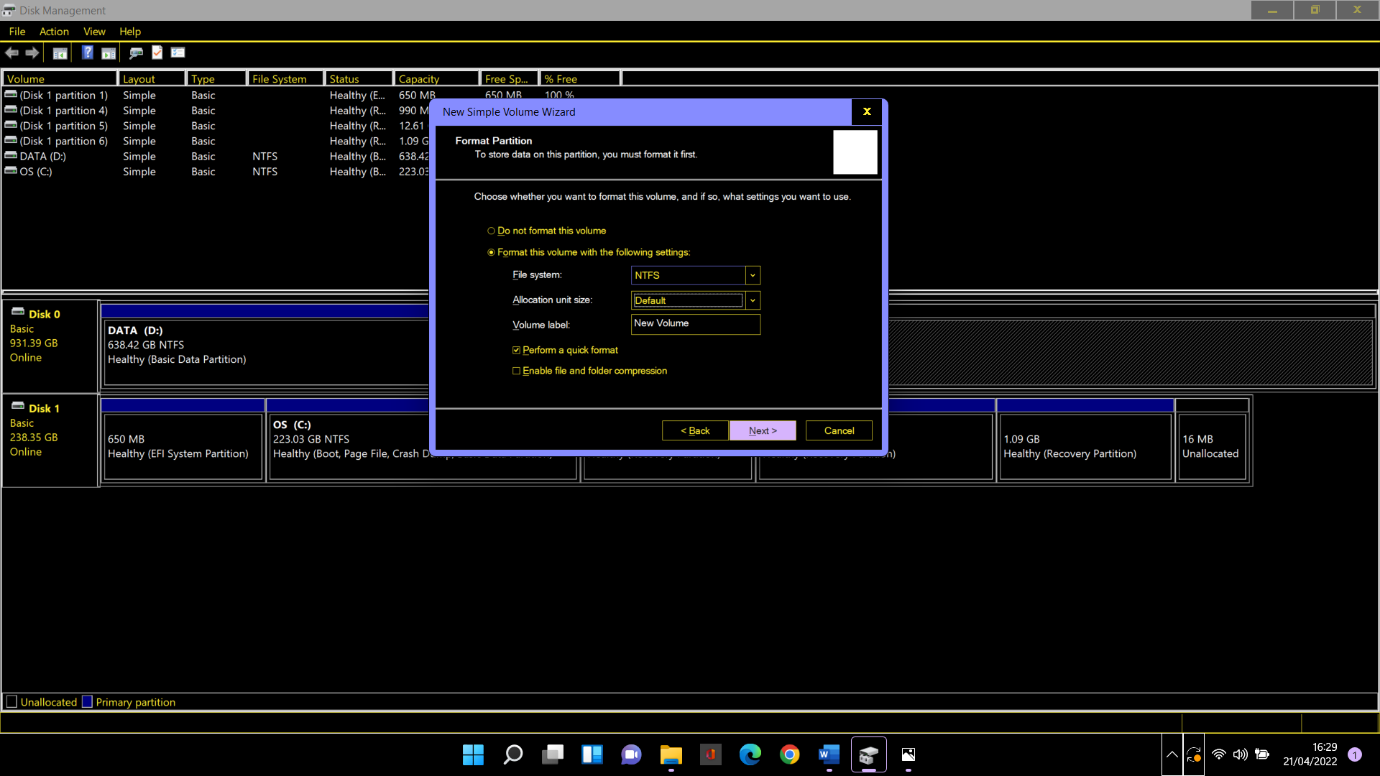
Step 5. Leave all the settings on the Format Partition screen as they are and click Next.
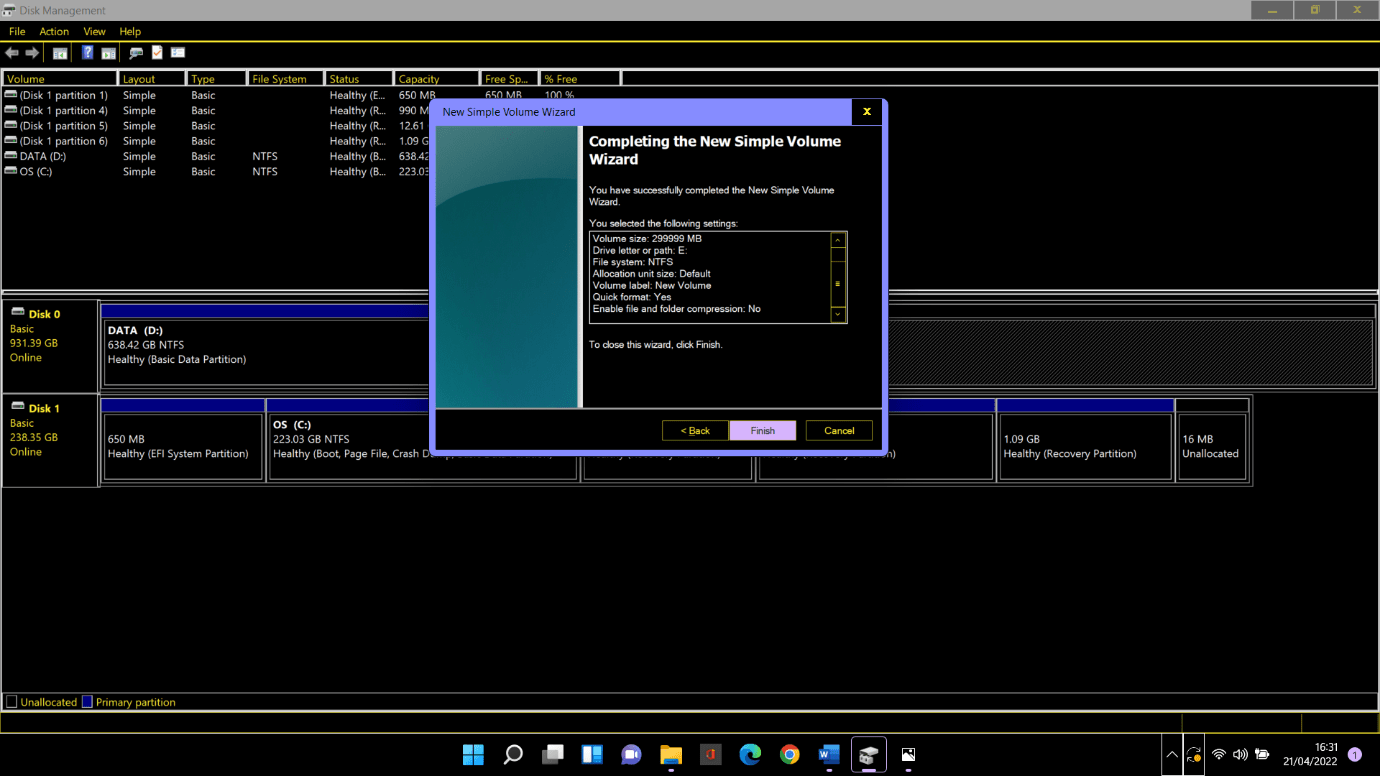
Step 6. Review everything on the Completing the Simple Volume Wizard window and click Finish.
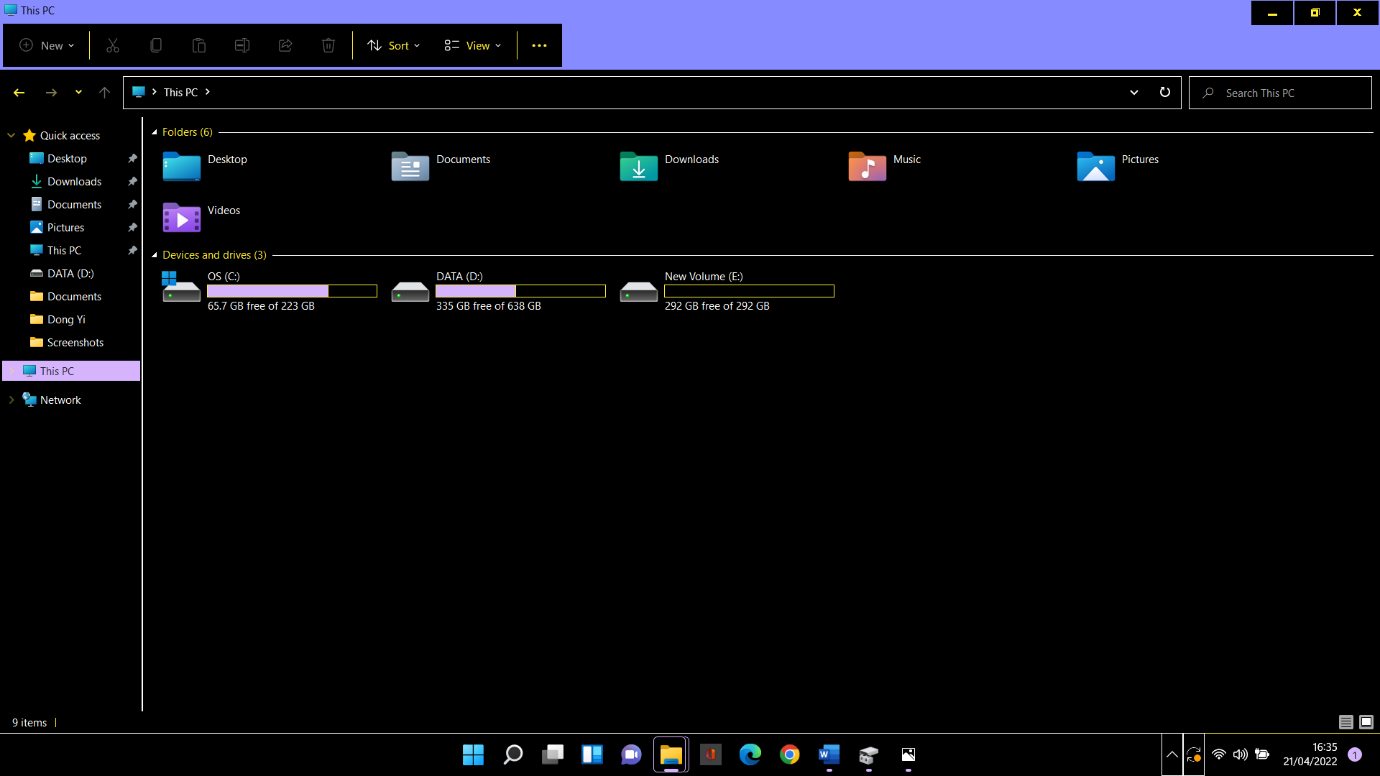
After a few moments, your new partition will open automatically in File Manager. Once you click This PC on the side panel, you will see your new partition listed on the main screen under Devices and Drivers. In our case it is the E partition.
We told you it’s easy.


 Done! Great to see you among our subscribers!