
Having a full backup of your Windows 10 system image can prove handy when a disaster strikes and you lose all your data. You never know when issues like hardware failure, software problems, malware attacks, system crashes, or hacking activities might occur.
That’s why regularly backing up your Windows 10 PC should be part of your routine. Learning how to back up Windows 10 will not only protect your system but will also help get your system up and running in no time.
A system image or a full backup means creating a copy of everything in your computer, including configurations, installation files, apps, and settings. When something bad happens, you can easily restore your entire system. Creating a full backup is also useful when trying to roll back to a previous version of Windows 10.
How to Create a System Image in Windows 10
It doesn’t matter whether you work from home or in an office, it’s advisable to backup vital data. If you use Windows 10, several tools can help you create a disk image.
However, the easiest option is to use the legacy built-in System Backup tool. While Microsoft no longer maintains it, System Image Backup still functions as well as it used to. While it’s still available, it remains one of the best ways to create a backup of Windows 10.
The System Backup tool lets you create a system image to an external drive or network shared folder. It is wise to use external storage, which you can safely keep separately from the computer.
If you intend to save the image backup to an external drive, be sure to connect it to your computer before you begin the process.
Here is the step-by-step guide on how to create a disk image in Windows 10:
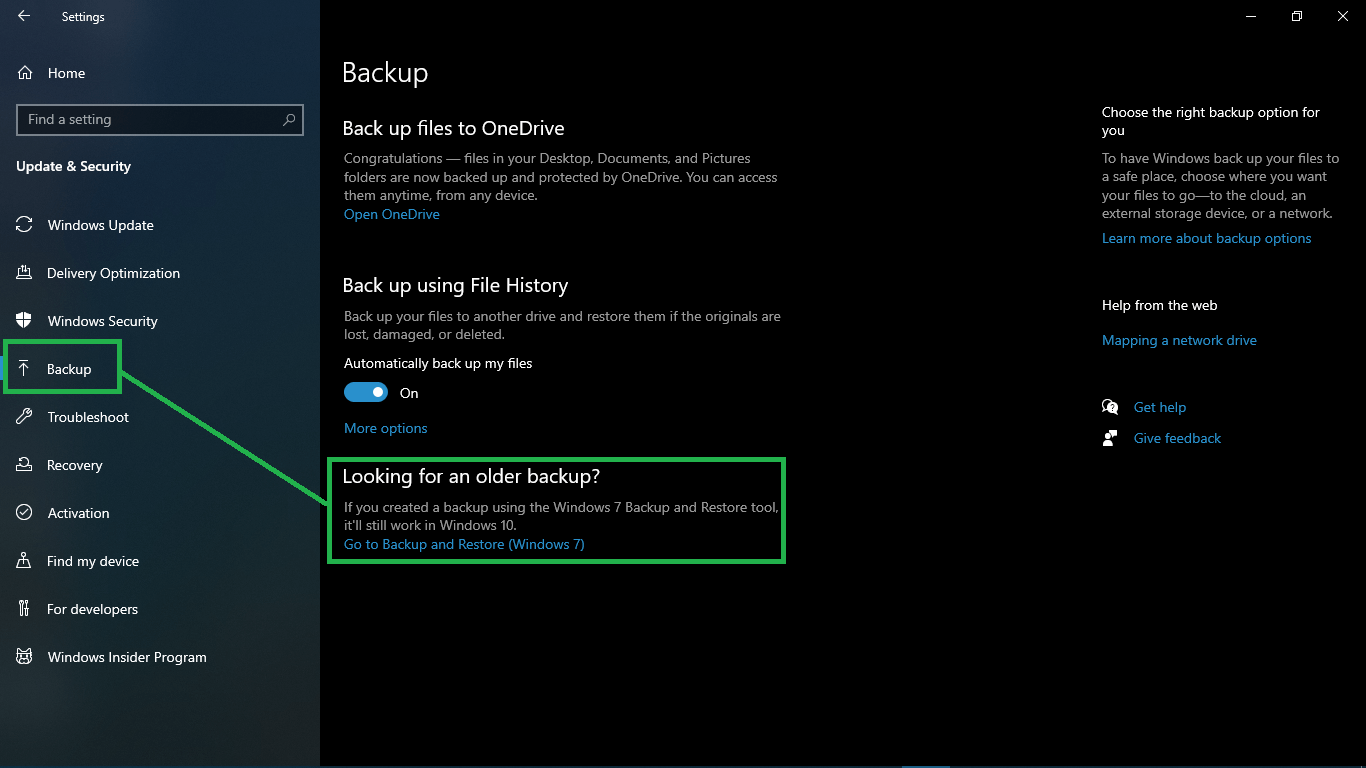
- Go to Settings (Win + I) and select Update & Security > Backup.
- On the right sidebar, under Looking for an older backup? section, select the link that says Go to Backup and Restore (Windows 7).
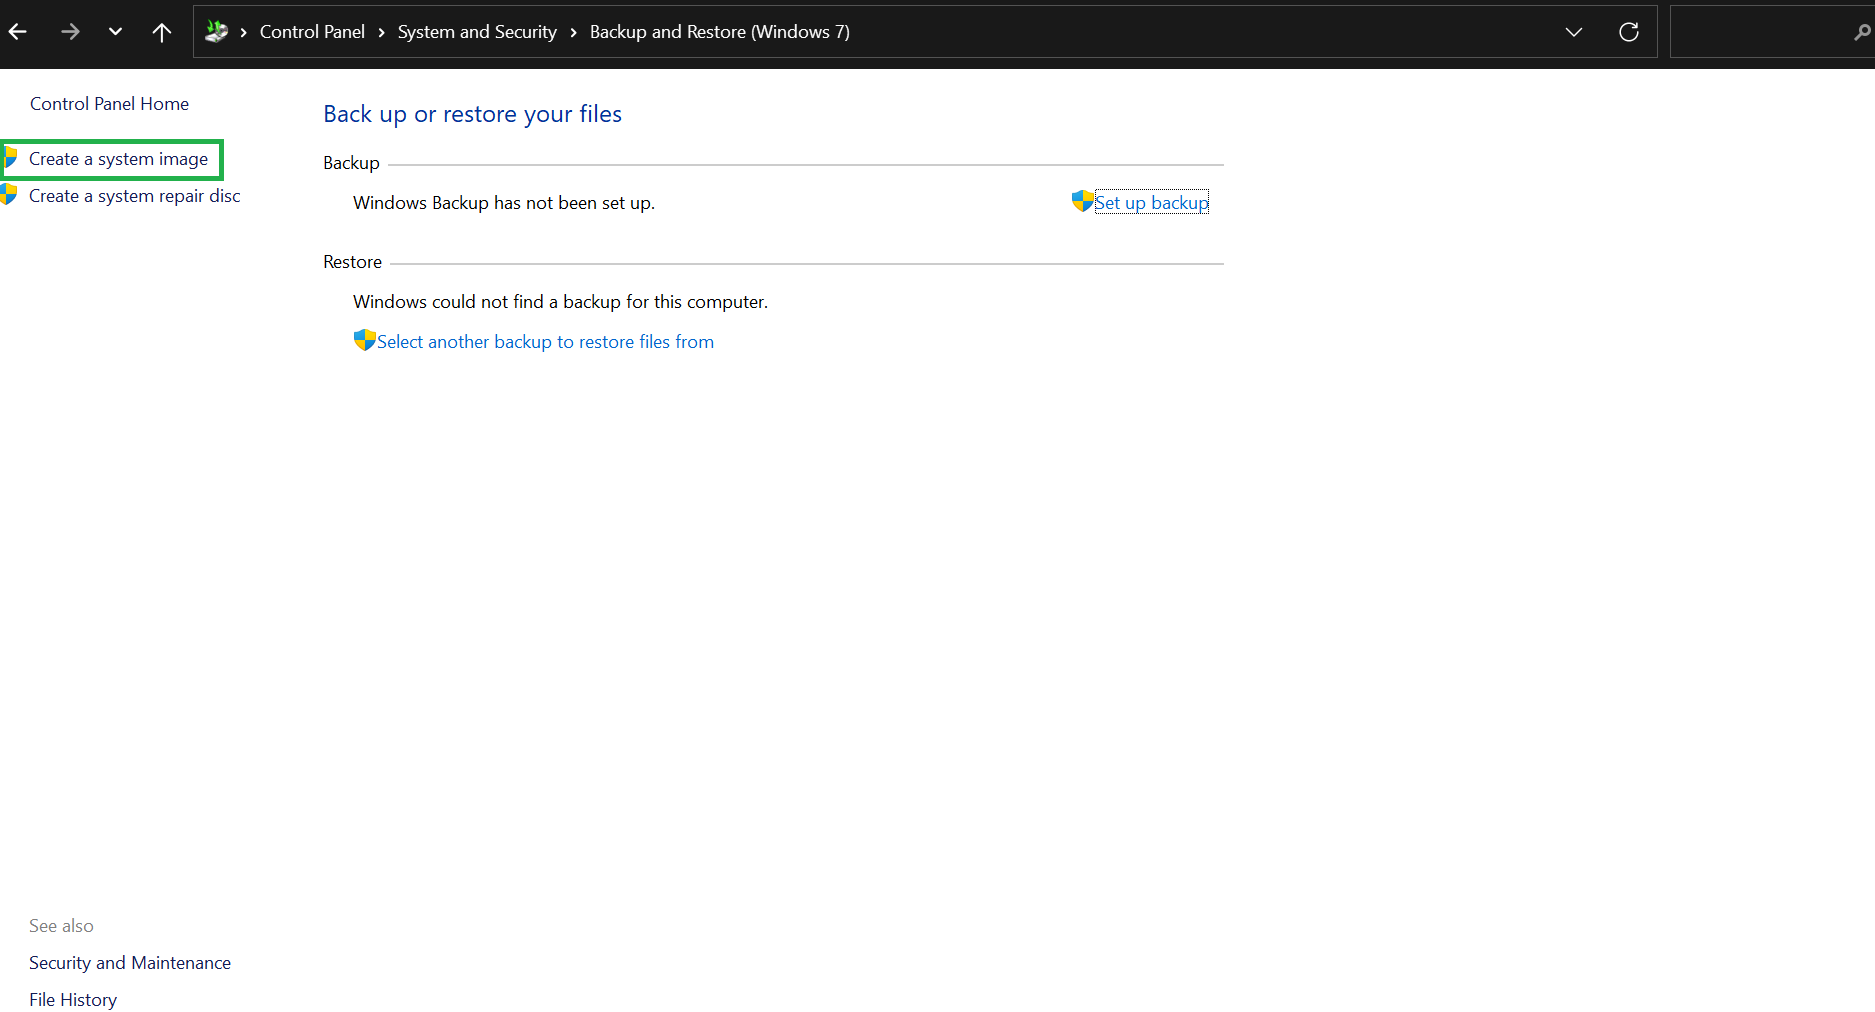
- This action opens the Backup and Restore (Windows 7) page in Control Panel. In the left sidebar, click on the Create a system image link. Your PC will scan for backup devices.
- On the Where do you want to save the backup screen, use the available toggles and drop-down lists to choose your preferred storage medium. For this post, we’ll use the hard disk option. So, select the On a hard disk toggle button and use the drop-down menu to choose the connected hard drive.
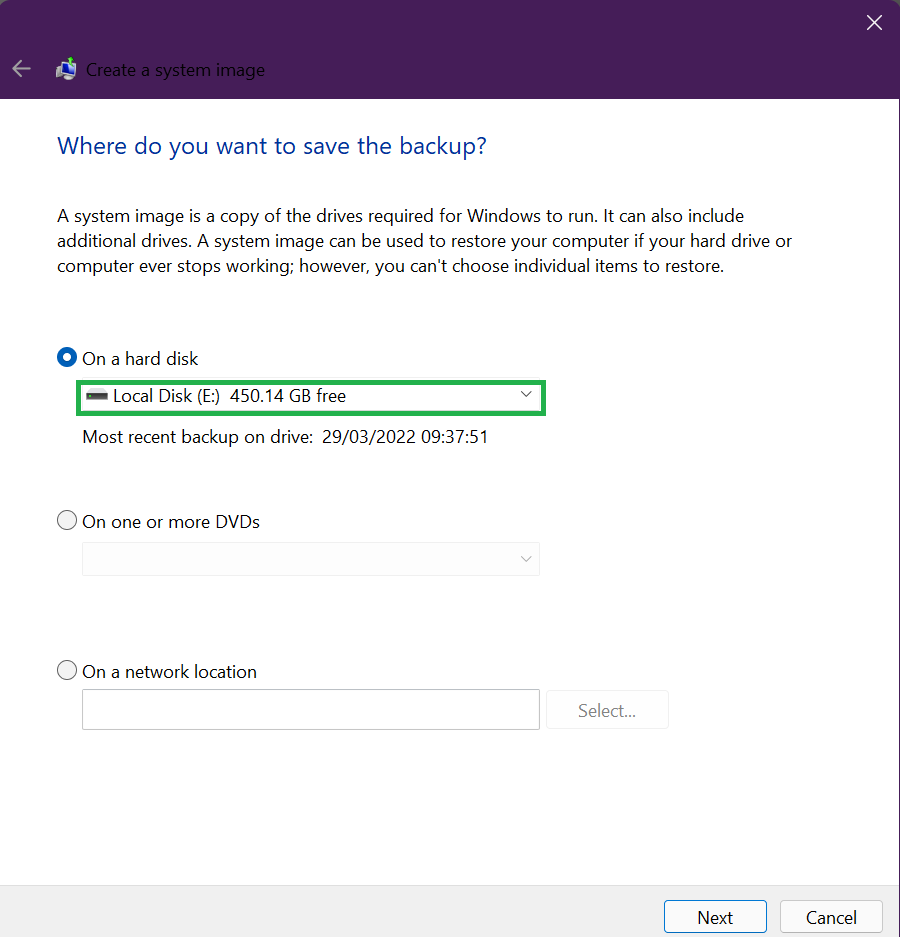
- Click Next.
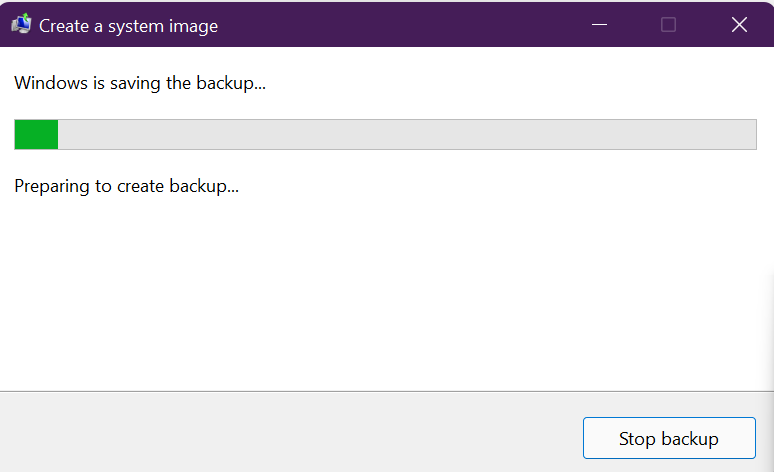
- On the next screen, confirm your selections, and once you’re ready, click on the Start backup button. The system will initiate the process and prepare to create a backup.
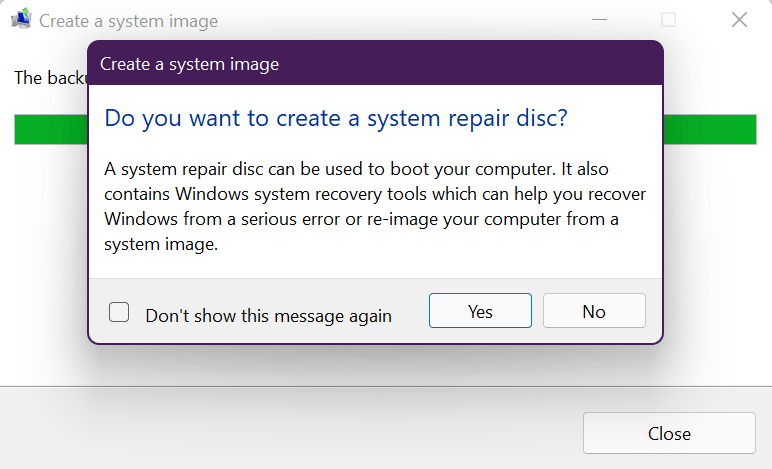
Quick note: You may see an option to create a system repair disk. If your PC has an optical drive, select Yes. Otherwise, click No. Most devices no longer have an optical drive anyway, so you may skip this step altogether.
The backup process will begin and may take a while, depending on how big the installations being backed up are and the speed of your drives. The good thing is that you can keep using your system as this is happening.
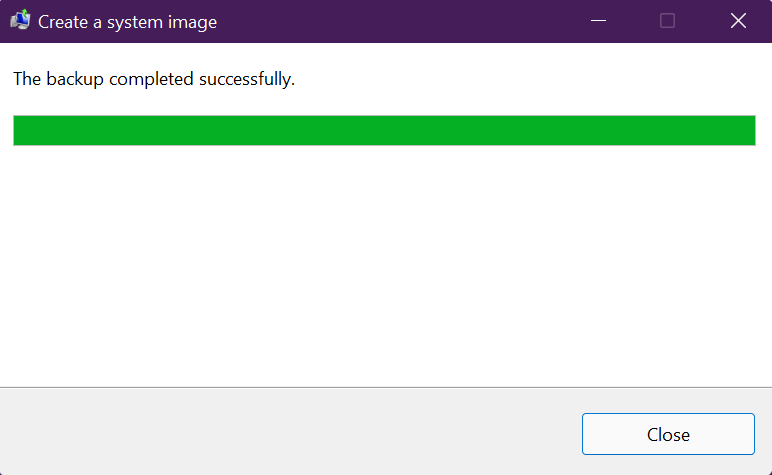
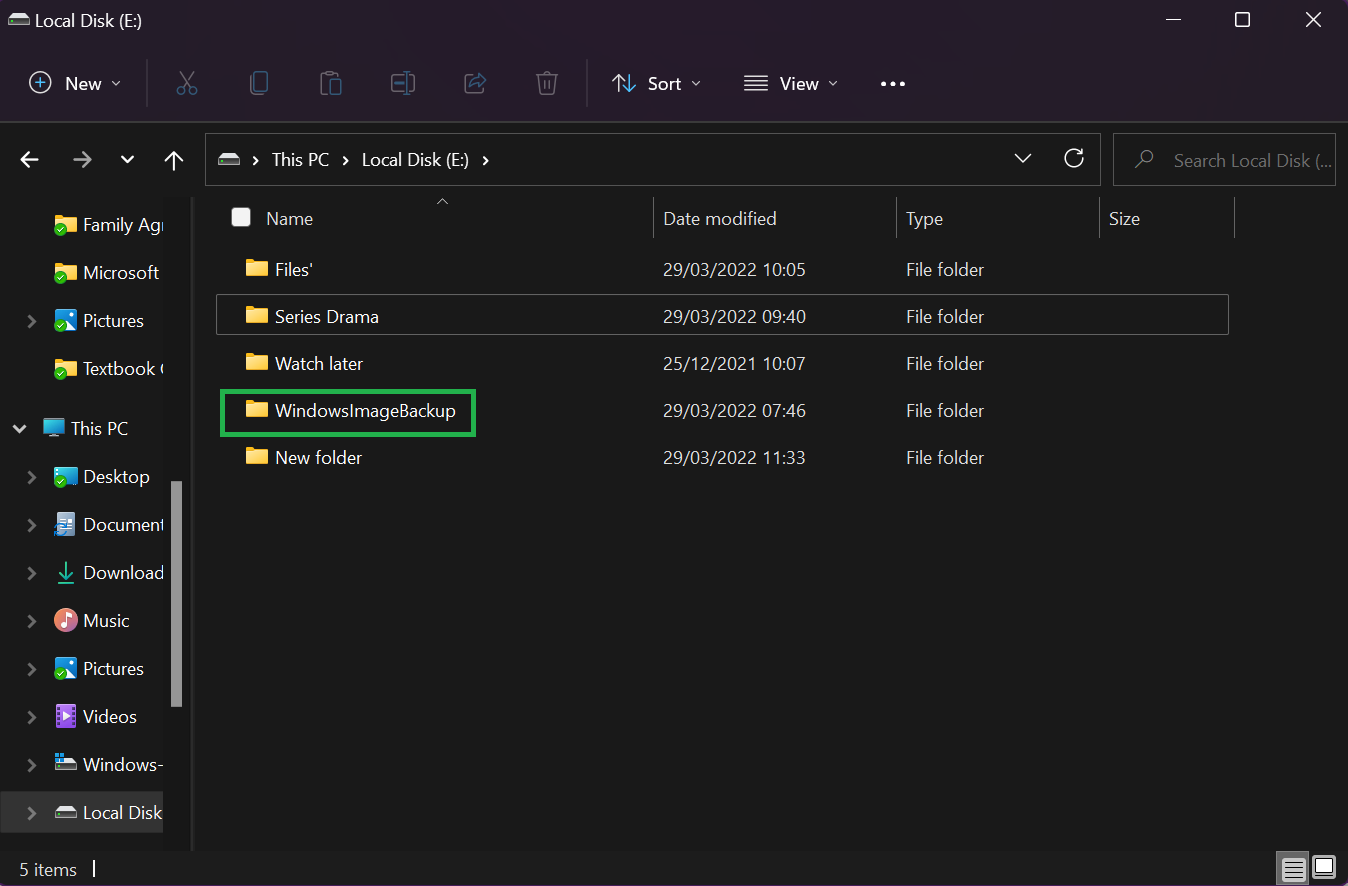
After the backup is complete, the tool will have created an image of your entire system, including everything on your drive. If you’re wondering where your image backup is on the drive, look for a folder called WindowsImageBackup.
Remember to disconnect the external drive from the machine and store it somewhere safe.
How to Restore a Backup on Windows 10
Hopefully, nothing will happen to your system that will damage your data. But in case of hardware failure or you need to access the data due to a ransomware attack, you can easily restore the backup.
Here are the steps:
- Plug the external drive containing the full backup to your Windows 10 PC.
- Boot your machine and repeatedly press the F8or F11 key to access the troubleshooting screen. Note that each Windows 10 computer brand uses different keys to boot directly to Advanced Startup Options. You should find the appropriate key that works for your PC.
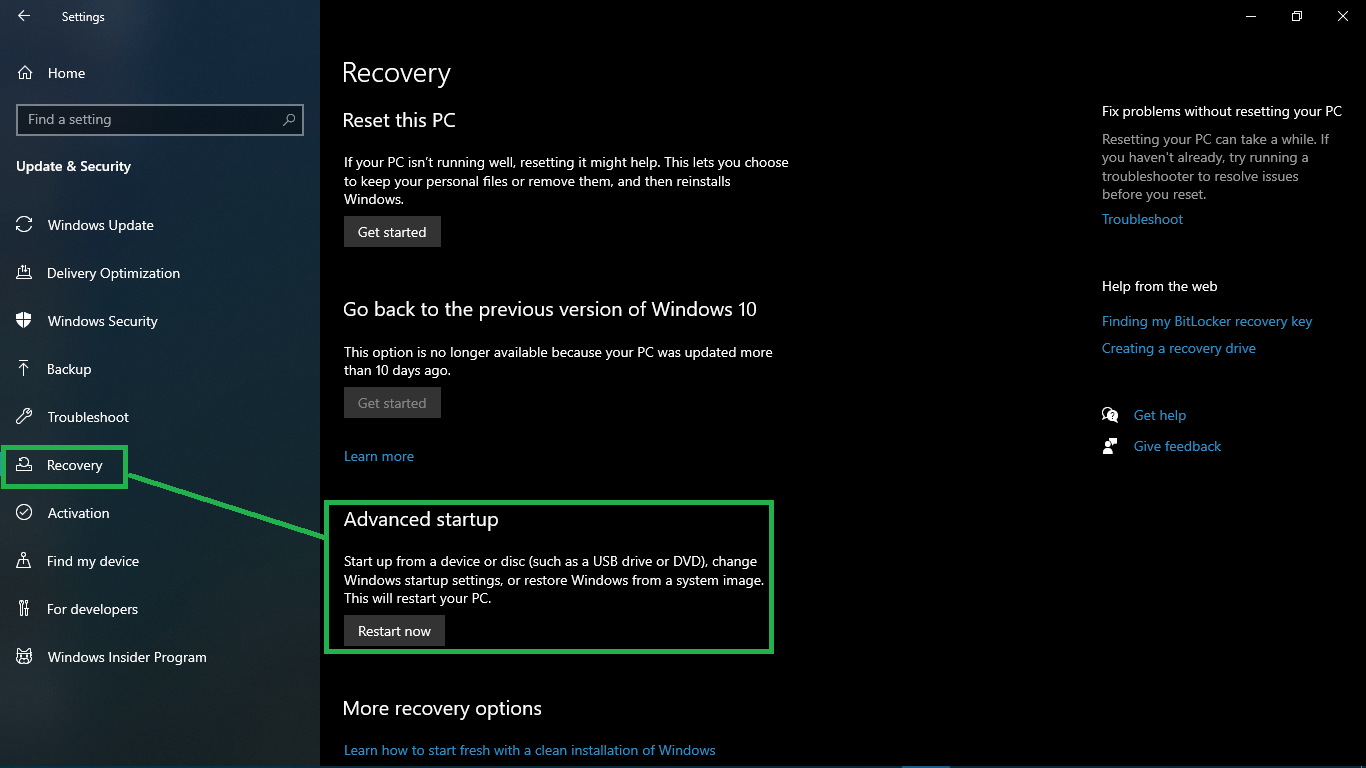
Useful Tip: There are various ways to access Advanced Startup Options. The method you use will depend on whether Windows 10 starts normally or not. If you can start Windows 10 normally, hold down the Shift key and click Restart. You can also go to Settings > Update & Security > Recovery > Advanced startup > Restart now. If your PC won’t start, you can use a recovery drive or a Windows installation media (you’ll need to have created this bootable drive beforehand). Alternatively, you can use someone else’s bootable disk or USB containing installation files. All you need is to access Advanced Startup Options. Keep in mind that using a bootable drive requires changing the boot order settings in BIOS.
- If you use a bootable drive, starting the computer should take you to the Windows Setup page. Press Next, and choose the Repair your computer option in the bottom-left corner of the screen.
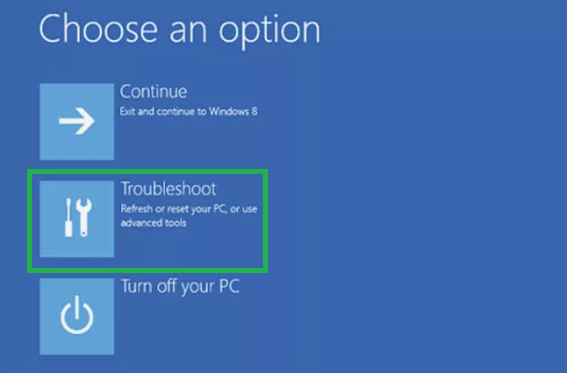
- Select Troubleshoot on the Choose an option screen that appears next.
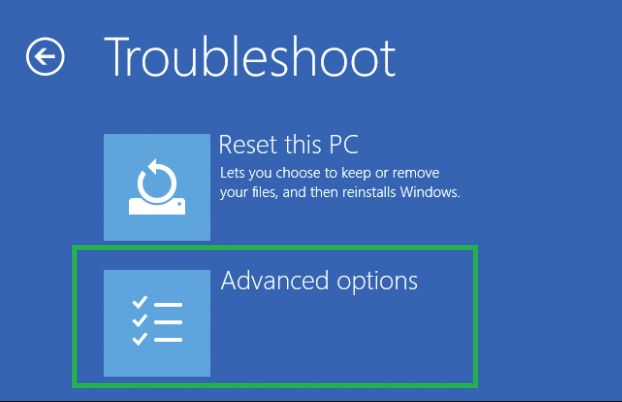
- Click on Advanced options and select System Image Recovery.

- Choose Windows 10 as the target operating system.
- On the Re-image your computer screen, choose Use the latest available system image. If you have multiple backups, use the Select a system image option to manually select the system image.
- Click Next.
Tip: If you’re restoring to a new drive, use the Format and repartition disks option before you proceed. Remember to Exclude disks to prevent your other disks from being formatted in the process.
- Be sure to select the Only restore system drives option if your backup contains multiple drives and you only want to restore the operating system.
- Click Next and then Finish.
- Click Yes to continue.
The recovery process will begin and may take a while depending on the size of your backup and the amount of data and configuration being restored. The recovery process shouldn’t be interrupted. It’s, therefore, advisable to connect a laptop to a power source and a desktop to an uninterruptible power supply (UPS) to prevent issues.
Once your Windows 10 backup has been restored successfully, you’ll need to update your system to install the missing security updates and any other updates. To do so, launch the Settings app using the Win + I hotkeys, open Update & Security, and select Check for Updates.
How to Recover Deleted Files on Your Drives
As powerful as computers are, your files are never completely safe or secure. Anything can happen from a sudden system crash to a malware attack to a damaged drive or hacking activity. Sometimes, you or someone else can accidentally delete important files, documents, videos, or photos from a hard drive.
Fortunately, you don’t have to worry about losing valuable or sensitive data. Auslogics File Recovery is a robust tool that can undelete any kind of file. It works on hard disk drives, memory cards, and USB flash drives. Plus, it can recover all file types, including those from lost partitions.
File Recovery is easy to use, thanks to the Easy Recovery Wizard that guides you. Additionally, you can quickly sort through hundreds of deleted files using advanced filters to find specific files that you want to restore.
The tool even lets you preview files to confirm their contents before recovering them. This ensures that you restore only the items you need. With Auslogics File Recovery, you no longer have to panic when you accidentally format your USB flash drive, memory card, or even HDD. Simply download it and let it do its magic!
Closing Thoughts
That’s how to back up Windows 10 image. It’s worth mentioning that the System Image Backup tool is used to create an image disk of the entire system to safeguard your configurations and installation files in case of a hiccup. If you want to back up your files and keep updated copies in the cloud, use a solution like OneDrive.
You should also know that anything you do after the full backup, such as installing new apps, adding new files, or changing certain settings won’t be available during the recovery process. Like System Restore, you can only recover the image up to the last backup.
For this reason, we recommend performing a full backup of your Windows 10 PC periodically to keep an updated image.


 Done! Great to see you among our subscribers!