- What is System Restore?
- Why do restore point problems occur?
- How can you fix ‘System Restore not working’ in Windows 10?
- 1. Make sure System Restore is enabled
- 2. Create a restore point yourself
- 3. Make sure System Restore uses at least 300MB of your disk space
- 4. Disable your non-Microsoft antivirus software
- 5. Run an anti-malware scan
- 6. Check restore-related services
- 7. Start your PC in Safe Mode
- 8. Check your hard drive
- 9. Run System File Checker
- 10. Run the Deployment Imaging and Servicing Management (DISM) tool
- 11. Fix Windows Registry

‘O, call back yesterday, bid time return’
William Shakespeare
What is System Restore?
System Restore is undoubtedly a most helpful feature: it allows you to configure your system to some previous state so that you can easily and efficiently fix even persistent malfunctions. The procedure in question is pretty straightforward: your Windows 10 generates restore points that literally take your system files, settings, registry, and apps to an earlier date – and this makes your current problems vanish! Sheer magic, isn’t it?
Why do restore point problems occur?
Unfortunately, restore point issues can easily spoil that backup idyll. They are often brought about by hard drive errors, software conflicts, corrupt system files, registry problems to name but a few. The sad truth is, if restore points do not work on Windows 10, all those exciting time travel tricks become impossible in practice.
How can you fix ‘System Restore not working’ in Windows 10?
If the adversity described above is your case, you might think you are in a terrible predicament. However, there is no need to despair: System Restore issues are 100 % fixable, and we are ready to walk you through an exhaustive list of proven fixes.
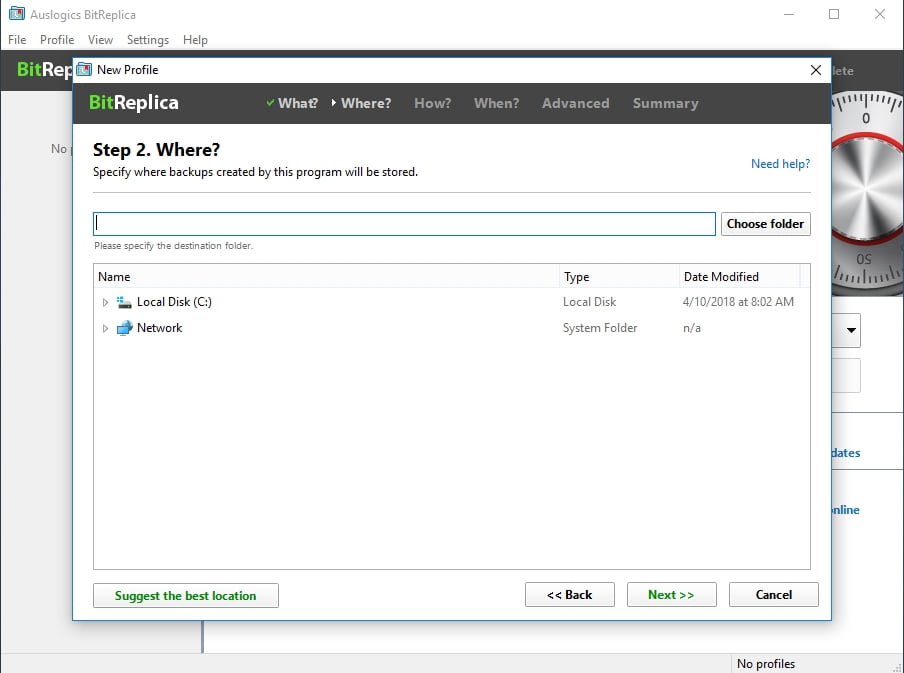
To begin with, let’s secure your personal files – losing them permanently won’t do you any good, you know. Therefore, make some time for a nice backup. You can move your files to a cloud solution or an external storage device or even migrate them to another laptop, but unfortunately, these methods are ridiculously time-consuming. So, we think that the easiest way to get things done is to employ a special tool such as Auslogics BitReplica.
And now it’s time to fix your ‘Restore Point not working’ issue:
1. Make sure System Restore is enabled
The point is, in Windows 10, the System Restore feature is disabled by default. So, you might have forgotten to turn it on.
To check your System Restore, follow the path below:
- Press the Windows Key + R shortcut on the keyboard.
- Run will open. Type gpedit.msc into it.
- Once in Local Group Policy Editor, navigate to the left pane.
- Click on Computer Configuration and select Administrative Templates.
- Go to System and select System Restore.
- Set both Turn off Configuration and Turn off System Restore to Not configured.
- Click Apply and OK to confirm your actions.
Now System Restore is enabled on your Win 10 computer.
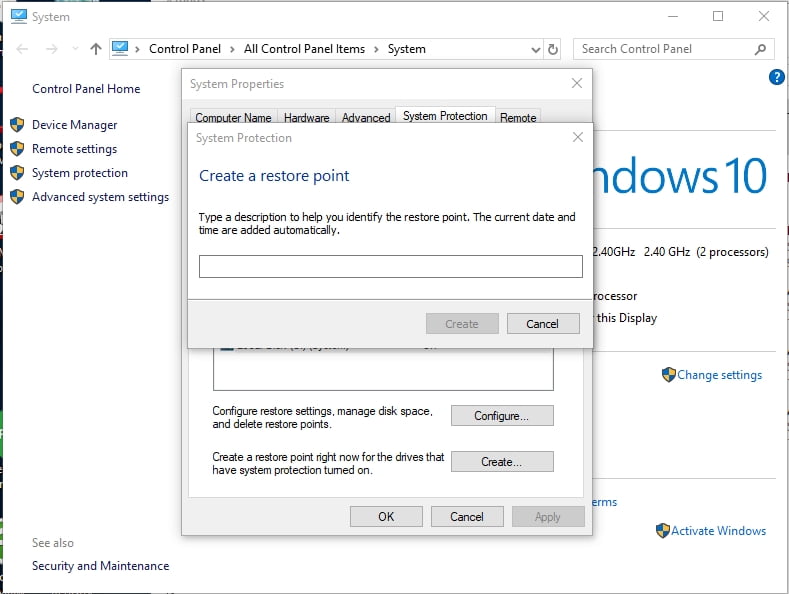
2. Create a restore point yourself
Although your OS is supposed to create restore points automatically when some important change is about to occur on your computer, things often do not work as planned. So, if your Win 10 fails to do the job, you should take matters into your own hands and learn how to create restore points manually:
- Press Windows Key + S to open Search. Type Create a restore point.
- Select the Create a restore point option from the list.
- You will be taken to the System Properties window.
- Once you are there, click on the Create button.
- Describe your new restore point and check it out.
This simple workaround is now your way of creating system restore points.
Here is how you can undo recent system changes, using a restore point:
- Open your Start menu and proceed to Control Panel.
- Move to System and Security and select the File History option.
- Click on Recovery and choose Open System Restore. Click on Next to proceed.
- Now select the restore point and click Next button -> Finish -> Yes.
3. Make sure System Restore uses at least 300MB of your disk space
This is a necessary condition for using the System Restore feature in Win 10. Thus, you should configure your system properties to meet it:
- Open your Search panel by simultaneously pressing Windows logo key + S.
- Type System Restore and select ‘create a restore point’.
- Click on Configure and set your maximum disk space usage to 300MB.
- Click OK to save the changes.
4. Disable your non-Microsoft antivirus software
Certain third-party antivirus products often come into conflict with System Restore on Windows 10. To check whether that is your case, disable your solution and see if your problems have gone.
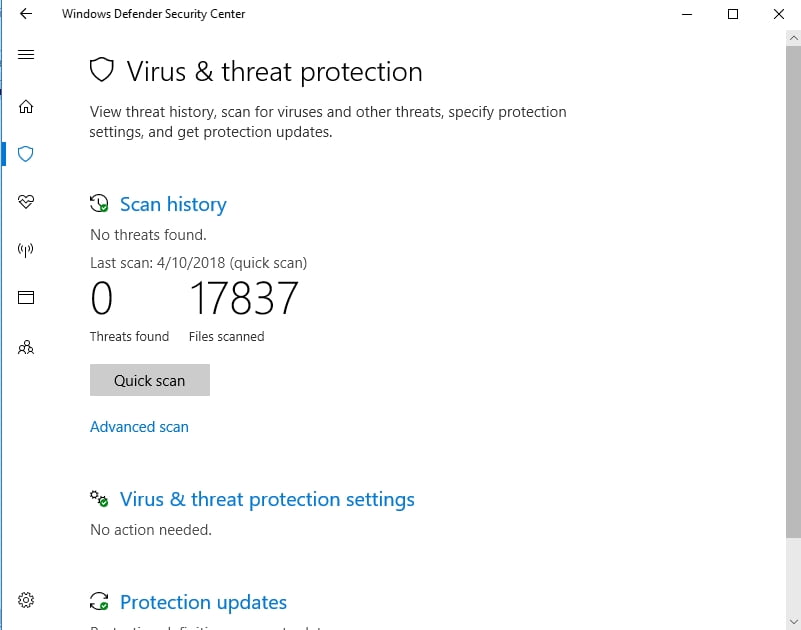
5. Run an anti-malware scan
System Restore is among your Windows components that are ruthlessly targeted by hostile soft. So, if your restore point issues persist, we recommend you to scan your computer for malware.
For this purpose, you are free to use the pre-built Windows Defender tool:
- Open Windows Search (Windows logo key + S).
- Type ‘Defender’ (no quotes).
- Choose Windows Defender from the list.
- Navigate to Scan and select the full scan option.
Furthermore, it is vital to ensure that no malware whatsoever is keeping a low profile in the depths of your system. We recommend you to use Auslogics Anti-Malware to scan for threats you never even knew existed.
6. Check restore-related services
There are some services that you need running in your system to be able to create and use restore points. Therefore, you should check them straight away:
- Press Windows Key + S on your keyboard.
- Type services.msc and hit Enter.
- The Services window will open.
- Once in it, find the services:
- Volume Shadow Copy
- Task Scheduler
- Microsoft Software Shadow Copy Provider Service
- System Restore Service
- Double-click on each of them to set Startup type to Automatic and Service status to Running.
- Restart your PC and check if your System Restore is OK now.
Not yet? Then try out the following fix.
7. Start your PC in Safe Mode
Safe Mode is an exceptionally helpful environment, as it provides you with a much-needed opportunity to troubleshoot persistent problems.
To enter Safe Mode in Windows 10, make use of the instructions below:
- Press the Windows logo and R keys simultaneously to open Run.
- Type msconfig into Run and press Enter.
- Once in System Configuration, navigate to Boot.
- Go to the Safe Boot box and tick it (uncheck this option to perform a normal boot after your troubleshooting mission is over).
- Clicked OK and restart your computer when prompted.
Having restarted your PC in Safe Mode, try to run System Restore. If it is problem-free now, consider undoing recent system changes or uninstalling new software – something must be interfering with the System Restore feature when your PC is in its usual mode.
8. Check your hard drive
If restore points do not work on Windows 10, your hard drive might be the culprit. To scan and repair it, take the following steps:
- Open an elevated command prompt (Windows Key + X -> Command Prompt (Admin)).
- Type the following command (make sure to replace X with the letter of the hard drive partition you wish to scan):
chkdsk /f /r X: - Be patient and wait for the process to finish.
- Restart your PC after the scan.
No luck so far? There is no need to worry: the method below is likely to get your System Restore back on track.
9. Run System File Checker
Corrupt or missing system files can cause your System Restore to malfunction, so hurry up to scan your Win 10 with the built-in System File Checker tool:
- Press the Windows Key + X shortcut on your keyboard.
- Select the Command Prompt (Admin) option.
- When in Command Prompt, input the following command: ‘sfc /scannow’ (no quotes).
- Press Enter to run the command.
- You will be walked through the process.
- Get the all-clear to proceed and exit the Command Prompt window.
Now restart your PC and see if you can use System Restore now. If restore point issues are still present, try scanning your system files on the boot:
- Perform an SFC scan, using the instructions above.
- Select Troubleshoot when the list of options appears.
- Go to Advanced options and select Command Prompt.
- Your PC will restart. Provide your login information if prompted.
- Now enter the following command and press Enter:
wmic logicaldisk get deviceid, volumename, description command - Check Volume Name to find the letter of your system drive.
- Besides, make sure to know what letter is assigned to the System Reserved drive.
- Now type the following command and hit Enter to run it (X must be your System Reserved drive letter while Y is supposed to be your Windows Volume name):
sfc /scannow /offbootdir=X:\ /offwindir=Y:\Windows - Wait for the system file scan to complete.
- Exit Command Prompt and boot your Win 10.
All to no avail? Do not worry – your perfect fix is yet to come. Just keep working your way down.
10. Run the Deployment Imaging and Servicing Management (DISM) tool
The chances are your Windows image might be having issues. As such, let the DISM solution have a go at fixing it:
- Press the Windows logo key and S buttons for the Search box to open.
- Type cmd and select Command Prompt from the list.
- Right-click on it and choose the Run as admin option.
- Type the following commands and make sure to and press Enter after each:
DISM /online /Cleanup-Image / ScanHealth
DISM /Online /Cleanup-Image /RestoreHealth - The procedure may take a while, so be patient.
- Restart your PC when the process ends and check your System Restore.
11. Fix Windows Registry
If you have made that far, your system registry might be faulty. Remember that modifying it is extremely risky – that is why we strongly advise you to employ a special tool to perform the necessary troubleshooting. 100 % free Auslogics Registry Cleaner will come in very handy for this purpose: this intuitive software will get your registry in tip-top shape without running the risk of damaging it.

However, if you are determined to edit your registry yourself in order to fix restore point issues in Windows 10, we can share quite an efficient trick:
- Open Search by pressing the Windows logo key + S shortcut.
- Type regedit to open Registry Editor.
- Locate the following registry path: HKEY_LOCAL_MACHINESOFTWARE > Microsoft > Windows NT > CurrentVersion > Schedule > TaskCache.
- To back up the TaskCache registry key, right-click on it and select the Export option from the context menu.
- Then name your backup file and choose where to put it. Remember to press Save.
- Go back to Registry Editor and move to HKEY_LOCAL_MACHINESOFTWARE > Microsoft> Windows NT > CurrentVersion > Schedule > TaskCache > Tree > Microsoft > Windows.
- Locate the Windows key, right-click on it, and select Delete.
- Confirm your actions and exit the editor.
- Restart your PC.
We hope your System Restore is up and running.
Note: Bear in mind that System Restore deals with system settings, so it will not restore your personal files. However, it is not yet time to mourn them. To get your precious pieces of data back, use a special recovery program. For instance, Auslogics File Recovery will retrieve them even from lost partitions.
Have our tips proved useful?
We are looking forward to your feedback!


 Done! Great to see you among our subscribers!