- Use Task Manager to Spot the Culprit
- Stop Excessive Disk Usage
- 1. Check Your PC for Malware Infection
- 2. Disable Your Main Antivirus Temporarily
- 3. Turn Off Windows Defender
- 4. Disable Windows Search
- 5. Turn Off SuperFetch
- 6. Disable Windows Tips, Tricks, and Suggestions
- 7. Check Your Disk for Errors
- 8. Run System Files Checker
- 9. Perform a Clean Boot
- 10. Tweak Google Chrome & Skype Settings
- 11. Uninstall Flash Player Updates
- 12. Upgrade Your Random Access Memory (RAM)
- 13. Reset Virtual Memory
- 14. Switch to High Performance Power Plan
- 15. Fix Your Microsoft AHCI Driver
- 16. Update Your Drivers
- 17. Optimize Your PC
- 18. Reinstall Your OS

‘You can do anything but not everything’
David Allen
Living life to the fullest is a great philosophy for you, not for your disk. Even if your drive seems pretty comfortable acting as a chronic overachiever, keep in mind that 100% disk usage is not something for you to take pride in.
Your disk working at or near 100 percent causes your computer to slow down and become laggy and unresponsive. As a result, your PC cannot perform its tasks properly.
Thus, if you see the ‘100 percent disk usage’ notification, you should find the culprit causing the issue and take immediate action.
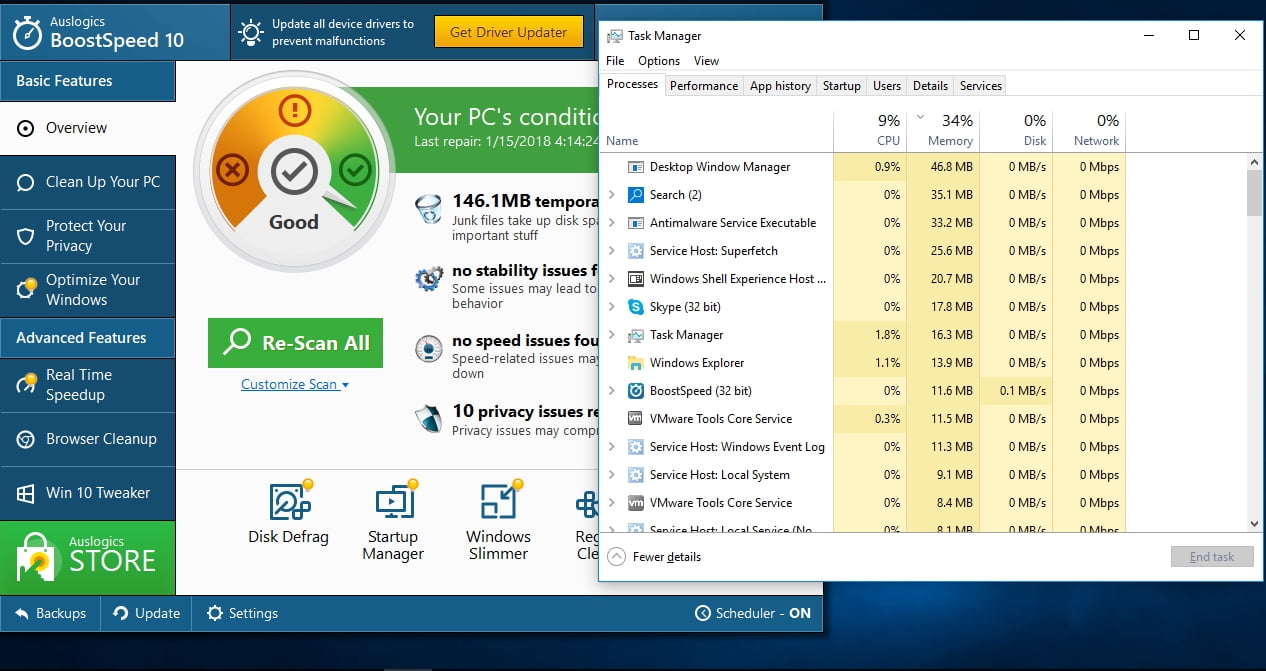
Use Task Manager to Spot the Culprit
Windows Task Manager can help you address the root cause of the notorious ‘100 percent disk usage’ problem:
Windows search bar -> Type task manager -> Select Task Manager -> Processes -> Disk
If your disk usage reaches almost 100 %, your drive is being overworked.
Proceed to the following tips to resolve this problem.
Stop Excessive Disk Usage
Here are our top 18 solutions to fix your Windows 10 100% disk usage issue:
- Check Your PC for Malware Infection
- Disable Your Main Antivirus Temporarily
- Turn off Windows Defender
- Disable Windows Search
- Turn Off SuperFetch
- Disable Windows Tips, Tricks, and Suggestions
- Check Your Disk for Errors
- Run System Files Checker
- Perform a Clean Boot
- Tweak Google Chrome & Skype Settings
- Uninstall Flash Player Updates
- Upgrade Your RAM
- Reset Virtual Memory
- Use High Performance Power Plan
- Fix Your Microsoft AHCI Driver
- Update Your Device Drivers
- Optimize Your PC
- Reinstall Your OS
So, it’s time to troubleshoot your 100 percent disk usage problem.
Hurry up to make life easier for your drive:
1. Check Your PC for Malware Infection
If your drive is constantly working at or near 100% for no apparent reason, this might mean your computer is malware-infected.The stakes are high – thus, scan your PC right away to find out if some malicious invaders are attacking your system.
Make use of:
Windows Defender
The Microsoft default security solution Windows Defender will scan your system for malware issues and do its best to make them cut and run:
Settings -> Update & Security -> Windows Defender -> Open Windows Defender -> Full
Your Main Antivirus
If you have a trustworthy antivirus program installed, let it do its job. Well, if not now, then when?
A Special Anti-Malware Tool
Your main antivirus is not omnipotent. You should back it up by any means whatsoever in order to protect your computer from irreversible damage. Consider using a special anti-malware tool to trace and remove the issues your main security solution may miss. For instance, Auslogics Anti-Malware is ready to help you.
2. Disable Your Main Antivirus Temporarily
Your main antivirus might be responsible for consuming 100% disk resources on your computer. Therefore, try disabling it temporarily to find out whether it is the one to blame for your drive going full capacity. You needn’t worry about your safety: Windows Defender can guard your system while your main antivirus is not at work.
If your computer’s disk usage returns to normal when your main security solution is off, you should contact your vendor and report this issue.
3. Turn Off Windows Defender
Windows Defender is your reliable ally against malware threats. It performs occasional scans even when your PC is protected by a third-party antivirus solution.
The problem is, Windows Defender might be on a collision course with your main antivirus. This can lead to excessive disk usage.
If you suspect such a conflict, try disabling Windows Defender:
- Start -> Settings, Update & Security
- Windows Defender -> Turn off Real-Time protection as well as Cloud-based Protection
4. Disable Windows Search
The frustrating 100% disk usage problem might be caused by Windows Search.
Although this feature helps you find your files quickly, try disabling it to fix the excessive disk usage issue:
- Windows Key + X -> Search box -> Type cmd -> Right-click Command Prompt -> Run as Administrator -> Yes
- Type net.exe stop “Windows search” -> Enter
Can you observe a reduction in the disk usage now?
If not, Windows Search cannot be blamed for the 100 % disk usage scenario.
In this case, feel free to enable Windows Search:
Go to Command Prompt again -> Type net.exe start “Windows search” -> Enter
However, if your disk is working properly after your turning off Windows Search, consider disabling this feature permanently:
- Windows key + R -> Type services.msc -> Double-click Windows Search
- Properties -> Startup type -> Disabled -> Apply -> OK
5. Turn Off SuperFetch
The SuperFetch feature is aimed at delivering fast OS boot. However, SuperFetch may lead to 100 % disk usage as well as sluggish performance.
Try disabling SuperFetch to sort out the Windows 10 disk usage problem:
- Windows Key + X -> Search box -> Type cmd -> Right-click Command Prompt -> Run as Administrator -> Yes
- Type net.exe stop superfetch -> Enter
Has your computer started to perform better?
If not, proceed to the following tip.
6. Disable Windows Tips, Tricks, and Suggestions
Some tips can actually slow down your PC instead of accelerating its performance. If you are sure you can do without Windows 10 tips and tricks, feel free to prevent your system from displaying them:
Settings -> System -> Notifications & Actions -> Turn off Get tips, tricks, and suggestions as you use Windows
7. Check Your Disk for Errors
Your disk itself might be the real culprit.
Check it for errors in order to resolve the annoying 100 percent disk usage issue:
- Windows Key + X -> Search box -> Type cmd -> Right-click Command Prompt -> Run as Administrator -> Yes -> Type chkdsk.exe /f /r -> Enter -> Type Y
- Close all your apps -> Restart your computer -> The disk check will be performed -> Keep in mind it might take some time to finish
8. Run System Files Checker
Missing or corrupted system files can cause your drive to work at or near 100 percent.
Try to spot and repair them using System Files Checker:
- Start -> Enter Command Prompt -> Right-click Command Prompt -> Select Run as administrator
- Enter DISM.exe /Online /Cleanup-image /Restorehealth -> Enter sfc /scannow
- Wait for the system scan to finish -> Reboot your Computer
9. Perform a Clean Boot
To find out what makes disk usage touch 100%, try performing a clean boot. It will load your Windows 10 with the fewest startup programs and drivers and help you find the culprit.
To perform a clean boot, follow these steps:
- Windows Key + X -> Search box -> Type msconfig
- System Configuration -> Services -> Hide all Microsoft services -> Disable all
- System Configuration -> Startup -> Open Task Manager
- Task Manager -> Startup -> Select the startup items -> Disable -> Close Task Manager
- System Configuration -> Startup -> OK
- Restart the computer
To identify the culprit after performing a clean boot, do the following:
Step 1. Log on to your computer as an admin
Step 2. Windows Key + X -> Search box -> Type msconfig
Step 3. System Configuration -> Services -> Hide all Microsoft services
Step 4. Select the upper half of the check boxes -> OK -> Restart
Does the 100 percent disk usage problem persist?
If it does:
Step 5.1. Repeat the steps 1, 2, 3 -> Select the lower half of the check boxes -> OK -> Restart
If it doesn’t:
Step 5.2. Repeat the steps 1, 2, 3 -> Select only the upper half of the remaining check boxes (the ones which are cleared in the list) -> Repeat these steps until you have checked all the boxes
Does the 100 % disk usage issue occur when there is only one service selected in the list? Then this service is the culprit.
Is there still no service to blame? Then keep going:
Step 6. Log on to your computer as an admin -> Windows Key + X -> Search box -> Type msconfig -> System Configuration -> Select the upper half of the check boxes -> OK -> Restart
Does the problem persist?
If it does:
Step 6.1. Log on to your computer as an admin -> Windows Key + X -> Search box -> Type msconfig -> System Configuration -> Select the lower half of the check boxes -> OK -> Restart
If it doesn’t:
Step 6.2. Log on to your computer as an admin -> Windows Key + X -> Search box -> Type msconfig -> System Configuration -> Select only the upper half of the remaining check boxes (the ones which are cleared in the list) -> Repeat these steps until you have checked all the boxes
Does the 100 % disk usage problem persist when there is only startup item selected? Then this startup item is the culprit.
All to no avail?
No worries, just keep working your way down.
10. Tweak Google Chrome & Skype Settings
Certain Google Chrome and Skype settings can cause your drive to overwork.
Here is how to fix them:
Google Chrome
- Google Chrome -> Settings -> Advanced -> Privacy and Security
- Turn off Use a prediction service to load pages more quickly
Skype
- Make sure your Skype is off.
- C: -> Program Files (x86) -> Skype -> Phone -> Right-click Skype.exe -> Properties -> Security -> Edit
- ALL APPLICATION PACKAGES -> Write -> Allow -> Apply -> OK
- Go to Task Manager and check whether these tweaks have fixed your overworked drive.
11. Uninstall Flash Player Updates
Uninstalling Flash Player updates may help you return your disk usage to normal.
Here is an easy way to do this in Windows 10:
- Start -> Settings -> Update & Security
- Windows Update -> Advanced Options -> View your update history
- Uninstall updates -> Uninstall your flash player update
12. Upgrade Your Random Access Memory (RAM)
If your machine is an old-timer, it might not have enough RAM to run smoothly. This may result in 100 % disk usage. Make sure your venerable old friend has no less 4 GB of RAM (to be honest, the more, the better).
Go this way to take a look at your memory usage metrics:
Windows search bar -> Type task manager -> Select Task Manager -> Performance -> Memory
If you can observe excessive memory usage, it’s time for you to upgrade the RAM on your PC.
13. Reset Virtual Memory
Resetting the virtual memory may help you fix your Windows 10 100 percent disk usage.
To perform virtual memory resetting, follow these steps:
- Windows key + Pause/ Break key -> Advanced System Settings
- Advanced -> Settings -> Advanced -> Virtual memory -> Change
- Disable Automatically manage paging file size for all drives
- Select your windows drive (it’s likely to be C:)
- Initial size -> Recommended (if you are not sure about the desirable value)
- Maximum size -> Approximately 1.5 times the size of your physical RAM
- Set -> OK
- Windows key + R -> Type temp -> Enter -> Temp folder -> Delete the files
14. Switch to High Performance Power Plan
To resolve your 100 % disk usage issue, try tweaking your power plan.
Move this way to switch to the customized High Performance plan:
- Start -> Control Panel -> Power Options
- Select a power plan -> Change settings that are currently unavailable-> High Performance
- Change plan settings -> Turn off hard disk after -> 0
This will prevent your disk from switching to the low power state or powering down.
15. Fix Your Microsoft AHCI Driver
The firmware bug StorAHCI.sys in Microsoft AHCI driver can initiate 100% disk usage on your computer.
Here are 8 easy steps to resolve this issue:
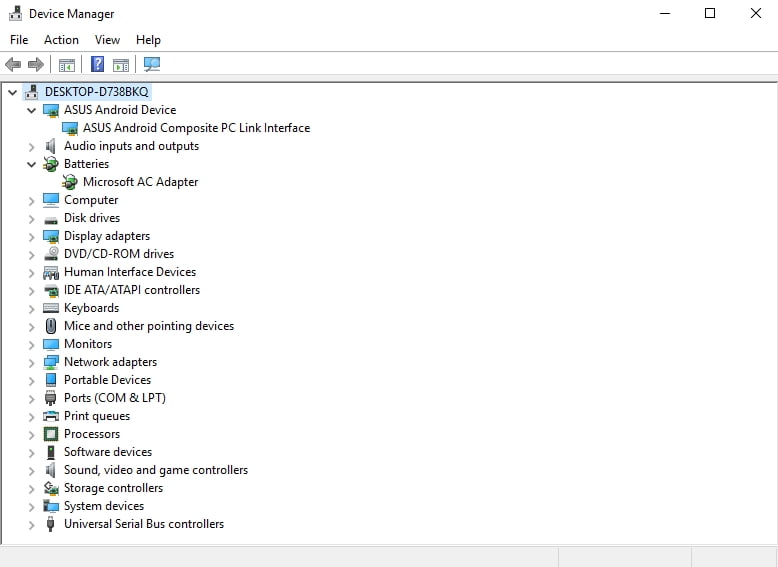
- Windows logo key + X -> Device Manager
- IDE ATA/ATAPI Controllers -> Double-click AHCI controller
- Driver -> Driver Details -> If you can see storahci.sys there, it is time to fix the bug in question
- Details -> Property -> Device instance path -> Write down/ copy the path starting from PCI\VEN
- Windows Key + X -> Search box -> Type regedit -> Registry Editor
- Proceed to HKEY_LOCAL_MACHINE\System\CurrentControlSet\Enum\PCI\<AHCI Controller>\Device Parameters\Interrupt Management\MessageSignaledInterruptProperties
- (<AHCI Controller> refers to the path from the Step 4)
- MSISupported key -> Set “0” as its value
- Restart your computer
Does the 100 percent disk usage issue persist?
If yes, do not let this get you down too much – you still have a few tricks up your sleeve.
16. Update Your Drivers
Out-of-date or faulty drivers are a potential cause of disk performance issues in Windows 10.
Here are our top tips to get your drivers back on track:
Use Windows Update
Let your Windows 10 search for the latest driver updates:
Start -> Settings -> Update & Security -> Check for updates
Utilize Windows Driver Verifier
Try using Windows Driver Verifier to detect problematic devices that cause your drive to overwork:
Start menu -> Type verifier -> Enter
Use Device Manager
You can also use Device Manager in order to troubleshoot your drivers:
- Win + X -> Device Manager -> Expand the device entries
- Search for the problematic driver -> Right-click on it and select Update Driver Software
Fix Your Drivers Manually
Fixing drivers manually is another solution. You can troubleshoot them one by one: uninstall and then reinstall them using the latest versions from the vendors’ websites.
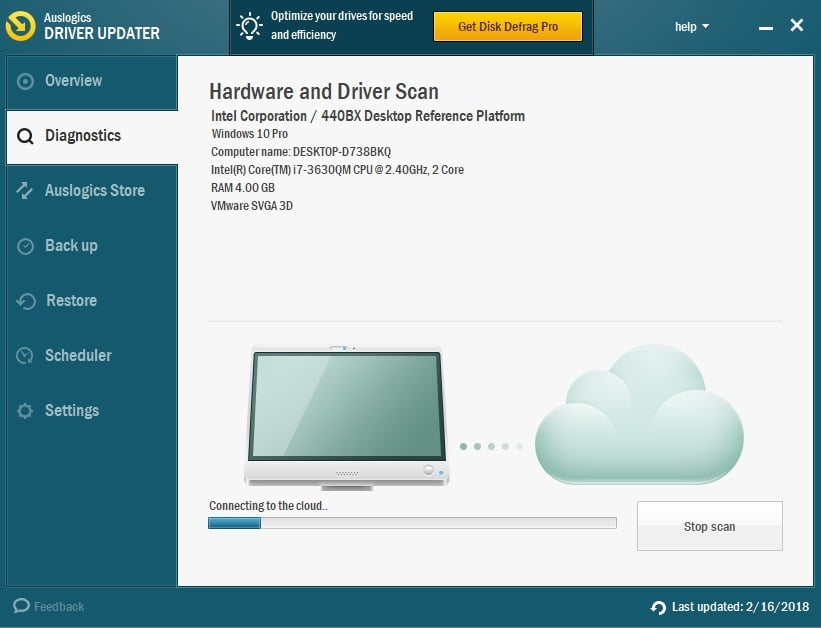
Use a Special Tool
Why not fix all your drivers in a fast and simple way? A special driver updating tool, e.g. Auslogics Driver Updater, can save you a lot of time and effort.
17. Optimize Your PC
If your disk usage reaches 100 %, try optimizing your PC to resolve this issue. You can do it manually or use a special tool: for example, Auslogics BoostSpeed can give your PC a noticeable boost and fix the ‘100 percent disk usage’ problem.
18. Reinstall Your OS
Any port in a storm, we are afraid:
if all the above-mentioned tips have taken you nowhere, you might as well consider reinstalling your operating system. Unfortunately, this will wipe out all your personal files. Therefore, make sure you have backed them up.
P.S.
There is one more solution to the 100 % disk usage problem. This solution entails using OS Performance Service in order to identify and fix your system’s ‘trouble spots’. So, if the issue still persists, we recommend you to explore our next article.
We hope our tips have helped you unburden your disk.
Do you have any ideas or questions regarding this issue?
We are looking forward to your comments!


 Done! Great to see you among our subscribers!