![ASUS Camera not Working, Black Screen [Fixed]](jpg/how-to-fix-asus-webcam-black-screen-windows-10-issue.jpg)
‘A minute of video is worth 1.8 million words’
James McQuivey
Some sad stories touch us deeply, and if your ASUS camera is showing a black screen after the Windows update, we cannot stand aside. Indeed, the horror of such a scene defies description. That is why we have prepared an exhaustive guide on how to fix webcam black screen issues in Windows 10 without much effort:
1. Check if your webcam is turned on
First and foremost, make sure your camera is enabled and apps can use it. Here is what you should do:
- Open your Start menu and tap on the Settings gear.
- Once in the Settings window, click on Privacy.
- Navigate to the left pane and select your camera.
- Make sure the ‘Let apps use my camera’ setting is enabled.
- Locate the ‘Choose apps that can use your camera’ list.
- Let all applications access your camera.
Finally, run the app you wish to record video with and check if you can do this now.
2. Make sure it is not a hardware failure
The point is, your built-in ASUS webcam might have malfunctioned. To check that, use the Windows 10 hardware troubleshooter:
- Open the Search bar (Windows logo key + S).
- Type ‘troubleshooting’ (no quotes). Press Enter.
- Navigate to the top left corner and click on View all.
- Select Hardware and Devices from the list and run the troubleshooter.
If there are any issues with your webcam, you will receive a report on them. Then you will have to find possible ways to fix the problems. If no hardware-related issues have been found, proceed to the following case.
3. Change your exposure settings
If a black screen shows up whenever your video recording soft tries to access your webcam, the app settings might be incorrect. Let’s tweak them in order to resolve your video problems:
- Run your recording software.
- Go to the video settings section.
- Navigate to Exposure and set it to Automatic.
Now check if this manipulation has fixed your webcam video.
4. Update your OS
Persistent webcam black screen issues may be a sign that your OS needs immediate updating. Using the instructions below may get things in order:
- On the Start Screen, locate the Search box (or simply press the Windows logo key + S shortcut on your keyboard).
- Type ‘update’ (without quotes) into Search and wait for the Windows Update home window to open.
- Once in, see whether there are any updates waiting to be installed. Let them in.
- If you see no available updates, then click on the Check for updates button. Your Windows will look for them online and install them on your PC.
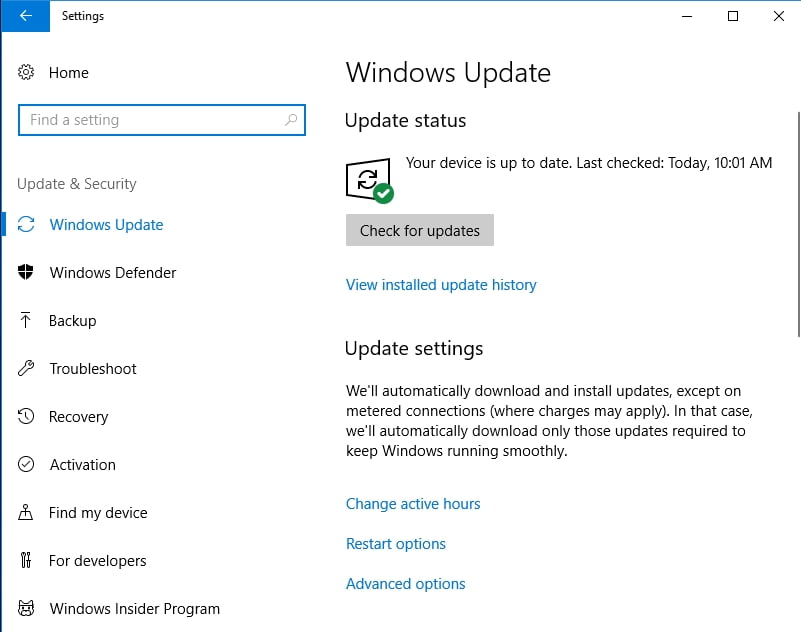
Restart your PC after the installation procedure and see if it has helped. If it has been to no avail or if your system is up to date, keep moving – there are yet 4 reportedly effective fixes to explore.
5. Re-install your recording software
If the ASUS camera is showing a black screen only when you are using a specific app, this very piece of software might be corrupt. Thus, try uninstalling and then re-installing this program:
- On your Start screen, locate Control Panel and click on it.
- Go to the Programs section and click on Programs and Features.
- Locate the program and click Uninstall.
- Wait until the software is removed and restart your PC.
- Finally, install the app in question again and see if you can use your webcam.
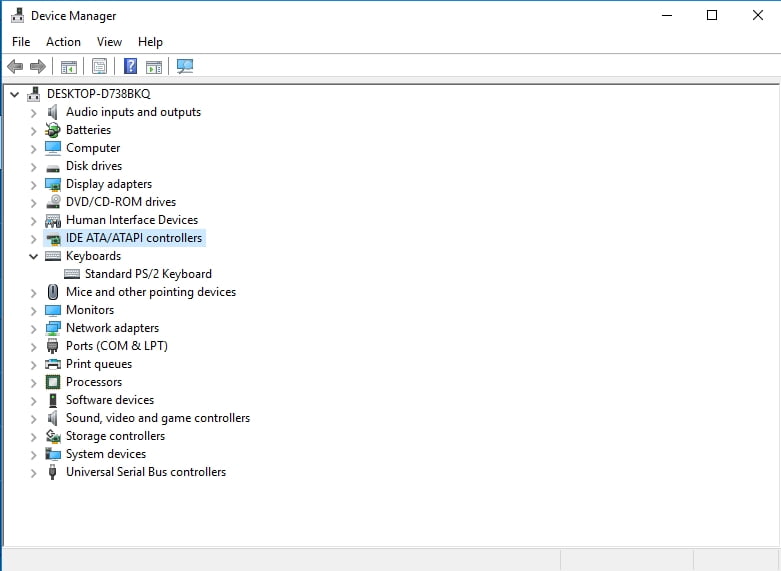
6. Update your drivers
To fix an ASUS webcam that is displaying a black screen on Windows 10, you should repair your drivers. Those that are most likely to be faulty or outdated on your PC are the webcam, graphics, and display drivers. To get them back on track, you can use the built-in Device Manager tool:
- Press the Windows logo + X shortcut on your keyboard.
- Click on Device Manager.
- Locate the driver you want to update and right-click on it.
- Choose to update its software.
Keep in mind that Device Manager may let you down: so, if it fails to update your drivers, you are free to search for the latest versions of them online. However, this kind of quest is quite time-consuming. Besides, you may end up installing wrong driver soft on your PC, which is likely to lead to further issues. That said, we recommend you to save yourself a lot of time and effort and fix all your driver problems by just clicking on one button – Auslogics Driver Updater will do the rest of the job for you.
7. Remove your laptop battery
If the methods above have not helped you, try removing your laptop battery – a lot of users have reported this manoeuvre to be an effective fix for Asus webcam issues.
These are the steps to take:
- Unplug your laptop from the power outlet.
- Remove the laptop battery.
- Press and hold the power button for at least 30 seconds. Repeat this action a few times.
- Insert the battery into the laptop.
- Start your device normally.
After doing that, check your webcam. Still no image? Then consider the following fix.
8. Perform a registry trick
If you have made this far, you might wish to take the nuclear option and modify your Windows Registry. It is our duty to warn you that this course of action is extremely risky, since you can mess up your system and cause it to go haywire. In fact, you are far better off entrusting registry tweaks to reliable software – Auslogics Registry Cleaner will come in very handy for this purpose.
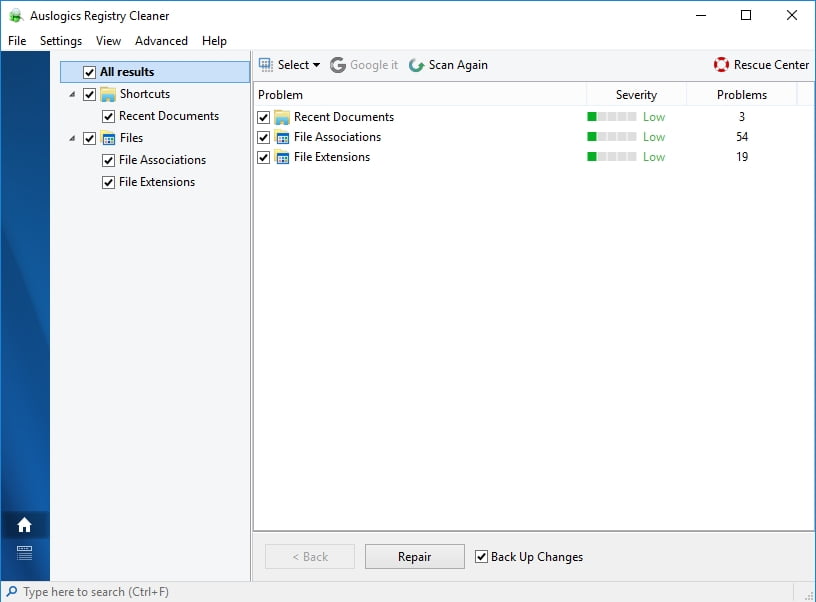
Nonetheless, if you still wish to edit the registry yourself, you can try the following:
- Press the Windows logo key + S shortcut for Search to open.
- Type ‘regedit’ without quotes to open Registry Editor.
- In the left pane, locate the following: ‘HKEY_LOCAL_MACHINE > SOFTWARE > Microsoft > Windows Media Foundation > Platform’.
- Go to the ‘Platform’ folder, move to ‘New’, and choose ‘DWORD (32-bit) Value.’ Name it ‘EnableFrameServerMode’ and set its value to ‘0.’
- Now locate ‘HKEY_LOCAL_MACHINE > SOFTWARE > WOW6432Node > Microsoft > Windows Media Foundation > Platform’.
- Right-click on ‘Platform,’ move to ‘New’, and choose to add a DWORD value. Name this new value ‘EnableFrameServerMode’. Set its value to ‘0.’
Remember to restart your PC for the changes to take effect.
We hope you ASUS webcam shows the creepy black screen no more.
P.S. Bear in mind that your camera is a coveted target for cunning hackers. As such, once it is up and running again, we strongly recommend you to learn how to protect your webcam from being hacked.
Have our tips proved useful?
We are looking forward to your feedback!


 Done! Great to see you among our subscribers!