
‘Failure is success in progress’
Albert Einstein
Although Windows 10 is the most polished and tuned operating system that Microsoft has developed so far, some of its components still leave a lot to be desired. For instance, the Windows Update feature is by all accounts prone to error, causing Win 10 users to keep bombarding tech and support forums with trenchant complaints and criticisms.
For now, let’s focus on how to get rid of Windows 10 update error 0x800703f1 since this persistent issue is the reason why you are here. To help you, we have collected a whole list of proven tips what to do when Windows updates fail with the error code 800703f1.
So, here are our top 6 ways how to fix Error Code 0x800703f1 when installing updates:
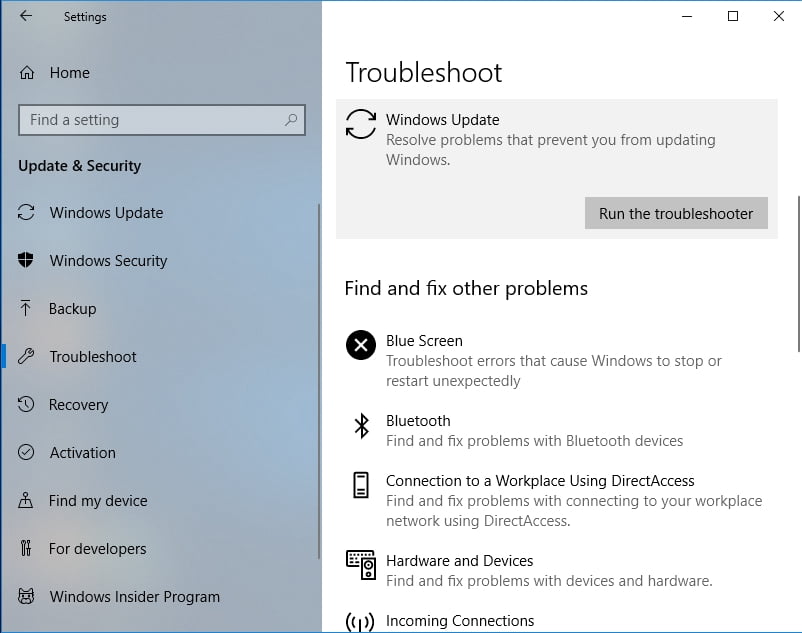
1. Use Windows Update Troubleshooter
Fortunately, Microsoft engineers are aware of the fact that Win 10 update problems spring up every now and then. That is why they have designed Windows Update Troubleshooter: this built-in tool will come in very handy if Windows updates fail with the error code 800703f1.
To run this solution, follow the instructions below:
- Press the Windows logo key + I letter key shortcut on your keyboard to open the Settings app.
- Proceed to the Update & Security section.
- Navigate to the left pane and select Troubleshoot.
- Go to the right pane and select Windows Update.
- Locate and click Run the troubleshooter button. The wizard will walk you through the troubleshooting process.
After getting the all-clear to proceed, restart your PC and see if your issue has been resolved.
2. Disable your antivirus software
Whether you use Windows Defender or a third-party security solution, your antivirus program can be behind the error 0x800703f1. To check if that is your case, you should temporarily disable your antivirus product and see if the issue persists.
If you use a non-Microsoft product, check its manual and disable the software. If this manoeuvre works, you should contact the vendor and report the issue.
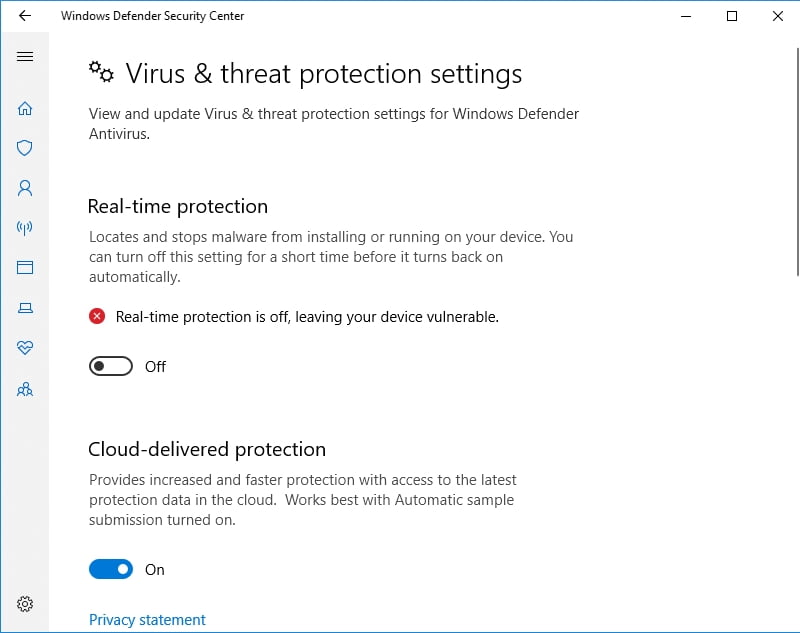
If you have entrusted your PC’s safety to Windows Defender, here is how you can turn it off in Windows 10:
- Open the Settings app, using the Windows logo + I keyboard shortcut.
- Go to the Update & Security section.
- Navigate to the left pane and select Windows Security.
- Then move to the right pane and select Open Windows Defender Security Center.
- Click Virus & threat protection. Then open Virus & threat protection settings.
- Turn off Real-time protection.
After disabling Windows Defender, try to perform an update. If the error 800703f1 keeps reoccurring, proceed to the following fix. However, if the problem has been fixed, update your OS via Windows Update.
If Windows Defender is your only security tool, please be careful: we recommend you to avoid suspicious websites since your PC is vulnerable while Defender is off.
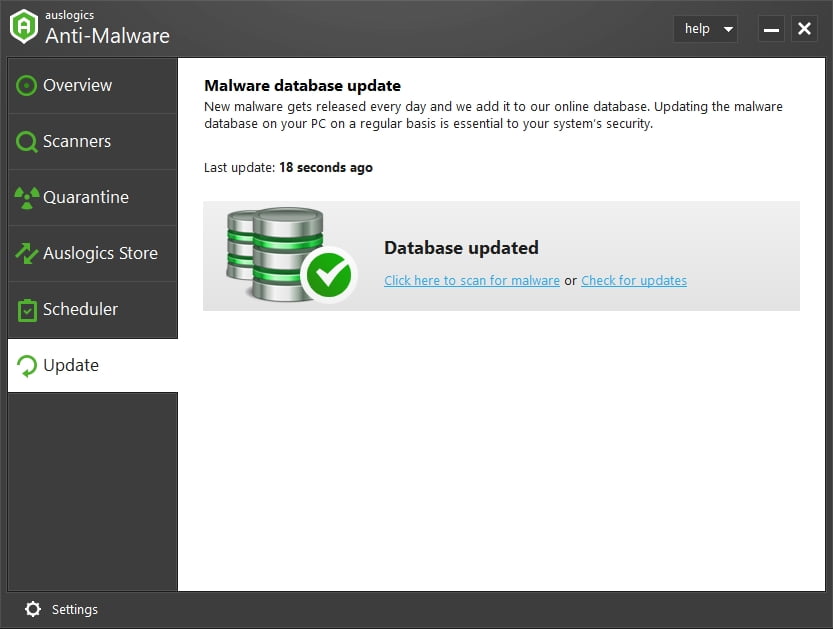
Moreover, it would be wise to add an extra layer of protection and install a powerful anti-malware tool. We advise using Auslogics Anti-Malware to keep nefarious entities out: this tool updates its database on a regular basis and is therefore able to bring down even the latest threats from the world of malware. In addition, this tool is designed to work hand in hand with your main antivirus tool without conflict or confrontation.
3. Fix your driver issues
Problematic drivers are a common cause of update issues in Windows 10. So, if you are still looking for a way how to get rid of Windows 10 update error 0x800703f1, the best course of action will be to check your drivers. Naturally, the easiest way to do that is to employ a special tool to get the job done. For example, you can make use of Auslogics Driver Updater – this solution will scan all your drivers in just one click and update them to the latest manufacturer-recommended versions that are compatible with your operating system. As a result, you will be able to enjoy a fast and stable computer.
Nevertheless, you can resolve your driver problems yourself – notably, this option requires more time and effort. However, it is up to you to decide how to get your problematic drivers back on track. That is why we have prepared the necessary instructions for you.
To start with, updating your drivers via Device Manager may prove successful under the circumstances in question.
Here is what you are supposed to do:
- Locate the Start icon on your taskbar (the Windows logo icon) and right-click on it.
- Locate Device Manager and click on it.
- Select the device which driver you wish to update.
- Right-click on the device and select Update driver software.
- Configure Device Manager to search for new drivers online.
You should carry out the procedures above for every piece of hardware which driver needs updating. Unfortunately, Device Manager may fail to find the versions needed, so be ready to update your drivers manually. Bear in mind that this method is exceptionally time consuming and should be carried out with utmost precision – you may end up installing a wrong driver and damaging your operating system.
To update your drivers manually, make sure you know the exact model of your device and what particular driver is needed for your piece of hardware to function properly. We recommend that you start your search from the official website of the device’s manufacturer. To be precise, you should search the support section for the necessary software. Reboot your PC after installing new drivers and check for the error 0x800703f1.
In a situation when the 0x800703f1 issue persists, you might need to roll back your current drivers: chances are they are incompatible with your system. To do that in Windows 10, use the following guide:
- Right-click on your Windows logo icon in the taskbar.
- Select Device Manager from the list of available options.
- Find a problematic device and right-click on it.
- Select Properties from the drop-down menu.
- Navigate to the Driver tab and click Roll Back Driver.
After restoring your drivers, restart your PC and check your Windows Update center. If your updates keep getting stuck, you should navigate to the following solution.
4. Run an SFC scan
It is possible that your Windows updates fail with the error code 0x800703f1 due to missing or corrupt system files. In such a case, it is advisable to run System File Checker. This tool comes as part of your operating system and is designed to fix your system file issues in a safe and effective way.
To run an SFC scan in Windows 10, take the following steps:
- Press the Windows logo key + X shortcut on your keyboard.
- Select Command Prompt (Admin) (or PowerShell (Admin) if Command Prompt is not available) from the list of options.
- Type sfc /scannow into the Command Prompt window and press Enter.
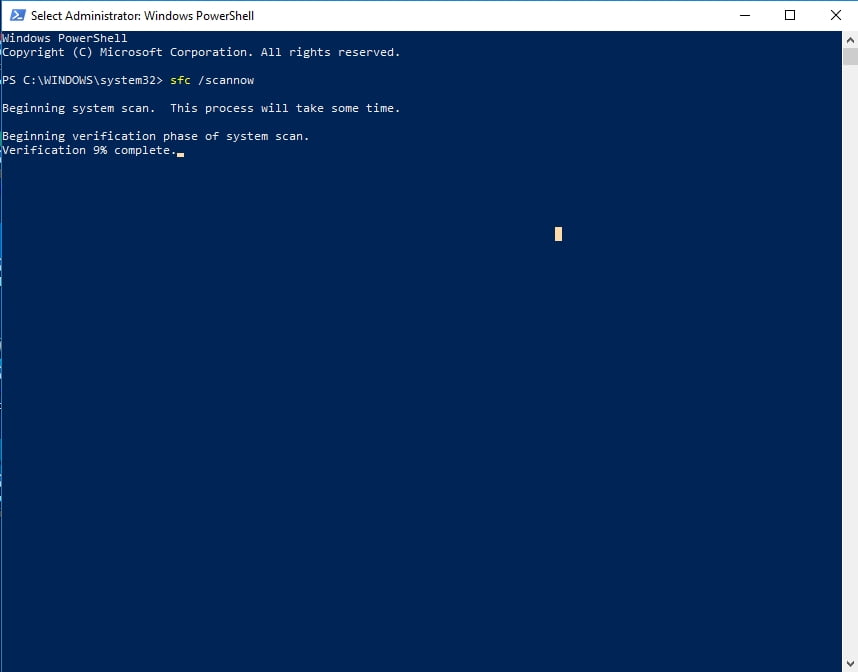
Wait for the scan to finish – it may take a while, so be patient. On no account should you abort the process!
Once the scan is complete, exit Command Prompt, restart your computer, and check your Windows Update. No success yet? Anyway, there is no need to despair. Keep working your way down – the following fix might be your triumph.
5. Run DISM
If running System File Checker has been to no avail, it is time for you to let the Deployment Image Servicing and Management (DISM) tool have a go. This set of instructions is here to help you:
- Open Command Prompt as an administrator (use the guidelines from the previous fix).
- Input DISM.exe /Online /Cleanup-image /Restorehealth and click Enter.
- If the command above does not work, insert your installation media and run the following command: DISM.exe /Online /Cleanup-Image /RestoreHealth /Source:C:\RepairSource\Windows /LimitAccess. Make sure to replace C:\RepairSource\Windows with the location of your media. Hit Enter.
Wait for the DISM scan to finish and try to update your OS. No luck so far? If so, you can resort to the nuclear option.
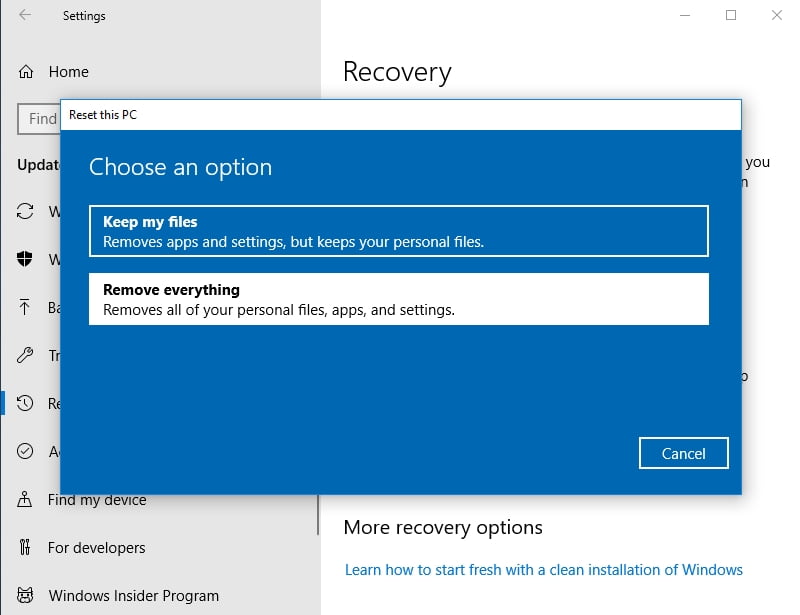
6. Clean install Windows 10
Performing a clean installation of Windows 10 is the last fix in line since this option is quite drastic. First and foremost, back up your important files to avoid permanent data loss. Make sure you have the installers for your third-party apps available – you will lose all your non-Microsoft software.
To give your Windows 10 a fresh start, do the following:
- Open the Settings app by clicking the Windows logo key and I key simultaneously.
- Enter Update & security and select Reset this PC.
- Click on Get started and select Remove everything.
Now you know how to fix Error Code 0x800703f1 when installing updates.
Have our tips proved useful?
We are looking forward to your ideas and comments.


 Done! Great to see you among our subscribers!