- Why is Windows scanning and repairing drive on booting?
- How to stop Windows from scanning and repairing the drive?
- Method one: using Windows Error checking tool
- Method two: checking drive status
- Method three: running a CHKDSK scan in Safe Mode
- Method four: running the Repair-Volume-DriveLetter command in Safe Mode

Among some of the most frequently reported Windows 10 errors is the error message that shows up on startup and says, “Scanning and repairing drive”. Sometimes, the error message gets stuck on the screen, preventing your PC from booting properly. Some users have even reported getting this error message every time they turn on their PC. Naturally, this can get quite annoying — but the problem is easily fixed.
From this article, find out why Windows is scanning and repairing your drive on booting and how to stop Windows from scanning and repairing the drive.
Why is Windows scanning and repairing drive on booting?
You will typically get the “Scanning and repairing drive” message when your computer hasn’t been properly switched off: due to a forced shutdown, a power failure, etc.
Why does it happen? When you are working on your PC, your hard disk and RAM are writing and reading data. If your computer shuts down unexpectedly, you may lose some of the data stored in RAM — in the worst-case scenario, this can even lead to hard disk damage. Thus, when you turn on your computer after an “improper” shutdown, Windows will automatically scan your driver, trying to fix the issues that occurred in the process.
Finally, we remind you that if you have a habit of performing forced shutdowns, it’s better to put an end to this practice so as to avoid potential startup errors — just like the one described here.
How to stop Windows from scanning and repairing the drive?
If you see the Windows scanning and repairing process is stuck or if you simply don’t have the time to wait for it to complete, you can bypass the automatic scanning and, instead, repair the drive manually, if needed.
If you are working in Windows Normal Mode, you can try using the Windows Error checking tool or checking the status of your drive.
On the other hand, if you can’t boot Windows, you can try running a CHKDSK scan in Safe Mode or using the Repair-Volume -DriveLetter command in Safe Mode.
Let’s go over the four error-fixing methods in more detail.
Method one: using Windows Error checking tool
One of the first things you can try is using the Windows Error checking tool to scan for and repair any potential issues. Here’s how to do that:
- In the Taskbar, select File Explorer.
- Go to This PC and expand Devices and drives.
- Right-click on the drive you saw in the Windows “scan and repair” message and select Properties.
- Go to Tools and, under Error checking, select Check.
- If errors are revealed during the scanning process, a new window will pop up suggesting you repair the drive. Click Repair.
- If no errors have been found, you will still have the option to scan and repair the drive — in the new window, choose Scan drive.
- Finally, restart your PC and check if the problem has been resolved.
If this method hasn’t worked, you can try checking the status of your drive.
Method two: checking drive status
You can see if there are any problems with the drive and if it needs repairing by checking its status. Here’s what to do:
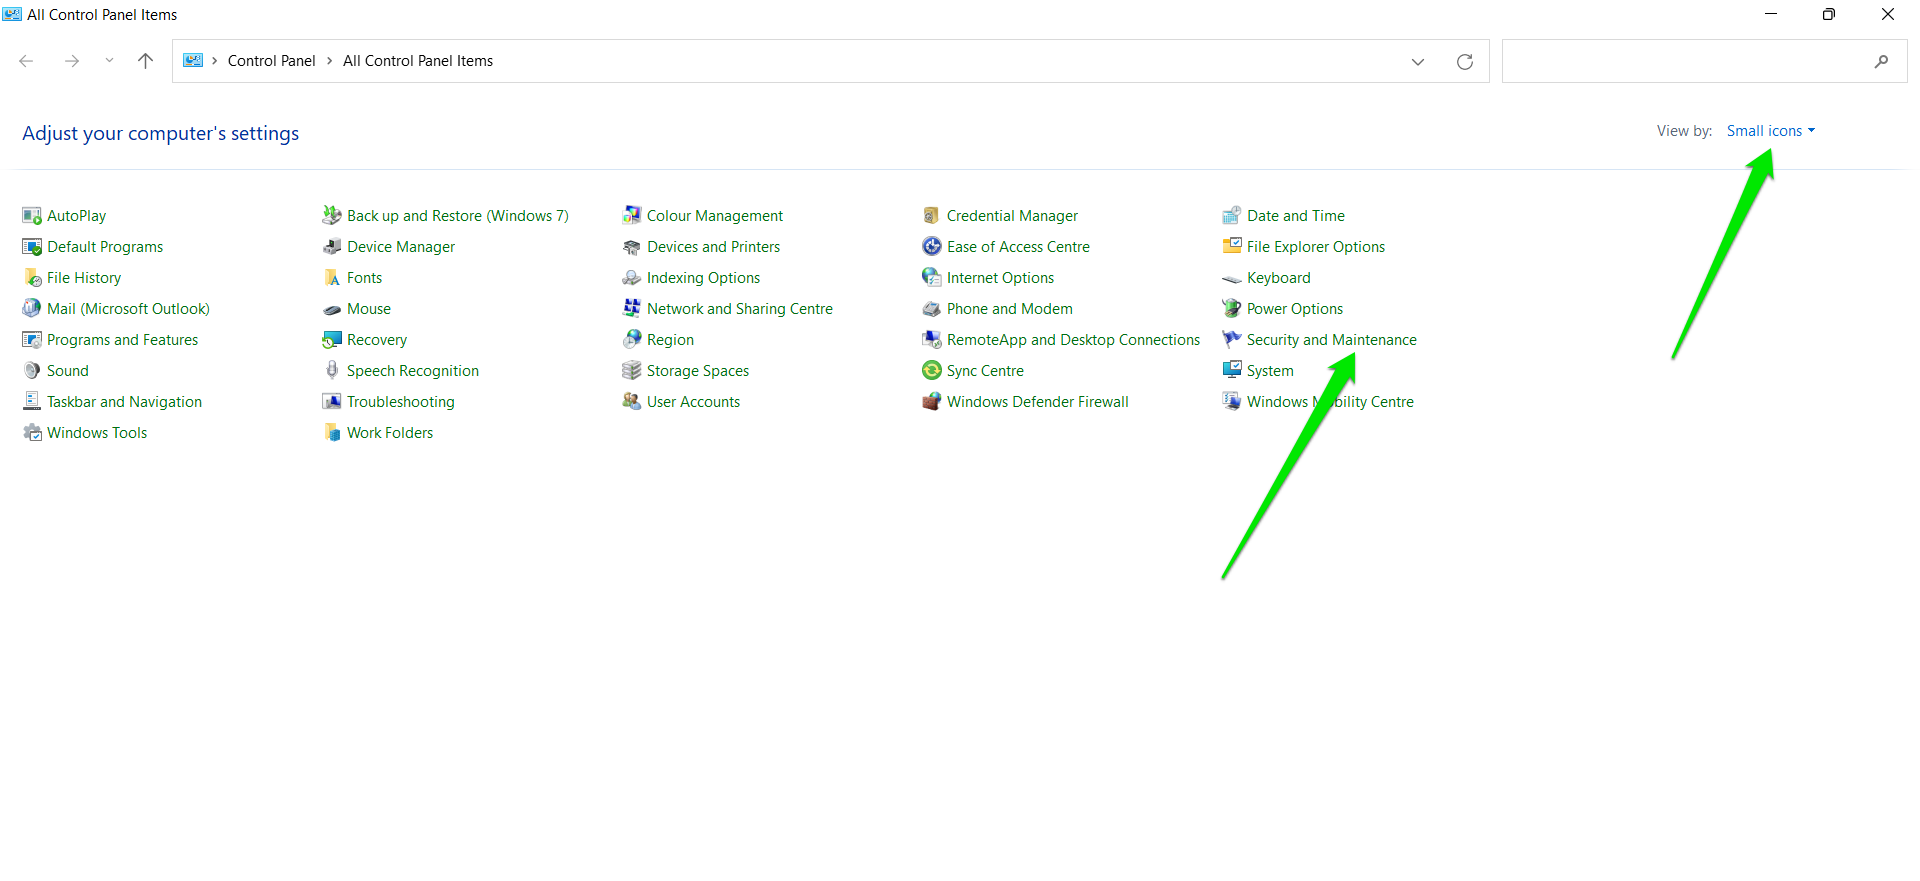
- Go to Control Panel.
- To open Control Panel, go to the Start menu and type “control panel” in the search bar, then select Control Panel.
- Select View by Small icons and click Security and Maintenance.
- Select Maintenance.
- In Drive status, you will find a link that will let you repair the drive. Click this link. Windows will tell you not to bother if the drive is okay.
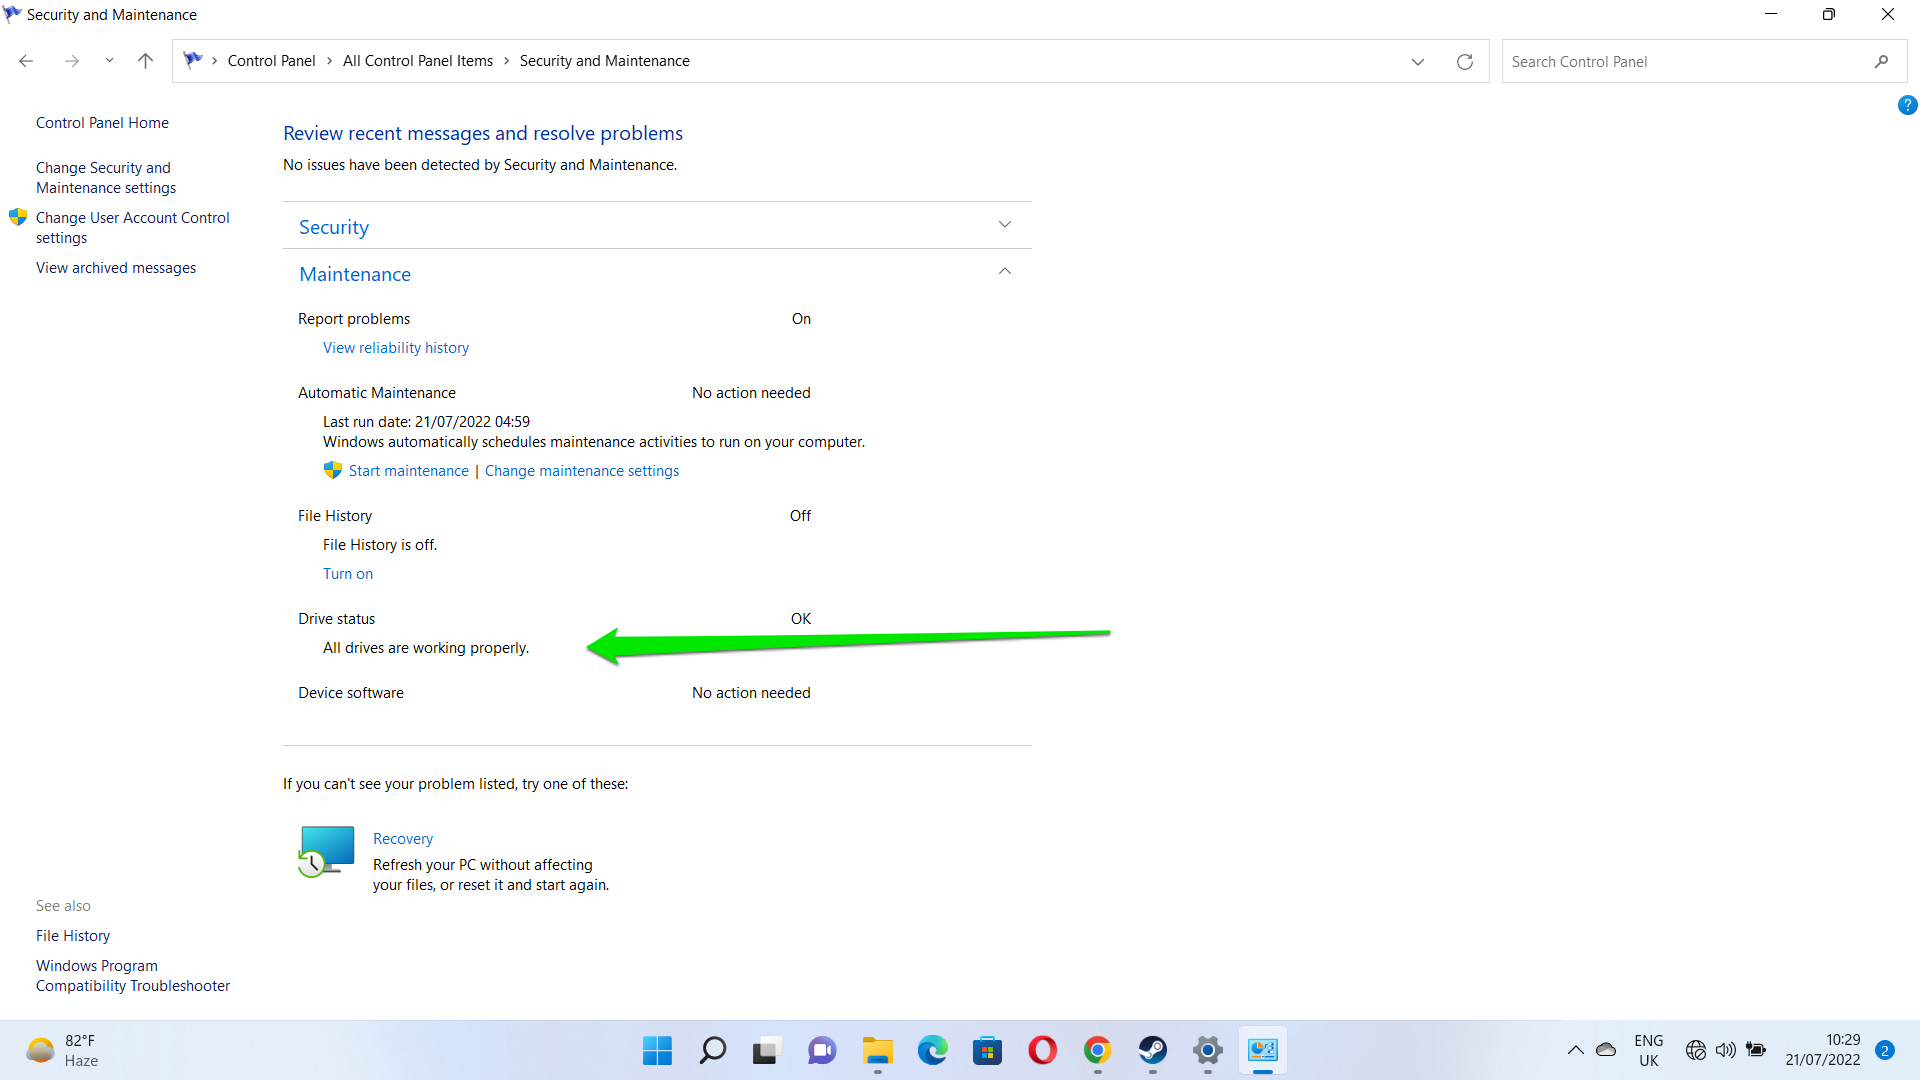
Your drive will now be scanned for potential errors, and, if any are found, they will be repaired.
Method three: running a CHKDSK scan in Safe Mode
A CHKDSK scan is a quick and easy way to check your computer drive for system file errors and repair any issues that may be found. If you have a problem booting into Windows, you will need to use the CHKDSK command in Safe Mode. Follow these steps:
- Run Windows 10 in Safe Mode.
- To do that, launch the Settings application (Win + I), click on Update & Security, then go to the Recovery tab once the Update & Security page opens.
- Next, click on Restart Now under Advanced Startup.
- Once your system restarts, click on Troubleshoot under Choose an Option.
- Select Advanced Options, then choose Startup Settings.
- Click on Restart, then select Safe Mode once your system reboots.
- To run Windows 11 in Safe Mode:
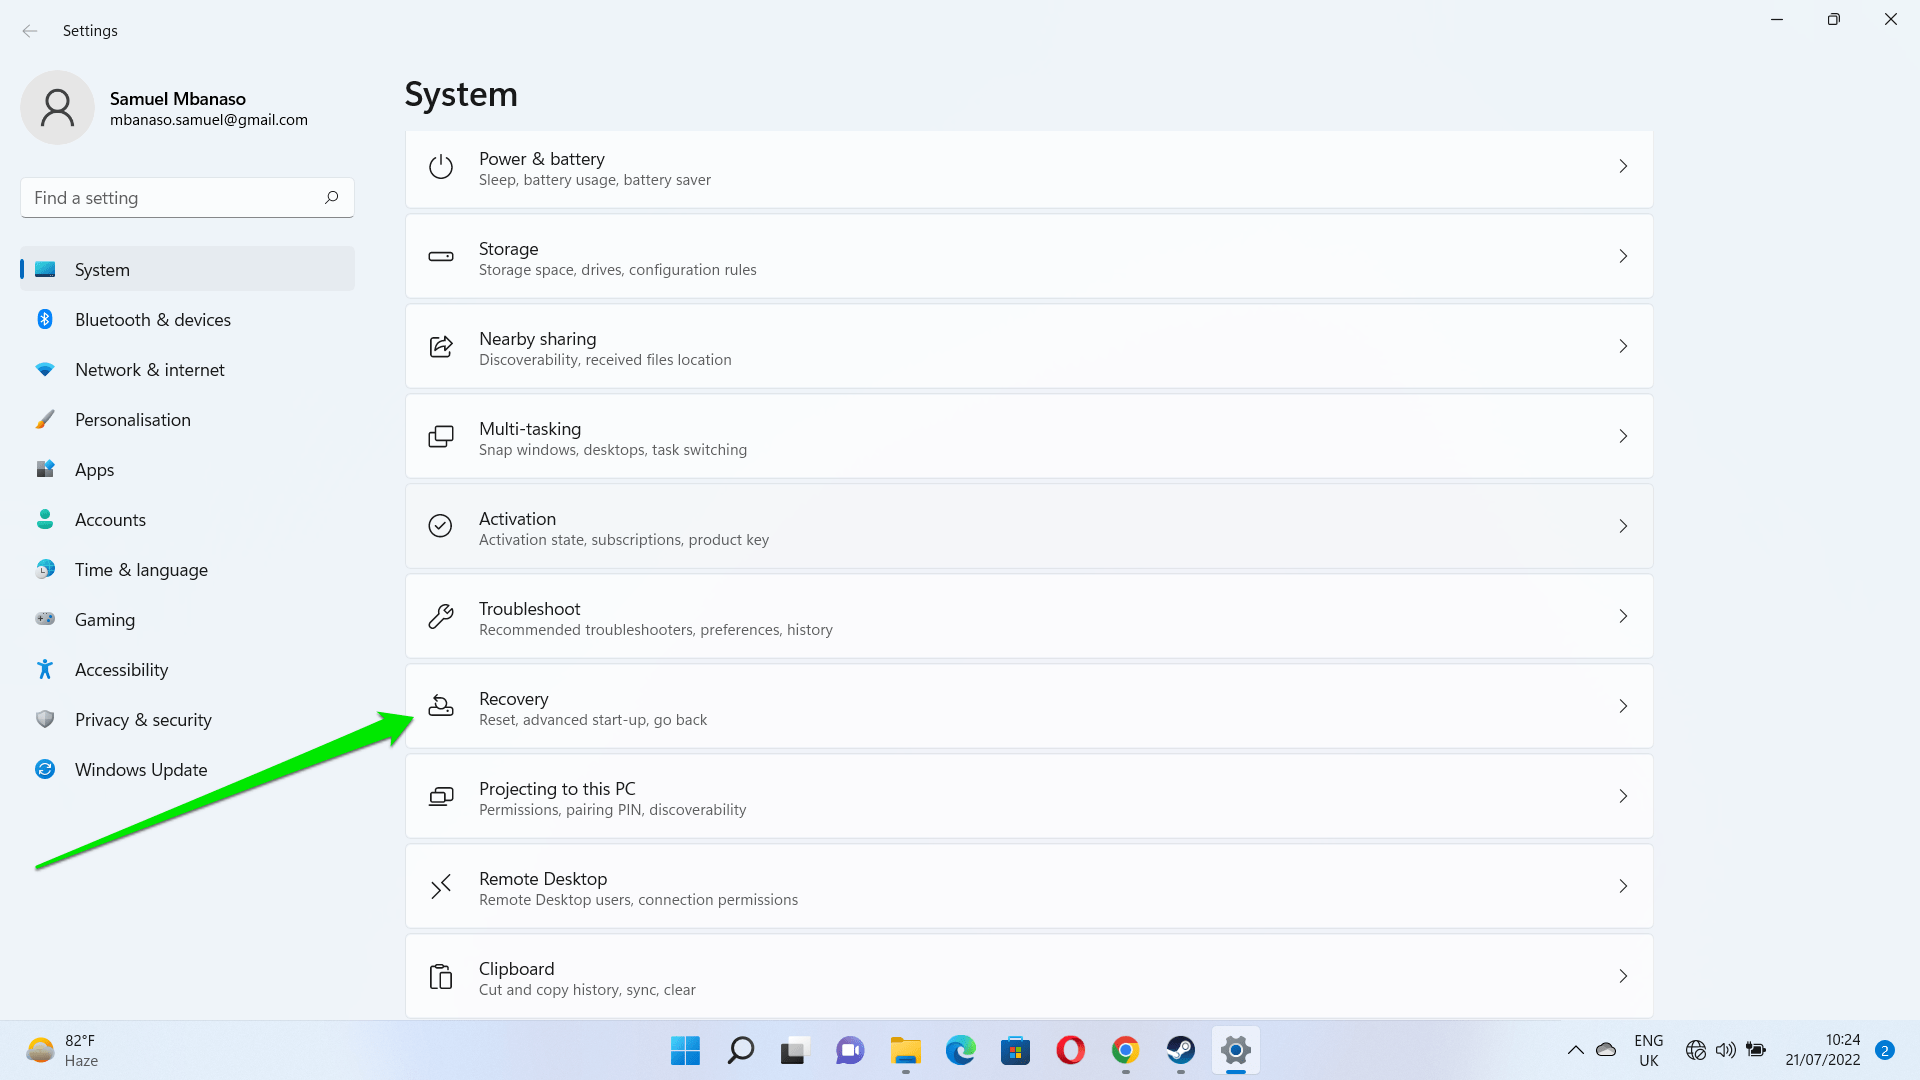
- Open the Settings app and click on Recovery on the System page.
-
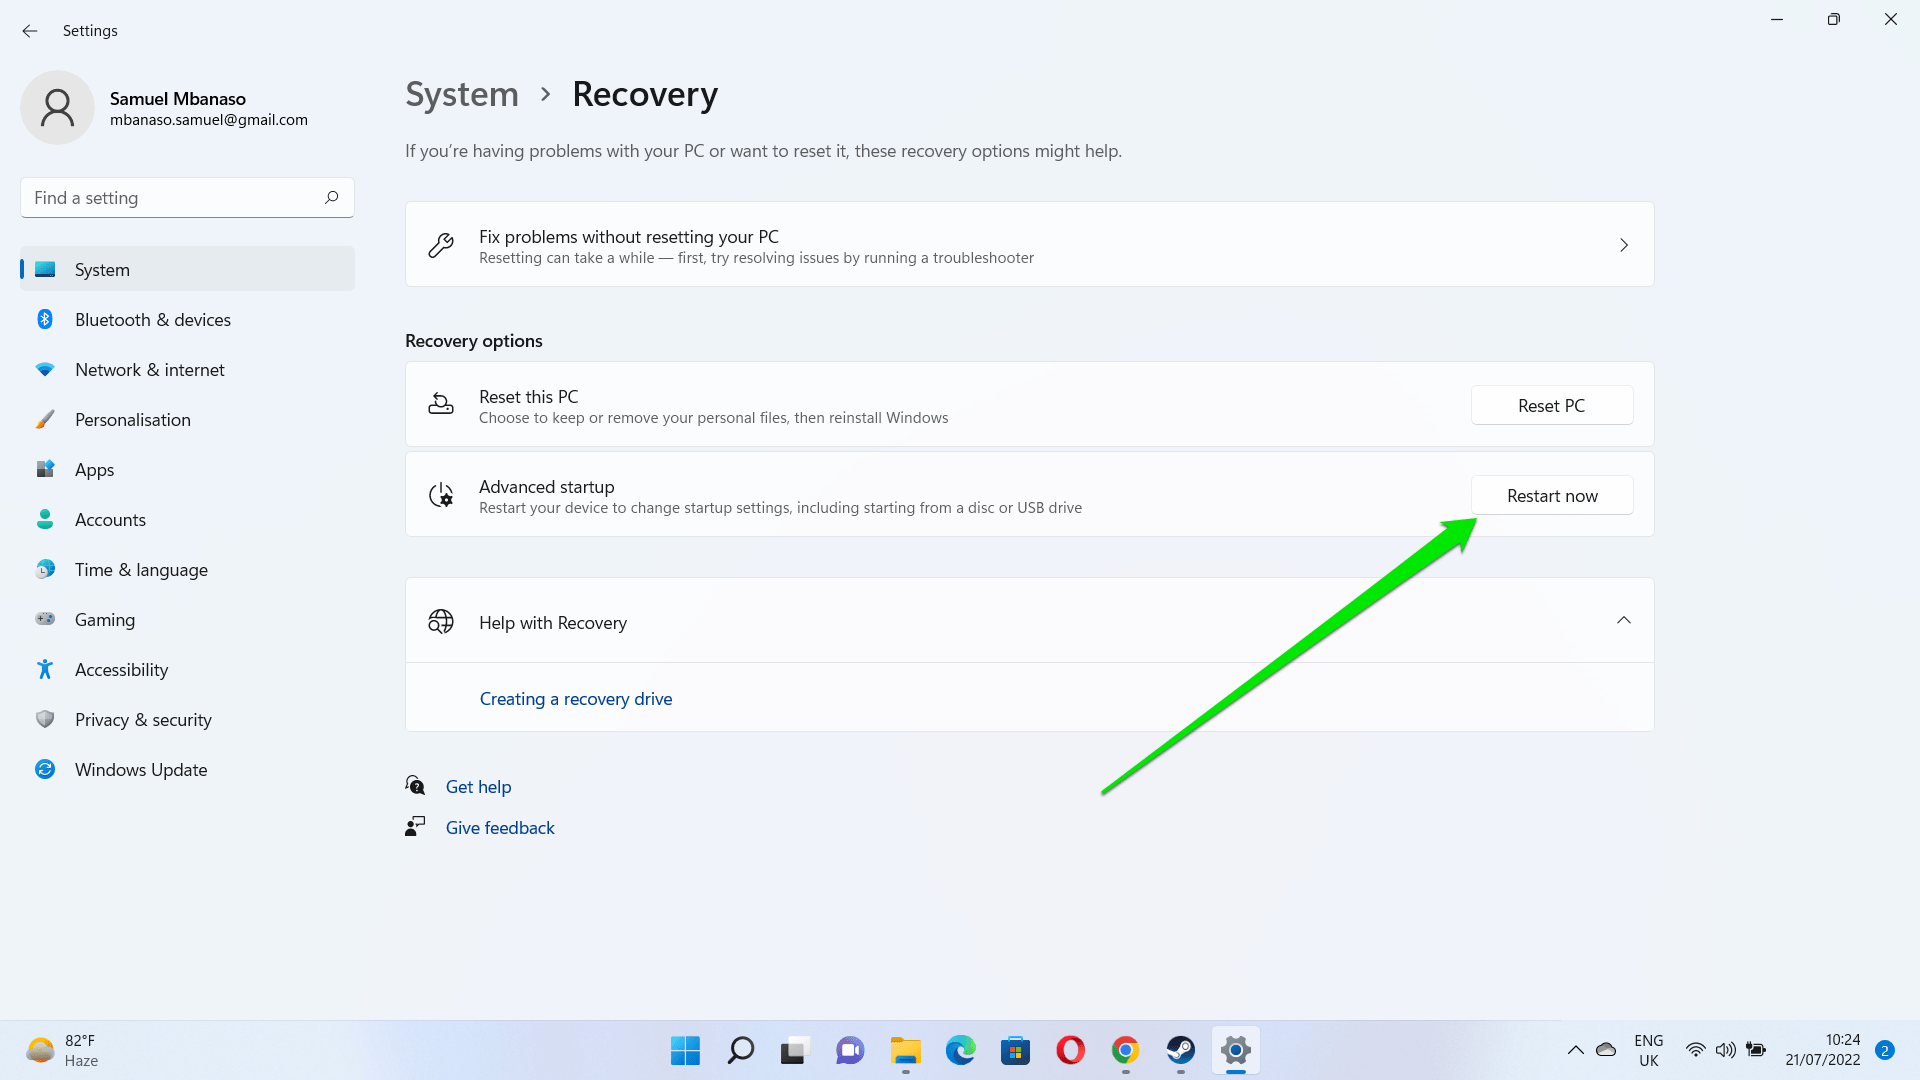
- Click on Restart Now next to Advanced Startup.
-
- Once your PC restarts, follow the steps in the previous guide to open Windows 11 in Safe Mode.
- Press the Win + R key combo on your keyboard to open Run.
- Enter “cmd” and press Shift+Ctrl+Enter to run Command Prompt in administrator mode.
- Type in “chkdsk x: /f” (where “x” is the name of the drive you plan to scan and repair) and press Enter.
When the scanning and repairing process is complete, restart your computer and see if the issues have disappeared. If they haven’t, try running the repair-Volume-DriveLetter command in Safe Mode.
Method four: running the Repair-Volume-DriveLetter command in Safe Mode
Here, you will be using PowerShell to run the Repair-Volume-DriveLetter command to scan for and fix potential drive errors. Here’s how to do that:
- Start Windows 10 in Safe Mode.
- In the search box, type “powershell” to open the menu. Right-click Windows PowerShell and choose to run it as an administrator.
- Enter the following command: “repair-volume -driveletter x” (where “x” is the name of the drive you want to repair). Then press Enter.
- When the scanning and repairing process is complete, restart your PC and check if the problem has been fixed.
Finally, in order to ensure smooth and error-free performance of your disk, you can use specialized software such as Auslogics Disk Defrag Pro that will help your drives run at maximum efficiency, optimize file placement on your hard drive and, overall, improve your PC experience.
What is a good defrag program? Definitely, it is a software that will safely make your PC work faster: when your registry or disk are defragged, the performance gets much better.
What other problems have you encountered after a forced shutdown of your PC? Share in the comments below.


 Done! Great to see you among our subscribers!