
‘Sometimes the things you’ve lost
can be found again in unexpected places’
Daniel Handler
For those PC users who have a lot of files to navigate through, thumbnails are undoubtedly an indispensable feature. Those small previews help us find what we are looking for and save us a lot of time and effort. And as you might guess, it is extremely dispiriting when they disappear.
Unfortunately, missing thumbnails are quite a common issue these days. The main reason for this is that your thumbnail cache accumulates continually, which makes your cache database prone to corruption.
The good news is, you can easily fix thumbnails messed up in Windows 10. For this, make use of our proven tips on how to restore thumbnails icons on Windows 10:
1. Clean up your disk
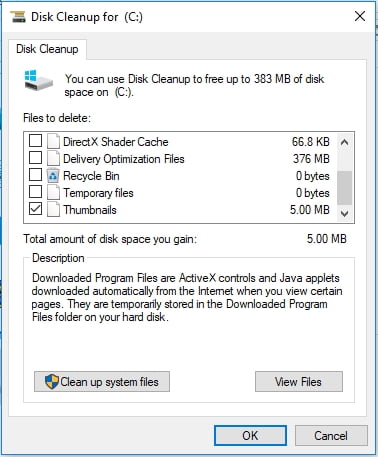
Your disk might be stuffed full of unnecessary files. Using the Disk Cleanup feature will help you rebuild your thumbnail cache:
- Open your File Explorer. Click This PC.
- Right-click the drive where you Windows is installed.
- Select Properties. Then select Disk Cleanup.
- Check the box next to Thumbnails. Make sure all other options are unchecked.
![Check Thumbnails in th Disk cleanup menu.]()
- Click OK and then Delete Files.
Wait for the process to finish. Then check if your issue has been resolved. And if you’d prefer also to speed up your PC, you can run Auslogics BoostSpeed. It is a safe and quite effective software.
2. Recreate your thumbnail cache with Command Prompt
To get rid of unnecessary thumbnail cache and make your system show thumbnails again, you need to execute the following commands, using your Command Prompt. Here is how you can do that:
- Click on the Windows logo icon on your Taskbar. The start menu will open.
- Now locate the Search area. Type ‘cmd’ (without quotes) into Search and hit Enter.
- Locate Command Prompt in the list of available options.
- Right-click on it and select Run as administrator. This will open an elevated Command Prompt window.
- To begin with, you should stop File Explorer. For this purpose, type the following command into the Command Prompt window and press the Enter key: taskkill /f /im explorer.exe
- Now let’s delete thumbnails from your database by using the following command: del /f /s /q /a %LocalAppData%\Microsoft\Windows\Explorer\thumbcache_*.db Then press Enter.
- It is time to start File Explorer: start explorer.exe
Finally, exit the Command Prompt window and restart your PC. Check if your thumbnails are present and displayed correctly.
3. Use Run to clean up your disk
If all the fixes above have failed to help you, you can try using Run to get your disk cleaned up. This will delete your thumbnail cache and allow you to have the thumbnail feature up and running again. Here is what you should do:
- Navigate to your Taskbar. Right-click on the Windows logo icon.
- Select Run from the menu. Type cleanmgr.exe into Run.
- Press Enter. In the window that has opened, proceed to Thumbnails and check the box next to this option.
- Click OK to provide your confirmation.
Be patient until the clean-up process is complete. Reboot your PC and check if thumbnails show up again.
No luck so far? Anyway, there is no need to despair. One of the following methods is sure to resolve your problem.
4. Configure your folder settings
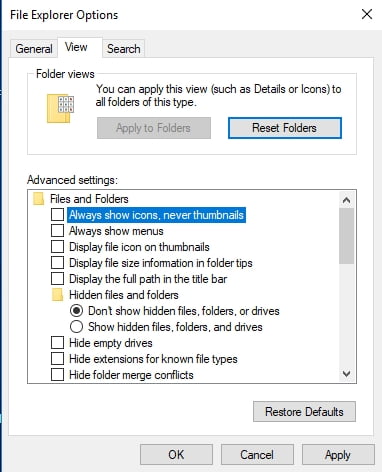
If your thumbnails have gone missing, chances are your folder settings have been interfered with. That is how you can fix them:
- Open your File Explorer and navigate to the View tab.
- Click Options. Folder Options will open. Click on View.
- Uncheck Always show icons, never thumbnails.
![Deselect Always show icons, never thumbnails.]()
- Click Apply and then OK.
Now check your thumbnails. Hopefully, they are available now.
5. Configure your visual effects, using Control Panel
Another solution that may help you implies dealing with your visual settings. That’s what you need to do:
- Click on the Windows icon to open the Start menu.
- Locate and click Control Panel.
- Select System and open Advanced system settings.
- Navigate to the Advanced tab. Open Performance Settings.
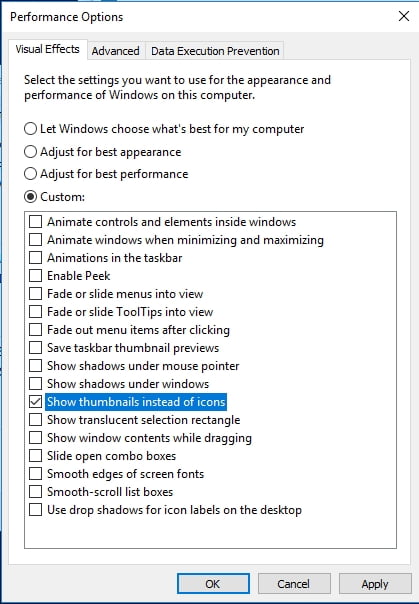
- Proceed to the Visual Effects tab.
- Make sure to check the Show thumbnails instead of icons option.
![Check Show thumbnails instead of icons.]()
- Click Apply. Restart your File Explorer.
All to no avail? Then we recommend applying the following fix.
6. Tweak your display properties and rebuild thumbnail cache
If you have made this far, then your thumbnails are still missing. It seems that to restore them, you might need to configure your display properties and then rebuild your thumbnail cache. For this purpose, use the instructions below:
- Go to your desktop. Right-click on an empty space there.
- Select Personalize. Click on Display Properties.
- Navigate to colors. Select Medium (16-bit). If you already have Medium selected, switch to Highest (32-bit).
- Click Yes to confirm your settings.
- Restart your PC.
- Launch your File Explorer. Go to the View tab.
- Click Options and move to Folder Options.
- Select Show hidden files and folders.
- Now go to C:/Users/(User Name)/AppData/Local.
- Delete IconCache.db.
- Close the window and empty the Recycle bin.
- You might need to restart your PC several times for this trick to work.
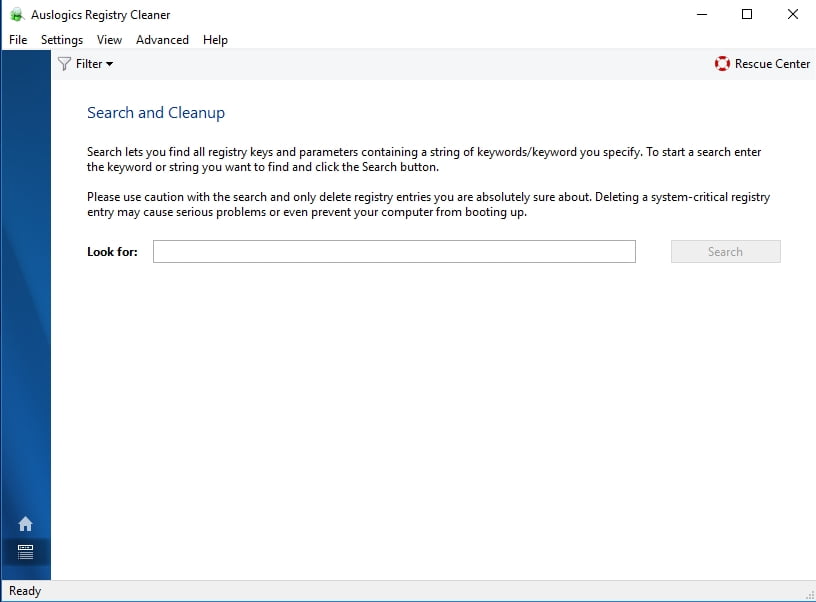
We hope we helped you fix thumbnails messed up in Windows 10. However, if you are still having issues with them, there might be something wrong with your system registry. This component is really fragile, so we recommend using a special tool to perform manipulations on Windows Registry. For example, Auslogics Registry Cleaner is a 100% free product that will repair your registry in a safe and efficient way.
Please do not hesitate to leave a comment if you need further assistance.


 Done! Great to see you among our subscribers!
now fixed after install register cleaner
thank you!