- Solution 1: Installing the Latest Game Patch
- Solution 2: Changing your Game’s Video Settings
- Solution 3: Updating your Graphics Driver
- Solution 4: Changing the Settings of your Graphics Card
- Solution 5: Changing your PC’s Power Plan
- Solution 6: Choosing the Best Performance Settings for your Windows System
- Solution 7: Disabling CPU Core Parking

Anyone playing CS: GO understands how crucial every second of the game is. Skipping a frame can make or break the competition. So, it is only natural to ask, “Can I improve the FPS in Counter Strike: GO?” If you share the same sentiment, then you will be glad that you found this article. We are going to teach you how to boost the FPS in CS: GO on Windows. Work your way down our tips until you find the one that works best for you.
Solution 1: Installing the Latest Game Patch
One of the best ways to enhance the game’s performance and fix bugs is to install the latest patch. In some cases, bugs are causing the drop in the FPS. So, we recommend checking Steam or the game’s official website to see if there are available updates. Once you’ve installed the latest patch, try running CS: GO and check if there is an improvement in the FPS.
Solution 2: Changing your Game’s Video Settings
You can also boost your CS: GO’s FPS by modifying your game’s video settings. To do that, follow the instructions below:
- Run your CS: GO by opening the Steam client.

- Access the settings by clicking the gear button.
- Go to Video Settings, then select Advanced Video.
- Change the video settings to the following:
Global Shadow Quality: Very Low
Model/Texture Detail: Low
Effect Detail: Low
Shader Detail: Low
Multicore Rendering: Disabled
Multisampling Anti-Aliasing Mode: None
FXAA Anti-Aliasing: Disabled
Texture Filtering Mode: Bilinear
Wait for Vertical Sync: Disabled
Motion Blur: Disabled
- Optional Step: You can also play the game in Windowed Mode, then lower the resolution to boost the FPS even further.
Solution 3: Updating your Graphics Driver
Another great way of boosting the FPS of CS: GO is by updating your graphics driver. That said, when you choose to upgrade your graphics driver manually, you have to scour the manufacturer’s website for the latest version of your graphics driver. You also have to make sure that you’re downloading and installing the one that is compatible with your Windows system.
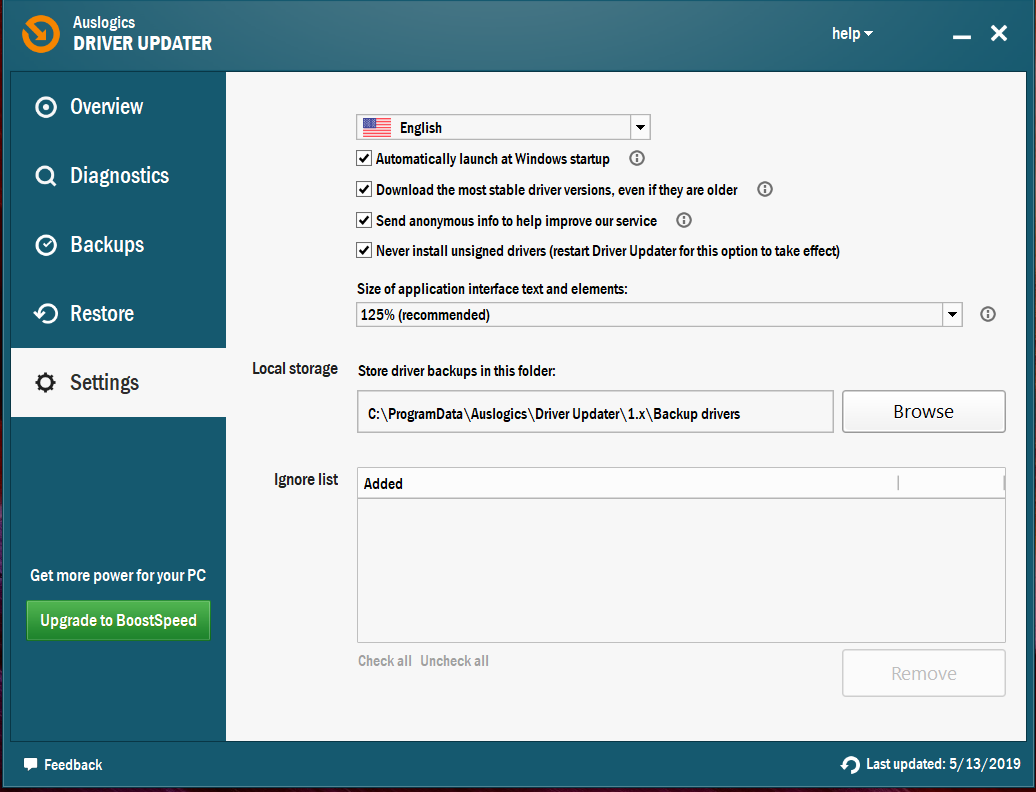
As you can see, the manual process can be complicated and time-consuming. There’s also the risk of getting the wrong drivers, which causes system instability issues. As such, we suggest automating the process, using a trusted program like Auslogics Driver Updater. Once you’ve activated this tool, it will recognize your system and find the right drivers for it. What’s more, it will deal with all the problematic drivers. So, you will notice a significant improvement in the speed and performance of your computer once the process is done.
Solution 4: Changing the Settings of your Graphics Card
You can also try modifying your graphics card settings to boost the FPS of CS: GO. We’ve laid out the instructions for the most common graphics cards below.
NVIDIA
- Press Windows Key+R on your keyboard to open the Run dialog box.
- Type “control” (no quotes), then hit Enter.
- Make sure that the View By option is set to Large Icons.
- Click NVIDIA Control Panel.
- Select 3D Settings from the left-pane menu, then click the ‘Adjust image settings with preview’ option.
- Go to the right pane, then select the ‘Use my preference emphasizing’ option.
- Drag the slider to the left.
AMD
- Open the Run dialog box by pressing Windows Key+R on your keyboard.
- In the Run dialog box, type “control” (no quotes), then press Enter. This will open the Control Panel.
- Click the drop-down list beside the View By option, then select Large Icons.
- Select AMD Radeon Settings.
- Go to Gaming, then select Global Settings.
- Modify the settings according to the details below:
Anti-aliasing Mode: Use application settings
Anti-aliasing Method: Multisampling
Morphological Filtering: Off
Anisotropic Filtering Mode: Use application settings
Texture Filtering Quality: Performance
Surface Format Optimization: On
Wait for Vertical Refresh: Off, unless application specified
OpenGL Triple Buffering: Off
Shader Cache: AMD optimized
Tessellation Mode: AMD optimized
Frame Rate Target Control: 150 FPS
Intel
- Click the Search icon on your taskbar.
- Type “Control Panel” (no quotes), then press Enter.
- Select Large Icons from the drop-down list beside the View By option.
- Click Intel Graphics Settings.
- Open the 3D settings by clicking 3D.
- Under the Select Application section, click the Scan button. This will allow you to add CS: GO to your application list.
- Change the settings according to the following details:
Vertical Sync: Use Driver Settings
Conservative Morphological Anti-Aliasing: Turn Off
Multi-Sample Anti-Aliasing: Turn Off
Anisotropic Filtering: Use Application Default Settings.
Save the changes by clicking Apply.
Try running CS: GO, then check if the FPS has improved.
Solution 5: Changing your PC’s Power Plan
When you change the power plan of your computer to High Performance, you can noticeably boost CS: GO’s FPS. It is worth noting that most PCs are configured to have a Balanced power plan. Such settings restrict the operating capacity of the CPU and graphics card. So, if you want to learn how to boost the FPS in CS: GO on Windows, follow the instructions below and change your computer’s power plan:
- Launch the Run dialog box by pressing Windows Key+R on your keyboard.
- Type “powercfg.cpl” (no quotes), then hit Enter.
- Expand the contents of the Hide Additional Plans section.
- Select High Performance.
Run CS: GO, and check if the problem with the FPS persists.
Solution 6: Choosing the Best Performance Settings for your Windows System
You can also adjust your Windows system for best performance to boost the game’s FPS. To do that, follow the steps below:
- On your keyboard, press Windows Key+S.
- Type “Control Panel” (no quotes), then hit Enter.
- Click the Search box in the upper-right corner of the window.
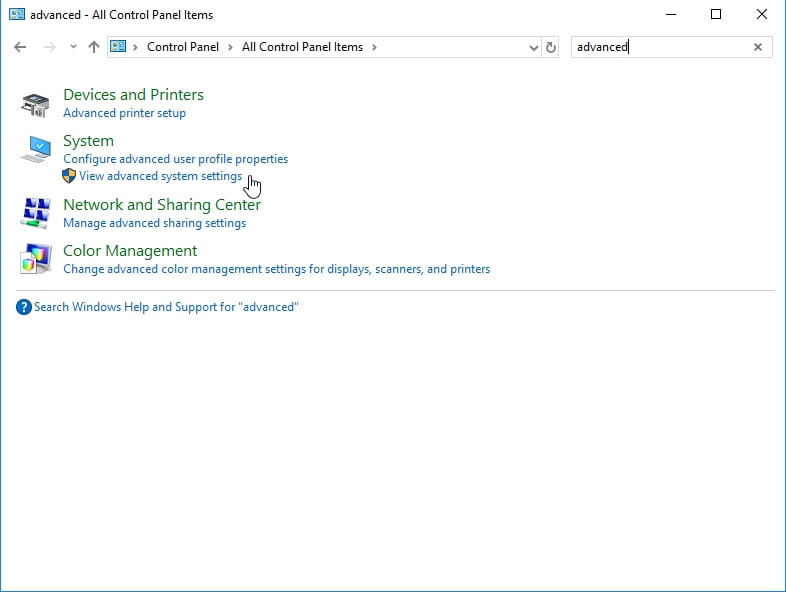
- Type “advanced” (no quotes).
- Under the System options, select View Advanced System Settings.
![Click View Advanced System Settings.]()
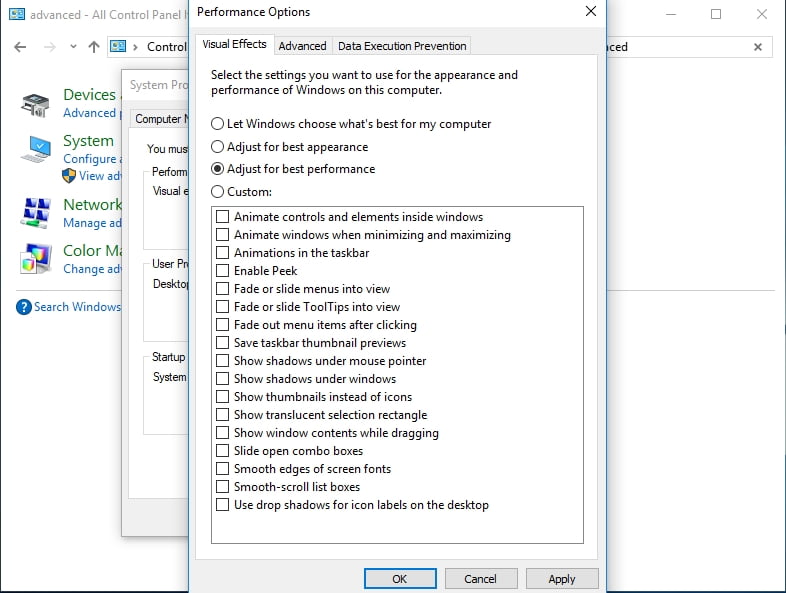
- Go to the Performance section, then click the Settings button.
- Select Adjust for Best Performance, then click Apply.
![Check Adjust for best performance.]()
- Go to the Advanced tab, then under the Processor Scheduling section, select Programs.
- Click OK to save the changes.
Solution 7: Disabling CPU Core Parking
CPU Core Parking can help improve your system’s efficiency. It can scale the number of logical processors dynamically, depending on the workload. However, if you enable this feature, your CPU’s performance is limited when you play CS: GO. To disable CPU Core Parking, follow the instructions below:
- Open the Run dialog box by pressing Windows Key+R on your keyboard.
- Type “msconfig” (no quotes), then hit Enter.
- Once the System Configuration window is up, go to the Boot tab.
- Click Advanced Options.
- Select Number of Processors, then choose the maximum number of processors available in the drop-down list.
![Check Number of processors and select the largest value from the list.]()
- Save the settings by clicking OK.
- Go back to the System Configuration window, then click OK.
- Click the Restart button.
- Once your computer boots, try running CS: GO and check if the FPS has improved.

Pro Tip: It is possible that your PC is generally slow. If you notice that CS: GO and other applications are not performing smoothly, we recommend using Auslogics BoostSpeed. Once you activate this tool, it will scan your entire system and identify junk files and other speed-reducing issues that cause glitches in CS: GO. It will safely address the problems without damaging your operating system. So, once the process is complete, you will notice a significant improvement in your game’s performance.
How did you boost the FPS of CS: GO?
Share your method in the comments section below!


 Done! Great to see you among our subscribers!