- What is a DNS server?
- How do DNS servers work?
- Why is the DNS server unavailable on Windows 11?
- How to fix the “DNS server unavailable” error in Windows 11
- Flush your DNS cache
- Reset and renew your IP address
- Change your DNS server
- Run the Internet Connection troubleshooter
- Disable your antivirus program
- Disable your proxy settings and VPN
- Reset your Hosts file
- Conclusion

Your computer relies on a DNS server to connect to and load websites. If you keep seeing the “DNS server unavailable” error, the server might be offline, or something else could be preventing your computer from reaching it.
We’ll walk you through everything you need to know about DNS servers and how to resolve the “DNS server unavailable” error.
What is a DNS server?
A static IP address, such as 142.251.33.78, is assigned to every device connected to the Internet. Other computers use this IP address to reach that device.
However, humans can’t easily remember numerical IP addresses, and typing them can be difficult. So, we use alphanumeric, human-friendly domain names instead, such as www.google.com.
Your web browser can only communicate with the Internet using IP addresses. So it needs an interpreter to translate an URL into an IP address (for example, www.google.com into 142.251.33.7). That’s where the DNS comes in.
Every web-related activity involves the DNS server at some point. Whether you’re trying to download a game, send an email, or load a web page, your computer sends a request to the domain name server to look up the IP address of the resource you’re trying to reach.
The Domain Name System (DNS) works as a wayfinding system commonly compared to a public phone book. Each IP address is saved under a domain name. So, whenever you enter a domain name into your web browser, it sends a request to a DNS server, which fetches the URL’s IP address for your browser.
How do DNS servers work?
We’ve established that DNS servers match domain names with their corresponding IP addresses after receiving the request from your computer.
The process involves four different stages, each facilitated by a different type of DNS server. These servers include the following:
- The recursive resolver
- The root nameserver
- The TLD nameserver
- The authoritative nameserver
The DNS recursive resolver receives the request from your web browser and makes another request to the root nameserver.
The root nameserver’s job is to match the URL’s Top Level Domain (TLD) with the correct TLD nameserver. The TLD is the last segment in a URL, such as .net and .com. The TLD nameserver checks the URL’s IP address in its TLD database.
Next, the TLD nameserver hands the information over to the authoritative nameserver, which checks the validity of the IP address.
Once the authoritative nameserver confirms that the IP address is correct, it sends it to your computer, which uses the address to load the website.
This process happens if you’re connecting to a website for the first time. And as we mentioned, it occurs within a couple of seconds or less with an averagely good internet connection.
After the process completes, your system stores the website’s URL and IP address information to a DNS cache to prevent it from repeating the process. It uses the cache file to find a URL’s IP address, which is faster.
Why is the DNS server unavailable on Windows 11?
The error typically shows up when your computer can’t reach its DNS server.
By default, your ISP provides the DNS server your entire system relies on to match domain names to their corresponding IP addresses. The message will show up if the server is offline.
Other things, such as your antivirus or firewall, could prevent your web browser or computer from reaching the server.
How to fix the “DNS server unavailable” error in Windows 11
We’ve compiled the best solutions to the problem for Windows 11 computers in this article. Make sure you follow each instruction carefully.
However, before you start, restart your router and computer to ensure the Internet device isn’t stuck or hasn’t crashed.
Switch off your router or modem and disconnect it from its socket, then shut down your PC and unplug it from its power source. Wait a few minutes and turn both devices back on.
You can now start troubleshooting the error if it still shows up.
Flush your DNS cache
Your computer saves IP address information to a local DNS cache to avoid the process of going through the DNS server to fetch IP addresses all the time. This saves time and improves website load speeds.
Each piece of DNS information saved to the cache has a lifespan of 48 hours. Once that time elapses, the IP address is deleted from the cache.
However, websites can change their IP addresses before your DNS cache’s time is up. Also, the cache could become corrupt and trigger DNS-related errors.
You can manually clear the cache to force your computer to check for IP addresses again using the domain name server.
You’ll have to open the Command Prompt as an administrator to flush the DNS cache.
Head to your keyboard, press down the Windows logo button, and press R to launch the Run dialog box.
After the dialog box appears in the bottom-right corner of your screen, type “CMD” and punch the CTRL, Shift, and Enter keys together.
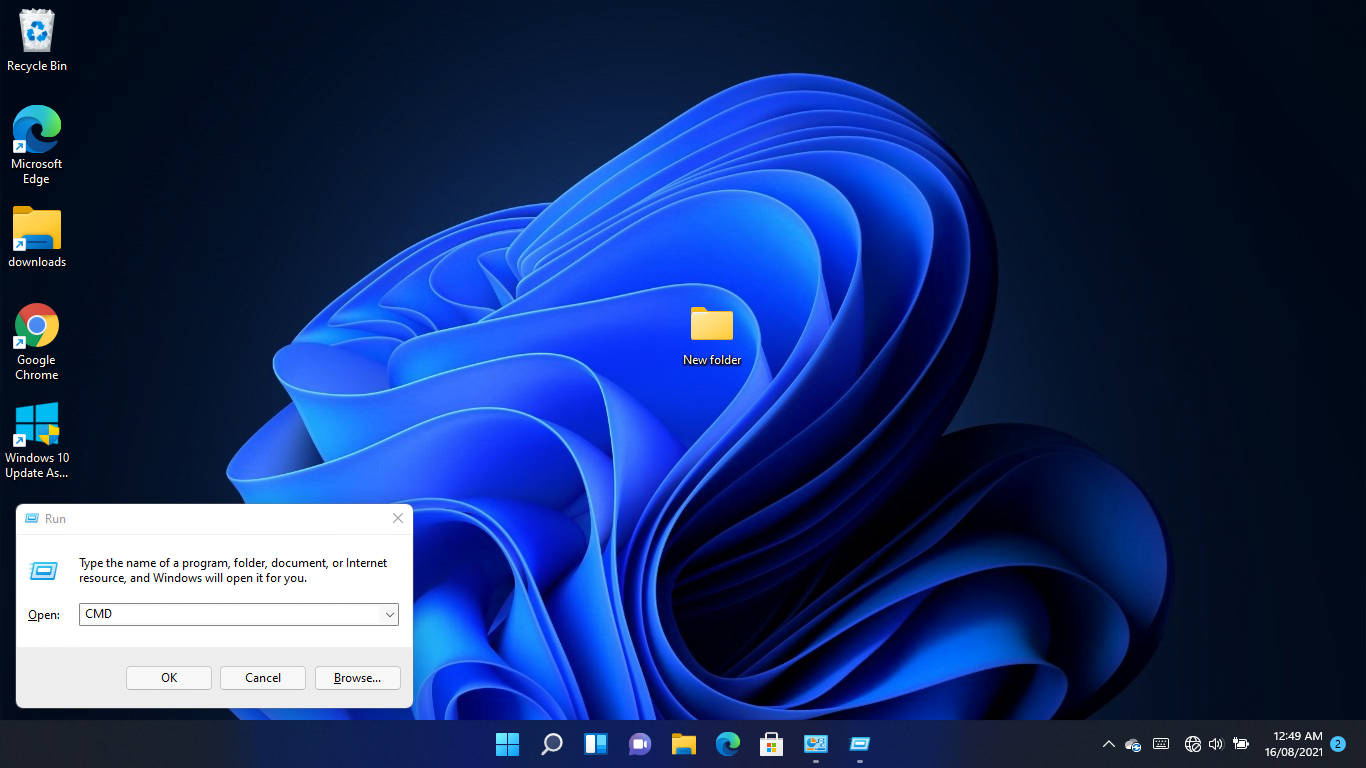
Tapping the combination will open the Command Prompt in administrator mode.
Click on Yes in the UAC pop-up to continue.
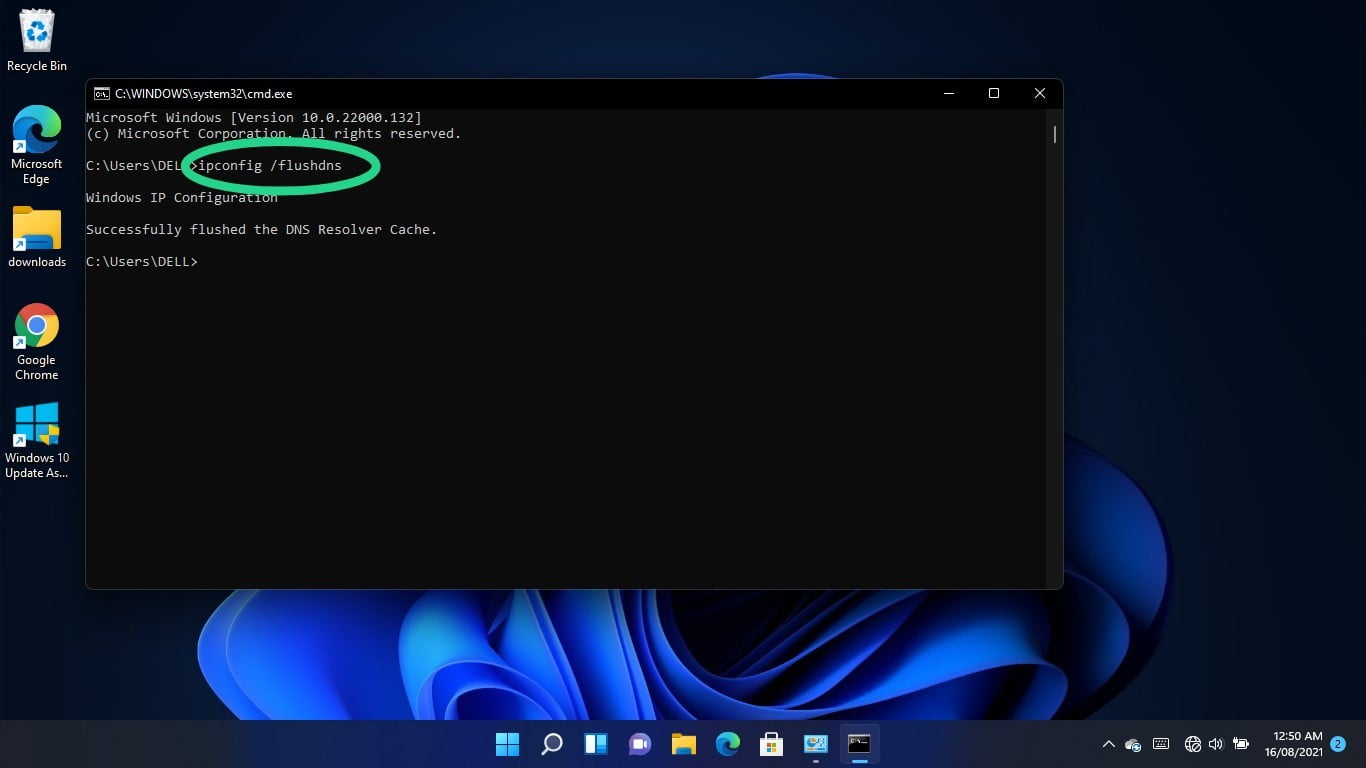
After the Command Prompt window shows up, type “ipconfig /flushdns” (don’t add the quotes) and hit the Enter key.

Reset and renew your IP address
Your router assigns a DHCP (Dynamic Host Control Protocol) IP address to your computer, which it uses to connect to the internet. DHCP addresses are temporary. They allow the router to automatically re-assign an IP address to a different device if it stays idle for a while.
Your computer’s IP address may be out of commission. You can request a new address using the Command Prompt. Here’s how:
Head to your keyboard, hold down the Windows logo button, and press R to launch the Run dialog box.
After the dialog box appears in the bottom-right corner of your screen, type “CMD” and punch the CTRL, Shift, and Enter keys together. Tapping the combination will open the Command Prompt in administrator mode.
Click on Yes in the UAC pop-up to continue.
After the Command Prompt window shows up, type “ipconfig /release” (don’t add the quotes) and hit the Enter key.
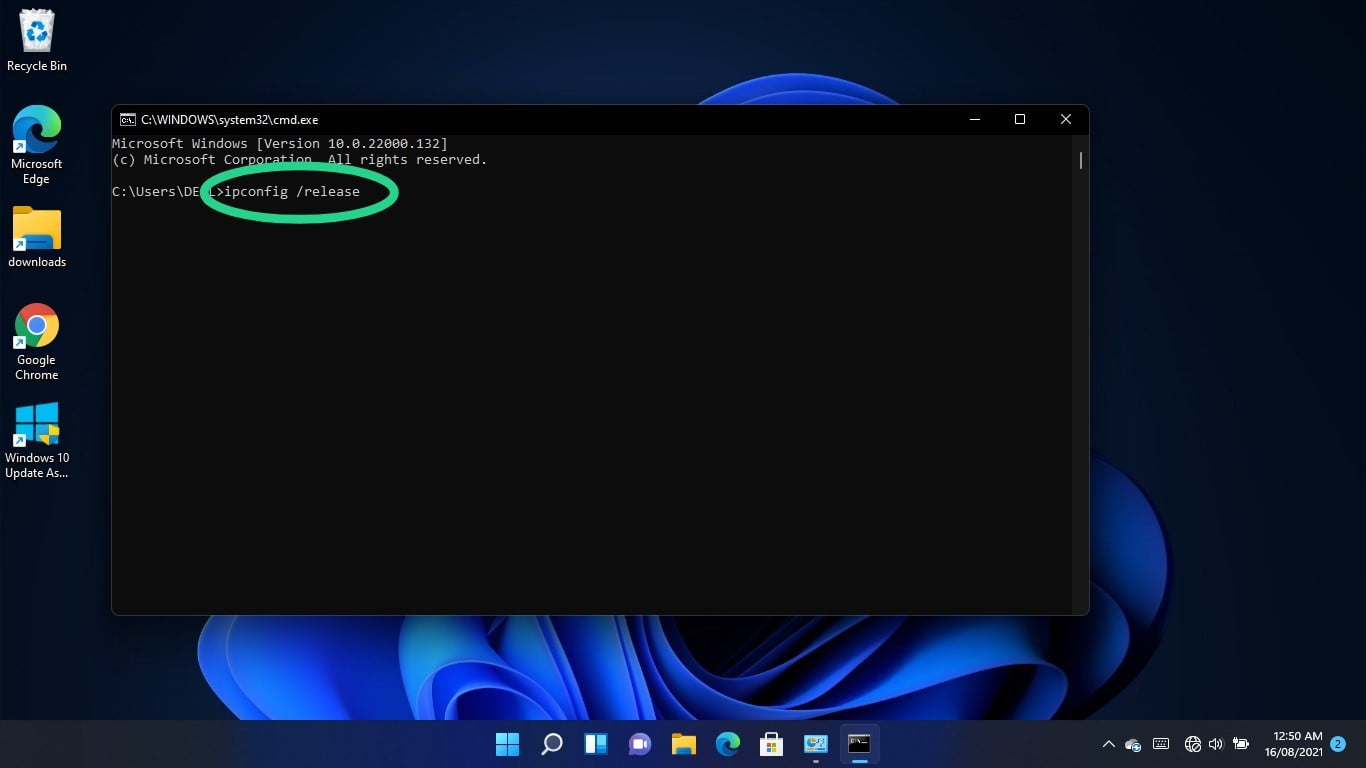
Go to the following line, type “ipconfig /renew” (don’t add the quotes), and hit the Enter key.
Change your DNS server
Your ISP-provided DNS could be the problem. Instead, you can go for a more reliable server, such as Google’s or Cloudflare’s.
Making the switch involves adjusting your network adapter’s IPv4 and IPv6 settings.
Tap the Windows logo and S keyboard buttons to summon the Search window.
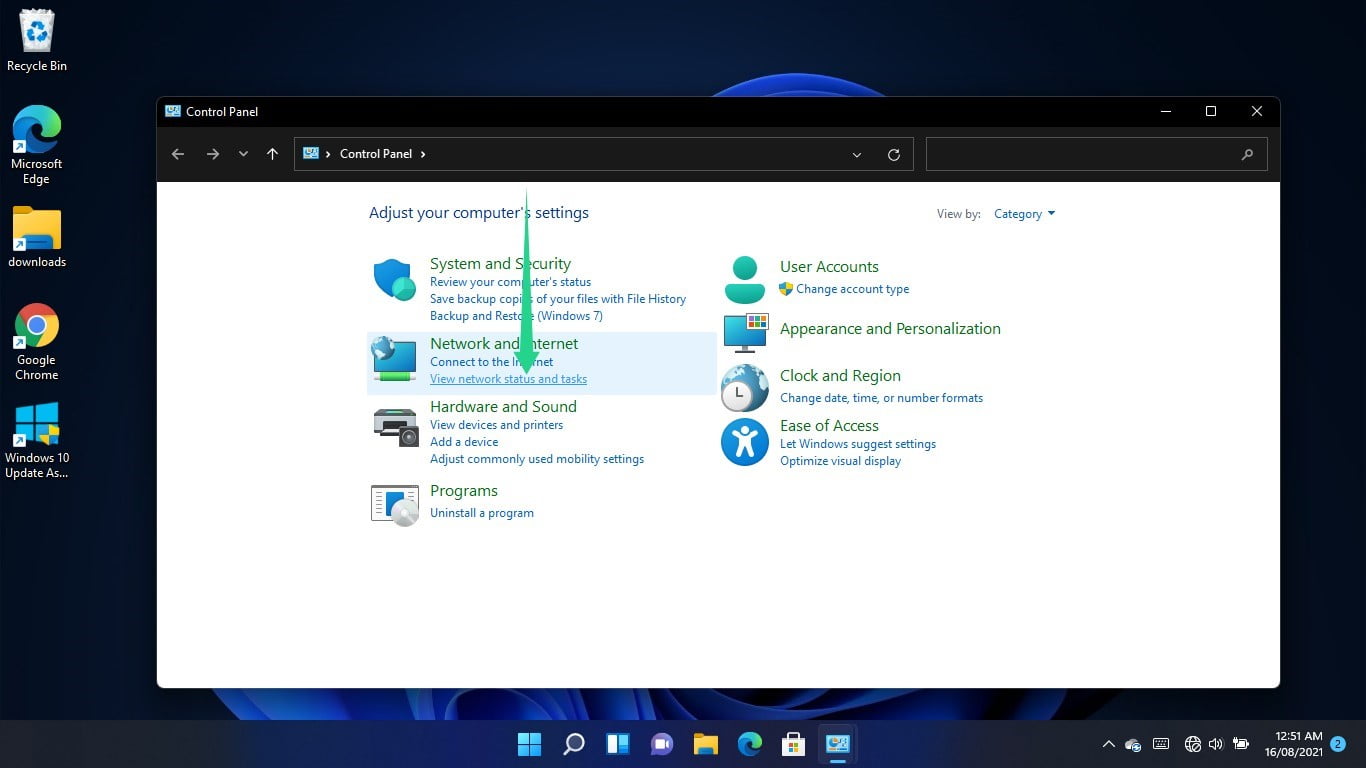
Type “Control Panel” once the Search window opens and click on Control Panel.
Click on the “View network status and tasks” link under Network and Internet as soon as the Control Panel window shows up.
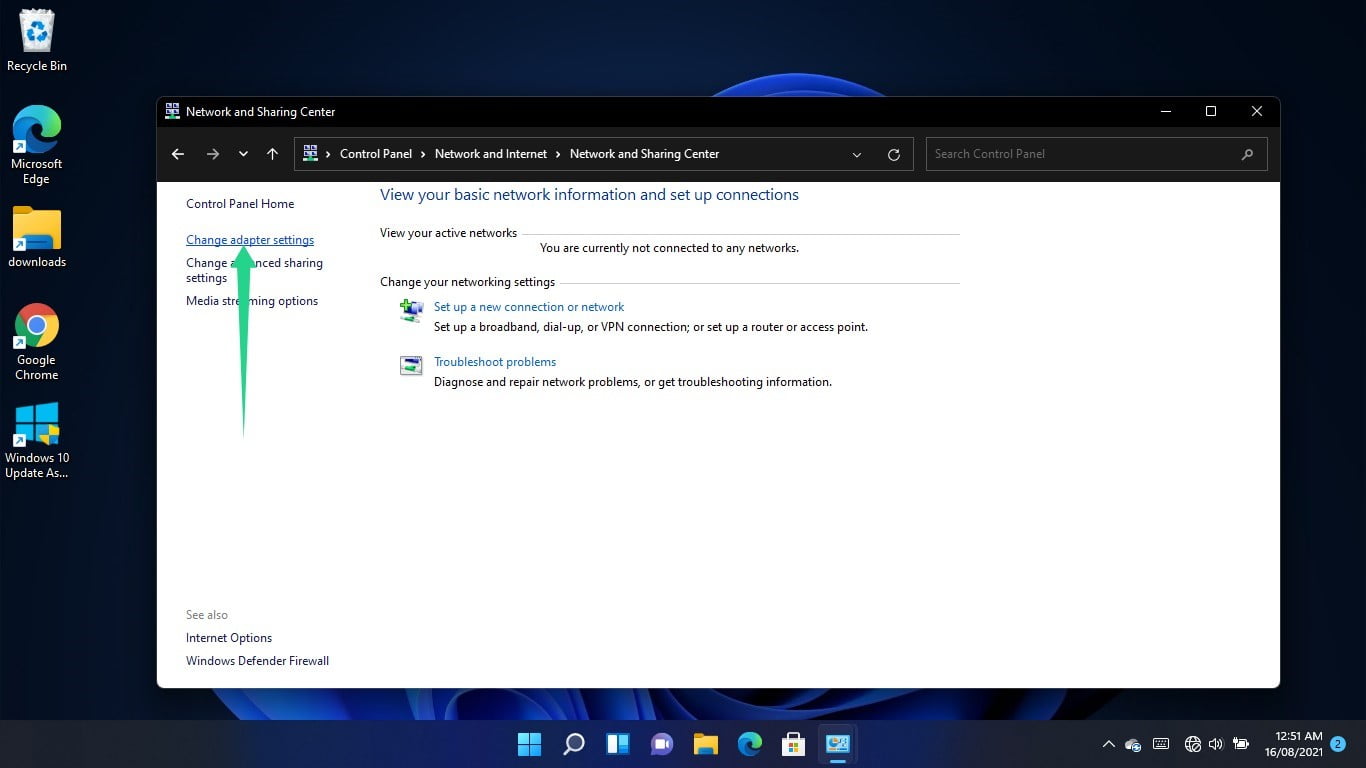
Switch to the Network and Sharing Center’s left pane and select “Change adapter settings.”
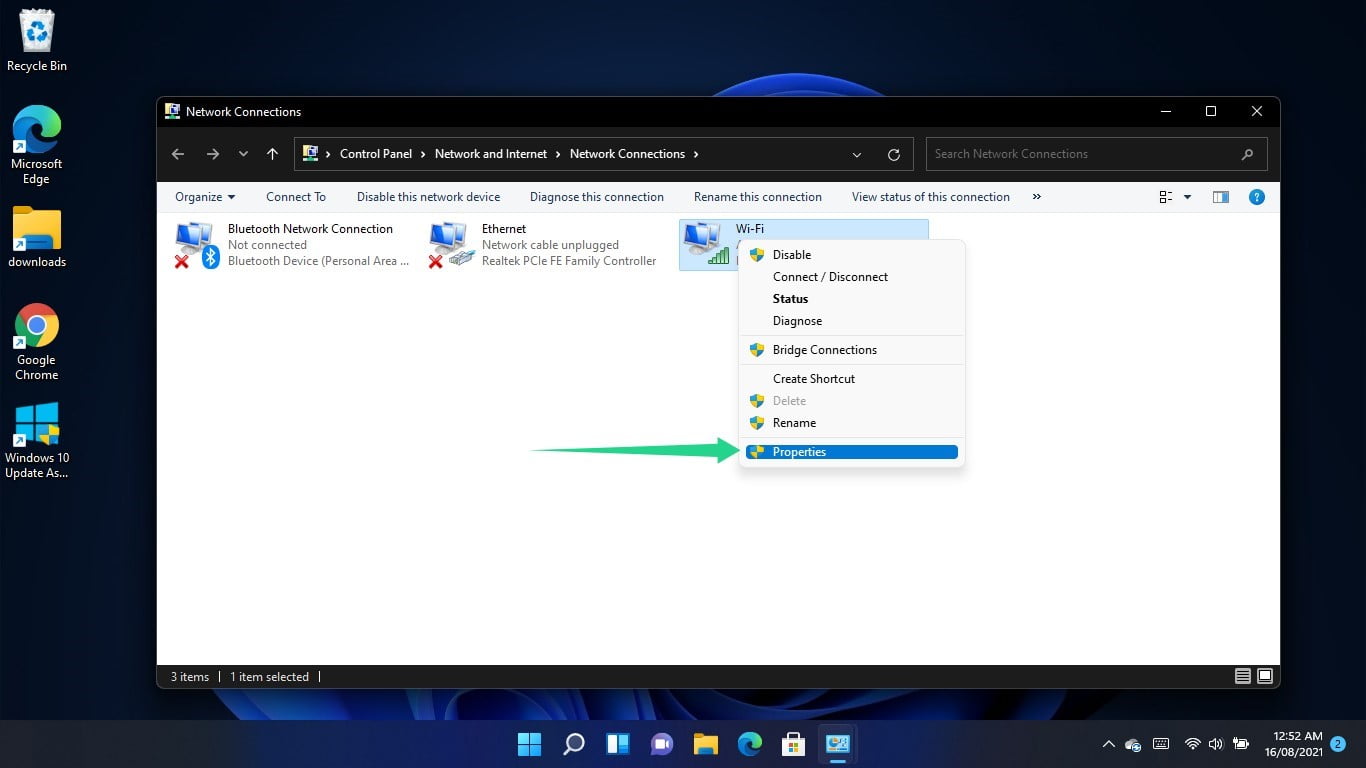
Right-click on your connection – your Wi-Fi or Ethernet adapter, depending on which you use – and select Properties.
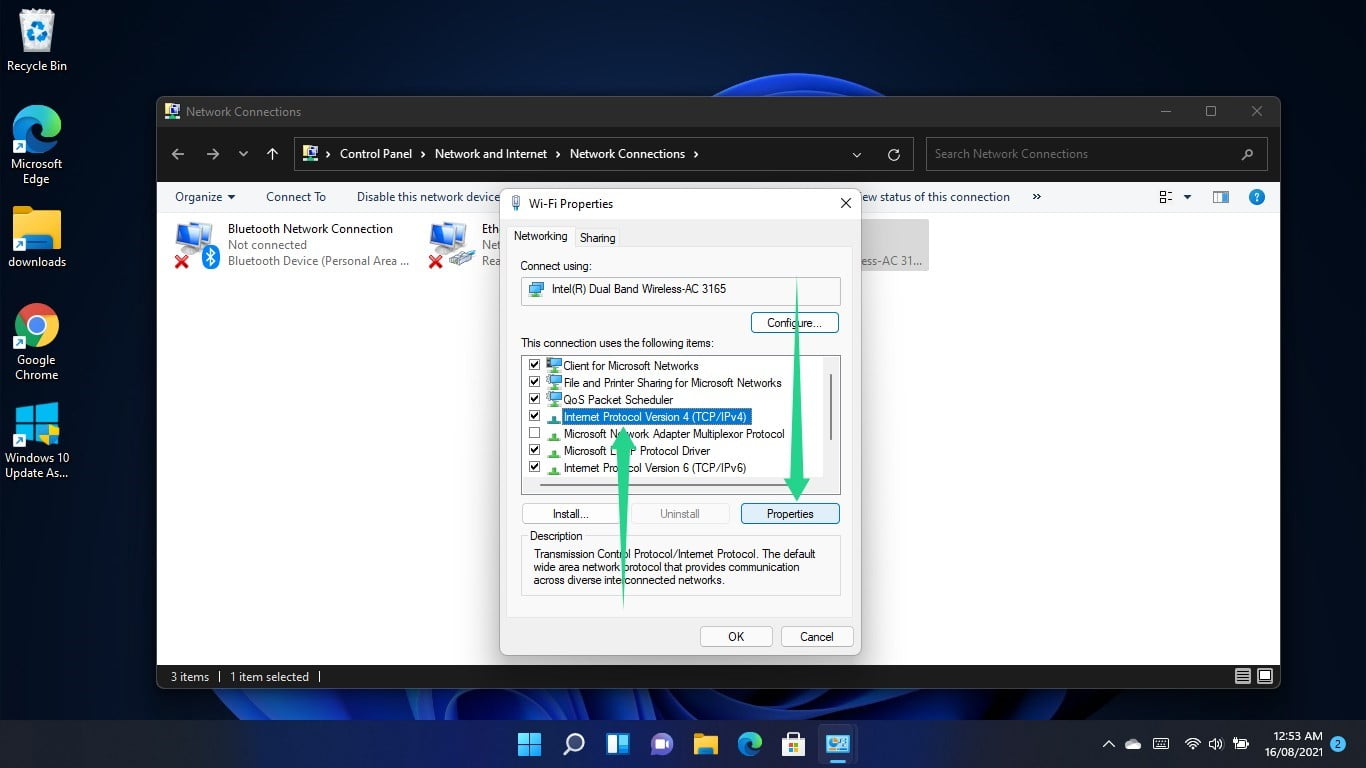
Go to the list under “The connection uses the following items,” click on Internet Protocol Version 4 (TCP/IPv4) and select Properties.
When the Internet Protocol Version 4 (TCP/IPv4) Properties dialog window opens, select the radio button for “Use the following DNS server addresses.”
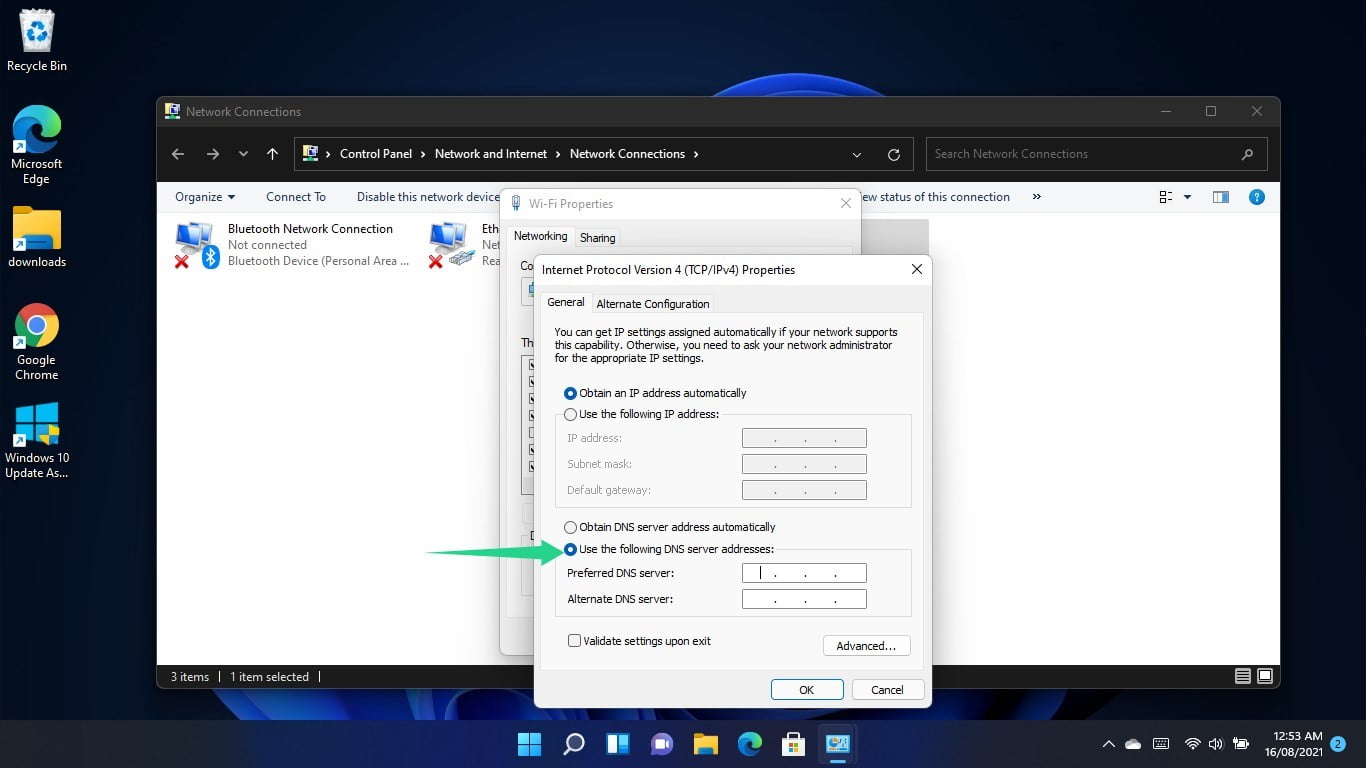
Now, enter the following to switch to Google’s DNS server:
- Preferred DNS server: 8.8.8.8
- Alternate DNS server: 8.8.4.4
To use Cloudflare’s DNS server, enter the following:
- Preferred DNS server: 1.1.1.1
- Alternate DNS server: 1.0.0.1
Click on the OK button.
If you use an IPv6 connection, return to your network adapter’s Properties dialog window, click on Internet Protocol Version 6 (TCP/IPv6) and click on Properties.
After the Internet Protocol Version 6 (TCP/IPv6) Properties window appears, click on the radio button for “Use the following DNS server addresses.”
Now, enter the following to switch to Google’s DNS server:
Preferred DNS server: 2001:4860:4860::8888
Alternate DNS server: 2001:4860:4860::8844
To use Cloudflare’s DNS server, enter the following:
Preferred DNS server: 2606:4700:4700::1111
Alternate DNS server: 2606:4700:4700::1001
Click on the OK button.
Check for the error.
Remove your custom DNS server address
If you have a custom DNS server address, it could prevent websites from loading, especially if the server is offline. Follow these steps to switch to Google’s or Cloudflare’s server:
- Press the Windows logo + R shortcut to launch Run.
- Type “Control Panel” and hit Enter.
- After the Control Panel window shows up, click on “View network status and tasks” under Network and Internet.
- Go to the left pane of the Network and Sharing Center window and click on “Change adapter settings.”
- Right-click on your connection – your Wi-Fi or Ethernet adapter, depending on which you use – and select Properties.
- Single-click Internet Protocol Version 4 (TCP/IPv4) and click on Properties.
- Next, click on Advanced when the Internet Protocol Version 4 (TCP/IPv4) Properties dialog window appears.
- Once the Advanced TCP/IP Settings dialog window opens, go to the “DNS server addresses in order of use” box, click on the DNS server address, and select Remove.
- Click on the OK button.
Run the Internet Connection troubleshooter
The Internet Connection troubleshooter is a built-in Windows 11 tool that checks for problems affecting your internet connection and fixes them. Your computer needs a working internet connection to reach its DNS server.
So, run the troubleshooter to make sure you have a functioning internet connection.
Start by using the Windows + I shortcut to open the Settings app.
After the application launches, scroll down and click on Troubleshoot.
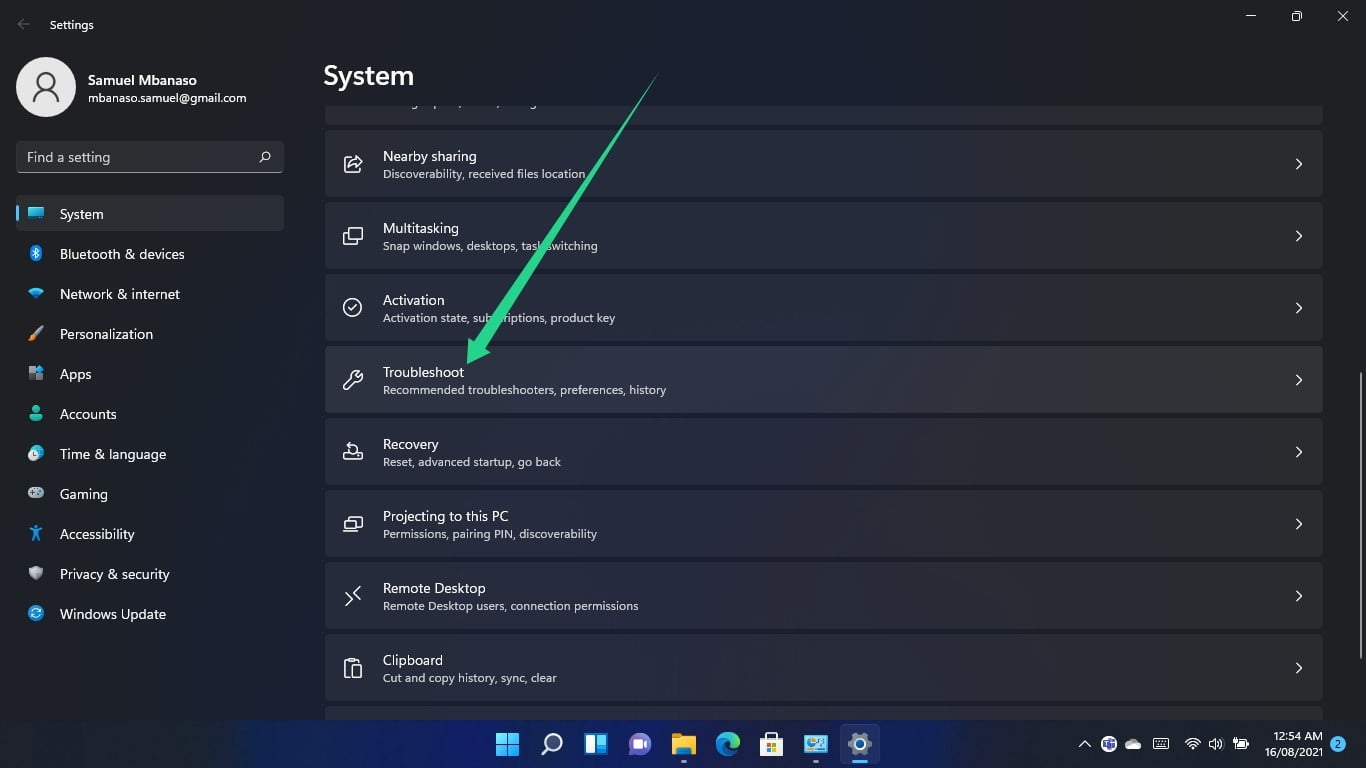
Once you get to the System > Troubleshoot page, click on Other Troubleshooters.
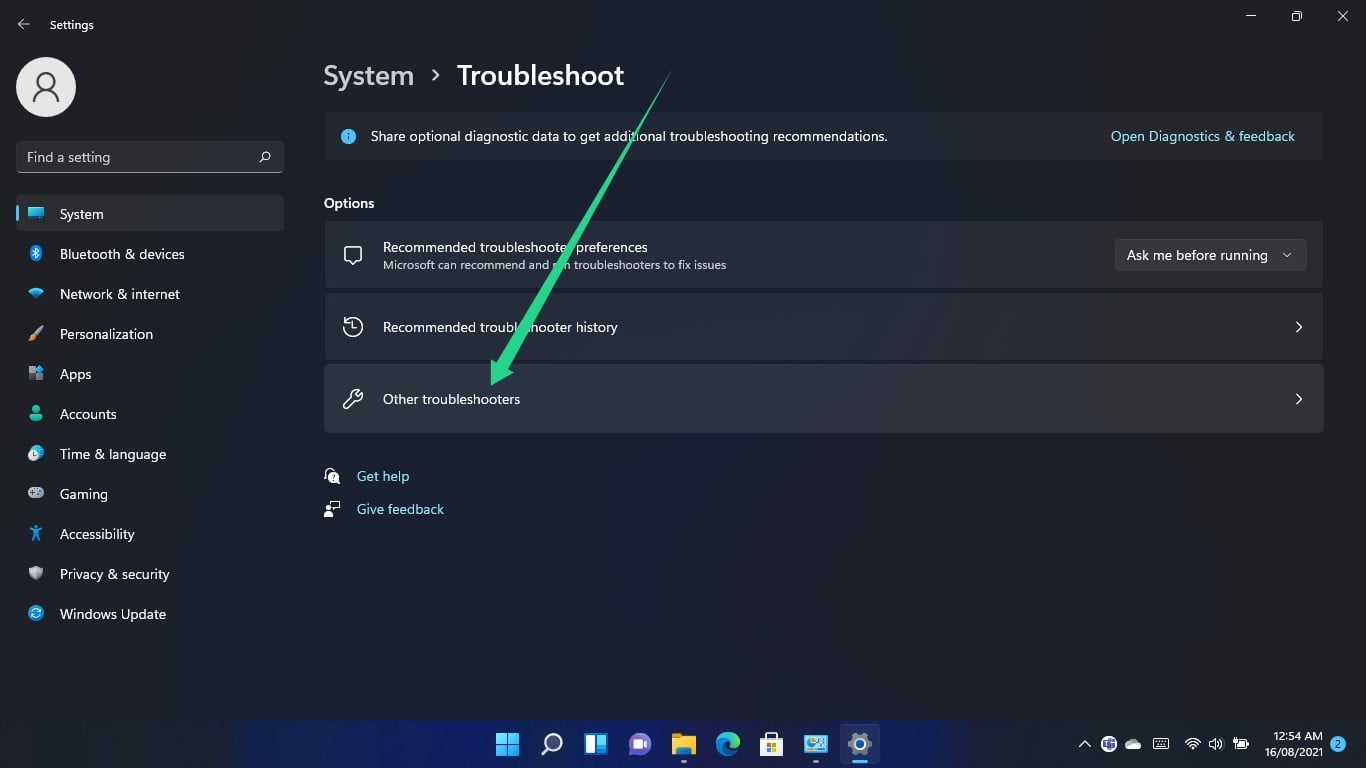
Scroll to Internet Connections and click on the Run button.
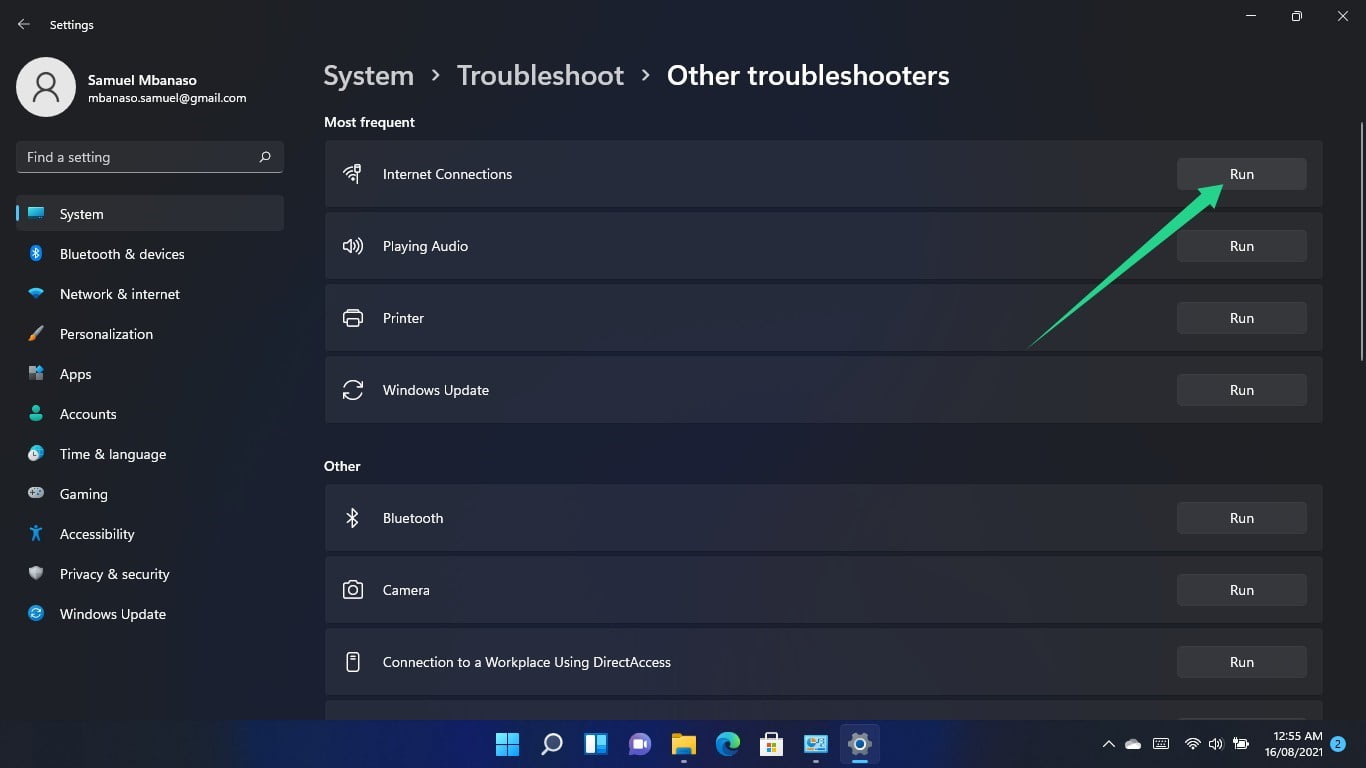
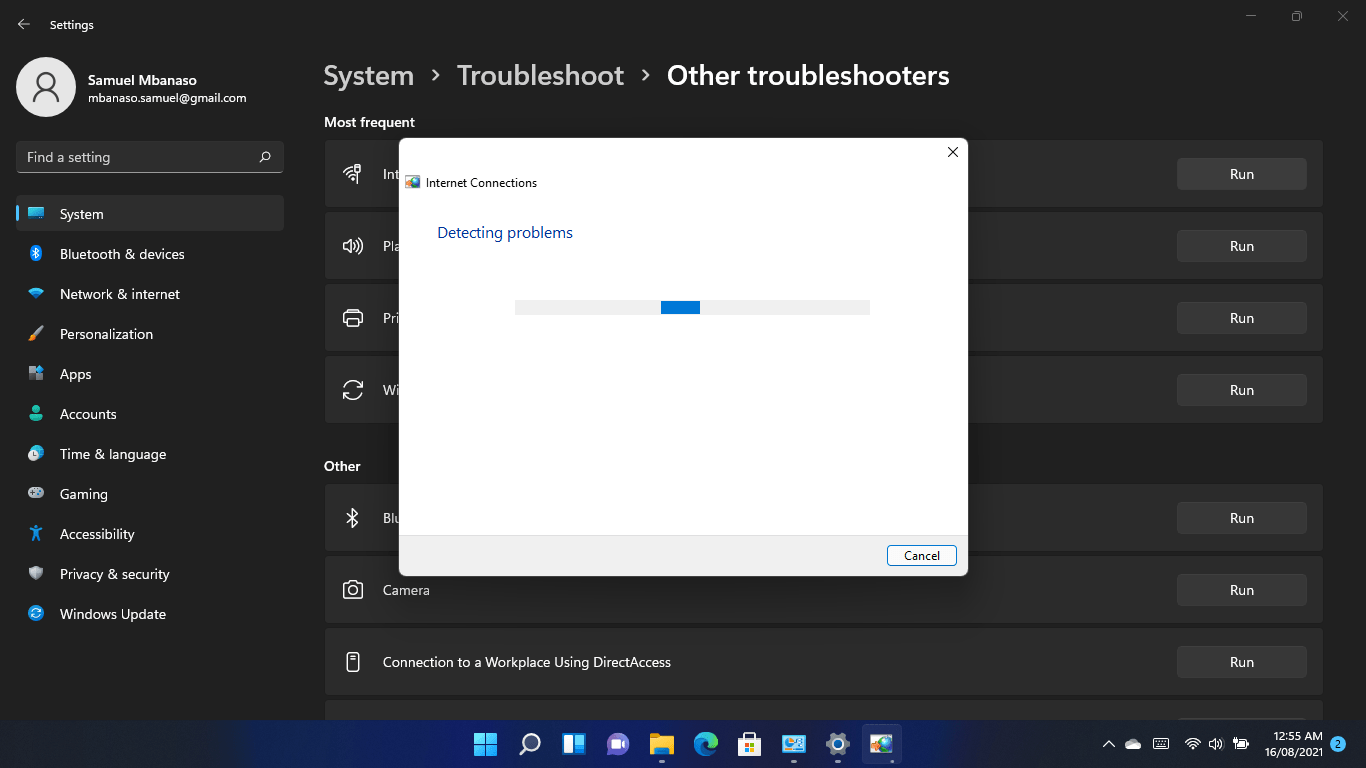
Allow the troubleshooter to check for problems and fix them, then load the web browser to check if the error persists.
Disable your antivirus program
Sometimes, your antivirus application may block specific web programs from connecting to the Internet. This happens because the security program suspects that the website you’re trying to open is dangerous.
If you’re sure that you’re trying to access a safe website, you can turn off your antivirus program to confirm if it’s the cause of the problem.
If the security program regularly causes such issues, you should get rid of it and install another competent protection suite.
Disable your proxy settings and VPN
If you have a proxy connection or VPN, this could be the reason your web browser can’t reach the DNS server. Turn off the VPN or proxy and check if it resolves the problem.
If you use a LAN connection, you can go through the Internet Properties dialog window to turn off your proxy settings.
Use the Windows logo + S keyboard shortcut to launch the Search window.
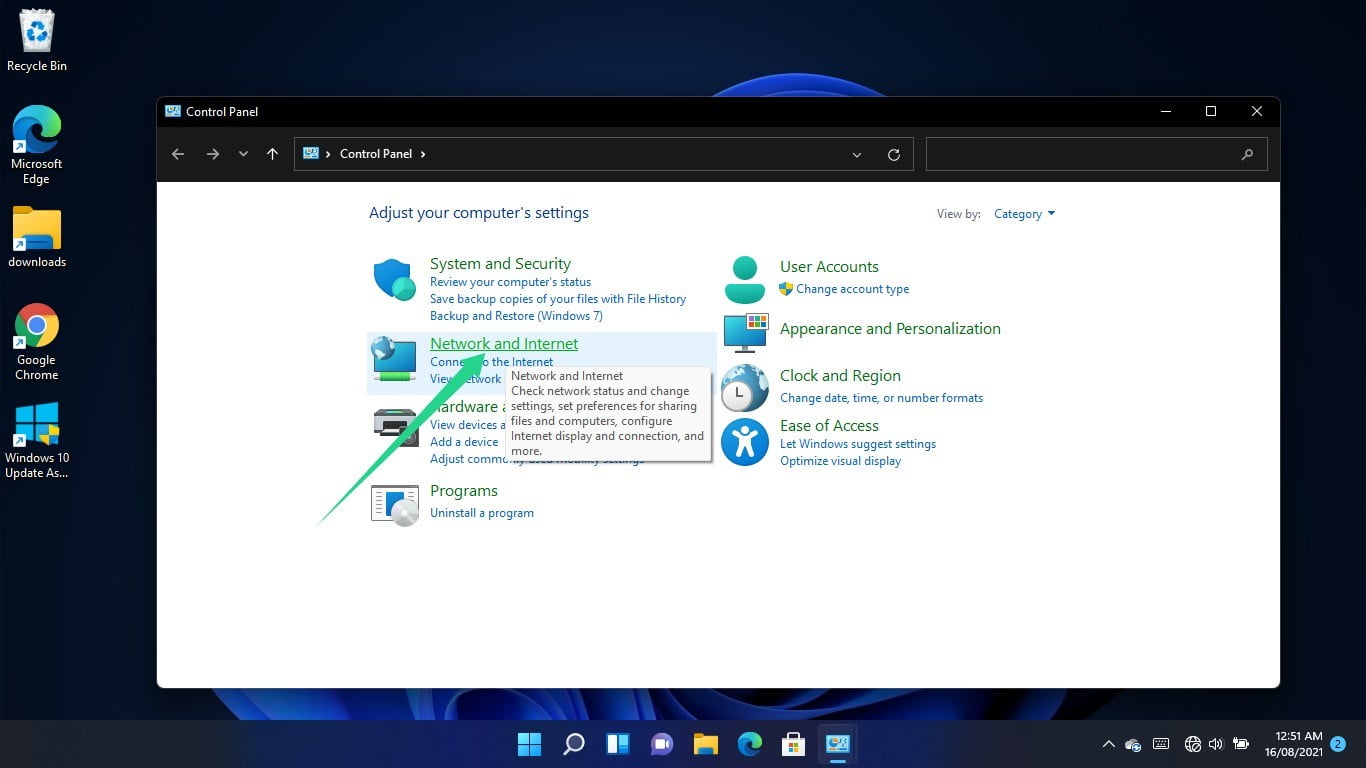
Type “Control Panel” once the search window opens and click on Control Panel.
Click on the Network and Internet link when the Control Panel window opens.
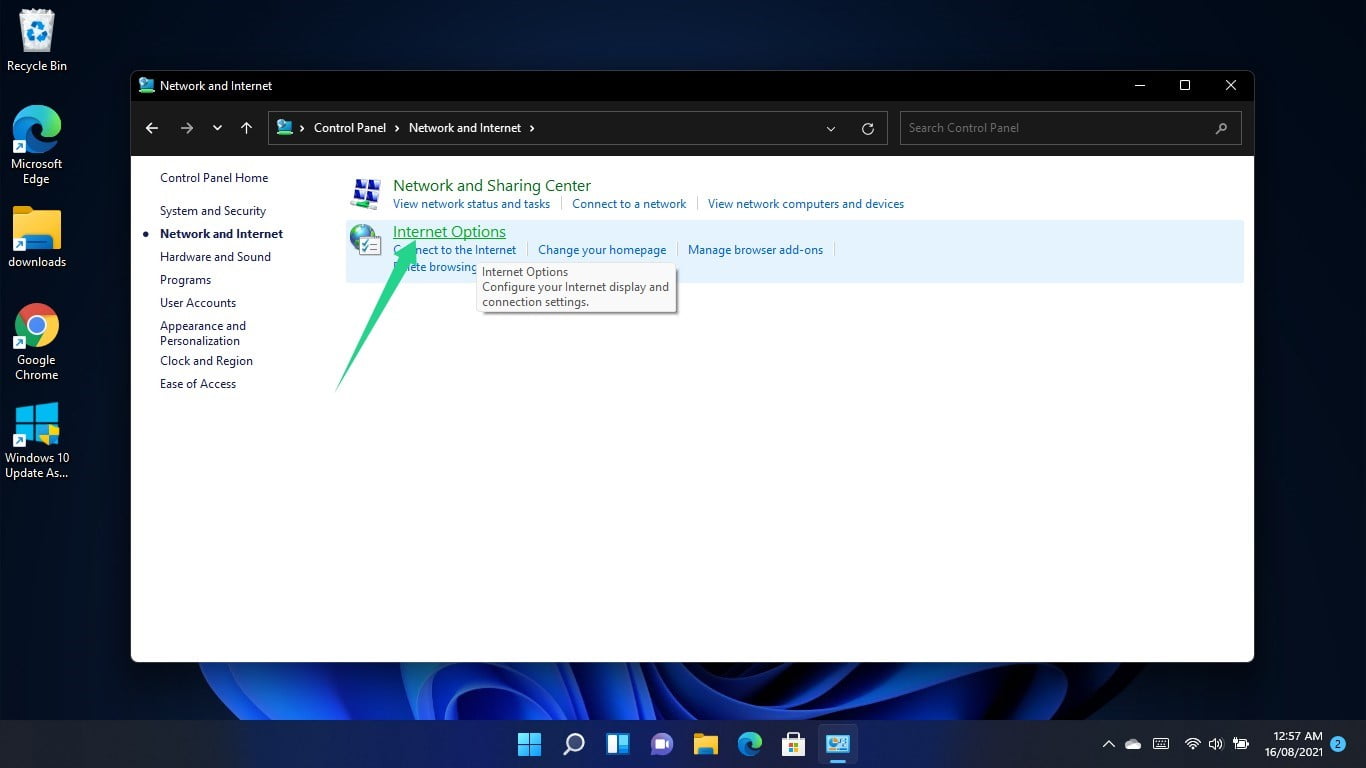
After the Network and Internet window opens, click on Internet Options.
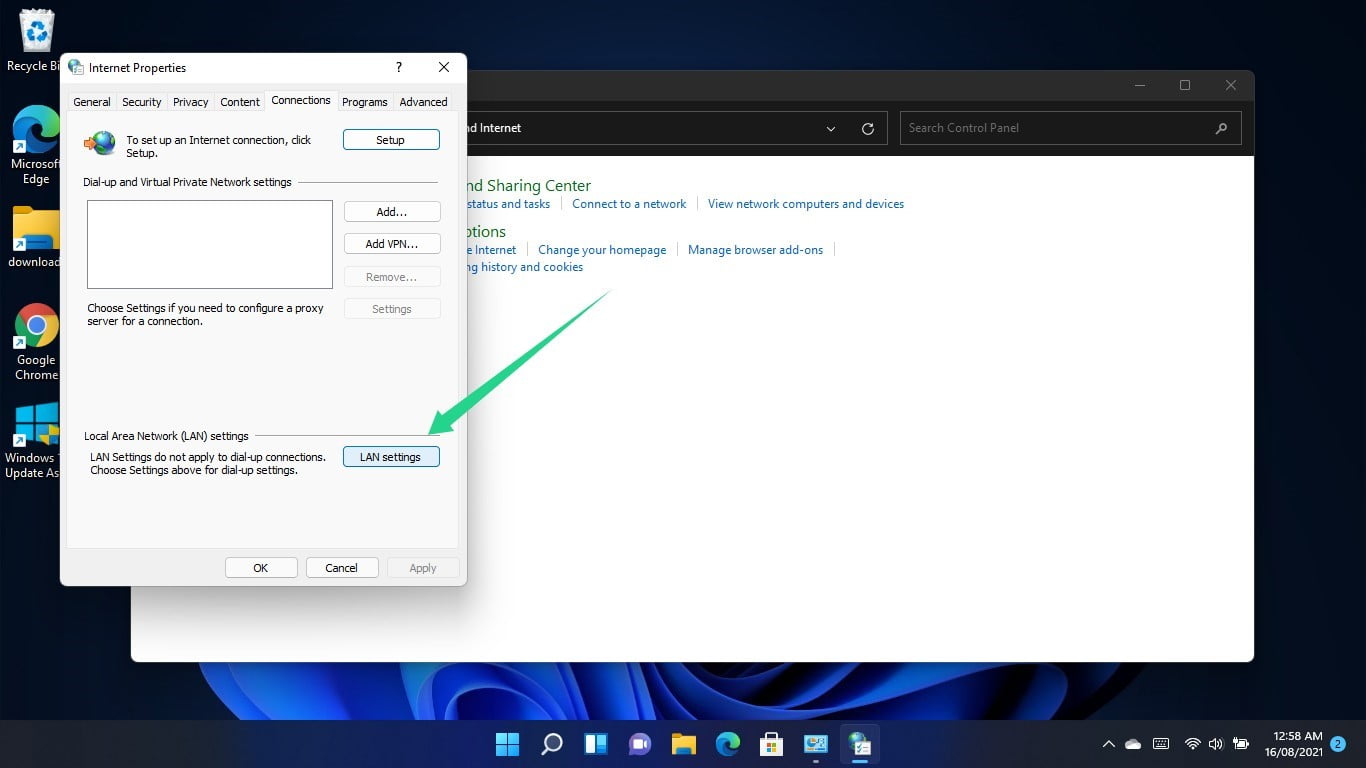
When you see the Internet Properties dialog window, switch to the Connections tab and select LAN Settings.
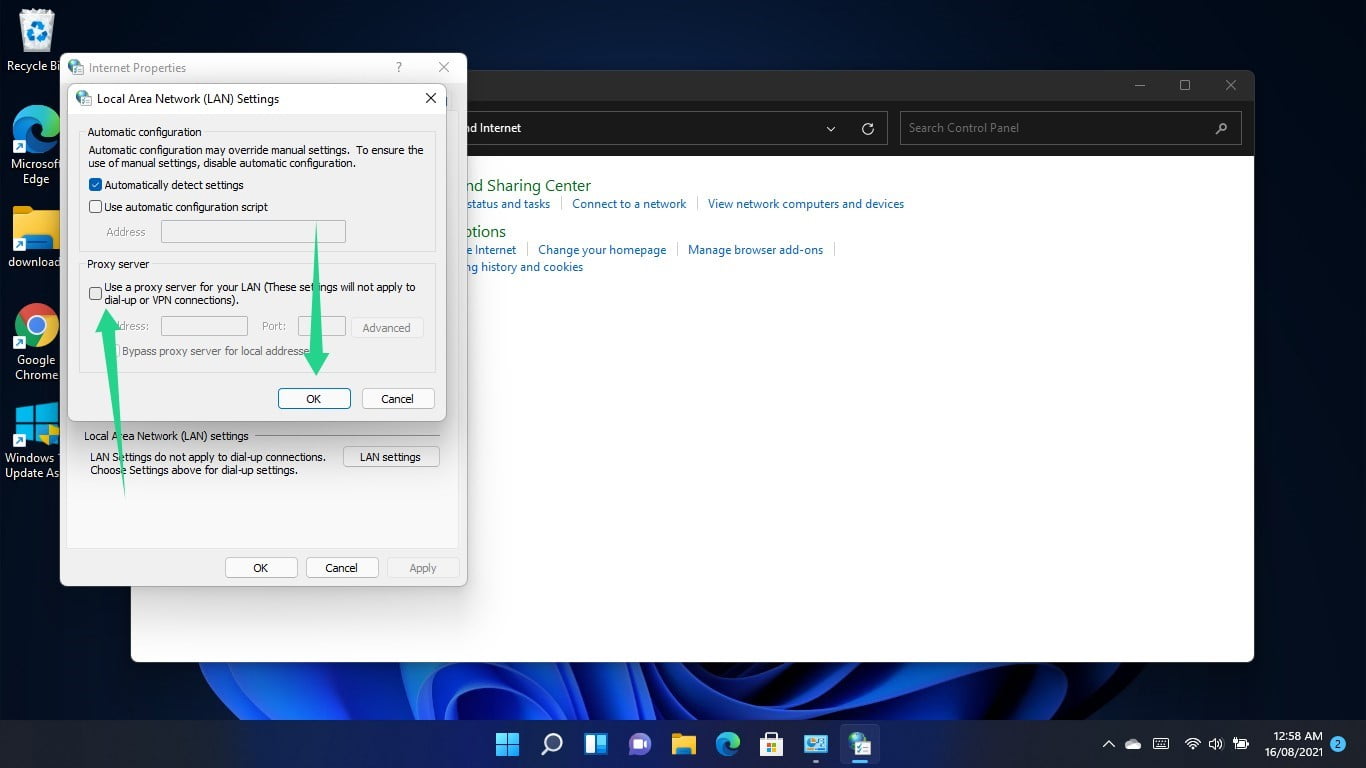
Go to the Proxy Server section of the Local Area Network (LAN) Settings dialog window and uncheck the box beside “Use a proxy server for your LAN.”
Click on OK.
Reset your Hosts file
The Hosts file is a domain name server of sorts. It also matches URLs to their IP addresses.
The Windows Hosts file is an ASCII text file that you can easily edit using Notepad in Windows. IP addresses are written beside their corresponding URLs. This is because the computer often checks the file to know which IP address to use.
You could be encountering the “DNS not available error” on your Windows 11 machine because your Hosts file is corrupt and getting in the way of the domain name resolving process.
Setting the file to its default state can get rid of the problem. Here is what you should do:
- Press the Windows logo keyboard button.
- Once the Start menu opens, search for Notepad and start the app.
- After the new note interface appears, copy and paste the following text:
# Copyright (c) 1993-2006 Microsoft Corp. # # This is a sample HOSTS file used by Microsoft TCP/IP for Windows. # # This file contains the mappings of IP addresses to host names. Each # entry should be kept on an individual line. The IP address should # be placed in the first column followed by the corresponding host name. # The IP address and the host name should be separated by at least one # space. # # Additionally, comments (such as these) may be inserted on individual # lines or following the machine name denoted by a ‘#’ symbol. # # For example: # # 102.54.94.97 rhino.acme.com # source server # 38.25.63.10 x.acme.com # x client host # localhost name resolution is handled within DNS itself. # 127.0.0.1 localhost # ::1 localhost
- After that, click on File in the top-left corner and select Save As.
- Save the file as “Hosts.”
- You can save it to your Documents folder or the desktop.
- Now, open a File Explorer window and navigate to C:\Windows\System32\Drivers\Etc.
- Delete the Hosts file.
- Copy the new Hosts file you created to the Etc folder.
Conclusion
Your web pages should now load without problems. However, if you still can’t get any website to open using any browser, you should contact your ISP.


 Done! Great to see you among our subscribers!