
Since Windows 7, pressing the Windows and right/left buttons together would divide your screen. It’s a cool split feature that easily lets you place two programs side by side instead of manually resizing windows.
The feature has evolved over the years. For example, Windows 10 allows you to further resize windows into smaller bits using the Windows logo key + Up arrow shortcut. However, Microsoft changed the game in Windows 11.
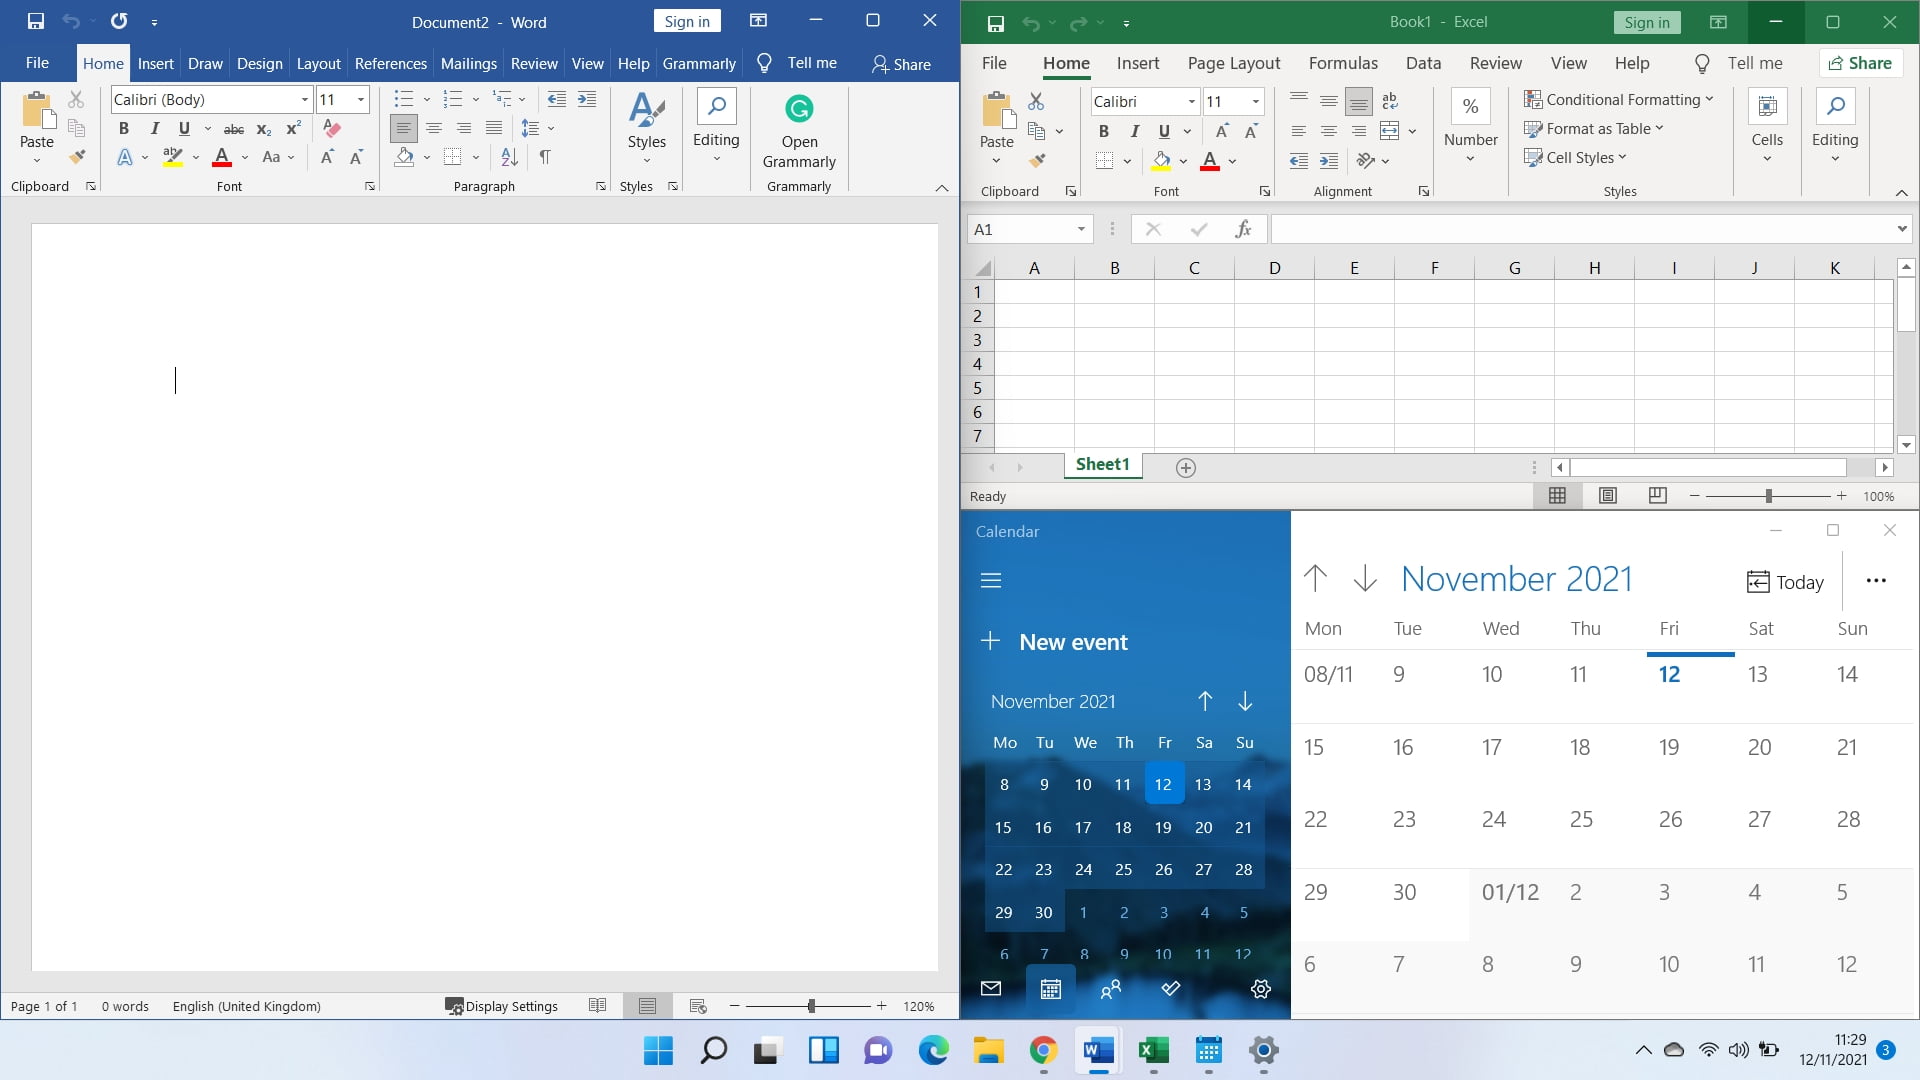
The new operating system’s snap mechanics is the best so far. With your mouse cursor and the keyboard shortcuts, you can quickly turn your PC screen into a multitasking grid.
Unfortunately, things are not always smooth with Windows. And since Windows 11 is still relatively new, a few bumps here and there are expected. For example, some users wonder if the OS comes with the Snap Layouts feature since it’s not working on their PCs for some reason.
If you’re in this boat, the instructions here will show you how to activate the feature. But first, we’ll walk you through how it works.
How Does the Snap Layouts Feature Work?
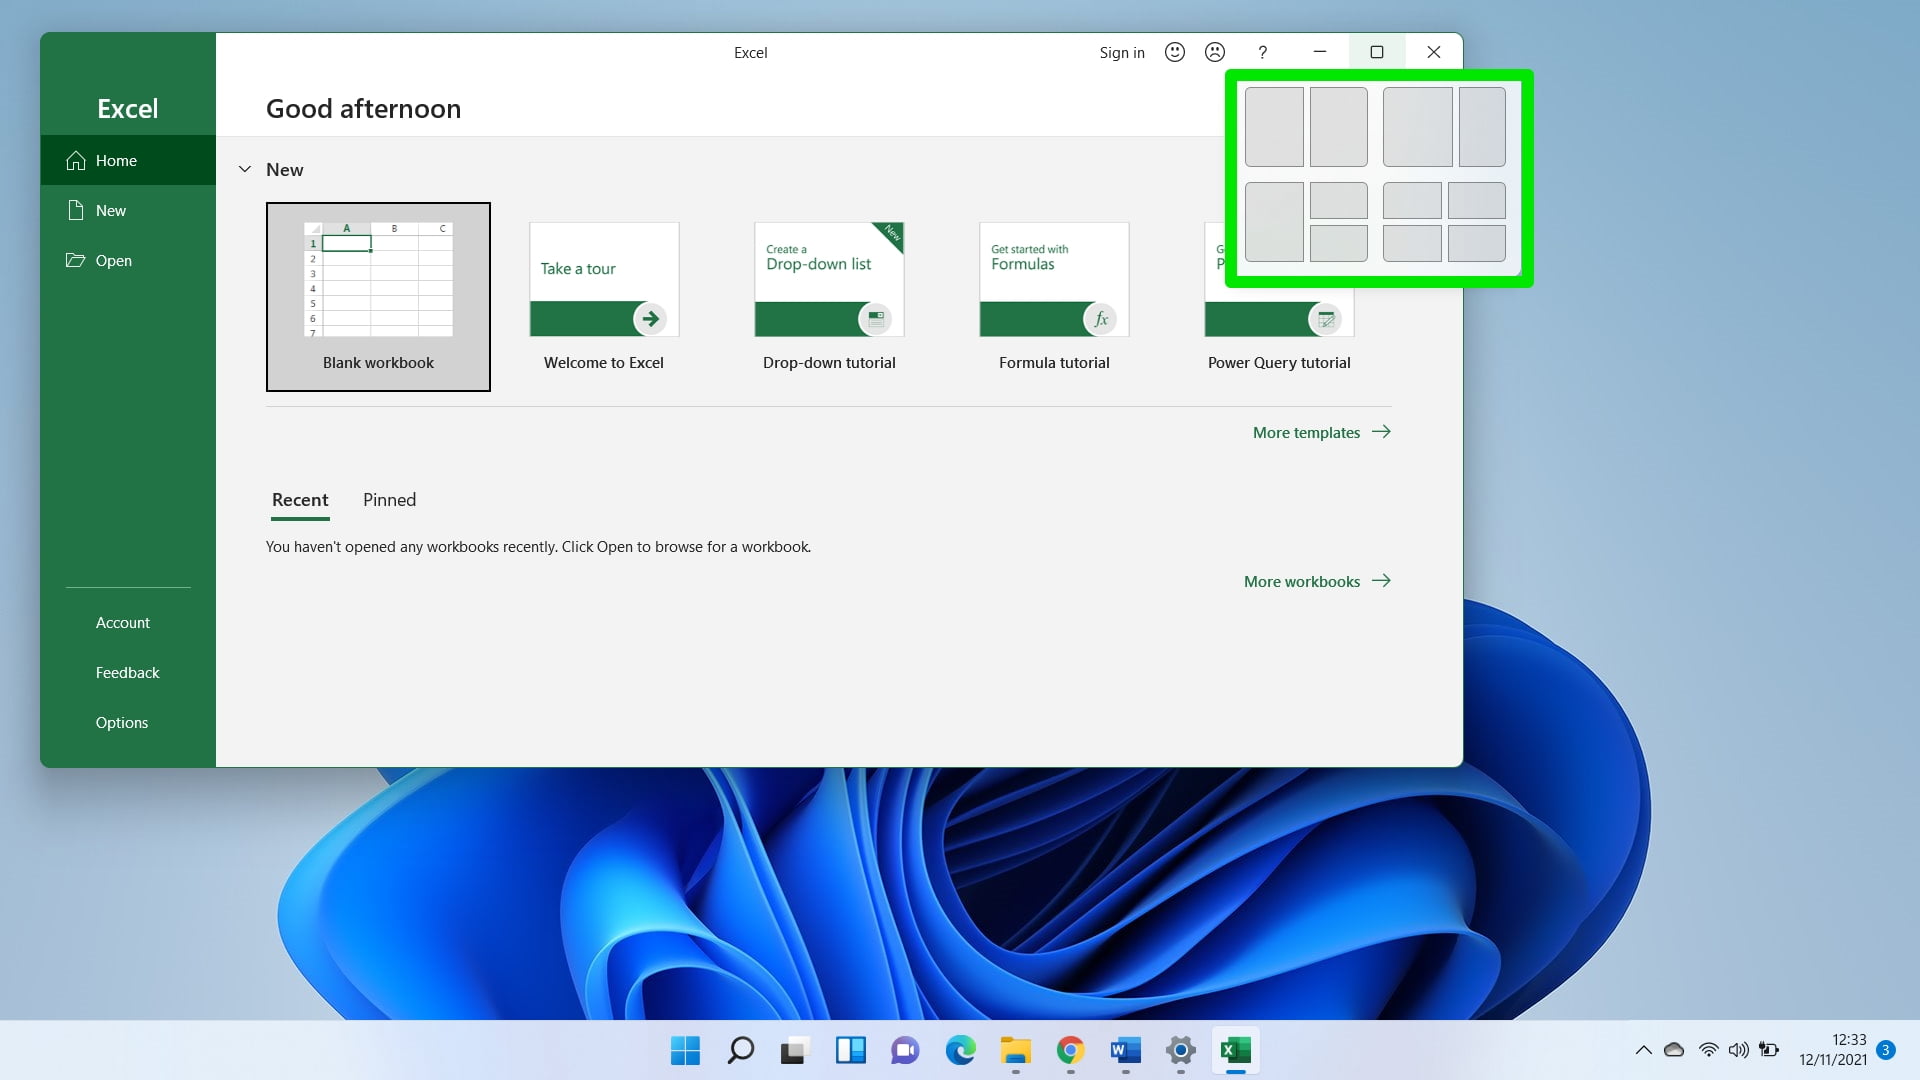
In Windows 11, all you have to do to use the feature is move your mouse cursor to the Maximize button in any program’s title bar to customize your screen layout. If you’re more comfortable with your keyboard, just tap the Windows logo key + the Up/Right/Left key. You can also bring up the Snap Layout grid options by tapping the Windows logo key + Z.
The Win + Z shortcut helps if you want to rearrange programs with customized title bars that won’t support the mouse cursor command.
Why Is Windows 11’s Snap Layout Feature Not Working?
The feature might not be working because it’s not activated. However, that’s not the only possible cause of the problem. If you’re still on an Insider Preview build, a bug might be preventing you from enjoying the multi-window arrangement.
You should also make sure your computer’s screen resolution is compatible with Windows 11. The feature might not be working because you’re using a screen resolution less than the required 720p.
What’s more, some applications are not compatible with Snap Layouts. These include programs that haven’t been optimized for the split-screen feature, those with a custom control box for windowed layouts, and others with customized title bars.
We’ll show you different ways to enable the feature.
The Best Fixes for Snap Layouts Not Working in Windows 11
From enabling the feature via the Settings app to tweaking your system’s registry, you’ll find different ways to fix the problem for good.
Confirm That Your App Supports Snap Layouts
As we mentioned, some applications don’t support the feature. When you’re in fullscreen mode in these programs, nothing will happen whether you use the Snap keyboard shortcuts or hover your cursor over the Minimize button. One good example is Skitch.
So, make sure you’re not confusing the lack of response from one app for Snap Layouts’ malfunction. Open another program, like Google Chrome or Microsoft Edge, and check if the feature works. You’ll notice that incompatible programs won’t appear in the suggestion window when you split other programs.
That said, you can resize them as you wish and continue to use other applications in the multi-window grid.
Enable Snap Layouts Via Settings
Usually, the Snap Layouts feature is enabled by default on Windows 11. However, it might be turned off for some reason. So, follow these steps to turn it back on through the Settings application:
- Head to the Windows 11 Settings app using the Windows logo key + I keyboard shortcut.
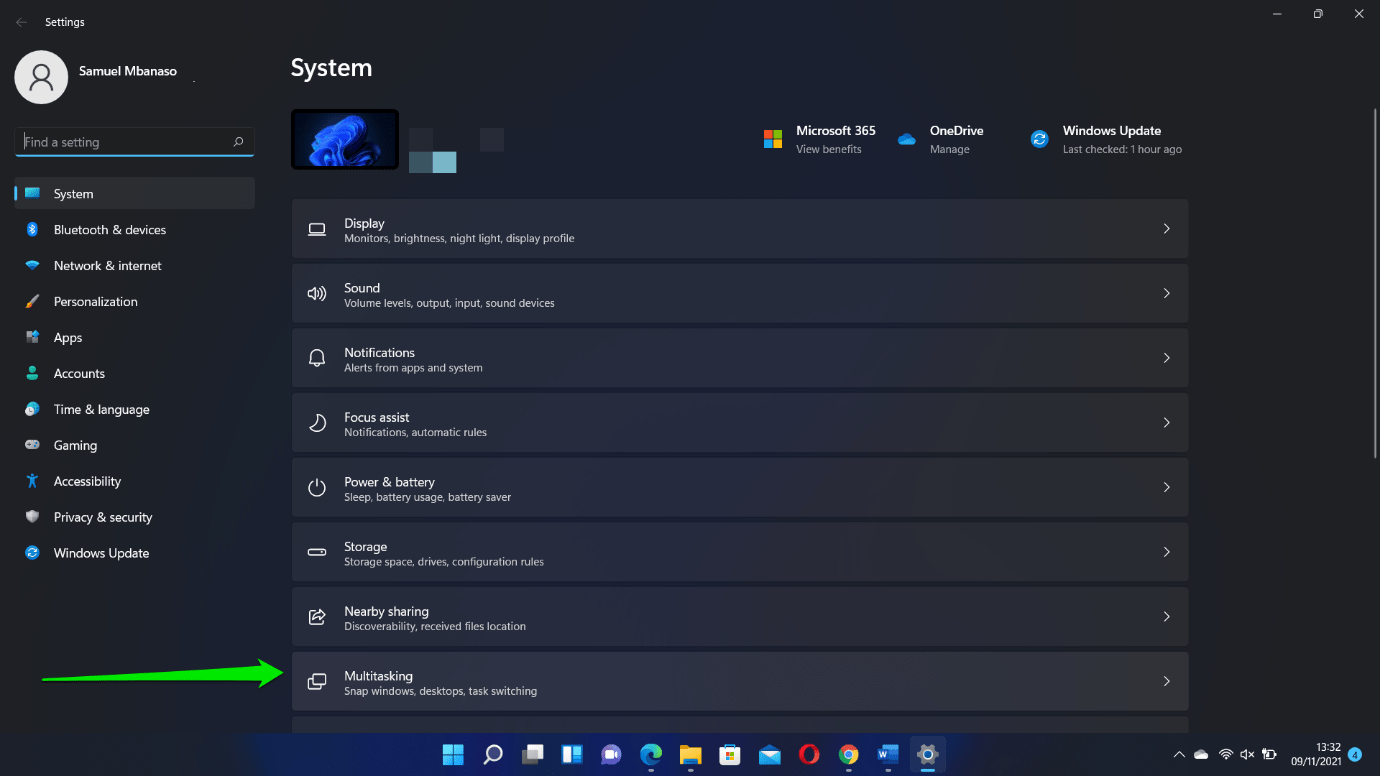
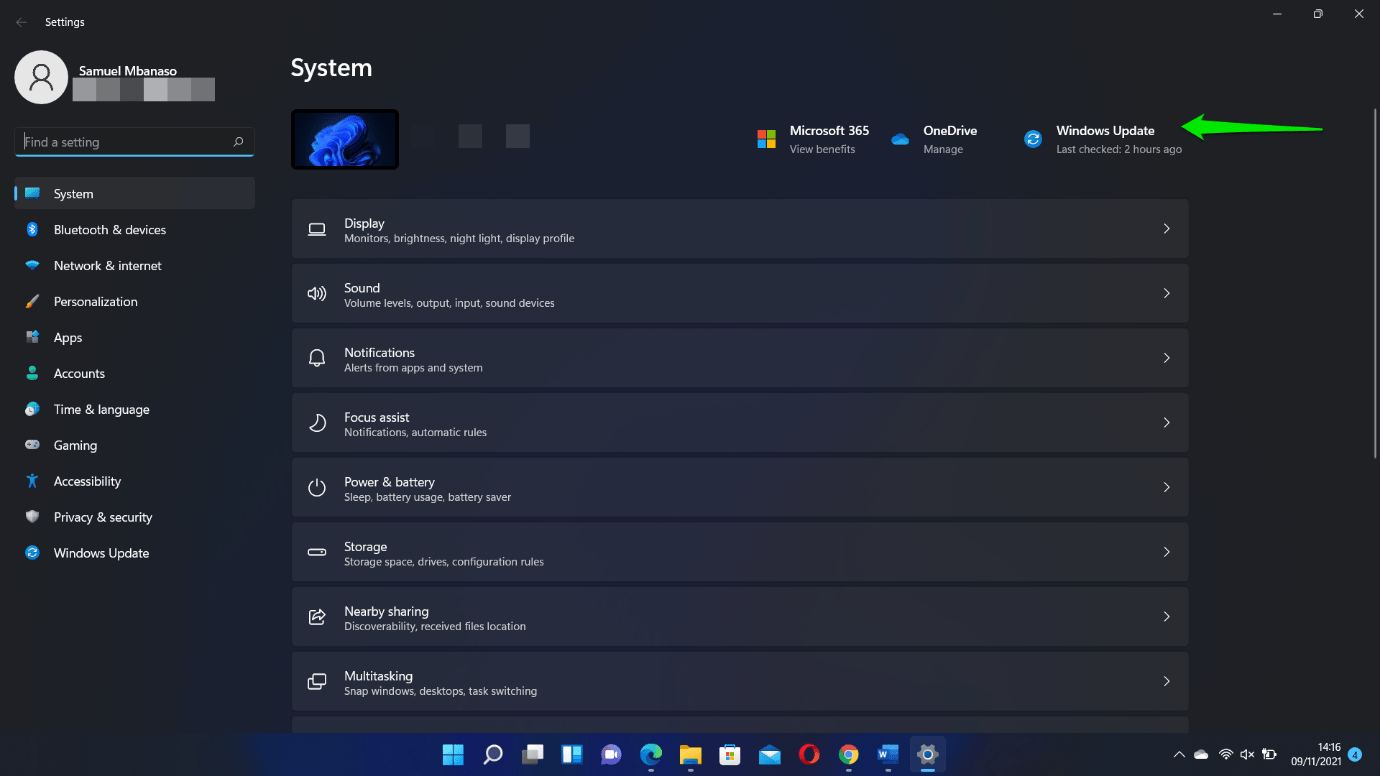
- Scroll down to Multitasking under the System interface.
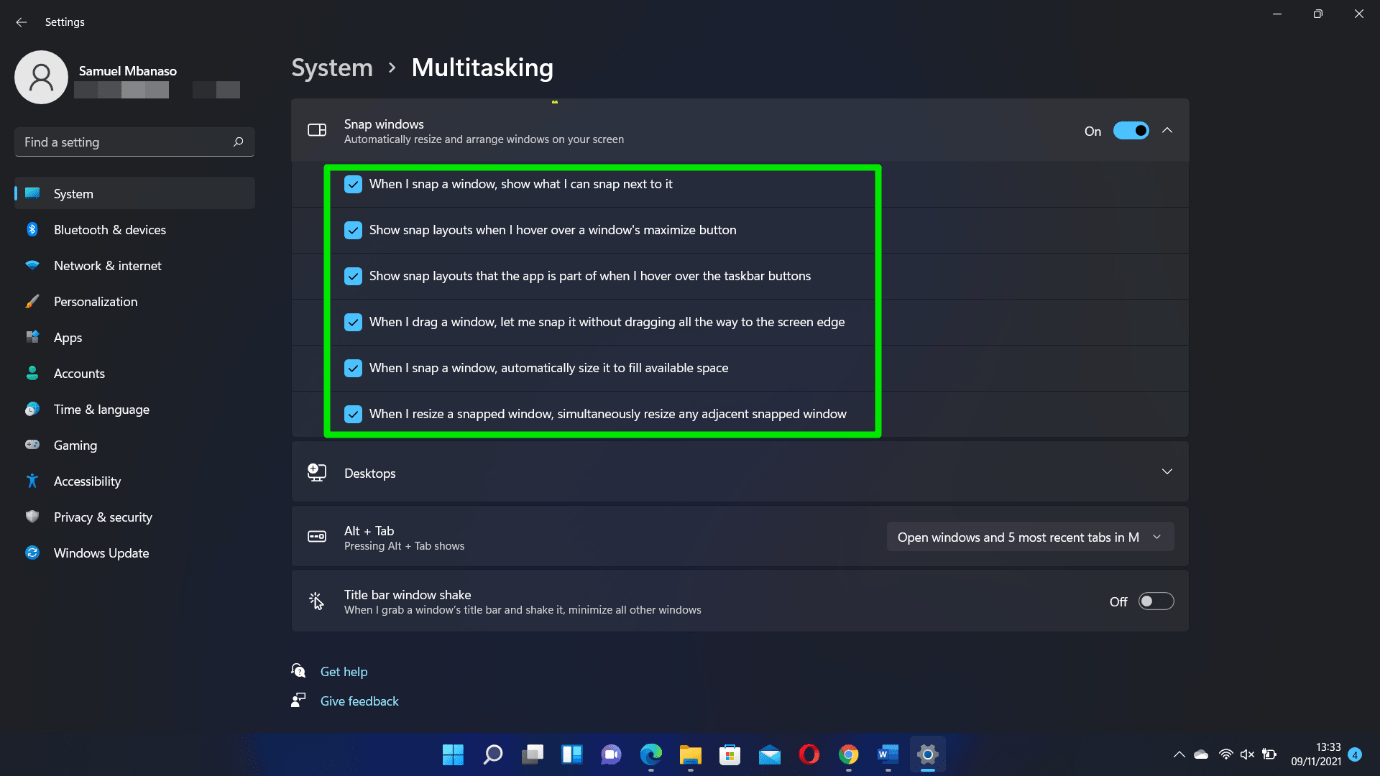
- Toggle the switch for Snap Windows to On when you get to the Multitasking page.
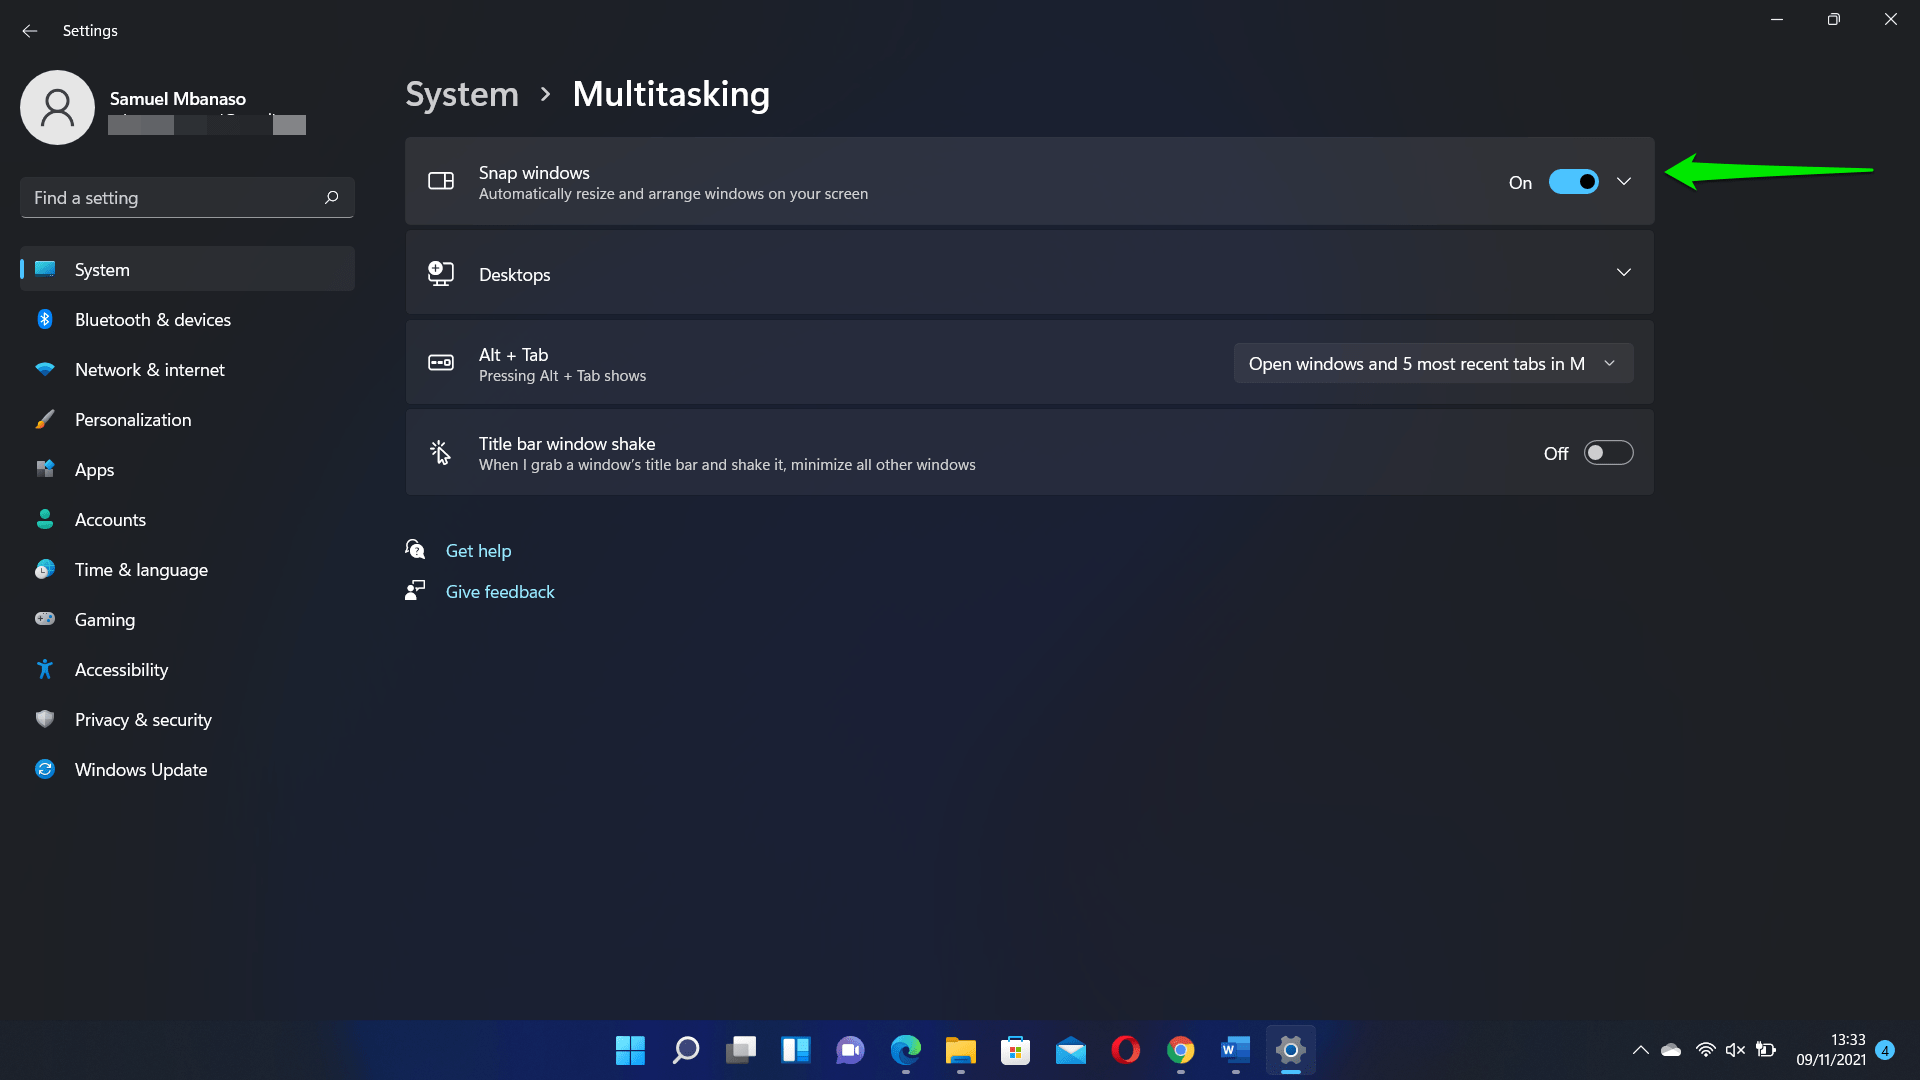
- You can also check and uncheck other snap options to customize how the feature works on your PC.
Update Your PC
As we mentioned, your current Windows 11 version may be the cause of the problem, especially if you’re still on an Insider Preview build.
Microsoft releases regular updates to fix bugs responsible for such problems. So, head to the Windows Update client to install the latest Insider release:
- Click on the Start button and select the Settings icon.
![]()
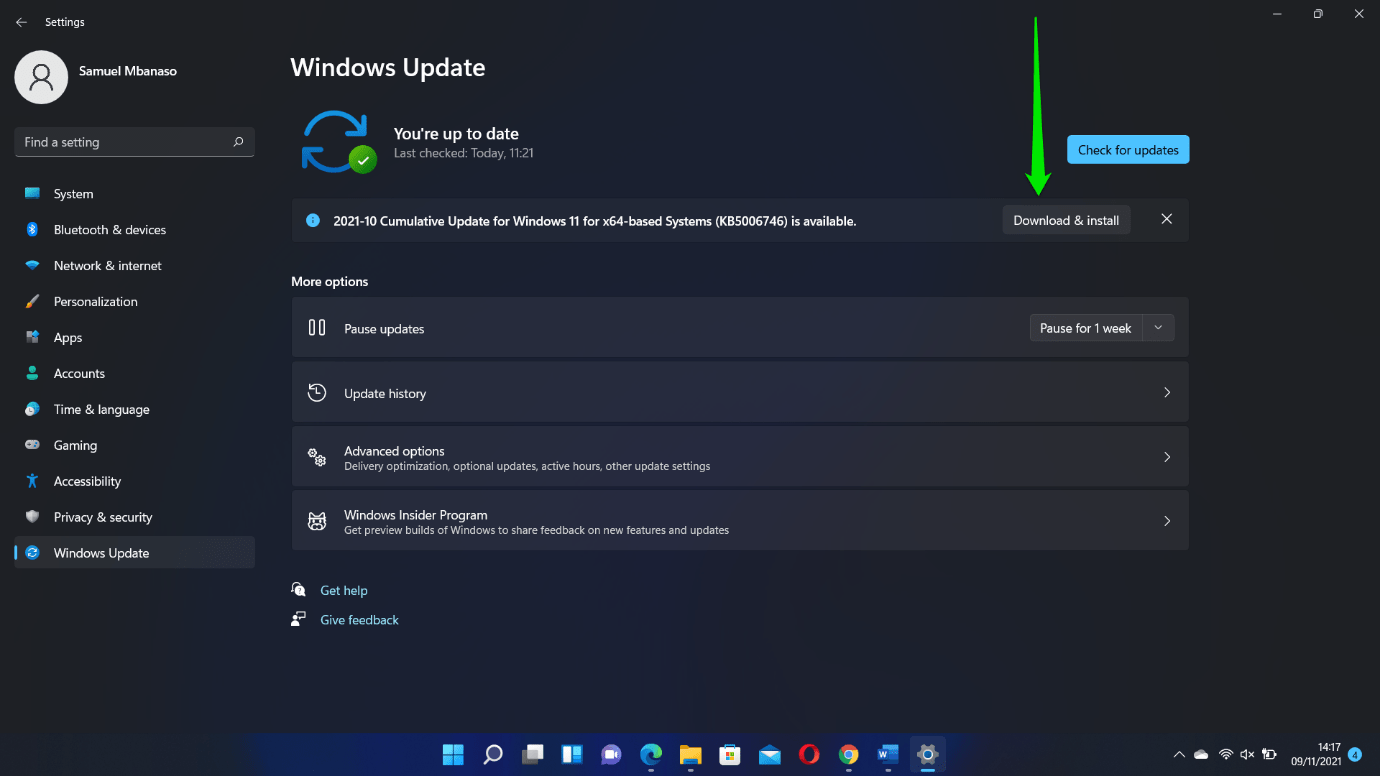
- Click on Windows Update once the program opens.
- Download and install available updates and allow your PC to restart if prompted.
If you face the issue in question with your new Insider build, consider installing the official release from Microsoft. Head to this guide on how to download and install Windows 11 to do that.
What If the Windows 11 Snap Layouts Feature Does Not Work for Mozilla Firefox?
Many users have reported a Snap compatibility problem with Firefox. This happens because Firefox has a custom control box feature. The browser manages its own window layout, which conflicts with Microsoft’s native snap tool.
Fortunately, it’s easy to fix this issue. Updating the browser should work if you haven’t done that in a while. We noticed that Firefox’s latest update is now compatible with Snap Layouts out of the box.
- So, click on the three lines under the right side of the title bar and select Help.
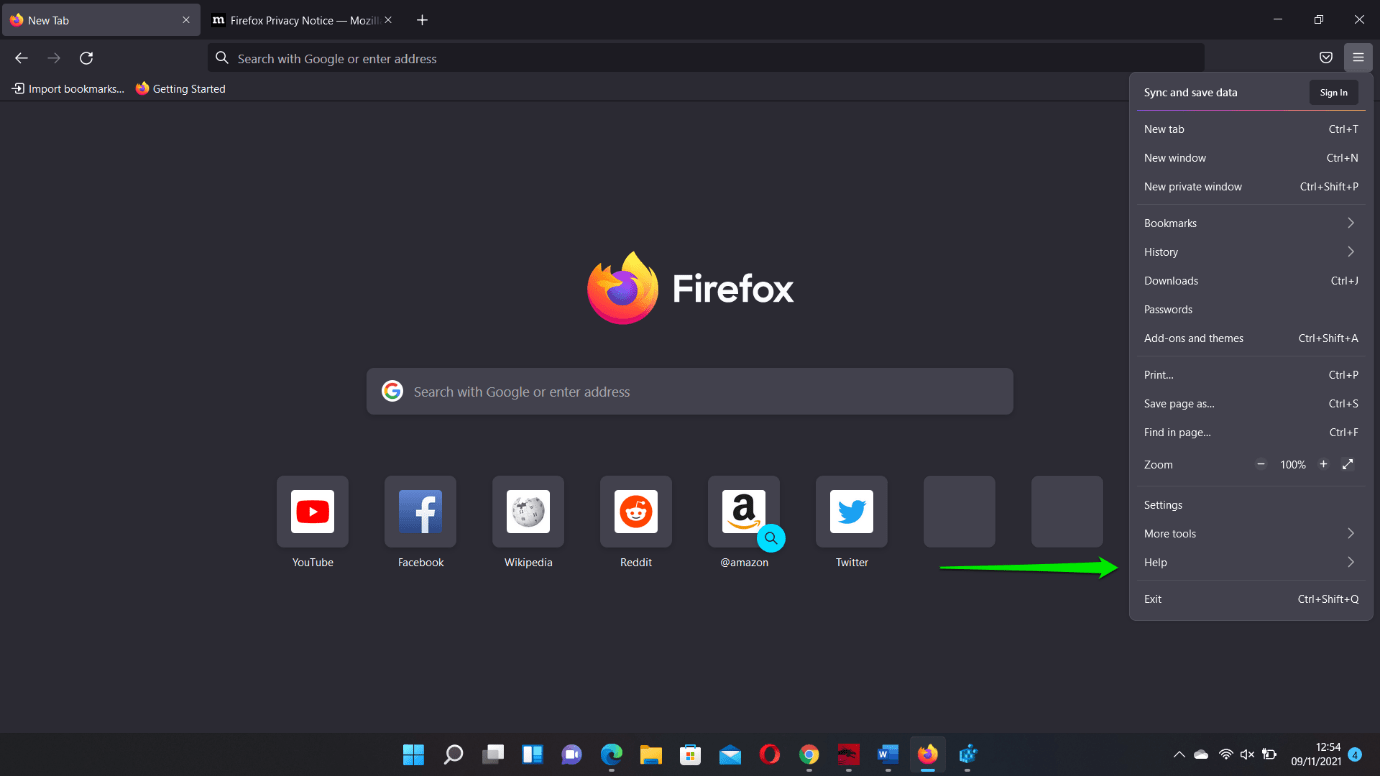
- Click on About Firefox.
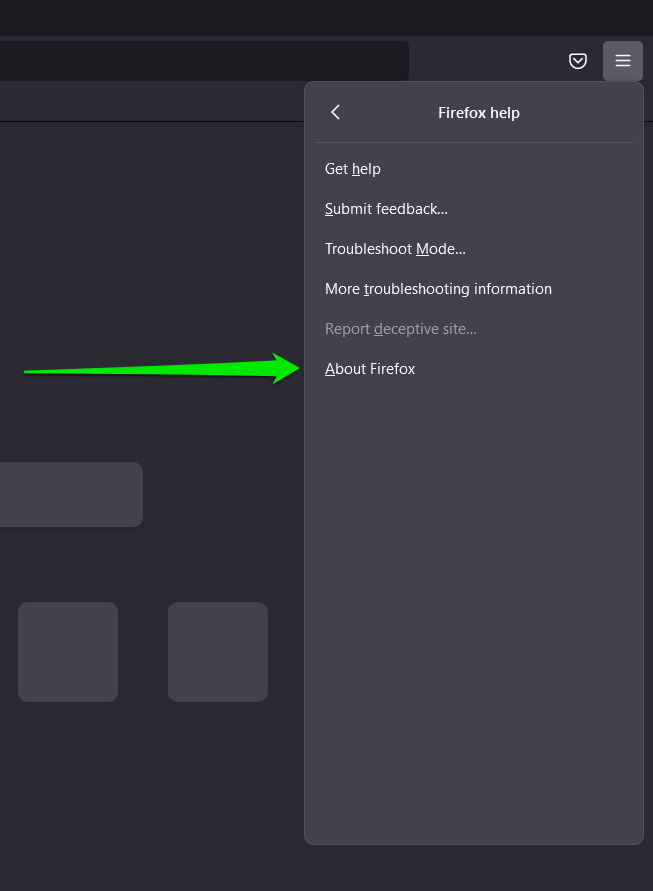
- Once the About Mozilla Firefox flyout appears, it’ll automatically check for updates.
If the problem persists, you just have to activate the traditional Windows Title Bar for the browser.
Follow these steps:
- Launch Mozilla Firefox.
- After the browser shows up, right-click the space next to its address bar and select Customize Toolbar from the context menu.
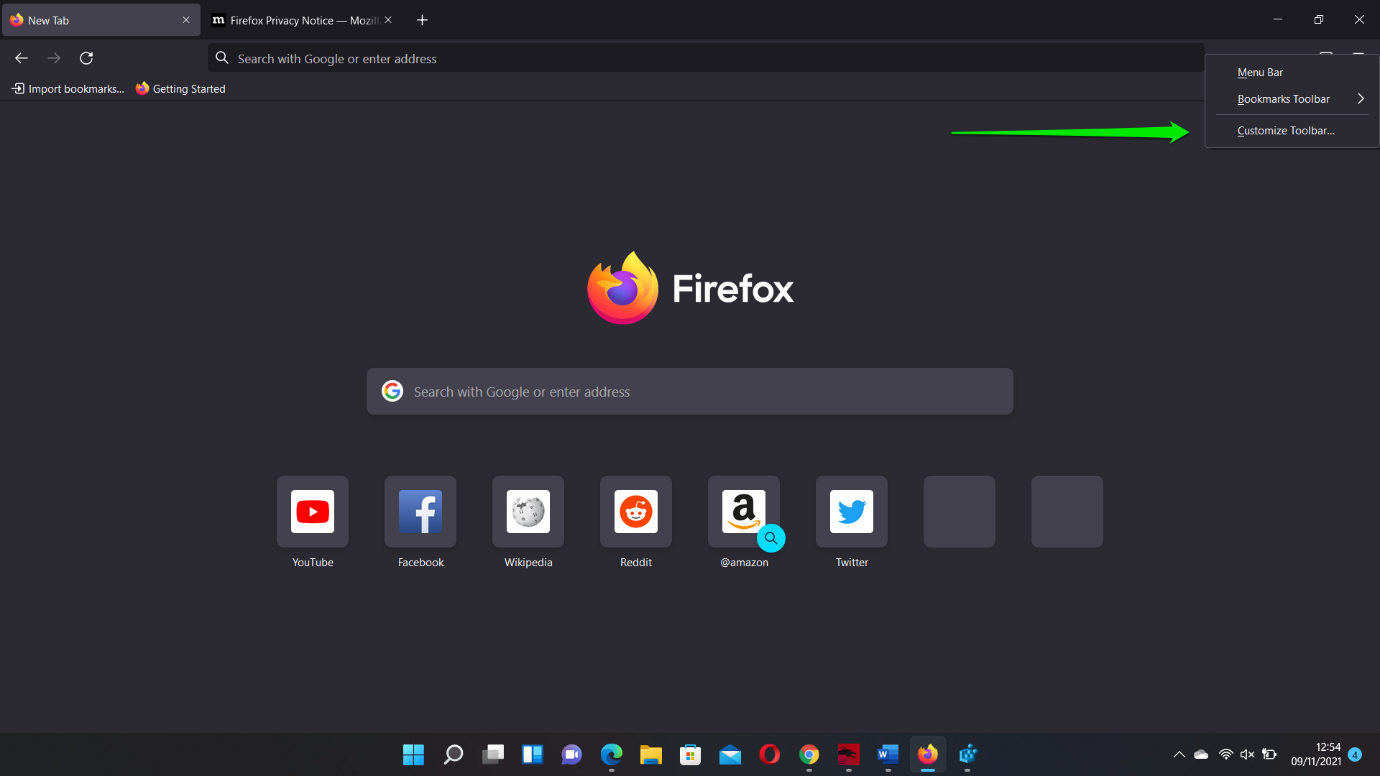
- After the Customize Firefox window shows up, head to the bottom-left corner of the screen and check the Title Bar box. You’ll notice an immediate change in the browser’s Title Bar.

The Snap Layouts feature should now work without issues.
Tweak the Registry
This method involves creating a DWORD to enable the Snap Layouts function.
However, before you start, we recommend that you back up your system’s registry. It’s a sensitive part of your operating system, and if you apply the wrong settings, certain functions could be permanently impaired. Creating a backup is even more critical since you’re likely entering the registry for the first time on Windows 11.
Follow these steps to back up your registry:
- Tap the Windows keyboard button and type “registry editor.”
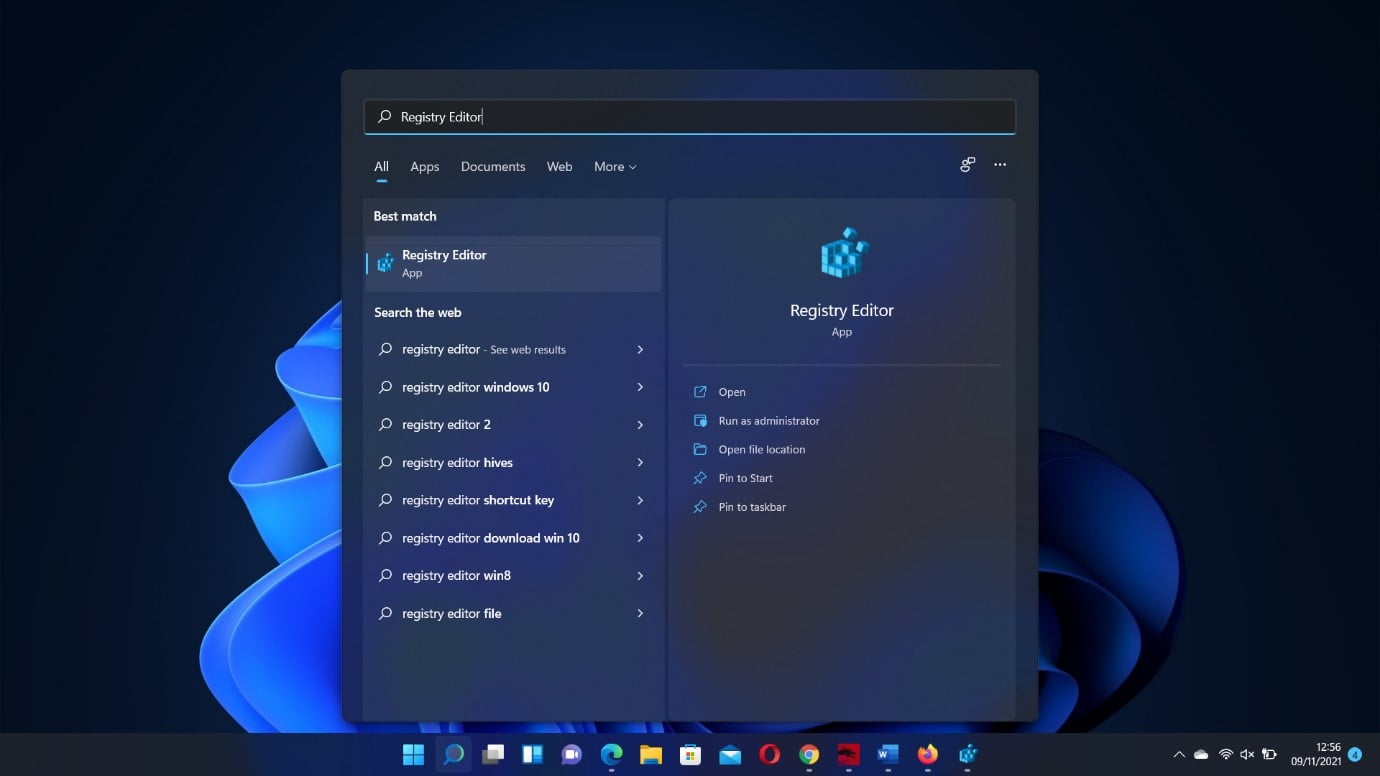
- Click on the Registry Editor app in the search results and select Yes in the User Account Control window.
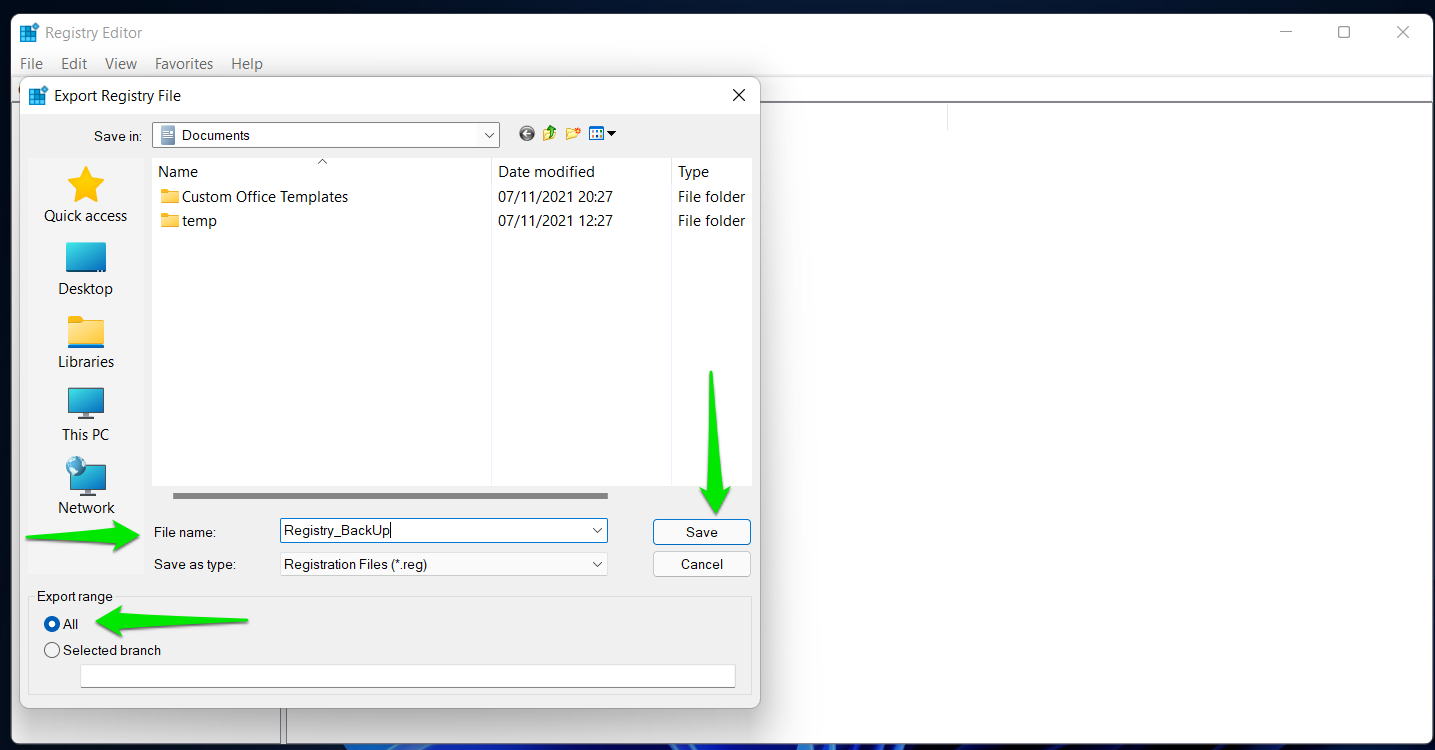
- After the app opens, click on File in the top-left corner and select Export.

- Select All under Export Range once the Export Registry File window appears.
- Enter a filename, select the folder where you’d prefer saving the backup, then click on Save.
- That’s it. You can quickly restore the registry by opening the Registry Editor and going to File > Import.
Now, let’s show you how to enable the Snap Layouts feature:
- Open the Registry Editor and head to the left pane.
- Next, drill down to the following key:
Computer\HKEY_CURRENT_USER\Software\Microsoft\Windows\CurrentVersion\Explorer\Advanced
- After clicking on the Advanced key, move over to the right side of the screen and look for the “EnableSnapAssistFlyout” DWORD. If you don’t see the DWORD, you’ll have to create it.
- So, right-click on the space on the right and click on New >> DWORD (32-bit) Value.

- Rename the new DWORD “EnableSnapAssistFlyout.”
- Double-click the “EnableSnapAssistFlyout” DWORD and type “1” under Value.
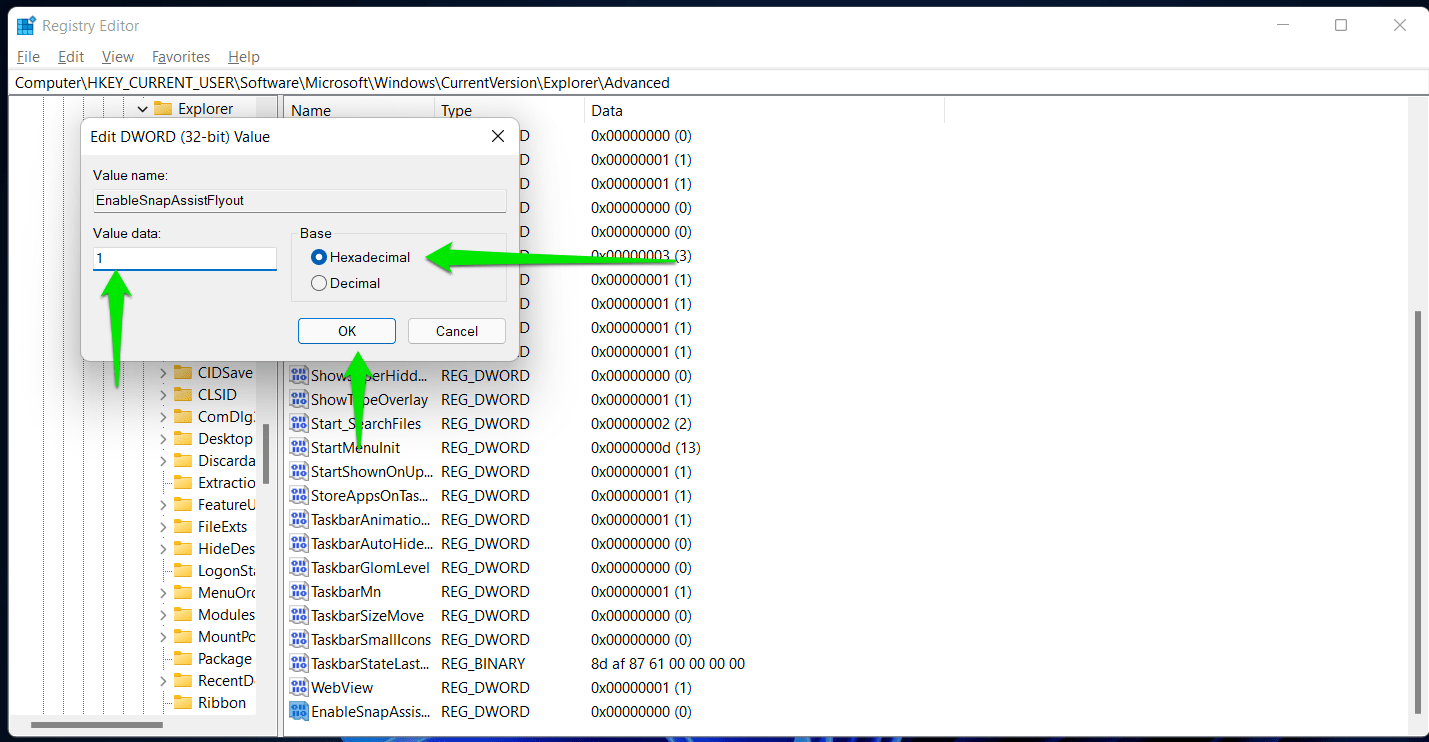
- Click on OK.
Uninstall Conflicting Applications
There are different applications used to manage program layouts in Windows 10. They include PowerToys, MaxTo, AquaSnap, Divvy, and DisplayFusion, among others. If you upgraded to Windows 11 without removing such apps, one of these programs could prevent Snap Layouts from working correctly.
Since you don’t need them anymore, it would be best to uninstall them.
Conclusion
That’s how to get the Windows 11 Snap Layouts feature to rearrange apps. Since the operating system still has minor bugs, it would be best to use Auslogics BoostSpeed to keep other glitches away. The program cleans out problematic junk files and leftover registry keys that could mess up some system functions. It also comes with other optimization tools that can help keep your system running smoothly.


 Done! Great to see you among our subscribers!