
If you want to enjoy high-quality sound when listening to music, watching movies, playing games, or using audio programs on your Windows 10 computer, adding and setting up a sound equalizer is imperative.
Sound equalizers can help you improve the sound on your Windows PC whether you’re using headphones or speakers. Therefore, knowing how to add a Windows 10 sound equalizer is essential, so we have put this guide together for you.
Whether you want to learn how to set up a sound equalizer in Windows 10 or how to add a Windows 10 sound equalizer, you will find all the answers you need in this guide.
What Is the Best Sound Equalizer for Windows 10?
Before you can adjust the sound equalizer settings on your Windows 10 PC, you need to have a good sound equalizer app working on your computer. Many excellent sound equalizers are compatible with Windows 10, but here are the best sound equalizers for you:
(Note: You must have updated all the audio drivers on your Windows computer to use a sound equalizer seamlessly).
1. The Default Windows Equalizer
The default Windows equalizer is an acceptable option if you don’t want to install third-party sound equalizers on your Windows 10 computer. It doesn’t have any unique features, but it can meet your audio needs in many cases.
2. Equalizer APO
Equalizer APO is a free, customizable sound equalizer for Windows 10 with all the features that you’d like your sound equalizer to have. As the name implies, it uses the Audio Processing Object (APO) system of operation, which is incompatible with audio APIs like ASIO or WASAPI.
Some of the unique features of Equalizer APO include an unlimited number of filters, support for 3D surround sound, multi-channel use, and multiple custom profiles (for speakers, headphones, and so on) with a very low impact on the computer’s CPU.
Unfortunately, it lacks a graphical user interface (or GUI), which implies that you have to edit the filters using a TXT file. That shouldn’t be a challenge since many reliable third-party GUIs can do the job.
3. Equalizer Pro
Equalizer Pro has a friendly, clean, and clutter-free user interface that makes it convenient to use. It features a ten-band equalizer, which is much less than what most other sound equalizers offer. However, the ten-band equalizer is still useful for adjusting the sound quality.
Equalizer Pro also features 20 presets, the ability to create and save custom equalizer profiles, system-wide bass boost, and a preamp volume control, enabling you to adjust or tweak bands individually to amplify low tones. The equalizer isn’t free but comes with a free 7-day trial.
4. Viper4Windows
Viper4Windows is an open-source sound equalizer that is compatible with Windows 10. You will also find it useful if you use earlier versions of Windows, such as Windows Vista, Windows 7, and Windows 8.1. With this sound equalizer, you can customize your settings by adjusting your room size, bass boost, distortion control, and reverberation settings.
Viper4Windows is an 18-band equalizer with bands that range from -120dB to 13dB. Like most of the other sound equalizers for Windows 10, it allows you to customize your profiles or select from the presets available on the platform.
5. FXSound
The FXSound app works not only as an excellent sound equalizer but also as a real-time audio processor. The equalizer features 10 bands and frequencies ranging from 110Hz to 15KHz.
The other features of the FXSound sound equalizer are customizable sliders, ambiance, 3D surround sound processing, dynamic boost, and bass boost. It also has built-in preset profiles, such as rap, alternative rock, country music, techno, and lots more. FXSound isn’t free but offers a free 7-day trial.
6. Voicemeeter Banana
Voicemeeter Banana works more like a mixer – you will find it more useful if you often deal with microphones. This advanced audio mixer will help you if you want to optimize your sound for recording or live audio streaming.
Voicemeeter Banana also allows you to fine-tune audio input and output. It works well as a microphone substitute on your Windows 10 PC. Interestingly, the software is donationware, which means you may choose to pay any amount or not to pay at all.
7. Boom3D
Boom3D is a sound equalizer that works on both Windows 10 and macOS. It is perfect if you mostly connect headphones to your Windows 10 computer to listen to your audio. Without additional hardware or boosters, Boom3D can help to convert your audio output to 3D surround sound.
The Boom3D sound equalizer has 31 bands and several presets that you can choose from, depending on what appeals to you more.
8. EQ Audio Equalizer
All the other sound equalizers we have reviewed in this guide are .EXE files that you can download, install, and run on your Windows 10 computer. However, EQ Audio Equalizer is a Chrome app.
That means you can only adjust or optimize the sound that is produced on your Google Chrome browser. EQ Audio Equalizer may not be useful if you don’t use Chrome to listen to audio.
How Can I Set Up a Sound Equalizer on My Windows 10 PC?
Setting up a sound equalizer on your Windows computer should not be a challenge if you have followed the instructions in this guide so far. However, the foremost step to take is to update driver software on your computer.
Update the Audio Drivers on Your Computer
Ensure you have downloaded and updated all the audio drivers necessary to set up a sound equalizer on your Windows PC. Then download, install, and run any of the sound equalizers that have been reviewed in this article, but ensure it is compatible with the audio drivers on your computer.
If you have any trouble installing the required audio drivers on your Windows computer, follow the steps below to update your drivers either manually or automatically using trusted third-party apps.
Update Your Audio Drivers Manually
Updating the audio drivers on your Windows 10 computer manually may be challenging if you are not conversant with the technicalities of the process. But the simple steps below should help you to do it successfully:
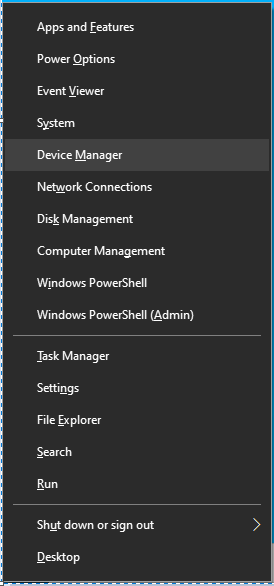
- Press the Windows logo key + X key shortcut and select Device Manager in the menu.
![Click Device Manager in the menu.]()
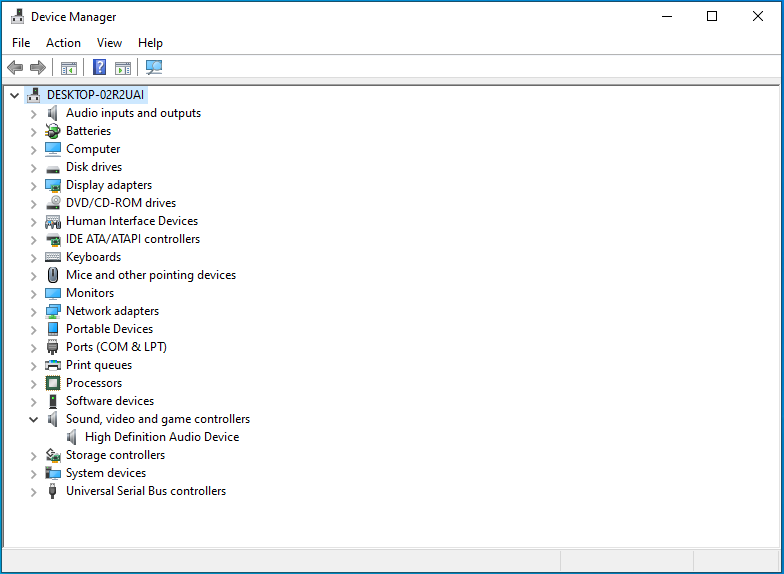
- Expand Audio inputs and outputs and Sound, video and game controllers.
![Expand "Sound, video and game controllers".]()
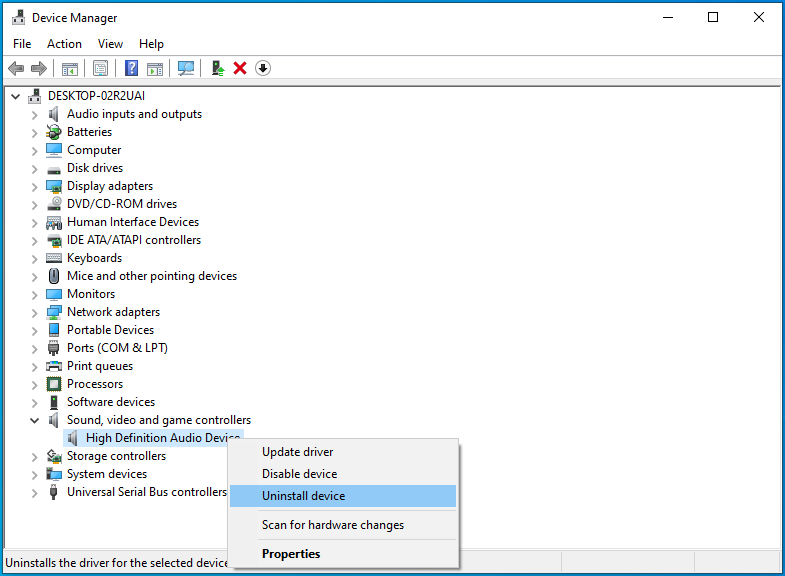
- Search for the audio device whose driver you want to update (which can be your speakers, microphone, or headset), right-click it and then select Uninstall device.
![Select "Uninstall device" from the menu.]()
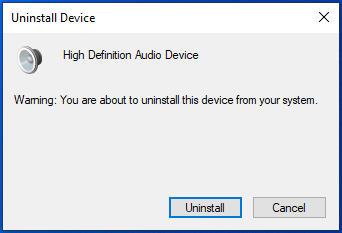
- In the dialog box that appears, click Uninstall to confirm your action.
![Click Uninstall to proceed.]()
- Restart your computer after you have uninstalled the device and its drivers. If that is not convenient, you can schedule a restart to another time.
- After you have restarted your device, Windows 10 will search for updated drivers and install them automatically.
If your audio drivers do not get updated, note down their details, go to the website of your audio device’s manufacturer and look for the latest updates for your audio drivers. Once you have found the latest driver software, install it and run it on your computer, and you’ll be good to go.
Update Your Audio Drivers Automatically
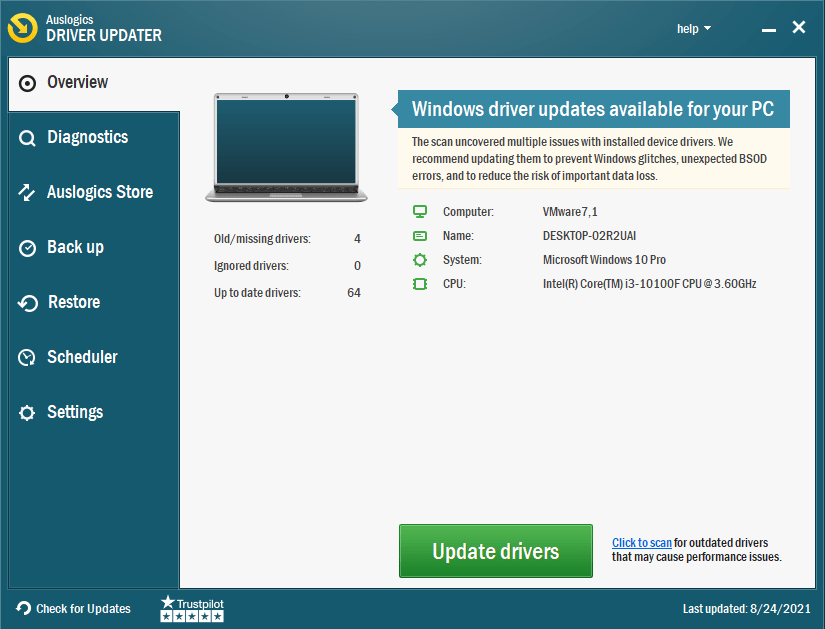
Trusted third-party software can help you avoid the trouble of updating your audio drivers manually. That’s the reason we recommend that you use Auslogics Driver Updater to update your audio drivers.
Auslogics Driver Updater is a piece of software that can help you quickly identify faulty, missing, or outdated audio drivers and download and install their most recent manufacturer-recommended versions.
Auslogics Driver Updater will help you in
- identifying the right audio driver software that is compatible with your Windows 10 computer,
- searching for the latest audio driver updates for your system and automatically installing them on your computer, and
- backing up your previous drivers so that your computer can revert to them if the newest driver software fails to work.
Keep in mind that Auslogics Driver Updater can help you update all your drivers in just one click.
After you have updated your audio drivers and downloaded the sound equalizer you want to use to improve the quality of your sound, follow the steps below to complete the setup:
Step 1: Open the sound equalizer and select the device you want to use the equalizer for.
Step 2: Download and install the required GUI (Graphical User Interface) if your sound equalizer lacks it.
Step 3: Open the downloaded GUI file and follow the instructions on the screen.
Step 4: After doing that, you will see the equalizer appear on your screen, and you can now adjust your equalizer’s settings.
Conclusion
Learning how to install and set up a sound equalizer in Windows 10 is not rocket science with the simple tips in this guide. However, if you cannot install or set up a sound equalizer in Windows 10 due to some technical issues, please let us know in the comment section. You will also find solutions to other Windows 10 issues in our blog.


 Done! Great to see you among our subscribers!