- Relieve the most annoying Windows 10 features – here is our ultimate list of how-to tips:
- 1. Tweak Update Settings:
- 2. Tailor Notifications:
- 3. Turn Off Windows Defender / Security Center Notifications:
- 4. Disable Notification and System Sounds:
- 5. Reclaim Your Privacy:
- 6. Improve Your Time Management:
- 7. Boost Your PC’s Performance:
- 8. Disable Advertising:
- 9. Sort Out Apps:
- 10. Turn off Synchronization:
- 1. Tweak Update Settings
- 2. Tailor Notifications
- 3. Turn Off Windows Defender / Security Center Notifications
- 4. Disable Notification and System Sounds
- 5. Reclaim Your Privacy
- 6. Improve Your Time Management
- 7. Boost Your PC’s Performance
- 8. Disable Advertising
- 9. Sort Out Apps
- 10. Turn Off Synchronization
‘Even the nicest person’s patience has a limit’
Sushan R. Sharma
Windows 10, the ingenious brainchild of Microsoft, is definitely an awesome operating system: it can unlock your computer’s full potential and deliver the best and most consistent Windows experience.
The problem is, some of the features offered by the OS in question would try the patience of a saint: annoying Windows 10 updates, sounds and notifications seem nothing but nuisances and make users go mental.
So, why not fix these issues so that you could get the most out of the latest Microsoft masterpiece?
Relieve the most annoying Windows 10 features – here is our ultimate list of how-to tips:
1. Tweak Update Settings:
- Disable Auto Reboots;
- Make Use of Active Hours;
- Customize Your Restart Settings;
- Disable Automatic Updates;
- Turn Off Automatic Driver Updates;
- Uninstall Unnecessary Updates;
- Disable P2P Updates
2. Tailor Notifications:
- Tweak Action Center;
- Pacify User Account Control
3. Turn Off Windows Defender / Security Center Notifications:
- Disable Windows Defender;
- Disable Windows Defender Security Center Notifications
4. Disable Notification and System Sounds:
- Turn Off Annoying Notification Sounds;
- Disable Event Sounds in Windows 10;
- Disable System Sounds in Windows 10
5. Reclaim Your Privacy:
- Turn Off Key Logging;
- Disable Your Internal Microphone;
- Turn Off Microsoft Experiments;
- Tweak Your Feedback and Diagnostics;
- Change Your Default Browser;
- Let Cortana Go
6. Improve Your Time Management:
- Use a PIN Instead of a Password;
- Disable the Windows 10 Lock Screen
7. Boost Your PC’s Performance:
- Turn Off Home Group;
- Disable Windows 10 Visual Effects;
- Disable Game DVR;
- Spur Your Windows 10
8. Disable Advertising:
- Get Rid of Targeted Ads;
- Disable Microsoft Consumer Experience;
- Remove File Explorer Ads;
- Deactivate Windows Spotlight Ads
9. Sort Out Apps:
- Remove Junk Apps;
- Disable Background Apps;
- Hide the Settings App;
- Block Suggested Apps;
- Allow Non-Verified Apps
10. Turn off Synchronization:
- Disable Syncing in Windows 10;
- Say Goodbye to OneDrive
So, it’s time to bid farewell to Windows 10 annoyances and irritations:
1. Tweak Update Settings
Windows 10’s repeated insistence that updates be installed on your PC as soon as they are released is such a burden.
So, why not run things your own way and prevent annoying automatic updates?
Now let’s tailor your update settings:
Disable Auto Reboots
Avoiding auto reboots is a pretty wise idea: when they occur, you can lose unsaved data in running apps. Therefore, we recommend you to prevent auto reboots and keep everything under control.
Here are 2 ways to keep auto reboots at bay:
Make Use of Active Hours
Thanks to the Active Hours feature, you can schedule specific hours to prevent automatic restarts during a set period of time.
Here is how it works:
- Start -> Settings -> Update & security
- Windows Update -> Update Settings -> Change active hours -> Tell your Windows when you usually use your PC to prevent automatic reboots during those hours
Customize Your Restart Settings
Your PC can restart even during your active hours: schedule a custom restart time and wait for a reboot to happen.
Here is how to do this:
- Start -> Settings -> Update & security -> Windows Update
- Update Settings -> Restart Options -> Use a custom restart time -> On -> Select the day and time you consider appropriate for a reboot
Disable Automatic Updates
If you do not want your Windows 10 to download updates automatically, use a metered Internet connection to limit your data.
Here is how it works:
Start -> Settings -> Network & Internet -> Wi-Fi -> Advanced options -> Turn on Set metered connection
To download updates using a metered connection, go this way and install what you need manually:
Start -> Settings -> Windows Update -> Download
Turn Off Automatic Driver Updates
You should keep your drivers up to date so that your OS can run smoothly. Windows 10 automatic driver updates are not your only option: it is OK to disable them as you can fix your drivers manually or use a special updating tool, e.g. Auslogics Driver Updater, whenever it is convenient for you.
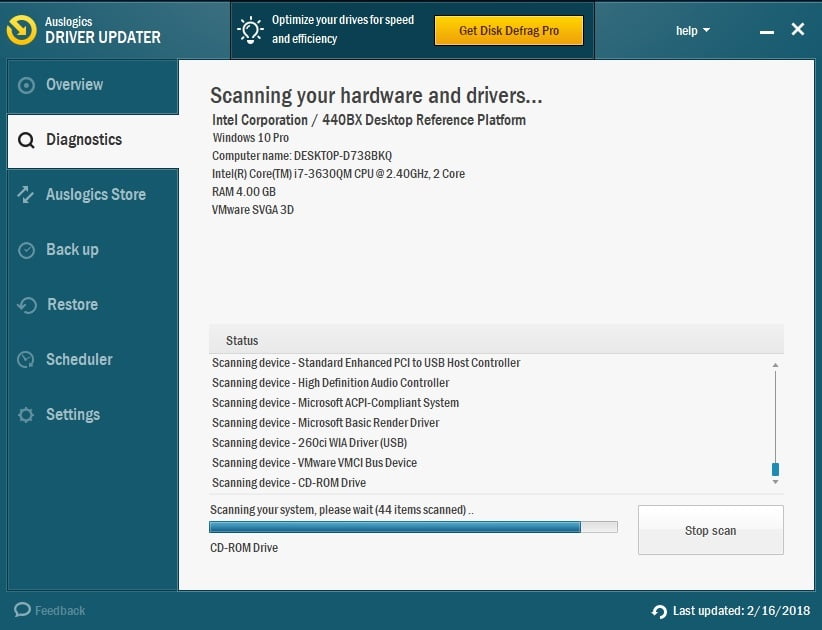
To disable automatic driver updates, follow these steps:
- Start -> Control Panel -> System -> Advanced system settings -> System Properties
- Hardware -> Device Installation Settings -> Choose No to reject automatic downloads -> Save Changes
Uninstall Unnecessary Updates
If undesirable updates have managed to sneak in, you can easily uninstall them.
Go this way:
- Start -> Settings -> Updates & Security -> Windows Update
- Advanced options -> View your update history -> Uninstall updates
or:
- Right-click the Start button -> Control Panel
- Programs -> View installed updates
Disable P2P Updates
As a loyal Windows 10 user, you are supposed to allow the peer-to-peer download feature: basically, Windows 10 encourages you to share your updates with other users.
So, good old Microsoft promotes a spirit of brotherhood among its customers. Well, isn’t that sweet?
Well, that would be really nice if your Windows 10 were not stealing your bandwidth to send updates to other people. Are you OK with this?
If not, feel free to disable peer-to-peer updates in Windows 10:
- Start -> Settings -> Updates & Security -> Windows Update
- Advanced options -> Choose How Updates are Delivered -> Delivery Optimization -> Off
2. Tailor Notifications
Your OS is a real attention seeker: that is why annoying Windows 10 notifications invade your screen and make you see red. They are often accompanied by annoying Windows 10 sounds, which is even more infuriating tactics.
So, Windows 10 notifications are profoundly disturbing. It is about time you stopped this anarchy and reined them in:
Tweak Action Center
The Action Center is the hub of all your Windows 10 notifications. Although this kind of concentration strategy might seem rather reasonable, the Action Center can really get your goat by throwing constant alerts at you.
Try customizing the Action Center to make it a bit more tolerable:
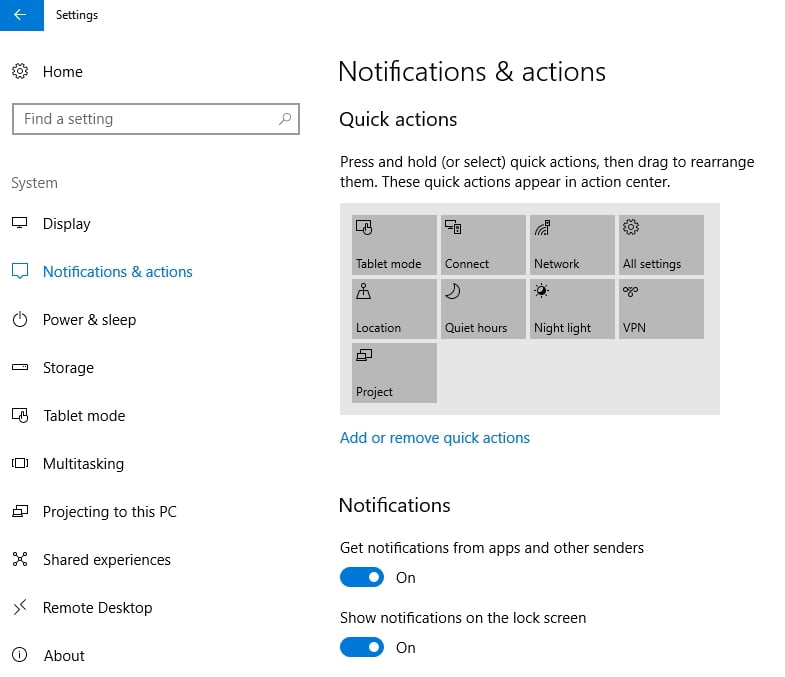
Arrange the Quick Actions:
Windows key + I -> System > Notifications & actions -> Add or remove quick actions
Fed up with annoying Windows 10 notifications?
- Windows key + I -> System -> Notifications & Actions
- Notifications -> Turn off the notifications you do not need
To deactivate security or maintenance messages, go this way:
- Windows key + X -> Control Panel -> System and Security
- Security and Maintenance -> Change Security and Maintenance settings -> Uncheck the messages you consider unnecessary
Irksome notifications, begone!
To remove the Action Center from your Taskbar, do the following:
- Windows key + I -> System -> Notifications & actions
- Turn system icons on or off ->Toggle the Action Center
If the Action Center is still getting on your nerves, consider disabling it via Registry Editor.
Note: Tweaking your registry is a risky business. A tiny mistake can actually kill your computer.
Proceed to the following steps only if you are an advanced user. If you are not so sure about your expertise, you might just as well stop here.
However, if you want to edit your registry after all, consider backing it up. Besides, we recommend you to back up your valuable files and create a system restore point in case something goes wrong.
Back Up Windows 10 Registry
To back up your registry:
- Start menu -> Type regedit.exe -> Enter
- Select the registry keys and/or subkeys you want to back up -> File > Export -> Choose the location and name for the backup file -> Save
Back Up Your Personal Files
Windows 10 Registry is proud and unforgiving: even a tiny mistake can cause your computer to go haywire. Therefore, before tweaking your registry, make sure all your personal files are properly backed up. A special backup tool, e.g. Auslogics BitReplica, can give you a helping hand.
Create a System Restore Point
A system restore point will help you get your Windows 10 back to the time point when everything seemed OK:
- Start menu -> Type restore -> Create a restore point
- System Properties -> Create -> Describe briefly the restore point -> Create
Now you can edit your registry:
- Windows key +X -> Search -> Type regedit -> Registry Editor
- HKEY_LOCAL_MACHINE\SOFTWARE\Policies\Microsoft\Windows\Explorer
- If there is no such key, create it: Windows -> New -> Key -> Name it Explorer
- Right-click on HKEY_LOCAL_MACHINE\SOFTWARE\Policies\Microsoft\Windows\Explorer -> Create a new DWORD (32-bit) Value -> Value data -> 1
Pacify User Account Control
User Account Control (UAC) can be pretty scary: every time you try to install something, your screen dims all of a sudden and gives you the creeps.
Try tweaking your UAC in order to make it a bit friendlier:
- Windows key +X -> Search -> Type UAC
- Change User Account Control Settings -> Choose the second level from the bottom
Phew, UAC notifications will not dim your screen anymore!
3. Turn Off Windows Defender / Security Center Notifications
Disable Windows Defender
Windows Defender is a built-in Microsoft security solution. It can perform system scans and spot the nefarious malware intruders violating your Windows 10.
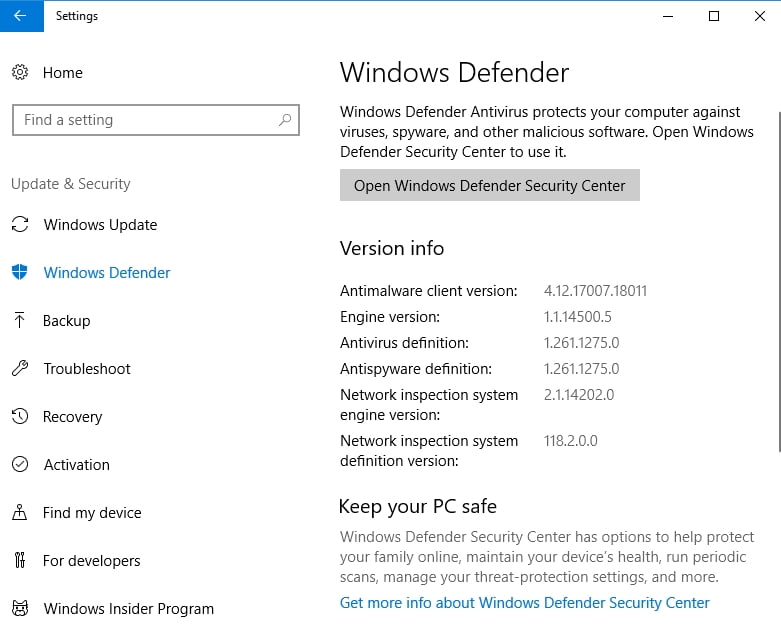
Windows Defender guards your system by running occasional scans even if you have a third-party antivirus solution installed. However, that faithful servant may take against your main antivirus, and running them side by side will turn your Windows 10 into a battlefield.
So, if you trust your third-party security solution, consider disabling Windows Defender:
- Start -> Settings, Update & Security
- Windows Defender -> Turn off Real-Time protection as well as Cloud-based Protection
Disable Windows Defender Security Center Notifications
If Windows Defender is your only security solution or if it gets on well with your third-party antivirus, you might want to keep it activated. However, irritating Windows Defender Security Center notifications can rattle your cage.
Feel free to disable them:
CTRL + ALT + Delete -> Task Manager -> Start-Up -> Windows Defender Notification Icon -> Disabled
4. Disable Notification and System Sounds
Annoying Windows 10 sounds seem able to rile anyone. Just turn them off to steady your nerves.
Turn Off Annoying Notification Sounds
You might want to leave notifications for some of your apps on. However, pesky notification sounds can drive you up the wall, can’t they?
To disable them, do this:
- Windows key + I -> System -> Notifications & actions
- Show notifications from these apps -> Choose an app -> Toggle it On
- Click on the app-> Turn off Play a sound when a notification arrives
Disable Event Sounds in Windows 10
You can actually disable sounds for any program event on your computer.
Here is an easy way to do this:
- Start -> Control Panel -> Sound -> Sounds
- Program events -> Choose the event -> Sounds -> None -> Apply -> OK
Disable System Sounds in Windows 10
Tired of irksome system sounds?
Disable them all:
Start -> Control Panel -> Sound -> Sounds -> Sound Scheme -> No Sounds -> Apply -> OK
5. Reclaim Your Privacy
Turn Off Key Logging
You don’t need to be Einstein to realize that the feature which Microsoft proclaims to be aimed at collecting your data for a more personalized experience … well, has something to do with privacy issues.
We assume you might want to switch off key logging in Windows 10:
- Start -> Settings -> Privacy -> General -> Turn off Send Microsoft info about how I write to help us improve typing and writing in the future
- Start -> Settings -> Privacy -> Speech, Inking and Typing -> Stop getting to know me
Say goodbye to an intrusive keylogger.
Disable Your Internal Microphone
Your internal microphone is actually a privacy concern. It can be hacked and taken over. In a nutshell, nefarious eavesdroppers can use it in order to know everything about you – your secrets, passwords, plans, and concerns.
Creepy?
So let’s disable this vulnerable target:
- Windows logo key + X -> Device Manager -> Audio Inputs and Output
- Select your microphone -> Right-click on it -> Select Disable Device.
Turn Off Microsoft Experiments
Microsoft can carry out live tests on your Windows 10 while you are using it. If you consider this annoying, you can banish Microsoft experiments from your PC:
- Windows key +X -> Search -> Type regedit -> Registry Editor
- HKEY_LOCAL_MACHINE\SOFTWARE\Microsoft\PolicyManager\current\device\System -> Allow Experimentation key -> 0
Tweak Your Feedback and Diagnostics
To improve its products, Microsoft needs your feedback and device data. You can customize your settings in order to make feedback and data collection a bit less intrusive:
Start -> Settings -> Feedback & Diagnostics
Change Your Default Browser
We have nothing against Microsoft Edge, seriously. But you have the right to choose your default browser.
To exercise this right, go to:
- Start -> Type Default app settings -> Select Default app settings
- Web browser -> Choose your default browser
Let Cortana Go
In Windows 10, Cortana is your personal assistant. She can be really nice, but we guess the heart wants what it wants. Besides, she knows too much about you.
So, if you are running out of patience with Cortana, feel free to disable her:
- Windows key +X -> Search -> Type Cortana
- Cortana & Search Settings -> Turn off Cortana can give you alerts…
Bye-bye, Cortana.
6. Improve Your Time Management
Use a PIN Instead of a Password
If it takes forever to log in to your PC using your super secure long password, consider replacing it with a short personal identification number (PIN):
- Start menu -> Click on your avatar pic -> Change account settings
- Sign-in -> PIN -> Add -> Enter the PIN you want -> Restart your computer
Note: Make sure that replacing your password with a PIN does not compromise your security.
Disable the Windows 10 Lock Screen
Do you really need a lock screen? Actually, it doesn’t even let you log in – you have to tap it in order to access your practical log-screen. And your precious time is running away.
So, the feature in question seems obnoxious and redundant. Unfortunately, for no apparent reason, Microsoft made your lock screen really difficult to get rid of. Let’s try to disable it together.
Here are two ways to do this:
Tip 1
The first tip will help you skip the lock screen after you wake up or unlock your PC. Nonetheless, every time your computer boots up, the intrusive lock-screen will be present.
- File Explorer -> C: -> Windows -> SystemApps ->The Microsoft.LockApp_cw5n1h2txyewy folder
- Right-click on it -> Rename -> Continue if you see a User Account Control pop-up -> Add .bak to the end of the folder’s name -> Enter
Tip 2
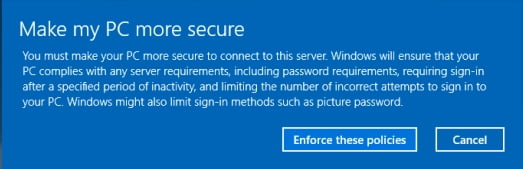
The second tip is a bit risky. Use it only if you are sure that nobody can access your computer without your permission. The point is, this tweak will let you skip both the lock screen and the log-in screen. And this is actually a security matter.
To disable all your pre-desktop screens, do the following:
- Windows key + R -> Type netplwiz -> Enter
- Users for this computer -> Select your username -> Disable Users must enter a user name and password to use this computer -> Apply
- Automatically sign in -> Type your password -> Confirm your password -> OK
Say good-bye to all your bootup screens.
7. Boost Your PC’s Performance
Turn Off Home Group
The HomeGroup feature allows you to share your files and devices within your local network. We agree this might convey the much-needed sense of community. However, HomeGroup slows down your computer. Therefore, if you want to give your PC a boost, consider disabling this feature.
Here are 4 easy steps to do this:
Leave your homegroup:
Start -> Control Panel -> Homegroup -> Change homegroup settings -> Leave the homegroup -> Finish
Disable the HomeGroup Service:
Start -> Control Panel -> Administrative Tools -> Services
Disable both HomeGroup Listener and HomeGroup Provider:
- Right-click HomeGroup Listener / HomeGroup Provider -> Properties
- General -> Startup Type -> Disabled -> Apply
Edit the registry:
- Start menu -> Type regedit.exe -> Enter -> Right-click on HKEY_LOCAL_MACHINE\Software\Classes\CLSID\{B4FB3F98-C1EA-428d-A78A-D1F5659CBA93}
- Create a new DWORD value: New -> DWORD (32-bit) Value -> Call the new value System.IsPinnedToNameSpaceTree -> 0
- If your Windows 10 prevents you from creating a new DWORD value, do the following:
Right-click on HKEY_LOCAL_MACHINE\Software\Classes\CLSID\{B4FB3F98-C1EA-428d-A78A-D1F5659CBA93} -> Permissions -> Advanced -> Change -> Type your Windows user account name -> OK -> Permissions -> Users -> Allow Full Control
HomeGroup is no longer a problem.
Disable Windows 10 Visual Effects
Windows 10 is a real eye candy. However, its attractive visual features can be a distraction. In addition, they may slow down your system. That is why those who put simplicity and performance first might find the pretty Windows 10 interface a bit annoying.
To disable Windows 10 Visual Effects, go this way:
- Start -> System -> Advanced system settings -> Advanced
- Performance -> Settings -> Turn off the visual effects you do not wish to see
Disable Game DVR
Windows 10 Game DVR is a great option for passionate gamers: it records your gameplay in the background so that you could share your accomplishments with other people. However, Game DVR can cause your gaming performance to deteriorate.
Not interested in sharing your epic moments?
Then hurry up to disable Windows 10 Game DVR in order to boost the FPS (Frames per Second) performance in your games:
- Windows key +X -> Search -> Type regedit -> Registry Editor
- HKEY_CURRENT_USER\System\GameConfigStore -> Right-click on GameDVR_Enabled -> Modify… -> Value -> 0
- HKEY_LOCAL_MACHINE\SOFTWARE\Policies\Microsoft\Windows -> Right-click on Windows -> New > Key -> Name it GameDVR
- Right-click on GameDVR -> New -> DWORD (32-bit) Value -> Name it AllowGameDVR
- Right-click on AllowGameDVR -> Modify… -> Value -> 0
Spur Your Windows 10
Your Windows 10 can be slow due to many reasons. To prevent or cure its sluggishness, you may try tweaking its settings or spotting speed-reducing issues. A special tool, for example Auslogics BoostSpeed, can save your time and give your Windows 10 a considerable boost.
8. Disable Advertising
Get Rid of Targeted Ads
Windows 10 has granted you with a unique advertising ID so that Microsoft itself or other affiliated vendors could bombard you with targeted ads.
If you do not agree with this kind of policy, feel free to change your privacy options:
Start -> Settings -> Privacy -> General -> Turn off Let apps use my advertising ID for experiences across apps
Willing to go further with your anti-advertising crusade?
- Start -> Settings -> Privacy -> General
- Manage my Microsoft advertising and other personalization info -> You will be taken to a website where you will be able to banish personalized ads both from your browser and Microsoft account.
Disable Microsoft Consumer Experience
To get rid of irksome promoted apps, you should turn off Microsoft Consumer Experience:
If you are a Windows 10 Professional, Enterprise, or Education user, you are allowed to turn off Microsoft Consumer Experience via Group Policy:
- Windows + R -> Type gpedit.msc -> Enter -> Local Group Policy Editor -> Computer Configuration
- Administrative Templates -> Windows Components -> Cloud Content -> Turn off Microsoft consumer experience-> Enabled -> OK
Windows Home Users can disable Microsoft Consumer Experience via Registry Editor:
- Windows + R -> Type regedit -> Enter -> User Account Control -> Yes
- The registry key HKEY_LOCAL_MACHINE\SOFTWARE\Policies\Microsoft\Windows\CloudContent -> Open the Dword DisableWindowsConsumerFeatures -> Choose 1 -> OK
Remove File Explorer Ads
Unfortunately, Microsoft keeps infesting your Windows 10 with pesky File Explorer ads.
Filled with an overwhelming sense of outrage?
Then it is time to get rid of annoying File Explorer adds:
- Windows key +X -> Search -> Type File Explorer Options -> File Explorer Options
- View -> Show Sync Provider Notifications -> Uncheck the box -> Apply
Deactivate Windows Spotlight Ads
Windows Spotlight ads are full-screen ads on your lock screen. And they make your blood boil.
To banish them, do the following:
- Start -> Settings -> Personalization
- Lock Screen -> Replace Windows Spotlight with either Picture or Slideshow
9. Sort Out Apps
Remove Junk Apps
It is important to prevent unnecessary apps from cluttering your PC.
Create a system restore point before uninstalling any pre-installed apps in case something goes wrong:
- Start menu -> Type restore -> Create a restore point
- System Properties -> Create -> Describe briefly the restore point -> Create
To get rid of the bloatware apps that you don’t really need, go this way:
Start Menu -> Right-click the undesirable item -> Uninstall
To prevent Microsoft from infesting your Windows 10 with unnecessary apps, do the following:
Start -> Settings -> Personalization -> Start -> Turn off Occasionally show suggestions in Start
You may make this easier with the smart software solution. Use Uninstall Manager which is a part of Auslogics BoostSpeed, and enjoy the result!
Disable Background Apps
Too many apps running in the background can make your Windows 10 sluggish. Therefore, it’s a good idea to disable those you do not really need:
Start -> Settings -> Privacy -> Background apps -> Disable the unnecessary apps
Hide the Settings App
The sad truth is, your PC can be compromised at any time: for example, your kids may interfere with your settings while you are enjoying your cup of tea in the kitchen. Therefore, we assume your Settings app is not something everyone should see.
If you are a Windows 10 Professional user, proceed to the following guidelines.
To prevent other people from tampering with your system, we recommend you to hide your Settings app:
- Windows key +X -> Search -> Type gpedit.msc ->Local Group Policy Editor
- Computer Configuration -> Administrative Templates -> Control Panel
- Double-click Settings Page Visibility -> Enabled
- Settings Page Visibility -> Type hide:display -> Apply
If you want to make your Settings app visible again, go to:
Settings Page Visibility -> Not Configured
Block Suggested Apps
Your Windows 10 can be a bit intrusive. The ‘suggested apps’ feature is a case in point.
To prevent suggested apps from popping up in your Start menu, follow these steps:
- Start -> Settings -> Personalization
- Start -> Occasionally Show Suggestions in Start -> Toggle it Off
To avoid suggested apps in the Share menu, do the following:
- Click any Share button within your OS -> Share window
- Right-click one of the apps -> Untick Show App Suggestions
Allow Non-Verified Apps
Does your bossy system keep telling you what to do?
Actually, you can stop it ordering your around and enjoy the apps YOU like – even if they are not verified apps from the Windows Store.
To allow non-verified apps, go this way:
- Start -> Settings -> Apps -> Apps and Features
- Installing Apps -> Allow Apps From Anywhere
Nevertheless, although this kid of rebelliousness might seem justifiable, you must be alert:
Preventing your Windows 10 from banning non-verified apps means taking serious security risks – your computer is now vulnerable to malware attacks. Therefore, make sure the apps you wish to install on your computer come from trustworthy sources. If you consider an app suspicious, google it to find out if it has harmed other PC users.
10. Turn Off Synchronization
Disable Syncing in Windows 10
Windows 10 likes to keep everything in sync. That is why many pieces of your personal data sync across your signed-in devices. Wonderful! Or not. Why let your smartphone searches sneak into your PC? Some things should be kept private, you know.
To disable syncing in Windows 10, go this way:
Start ->Settings -> Accounts -> Sync your settings
To disable search history syncing, go to:
- Windows key +X -> Search -> Type Cortana -> Cortana & Search Settings
- My device history / My search history
Say Goodbye to OneDrive
Not a Microsoft OneDrive fan? You can disable this cloud solution and opt for something else – the choice is yours!
To disable OneDrive, use Windows Registry:
- Start menu -> Type regedit.exe -> Enter -> Registry Editor -> Go to or create the HKLM\Software\Policies\Microsoft\Windows\OneDrive key
- Right-click on HKLM\Software\Policies\Microsoft\Windows\OneDrive -> New -> DWORD (32-bit) Value ->
- Name it DisableFileSyncNGSC
- Right-click on DisableFileSyncNGSC -> Modify… -> Value -> 1
- Restart your computer
We hope our tips have helped you make your Windows 10 more enjoyable.
Do you have any ideas or questions regarding this issue?
We are looking forward to your comments!


 Done! Great to see you among our subscribers!
That’s a lot of great advice. I’ll definitely use it on my new Windows 10 laptop. Thanks!