
Today many people rely on social media and other digital platforms for personal and business communication. From Facebook to Instagram, WhatsApp to Email to many other official platforms, you can use to communicate quickly, safely, and conveniently. However, there are a few challenges that might bring frustrations when using digital communication, and many of them arise from internal errors or mishaps that have simple solutions.
“Why does my email say the server rejected one of the recipient’s addresses?” This is one of the most common email issues today, especially in Outlook. Like other platforms, you are likely to encounter errors while using Outlook. The “Recipient Address Rejected” error is a problem that is easy to fix but might wreak havoc if you are in a hurry or don’t know enough about fixing it.
What Is the “Recipient Address Rejected” Error?
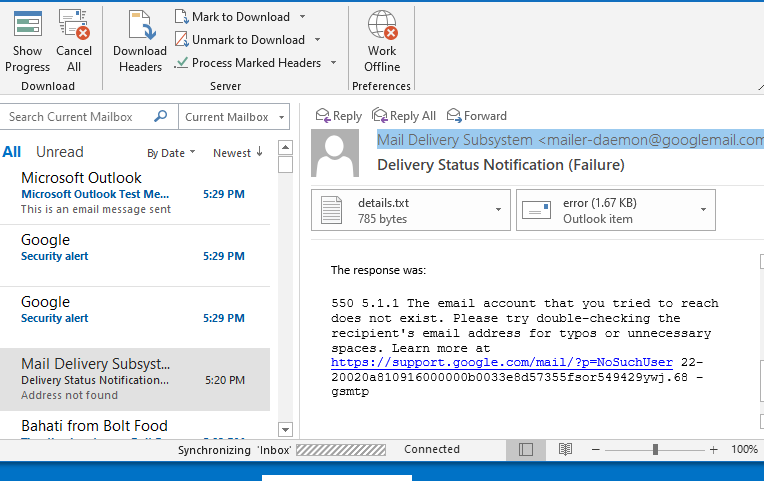
So, what does it mean when it says recipient address rejected? Or, what does 550 5.4 1 Recipient address rejected: Access denied mean? If you are a frequent email user, you must have encountered a bounce-back message with specific error codes. The most common error codes are 551 and 541, and although they look sophisticated, you don’t have to scratch your head too much. First, you have to know what causes these errors:
-
Invalid Recipient Address
This issue is probably one of the main reasons you have been asking yourself, “why is my email address rejected in Outlook?” One of the causes of the rejected recipient address error is an invalid recipient address. When you are in a hurry, it is easy to miss a character, number, or letter when keying in your recipient’s email address. Failure to notice this may send the message to a different recipient or display an error.
An invalid address may mean that the email address does not exist or is no longer active. So, the emailing system cannot recognize or locate the recipient’s address; thus, the message won’t be sent.
-
DNS Misconfiguration
Non-delivery report (NDR) after sending a message may also arise from Domain Name System (DNS) or mail server misconfiguration. The primary role of DNS is to translate domain names into unique IP addresses. This translation is done using a cache that is susceptible to errors that might corrupt it. When this happens, you may receive the rejected email error with almost all the emails you send. The errors may arise from issues in the browsers or email apps like Outlook. So, it is vital to consider updating your apps and browsers, especially after a Windows 11 upgrade.
-
Anti-Spam Feature
Most people use the anti-spam feature to bar unnecessary emails from their inboxes. But, sometimes, this feature cannot differentiate between genuine and unnecessary emails. So, you might find some external messages redirected to spam. When your recipient has the spam rulebook for their inbox, you are likely to receive the recipient address rejected notification.
-
DBEB Microsoft 365 Settings
Microsoft 365 has developed the Directory-Based Edge Blocking to allow its users to block emails for unknown or invalid recipients. If the Exclaimer Cloud settings have been changed, errors might occur. DBEB is a feature in Exchange Online that protects your folders by blocking email messages to recipients that are not in the Office 365 tenant. Every domain’s DBEB is enabled by default in the tenant.
One of the limitations of Azure AD Connect — or any previous version of directory synchronization software — is that it doesn’t sync public folders that have email addresses. New mail-enabled public folders won’t appear as recipients in Office 365 unless someone manually adds them. To get around this limitation, Microsoft created a series of scripts that will automatically create new mail-enabled public folders whenever a new on-premises one is made. These scripts can be scheduled to run regularly and essentially automate directory synchronization.
Creating an item in Exchange Online representing an on-premises public folder triggers a synchronization process. However, the scripts don’t synchronize with Azure AD; instead, they create a “sync mail public folder” in Exchange Online. Mails should begin flowing once DBEB picks up the new recipient. Therefore, new emails to external recipients are recognized as unknown.
How to Fix ‘Recipient Address Rejected’ Error When Sending Emails
To successfully solve this issue, you first need to answer these questions: Are you getting these error codes when sending emails to any recipient? Have you sent emails to the recipient successfully before? If the error codes come up when sending emails to any destination, then the problem is not in a typo but may be in the DNS configurations. Here are a few tips to help you fix recipient address rejected issues:
-
Ensure the Recipient Address Is Correct
The first thing to do when you get this error is to check if the recipient’s email address is correct (if there are no typos). If this doesn’t help, check if the email address is valid or active. You can do this using various websites or search for the address on Google. If the email address is invalid, ask your recipient to provide a different one. If the error persists, consider the options below.
-
Do a DNS or TCP/IP Reset
A bad cache in the Domain Name System will most likely lead to an error when sending an email. Also, errors 551 and 541 may arise from glitches in the network adapters. All these issues can be solved by performing a reset through a command prompt. Read the step-by-step guidelines below to know how:
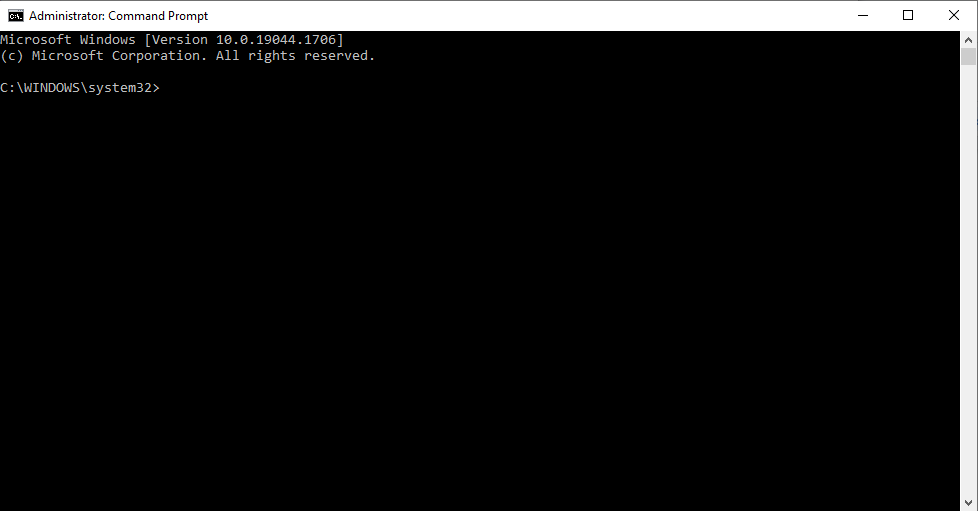
- On your Windows 11, access the search box by clicking on “Search” at the bottom-left of your computer.
- Type “cmd” (without quotes) on the search box, right-click on the “Command Prompt” result, then pick “Run as administrator.” Next, click the “Yes” button on the permission window.
- After accessing the Command Prompt window, type the following commands hitting Enter after each:
- ipconfig /flushdns
- nbtstat -R, nbtstat -RR
- Netsh int reset all
- Netsh int ip reset
- netsh winsock reset
- Once completed, you can close the window and try resending the emails.
If the problem persists, you can re-run the commands to ensure that the issues do not arise from DNS or network adapters. If this is not the case, then move to the following techniques.
-
Store All the Public Folders On-Premise
As mentioned earlier, some “Recipient Address Rejected: access denied” errors are associated with the Directory-Based Edge Blocking (DBEB) option. This glitch happens when you configure your Email with Exclaimer Cloud through Microsoft 365 since this is known to cause external emails to be rejected. To solve the problem:
- Access the Microsoft Azure Active Directory Connect platform via your browser or app.
- After logging in, click on “Optional Features” from the left menu and tap the checkbox to tick it. Then select the checkbox that says “Exchange Mail Public Folders” on the right.
- Tap Next to save the changes.
- Next, try sending the email again and see if the error has been solved.
Picking the Exchange Mail Public Folders option incorporates email addresses from within the company and outside. So, you can securely send messages to external addresses without any restrictions.
-
Keep Folders in Exchange Online
You can also hold your folders in Exchange Online to avoid DBEB-related issues. Mail Enabled Public Folders in Exchange Online don’t support the DBEB option. So, you have to go to the main menu to configure your settings. This includes holding some of your folders on Exchange Online, so you can send emails to internal and external links / addresses without restrictions. However, you should know that this might compromise the security of your data.
Here is a simple guide to help you through the procedure:
- Sign in to Exchange Online using your Microsoft account details. Windows 11 saves your details, so you only need to re-select them.
- Once in, browse to “Main flow,” then tap the “Rules” tab.
- Next, click “Identify Messages to send to Exclaimer Cloud” from the many rules displayed, then select Edit.
- Navigate down to the “Add Exception” option at the bottom
- Below “Use the following connector…”, select “The recipient…is this person”.
- Add the mailboxes you wish to use for public folders. Then save changes.
- Lastly, try resending the email to see if the errors have disappeared.
-
Deactivate the Directory-Based Edge Blocking (DBEB) Option
Completely blocking the actions of the DBEB option is the only viable alternative after trying other ways of going around it, but the errors persist. According to Microsoft support, changing your domain type from Authoritative to Internal Relay is the best solution. This will disable DBEB, and any mail that isn’t accessible in Exchange Online will be directed to mail-enabled public folders on-premises. You can follow these steps to disable DBEB:
- After signing in to Exchange Online, you can access the accepted domains tab from the Mail flow section.
- Click Edit next to the root domain of your public folder.
- Next, to disable DBEB, select the “Internal relay domain” option from the “This accepted domain is” section and click Save.
You should note that using this method might increase traffic on your on-premises Exchange server. This is because emails received by non-existent recipients would be directed to the on-premises Exchange server instead of being rejected.
Exchange can detect mail loops — messages sent back and forth a few times — though it doesn’t prevent it from happening. If the email’s recipient doesn’t exist on-premises, the message will be returned to Exchange Online and forwarded to on-premises again. This process can continue indefinitely.
Conclusion
There are several ways to ensure the “Recipient Address Rejected” error does not hinder you from sending emails smoothly. Most of these solutions are explained above. It is prudent to start with a less complicated solution and advance only if the errors do not disappear. You could also use a PC optimizer such as BoostSpeed 12 to help you clean your registry to reduce the chances of getting random errors.
Sometimes you are unable to fix the errors no matter what you do. When this happens, it is advisable to seek professional help or connect with Microsoft experts via their legal websites.


 Done! Great to see you among our subscribers!