
Microsoft started Windows 11’s official rollout on October 5. The new operating system brings lots of aesthetic and performance upgrades with new features, such as Android app compatibility. You can quickly install the OS through the Windows Update client once it becomes available for your PC.
You can’t install Windows 11 if your system does not meet its requirements. That means you won’t see the upgrade banner on the Windows Update interface. Instead, you’ll continue to receive security and performance updates for Windows 10.
You don’t have to buy a new license to install Windows 11 as you can upgrade from Windows 10 for free.
That said, users with eligible PCs will need a Wi-Fi connection to complete their setup, and those running Windows 10 Home will need a Microsoft account. While a Microsoft account is not compulsory for Windows 11 users, it’s quite difficult to use a local account.
Can You Set Up Windows 11 Without a Microsoft Account?
As we mentioned, the Microsoft account requirement is limited to Windows 10 Home users. If you’re running Windows 10 Pro, you can set up the Windows 11 OS using a local account. What’s more, turning off your Internet connection will likely force the setup to allow you to use a local account.
Many users keep asking, “Can Windows 11 use a local account?” The simple answer is yes. A Microsoft account is only required for the setup phase when installing the Home version of the operating system.
Thankfully, there’s a workaround. In this article, we’ll show you how to install Windows 11 with a local account if you’re using a bootable drive for the installation. You’ll also find out how to switch your system’s sign-in option to a local account.
How to Use a Local Account
This process works if you intend to install Windows 11 using a bootable USB drive. If you don’t know how to create one, this guide will help you learn how to create the drive using the Media Creation Tool.
Note that you can’t use a tool like Rufus to create Windows 11 bootable media. Windows 11 requires Secure Boot, and Rufus’ bootable drive doesn’t work well with the security feature.
Once you create a Windows 11 bootable drive, head to your BIOS and change your boot order. Insert the drive and restart your system. After the setup page opens, choose your language and keyboard layout and select Next. Click on Install on the next page.
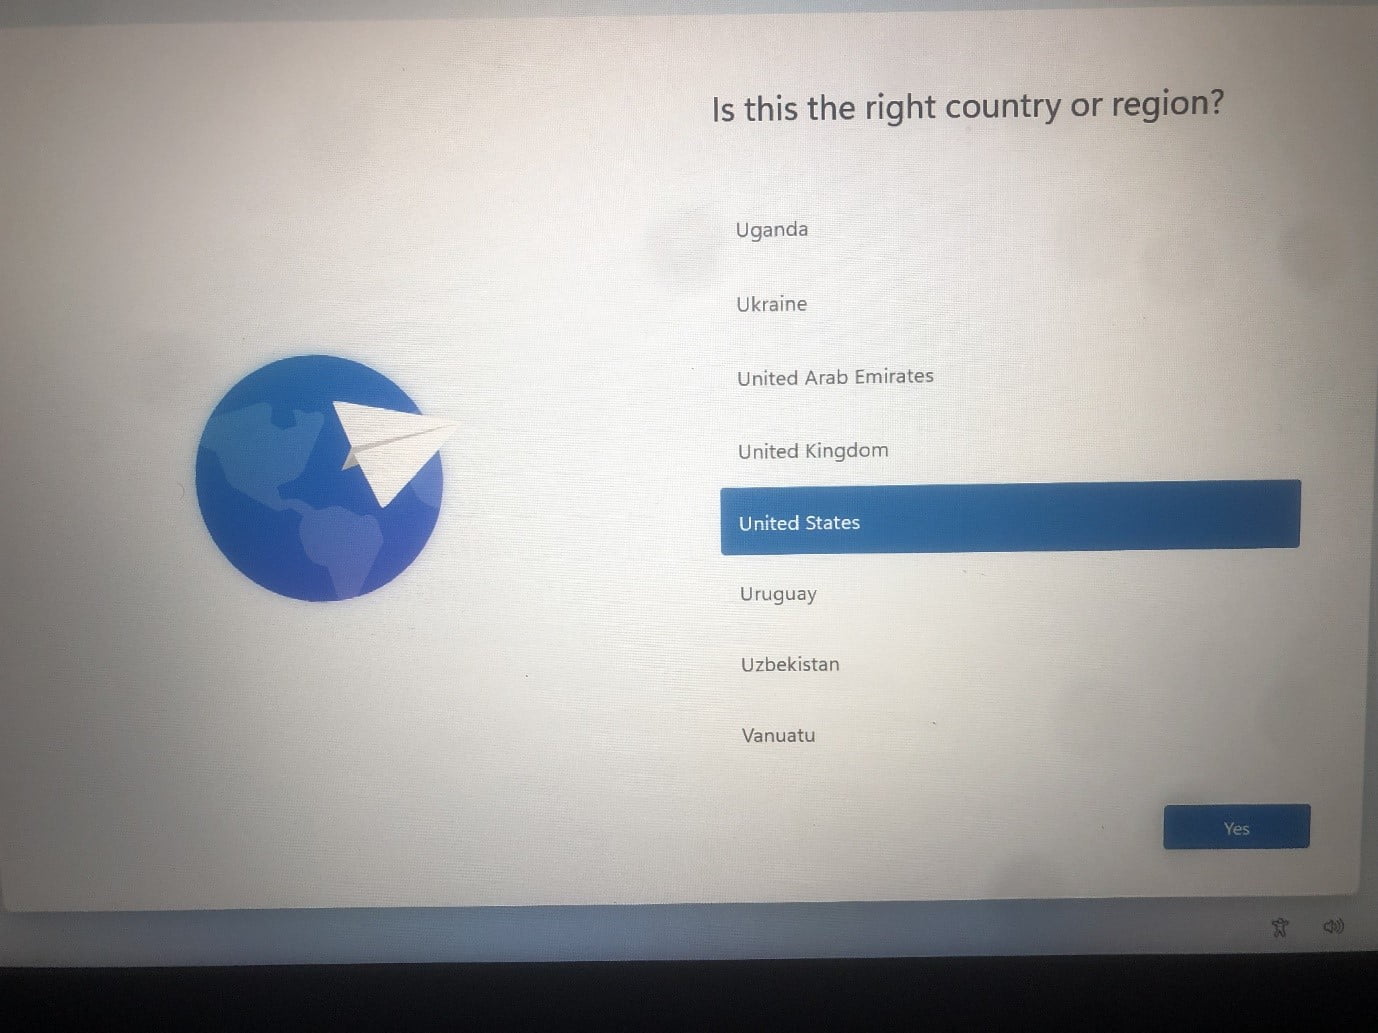
Accept the terms and license agreement, then choose a drive to install the OS. After Windows installs and reboots, you should see a page where you can select your country or region.
After that, select your keyboard layout.
You’ll now be directed to the “Let’s connect you to a network” page. Connect to a network and click on Next.
Enter a name for your device and click Next.
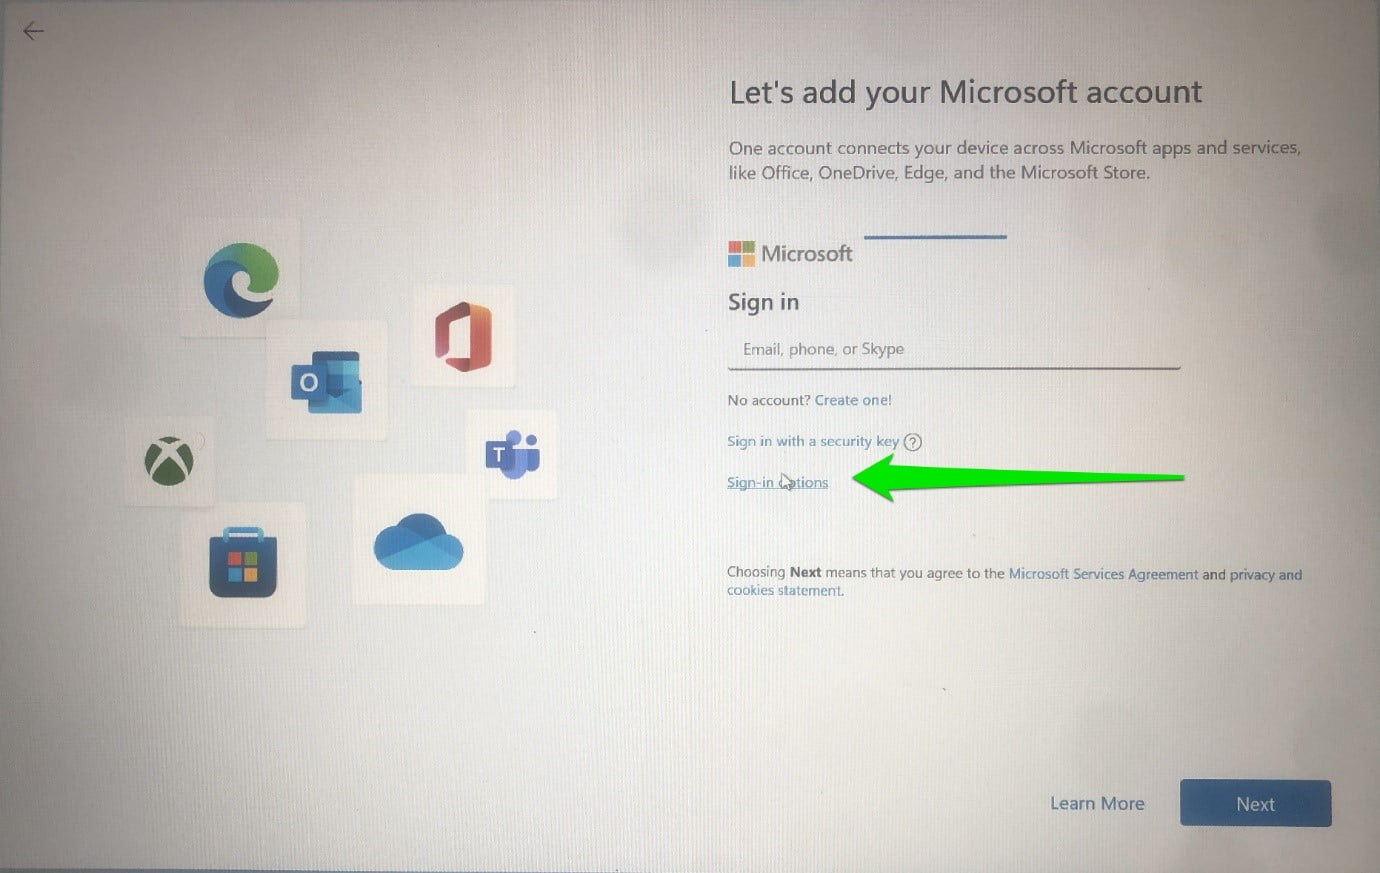
The setup will now ask for your Microsoft account. Click on the “Sign-in options” link and select Offline Account.
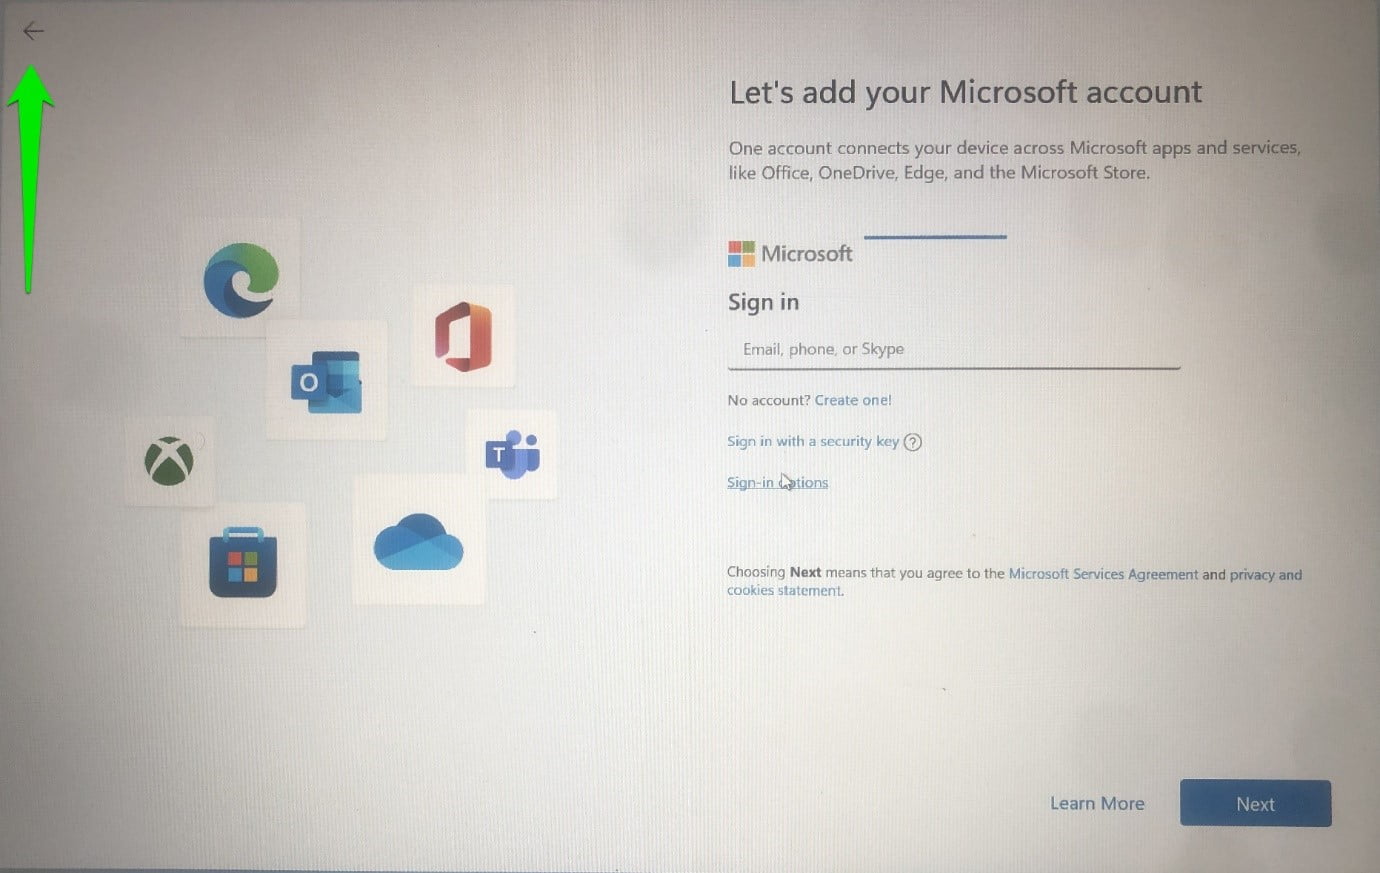
If you don’t see the Offline Account option, turn off your router or disconnect your hotspot and click on the back button. When you get to the “Let’s add your Microsoft account” page, click on the back arrow in the top-left corner.
You should now see the “Who’s going to use this device” page.
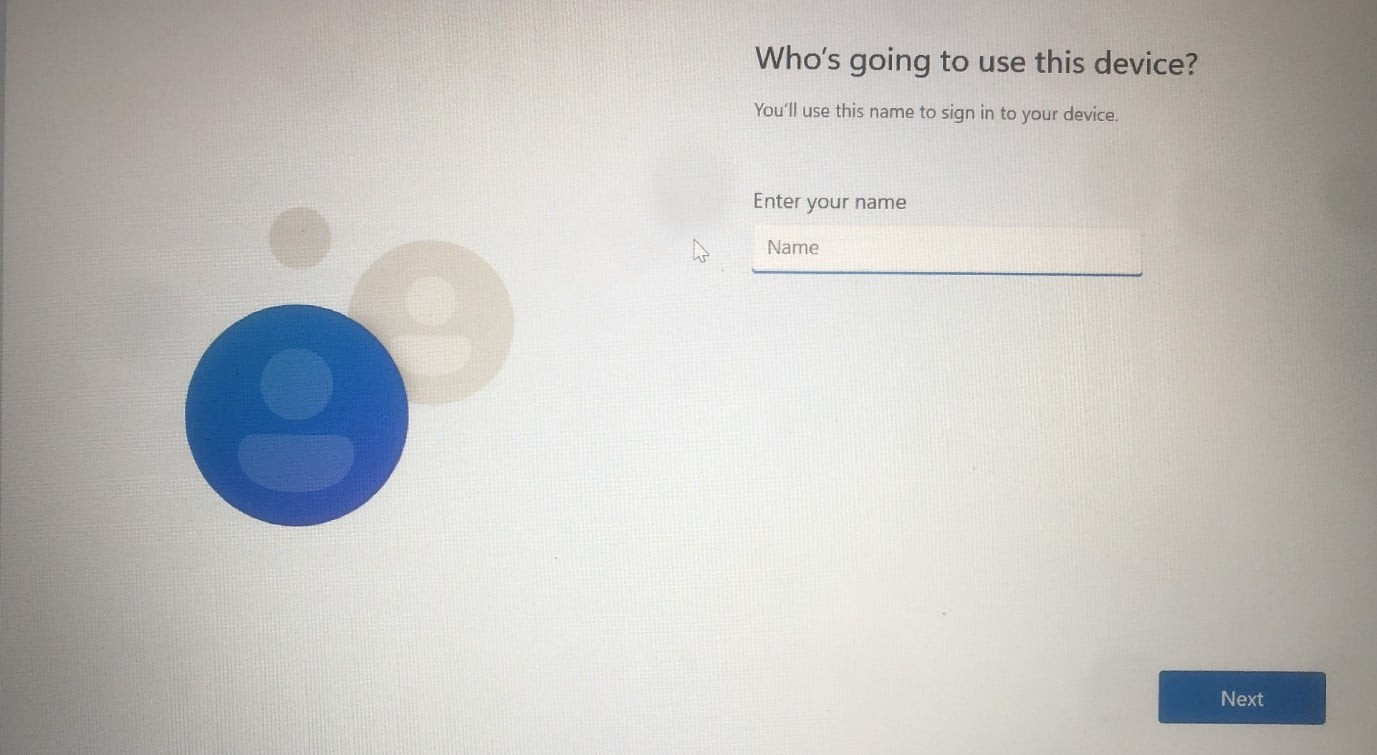
Enter your name and your password and allow Windows to complete the process.
You just completed the setup using a local account.
How to Switch to a Local User Account
If you installed Windows 11 Home via the Windows Update client and want to switch to a local account, here’s how:
- Press the Windows logo + I keyboard shortcut to launch the Settings app.
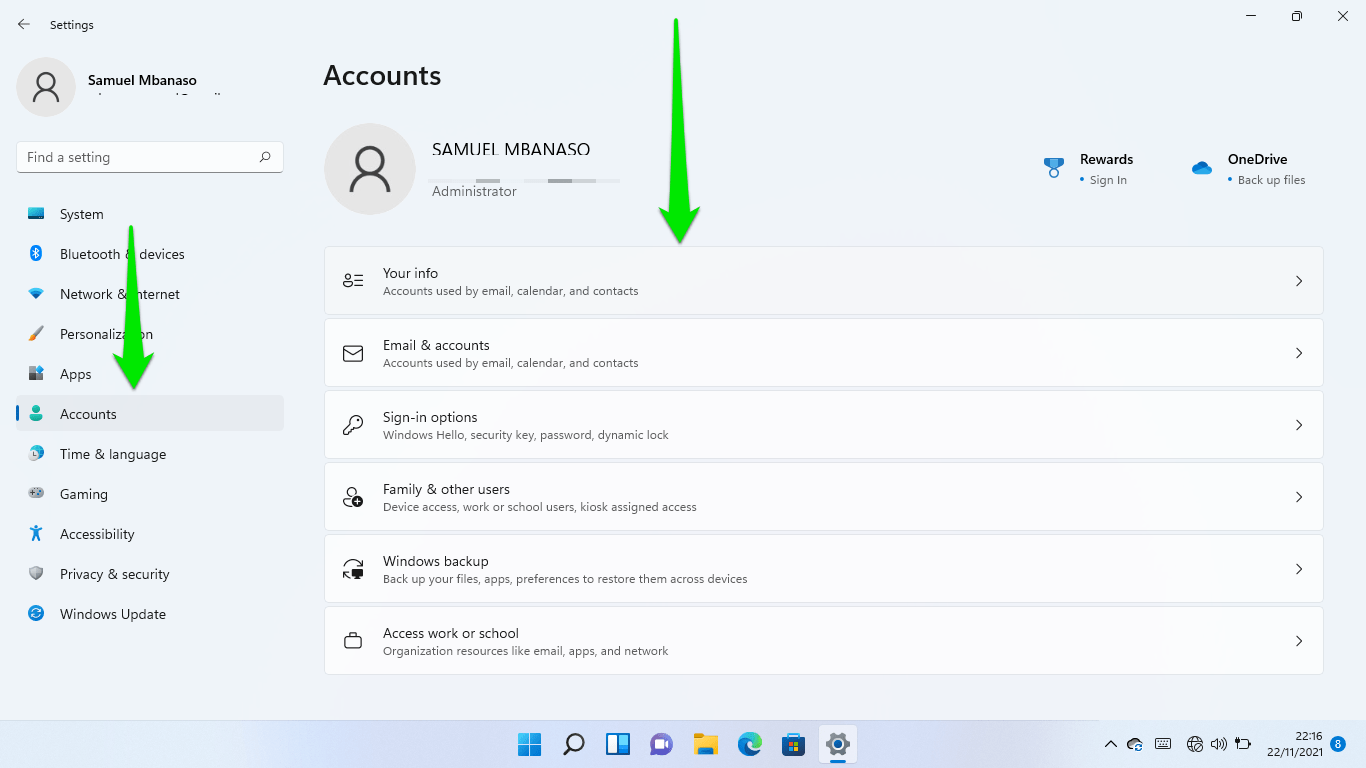
- Click on Accounts once the application opens.
- Next, click on Your Info.
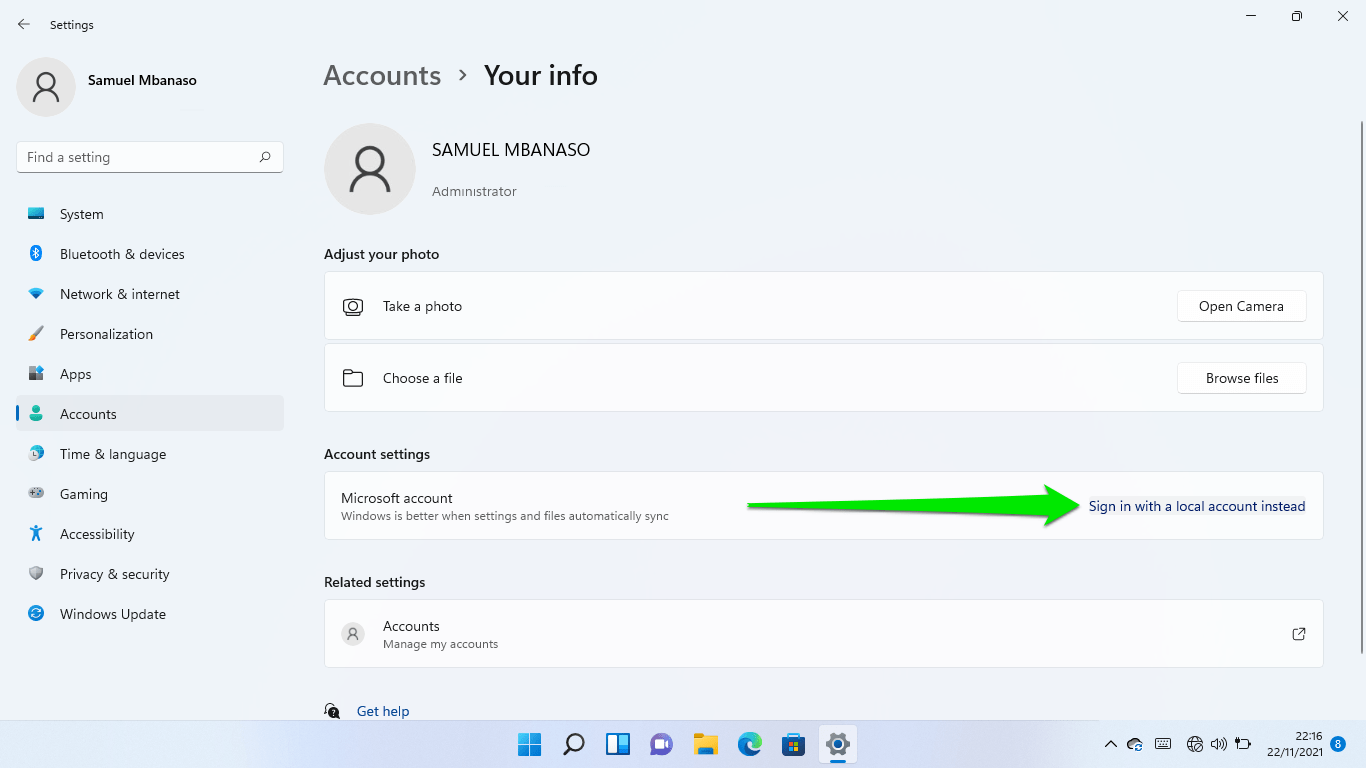
- Go to the Account Settings section and click on “Sign in with a local account instead.”
- A pop-up will appear with the “Are you sure you want to switch to a local account?” message.
- Click on Next.
- Enter your PIN or password.
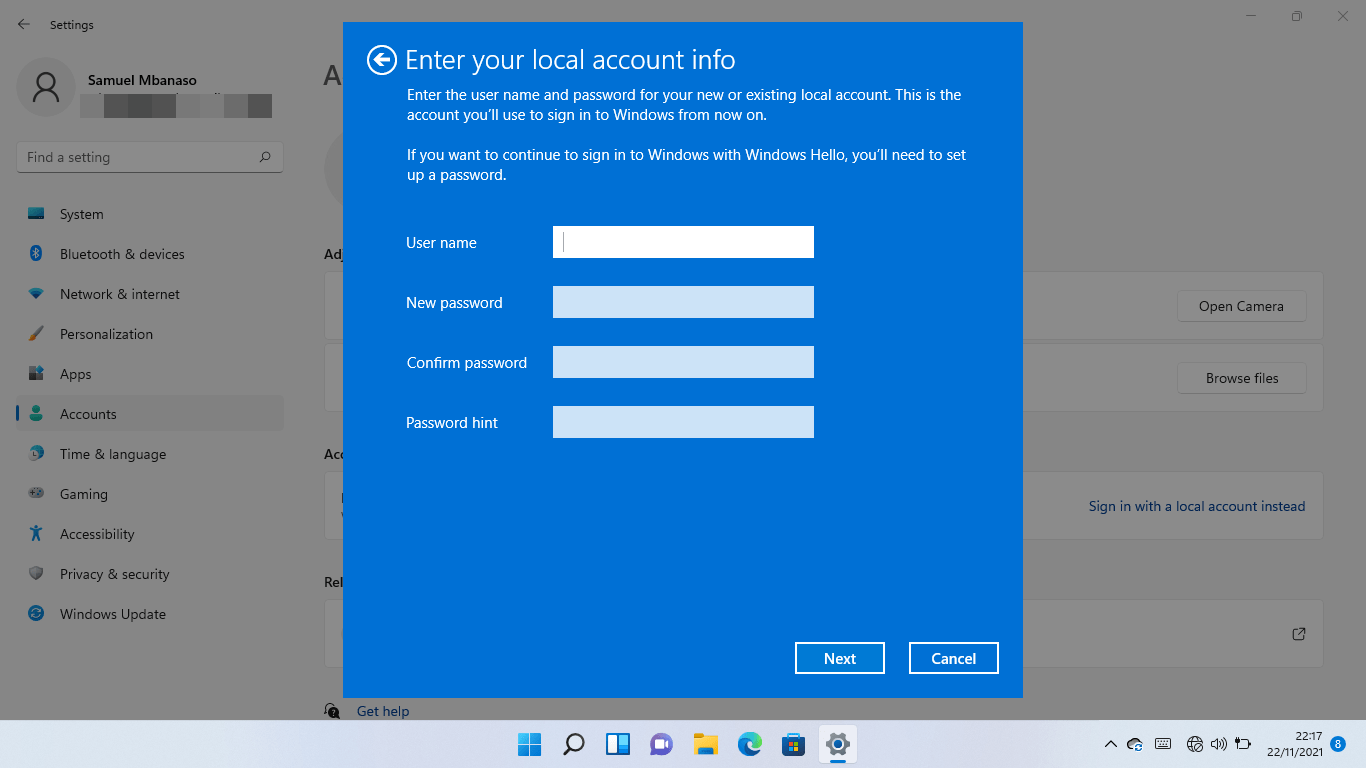
- Now, enter your local account’s username, password, and password hint.
- Restart your computer.
Conclusion
It would be best to go for a Microsoft account for many reasons. For starters, it’ll be easy to sync your profile across devices and recover your files on the go. Once you log in with the account, you are automatically logged into OneDrive, Office, the Microsoft Store, and Edge, meaning you can access your files, apps, browser history, and saved passwords.
In the end, it’s up to you. You can always go for a local account if you prefer to keep your system offline.


 Done! Great to see you among our subscribers!