
Did you know that you can open Microsoft Store and any Microsoft Store app from Command Prompt? The Microsoft Store app comes built into Windows 10 and allows you to download and install dozens of apps and games (free or paid) and purchase Microsoft devices and digital media.
Microsoft Store contains a vast library of apps from every category, including productivity and entertainment. Microsoft continues to change Microsoft Store by introducing new improvements and features.
There are several ways to access Microsoft Store. So, before we show you how to start the Windows 10 store app from the command line, here are other ways to do that:
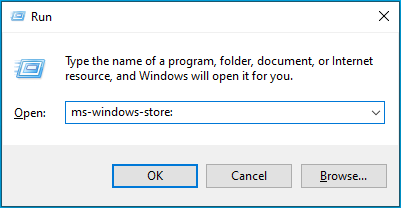
How to Open Microsoft Store from Run
Press the Win + R shortcut, type ms-windows-store: and press “Enter”.
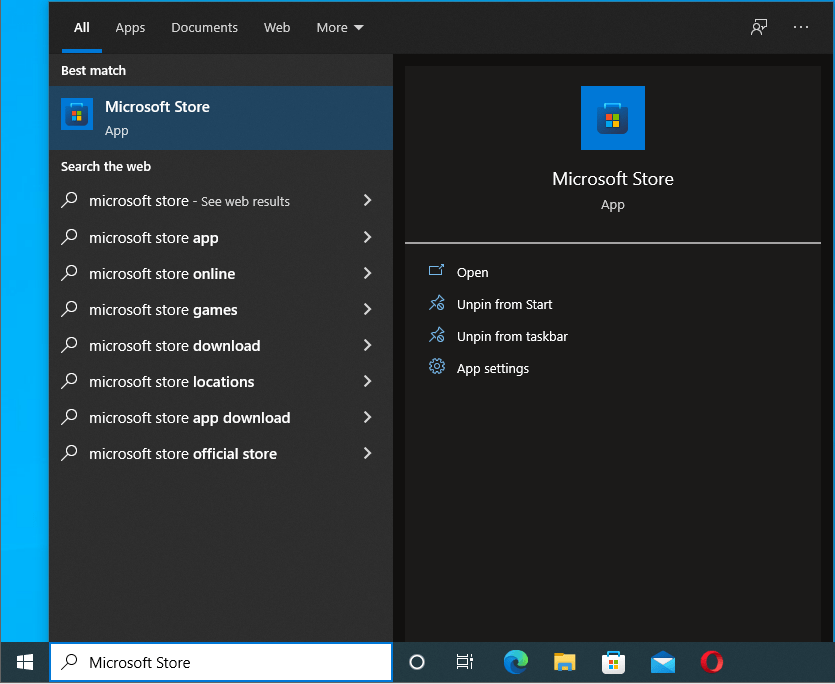
How to Open Microsoft Store from the Start Menu
Press the Windows logo on your keyboard or click on “Start”, type “Microsoft Store” (without quotes), and hit the “Enter” key.
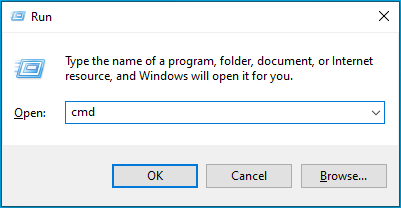
How to Open the Windows 10 Store App from the Command Line
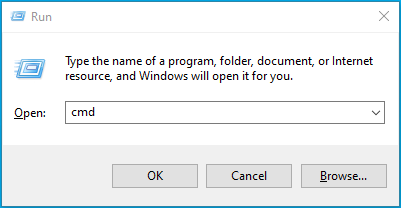
- Press the Windows logo key + R combination, type cmd into the “Run” input field, and press “Enter”. If you want to open an elevated Command Prompt, type cmd and hit the Ctrl + Shift + Enter combination.
![Type cmd into the “Run” input field.]()
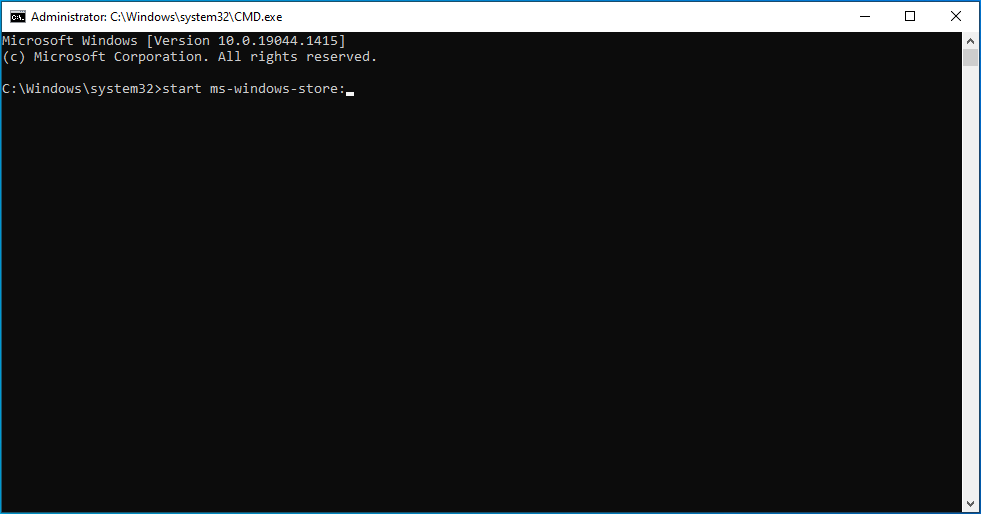
- In the Command Prompt window, type “start ms-windows-store:” (without quotes) and then press the “Enter” key. Don’t forget to add the colon at the end of the command – otherwise, it won’t execute.
![Type start ms-windows-store: into cmd.]()
If you plan to use the Microsoft Store app frequently, it’s wise to pin it to the taskbar. To do that, simply right-click the Microsoft Store icon in the taskbar (after you launch it), and then select “Pin to taskbar”.
How to Open Microsoft Store Apps from Command Prompt
Now, we mentioned that it’s possible to open any Microsoft Store app from Command Prompt. But, to be able to do that, you need to know the app’s Package Family Name and App ID. Yes, every Microsoft Store app has a unique Package Family Name and App ID.
If you’re wondering how to get this information, don’t worry – we cover everything in our guide below:
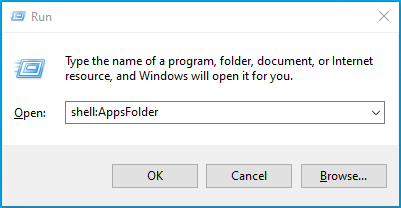
- Open the “Run” dialog box using the Win + R key combination.
![Open the “Run” dialog box.]()
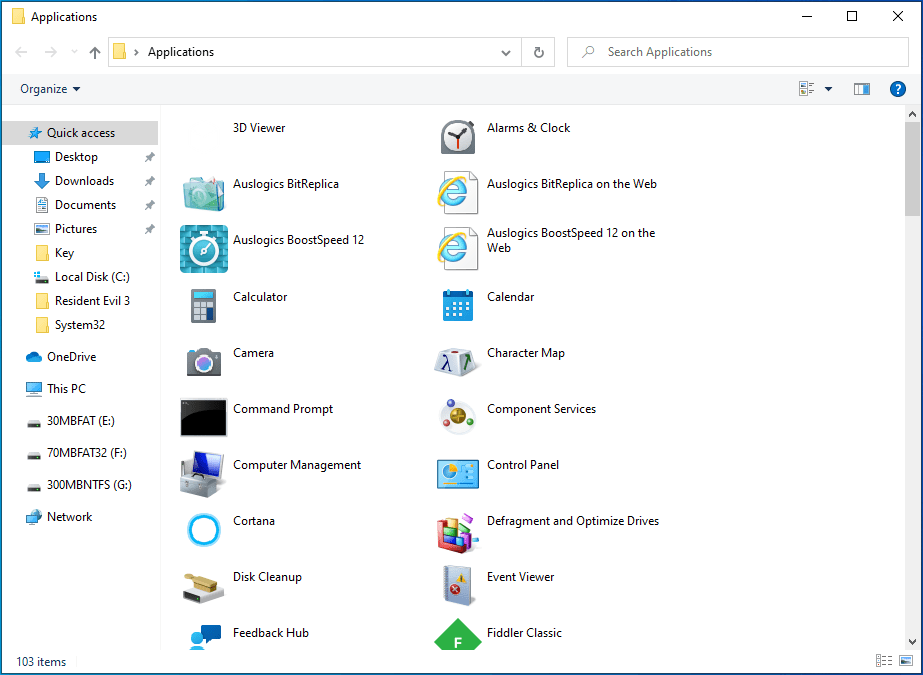
- In the text field, type the command shell:AppsFolder, and hit “Enter”. This opens File Explorer with a list of the Microsoft Store apps installed on your PC.
![Type the command shell:AppsFolder.]()
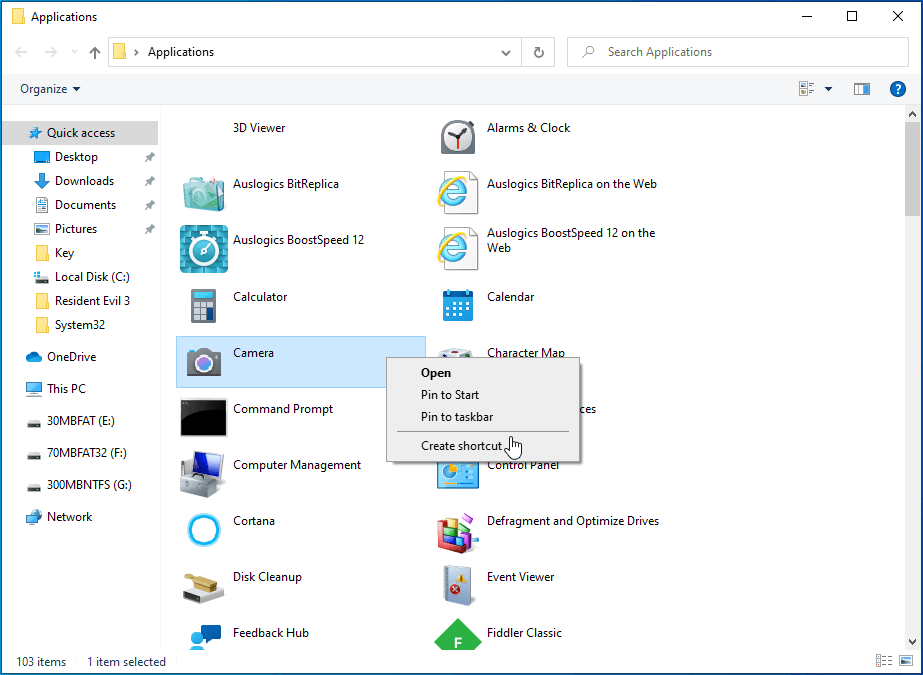
- Locate the Microsoft Store app that you wish to open. We’ll use the Camera app as our example.
![Locate the Camera app.]()
- Right-click on it and click “Create shortcut”.
![Click “Create shortcut”.]()
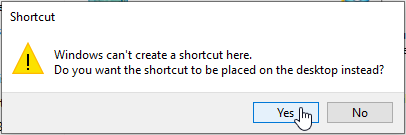
- Click “Yes” on the warning prompt that appears.
![Click Yes.]()
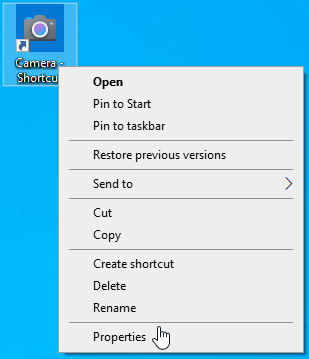
- Next, go to your desktop, right-click on the Camera shortcut you just created, and select “Properties”.
![Click Properties.]()
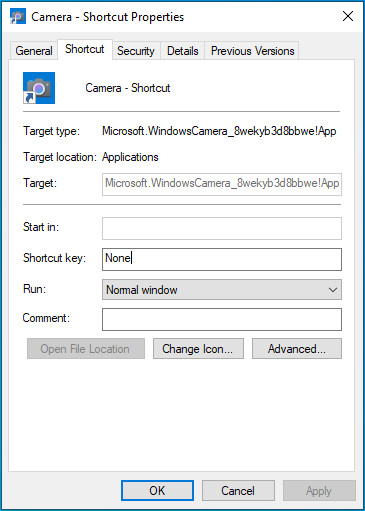
- In the “Properties” window, the “Shortcut” tab should be selected by default. If it’s not, be sure to click on it. Next to “Target Type”, you’ll see a specific description. Note it down somewhere.
![Note Target type.]()
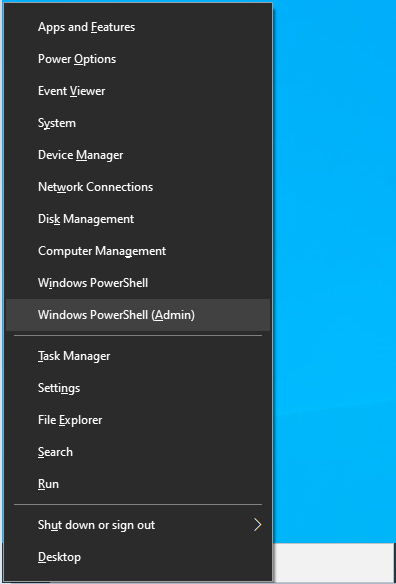
- Now, go to your Start menu, type “PowerShell” (without quotes), and hit “Enter”. Alternatively, press the Win + X keyboard shortcut and select “Windows PowerShell (Admin)”.
![]()
- Click “Yes” on the system prompt.
![Click Yes.]()
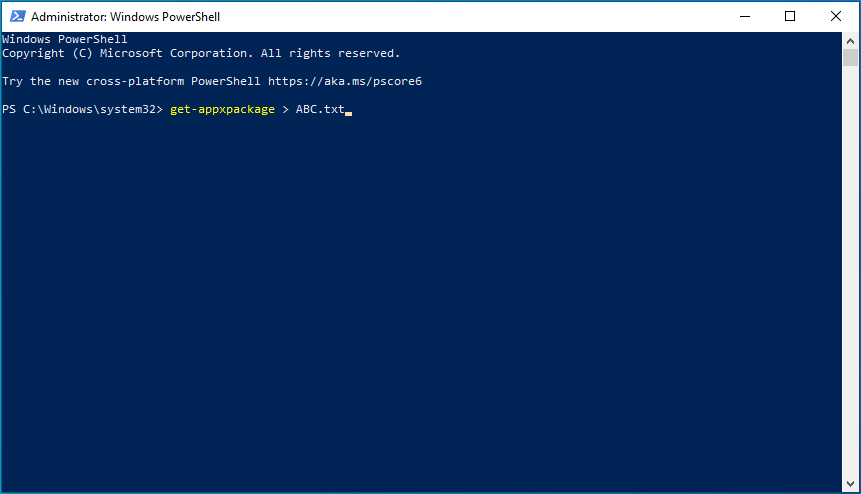
- Type or paste the following command next to the blinking cursor on the Windows PowerShell screen: get-appxpackage > ABC.txt.
![Type get-appxpackage > ABC.txt.]() The idea is to create a text file containing the details of the apps installed on your system. Replace the “ABC” part with any suitable name.
The idea is to create a text file containing the details of the apps installed on your system. Replace the “ABC” part with any suitable name. - Launch the “Run” dialog box again and type or paste the command %UserProfile% followed by “Enter”. This command opens the User profile page in File Explorer.
![Paste the command %UserProfile% followed by “Enter”.]()
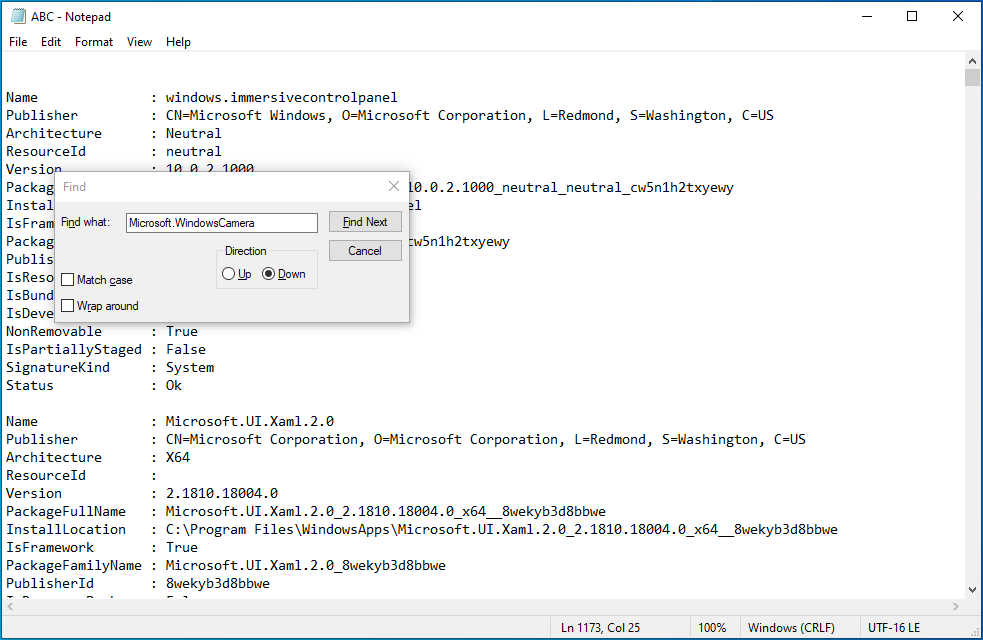
- Here, you should see the text file you just created. Double-click on it to find the app’s PackageFamilyName. To do that, use the Find function. Press the Ctrl + F shortcut and paste or enter the “Target Type” details (those you noted in step 6 above). You don’t need to type the complete information as shown in Target Type. All you need are the first few characters. You can also use the Target name, which in our case is “Microsoft.WindowsCamera”.
![You'll be taken to the User profile page.]()
- Click on the “Find Next” button to continue.
![Click Find Next.]()
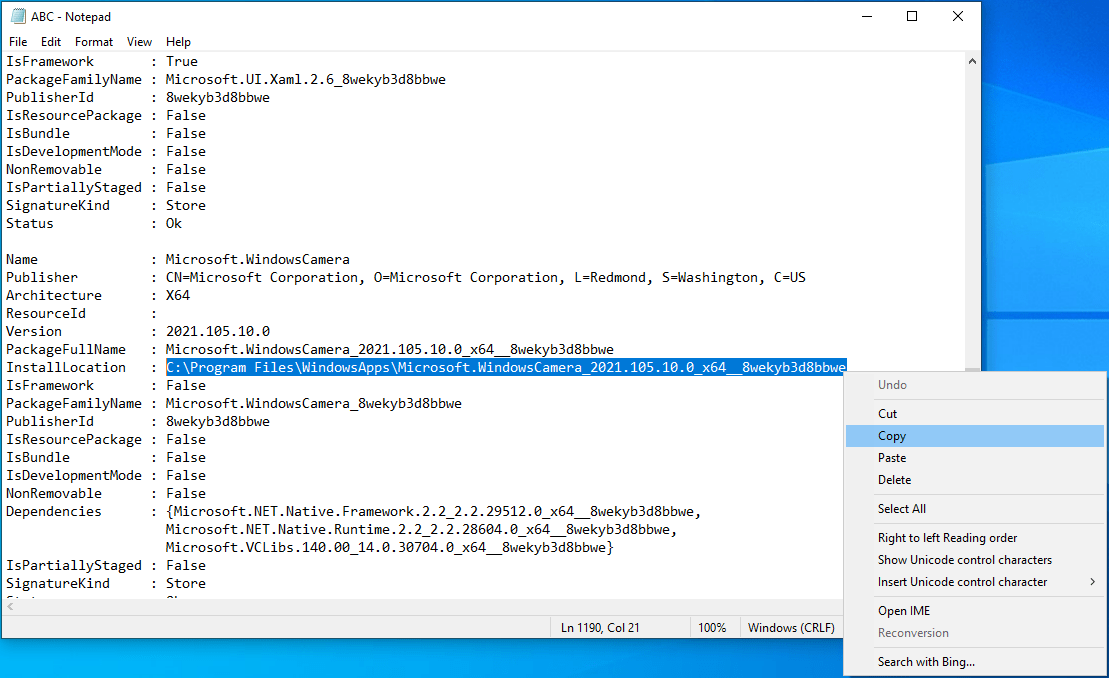
- Next, copy the details next to “InstallLocation” to copy the installation location or path of the app and paste it into the File Explorer address bar.
![Copy the installation path.]()
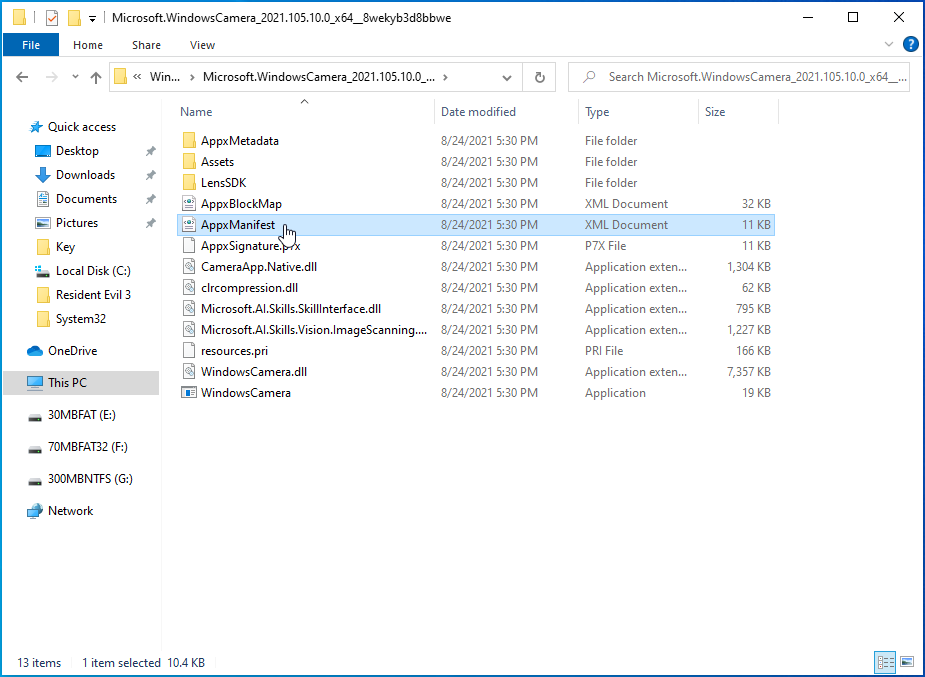
- Press “Enter”. You should see a file labeled AppxManifest. Double-click on it to open it.
![Double-click AppxManifest.]()
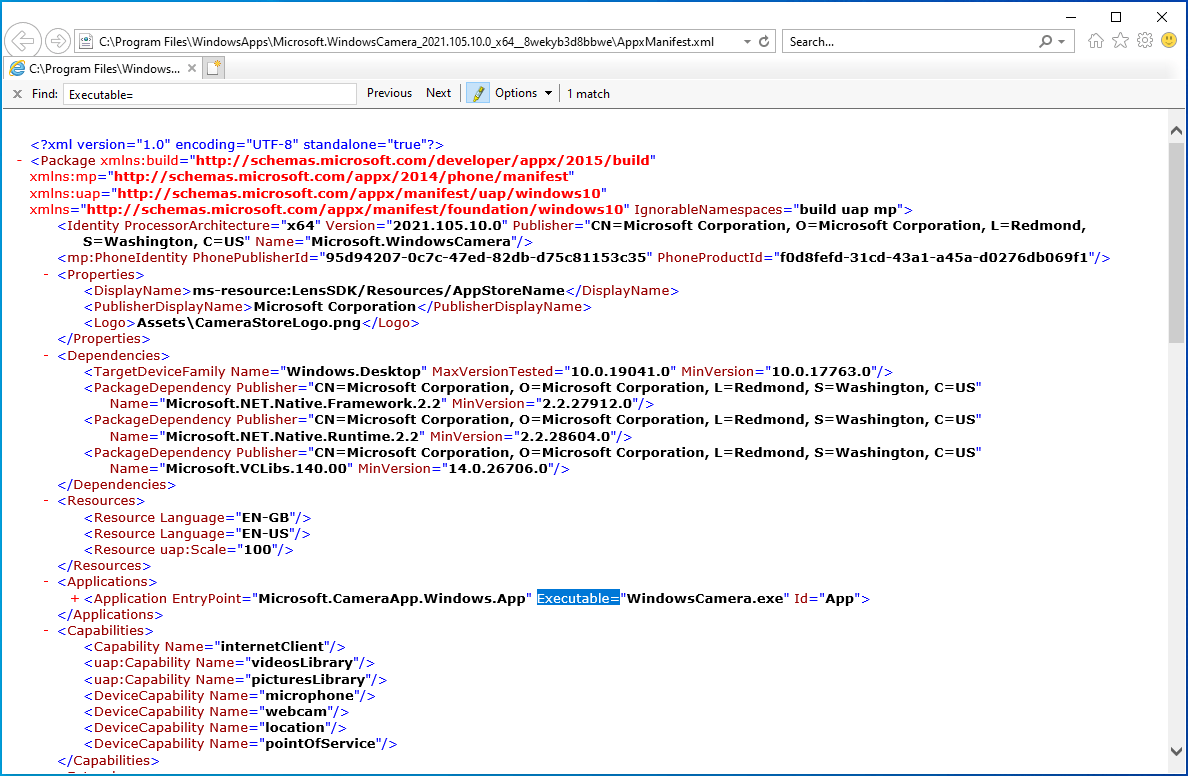
- By default, the XML file will launch in Internet Explorer. The next step is to locate the APP ID. To do that, press the Ctrl + F shortcut, type Executable=and hit “Enter”. You should see the App ID in the same line.
![Locate Executable= in the file.]()
- Now, launch Command Prompt by pressing the Win + R keyboard shortcut, type the command cmd into the “Run” dialog box, and press “Enter”.
![Type the command cmd into the “Run” dialog box.]()
- In the Command Prompt window, type or paste the command exe shell:appsFolder\<PackageFamilyName>!<App ID>and press “Enter”. Replace <PackageFamilyName> and <App ID> with the correct PackageFamilyName (refer to step 11) and App ID (refer to step 16). In our case, the PackageFamilyName is Microsoft.WindowsCamera_8wekyb3d8bbwe and the Application ID is App. So, the command line will look something like this:

 The idea is to create a text file containing the details of the apps installed on your system. Replace the “ABC” part with any suitable name.
explorer.exe shell:appsFolder\Microsoft.WindowsCamera_8wekyb3d8bbwe!App

That’s it. The command should open the Camera app on your desktop.
Keep Your Apps Running Optimally
To enjoy using your computer, everything, from the system to the apps, must be optimized. Auslogics BoostSpeed is the ultimate PC optimization suite that gives you access to more than a dozen tools, all designed to tweak your system and boost its performance.
From the PC junk cleaner to registry cleaner to file duplicate remover, you can customize each of these tools to work according to your preferences. You can also defragment your drives for faster response, disable startup programs that are slowing down the boot process, and remove unneeded applications to reduce bloatware.
BoostSpeed has been carefully developed to detect all speed-reducing issues on your PC and effectively fix them. If your computer has been freezing or crashing a lot lately, you can rest assured that this program will help resolve all those issues. It’s easy to use, and since it automates the system maintenance process, you don’t have to do much. Just click a button, sit back and let the tool do the hard work for you.
For more personalization, you can go to the “Optimize” tab, where you can activate a particular Windows mode to get the most out of your system. To ensure optimal performance throughout, you can schedule automatic maintenance once and enjoy a quick and smooth experience on your PC 24/7.


 Done! Great to see you among our subscribers!