- HDD vs SSD
- Optimize SSD: Easy Tweaks You Need to Try Now
- Tweak #1: Enable AHCI Mode
- Tweak #2: Make Sure TRIM Is Enabled
- Tweak #3: Use an SSD Cleaner
- Tweak #4: Disable Disk Defragmenter
- Tweak #5: Disable Indexing Service/Windows Search
- Tweak #6: Update Your Drivers and SSD Firmware
- Tweak #7: Enable SSD Write Caching
- Tweak #8: Use High-Performance Power Settings
- Tweak #9: Turn Off System Restore
- Tweak #10: Optimize Page File for SSDs
- In Conclusion

SSDs (Solid State Drives) are great, but they have a downside: they slow down with age and eventually become slower than they were when you first got them. This isn’t because of anything you did wrong; it’s just the way these kinds of drives work, and the only real solution is to buy another one and do a fresh install of your operating system onto it.
Fortunately, there are some simple things you can do to speed up your existing SSD now before it reaches that point! Check out this guide on how to make your SSD faster now before it gets worse.
HDD vs SSD
Most people have a hard drive in their computer: your operating system, applications, photos, and music all live on it. The reason they’re so slow is that they have a spinning disk that can’t access data as quickly as a solid-state drive (SSD).
If you’ve got an SSD inside your laptop or desktop PC, you’ll be happy to know there are some simple ways to make it even faster. In fact, most new PCs come with both kinds of drives, which means you can enjoy some serious performance gains by doing some solid-state storage drive tweaks.
Optimize SSD: Easy Tweaks You Need to Try Now
You don’t need to be tech-savvy in order to optimize your SSD; all you have to do is follow these simple tweaks:
Tweak #1: Enable AHCI Mode
AHCI is usually confused with IDE mode. The IDE mode is designed to help you easily add and remove hardware components, but it comes with a speed penalty. AHCI or advanced host controller interface, on the other hand, uses a more streamlined approach that doesn’t require too much overhead, making your computer faster overall.
If you want to optimize your SSD, switch from IDE mode to AHCI in your BIOS. However, you must do this before installing your Windows OS. Otherwise, your PC will fail to boot properly. It will only force you to format Windows and reinstall it in the correct mode.
Then again, it is possible to enable the AHCI mode on a Windows install that is in IDE mode. And for this, you need to access the registry. Here’s how:
- Launch the Run menu by pressing the Windows + R shortcut.
- Input regedit and press Enter to launch the Registry Editor.
- Then go to HKEY_LOCAL_MACHINE\System\CurrentControlSet\services\iaStorV and change the reg_dword start value from 3 to 0.
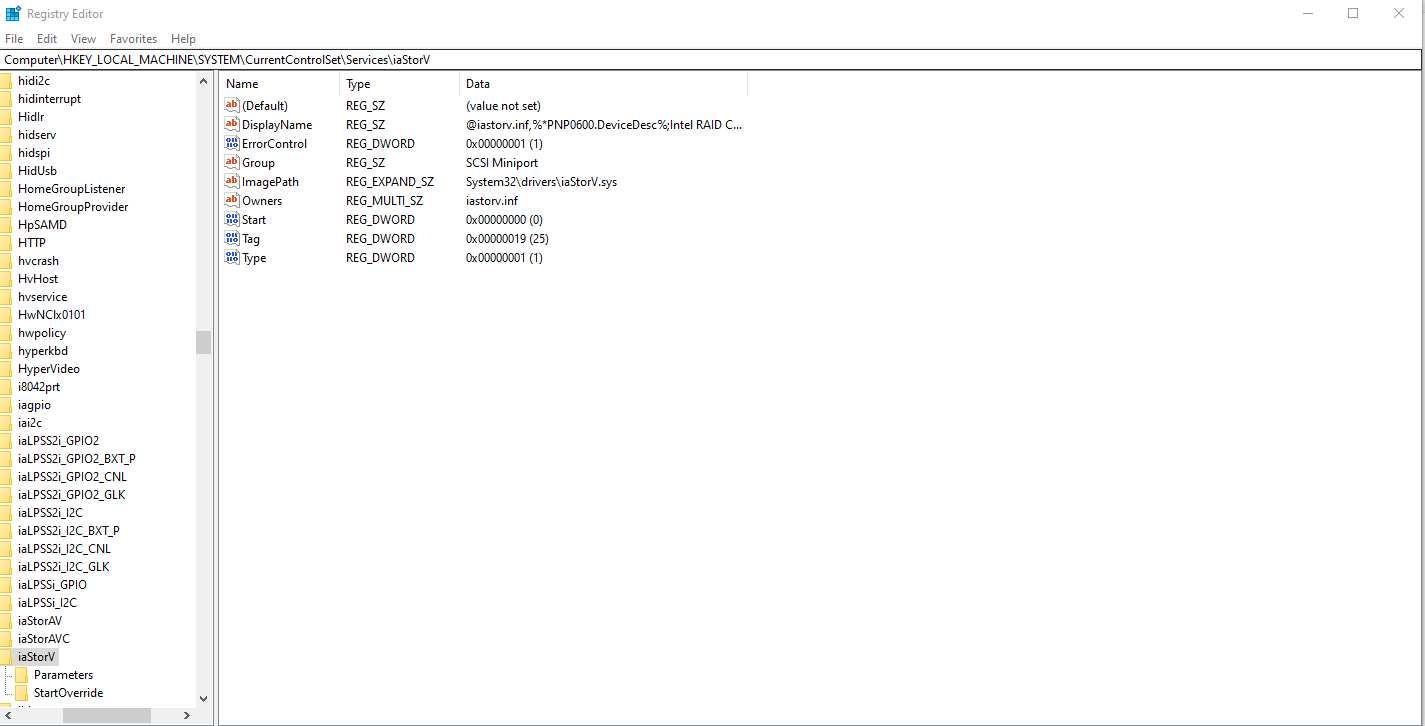
- Next, access this location: HKEY_LOCAL_MACHINE\System\CurrentControlSet\services\msahci and change the reg_dword start value to 0.
- Once done with these two changes, restart your computer and enter the BIOS mode.
- Now, switch from the IDE mode to AHCI.
Tweak #2: Make Sure TRIM Is Enabled
TRIM is a Windows technology that cleans up unneeded data and increases drive speed. When you delete files from your computer’s hard drive, it doesn’t actually delete them. It just marks those files as unused and moves them to a part of your hard drive marked unallocated. The unused portion of space still takes up physical space on your hard drive, even though you can’t use it.
With TRIM enabled, when you delete files, they are deleted immediately instead of being moved to unallocated storage. So, there is no unnecessary space.
By default, this technology should be enabled on your Windows device. But sometimes, you may need to double-check this. Here’s how to ensure that TRIM is enabled:
- Press the Windows or Start menu and type cmd into the search field.
- Select Run as administrator.
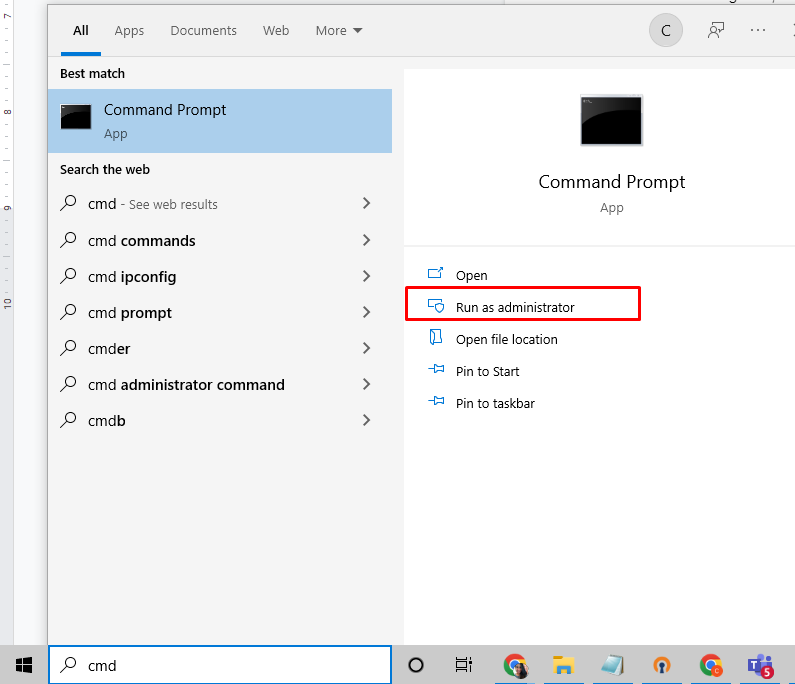
- When the Command Prompt window launches, execute the fsutil behavior query DisableDeleteNotify command.
- Check the result. If it says “0,” it means that TRIM is enabled. Otherwise, it is disabled.
Tweak #3: Use an SSD Cleaner
SSDs (solid-state drives) have taken over from traditional hard drives, and it’s easy to see why. Because SSDs don’t rely on moving parts to access data, they are much faster and more reliable than traditional mechanical drives.
However, SSDs can only function properly if there is no unnecessary junk on them. Having unnecessary files or unnecessary duplicate files causes fragmentation, which slows down your drive.
If your device has an SSD, some sort of boost speed software program may help you clean up unneeded files. These programs can help keep your system running smoothly by cleaning out temporary files and removing clutter from your registry.
Tweak #4: Disable Disk Defragmenter
Disk Defragmenter is a maintenance tool that physically reorders your files on your hard drive to be more contiguous and efficient. This is done because non-contiguous files take longer to load, reducing speed and performance.
If you’re using an SSD with TRIM, it doesn’t matter how fragmented your disk is. It’s still going to run at peak speeds. And since defragmenting will put wear and tear on your flash-based drives, there’s no point in doing it. So, go ahead and disable the disk defragmenter if you haven’t already.
Take note, though. Windows does not automatically defragment your solid-state drive (SSD). That’s because, unlike traditional hard drives, SSDs are capable of much faster write speeds without creating excessive amounts of fragmentation.
But when a file is deleted from an SSD, its physical location on the flash memory chip isn’t actually erased. Instead, those bits are simply marked as available and left untouched until they’re overwritten by new data, which means there’s always some amount of fragmentation present on an SSD.
Tweak #5: Disable Indexing Service/Windows Search
When searching, Windows checks all your disks when looking for documents. This means every bit of data on your computer is being read multiple times as it searches. An SSD, because of its design, can only be written a certain number of times before it starts deteriorating in performance and dies, making indexing your search process even more important.
By disabling indexing service, Windows is prevented from writing data over an existing file. This means you can significantly increase your drive’s life span without reducing its speed. So, how do you disable indexing service?
- Press Windows Key + R to launch and open up a Run box.
- Type services.msc.
- Find Windows Search and right-click on it.
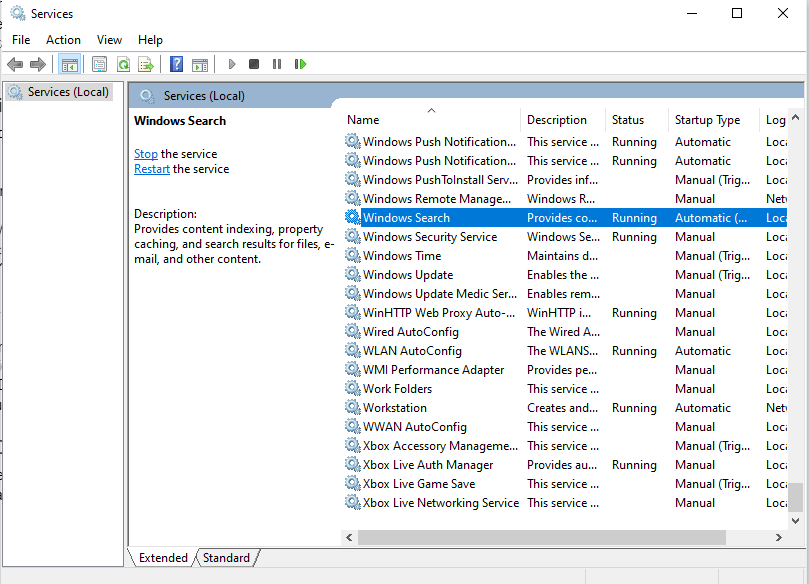
- Select Properties and click Stop.
- Change Startup type to Disabled.
- Click OK and restart your PC.
Tweak #6: Update Your Drivers and SSD Firmware
You know how you can update your computer’s operating system or applications, right? Well, with solid-state drives, it’s similar.
Solid-state drives have firmware that can be updated in much the same way. Make sure your SSD’s firmware is up to date by going into its settings. Be wary of updating firmware while you are using them. They should be updated when they aren’t in use. Since these updates don’t take very long and because an updated firmware improves performance, we highly recommend checking up on them regularly!
Tweak #7: Enable SSD Write Caching
When enabled, write caching, or wear leveling, ensures that data is written to each block evenly. This prevents individual blocks from becoming too worn out, which can cause your drive to crash and corrupt all of your data.
To enable it on Windows, do the following:
- Open up Computer Management (by pressing Win+X and choosing Computer Management).
- And then, go under Storage and select Disk Drives.
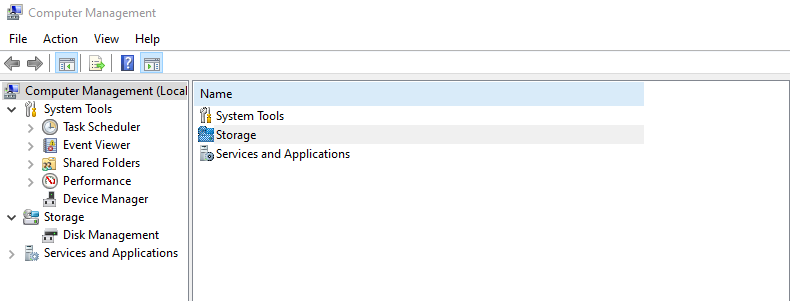
- Right-click on your SSD then select Properties.
- Go to the Policies tab.
- Check the Enable Write Caching option or select Enable write caching on the dropdown menu.
- All other tweaks should be left at their default settings; changing them could cause system instability or instability in games.
Tweak #8: Use High-Performance Power Settings
Windows devices offer a power-saving plan named Balanced that can be found in your computer’s Advanced Power Settings. What you want to do is click on Change Plan Settings, and then select Change Advanced Power Settings.
From there, change Sleep (which includes Standby) and Hibernate after to 0 minutes. Next, scroll down and find Processor Power Management and make sure Maximum processor state is at 100% (if it isn’t already). Make sure Minimum processor state is at 1% and that both Min Screen brightness and System Audio are muted or off.
Tweak #9: Turn Off System Restore
System Restore keeps copies of files that you’ve previously saved and restarts them if your computer ever crashes. While it’s nice to know that, in theory, you won’t lose anything if your system goes down, all those older versions of files can take up a lot of space, especially if you’re saving a lot on an SSD.
You probably don’t need previous versions of files taking up room on your solid-state drive. Plus, System Restore is an easy way for malware and hackers to access sensitive information. They can essentially go back in time on your PC and dig through old files that are stored in older restore points.
Here’s how to disable System Restore:
- Click Start then Control Panel.
- Select System and Security.
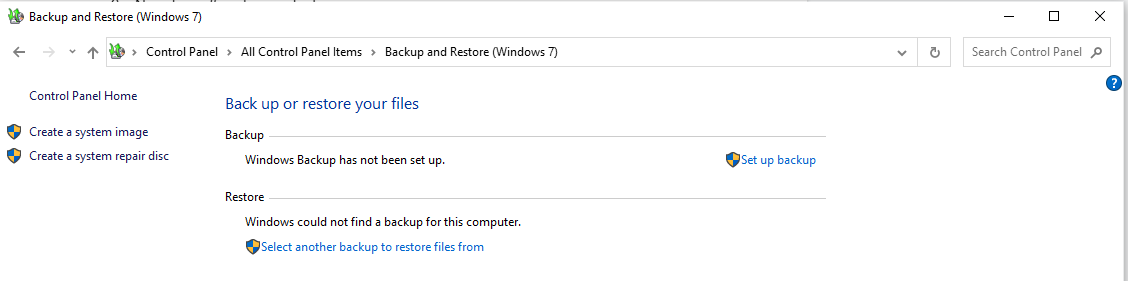
- Go to Backup and Restore Center.
- Choose Create a restore point or change settings (Windows 10).
- Open the System Protection tab and click Configure.
- Now, turn off system protection.
- Click OK then Restart Now.
Tweak #10: Optimize Page File for SSDs
If you’re using an SSD, your computer may be defaulting to paging your inactive data onto a separate drive. This can make things slower as it uses extra storage space, too.
To change where Windows stores paging files (or disable them entirely), do this:
- Head to Control Panel. Here, select System and Security.
- Click System then Advanced system settings.
- Select Settings under Performance, then click on Advanced.
- Under Virtual memory, select Change… from under Paging file size for all drives. You can either choose custom size or uncheck the box next to Automatically manage paging file size for all drives.
- Click OK when you’re done making changes.
- If you disabled page files altogether, restart your computer so that they’re no longer in use.
- That should speed up boot times and overall performance of your PC, and it’ll save some hard-drive space as well!
In Conclusion
One of the most common complaints about Solid State Drives (SSDs) is their somewhat sluggish performance, especially compared to traditional hard disk drives (HDDs). Although SSDs are indeed significantly faster than HDDs, they still aren’t as fast as many people would like them to be.
Luckily, there are several Windows tweaks that can help optimize your SSD so that it performs faster and more reliably while still maintaining the safety and speed benefits inherent in SSD technology. This article shares ways to make sure your SSD is set up optimally on Windows.


 Done! Great to see you among our subscribers!