- Why Is Your Hard Drive Not Showing Up?
- Method 1. Reboot Your PC
- Method 2. Make Sure There Is a Proper Connection between the Drive and Your PC
- Method 3. Try a Different USB Port
- Method 4. Connect Your Drive to Another Personal Computer
- Method 5. Update Your Drivers
- Method 6. Initialize Your New Disk
- Method 7. Change the Assigned Drive Letter
- Method 8. Run the Hardware and Devices Troubleshooter
- Method 9. Get Rid of Malware
- Method 10. Enable Your Hard Drive in BIOS
- Method 11. Perform a Hard Reset
- Final Thoughts
External drives are devices used for backing up important data. Unfortunately, they are not immune to issues and may develop malfunctions over time. In this article, you will learn what to do if your external hard drive is not showing up in Windows 10/11 and how to prevent similar problems from occurring in the first place.
Why Is Your Hard Drive Not Showing Up?
Your hard drive is a simple yet extremely helpful device: you plug it into your computer, see it appear among your devices, and drag and drop your files into it. This way, you will prevent data loss in case of an unforeseen disaster.
However, things may not go as planned. Sometimes, external drives fail to appear when connected to a PC. Luckily, the issue in question is easily fixable. To get rid of it, you need to start with figuring out the possible culprit.
Your new hard drive not showing up on Windows is a problem that may stem from one of the following issues:
- The hard drive is not initialized.
- The hard drive needs formatting.
- The hard drive is not properly connected to your PC.
- Your hard drive is disabled in BIOS.
- One of your drivers is outdated.
Below you will find easy-to-apply tips on how to make your external hard drive detectable. We recommend that you start with the first method and proceed downwards until your problem gets eliminated.
Method 1. Reboot Your PC
This is the simplest yet one of the most effective solutions to both software and hardware issues by far. If your external hard drive is not showing up in Disk Management on Windows 10/11, start your troubleshooting journey by restarting your computer:
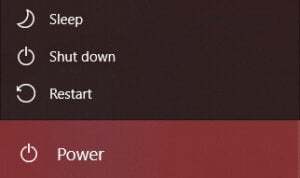
- Navigate to the taskbar.
- Click on the Start button.
- Then click the Power button.
- Select Restart from the options.
After rebooting your PC, check whether the hard drive problem is fixed. If it persists, try the following solution.
Method 2. Make Sure There Is a Proper Connection between the Drive and Your PC
Your hard drive being plugged into your PC does not necessarily mean it gets the power it requires to function the right way. You might be experiencing an issue caused by a loose connection or a malfunctioning cable.
To eliminate this kind of problem, you need to check your cables. If your power cable or SATA cable is damaged, it is time to replace it with a new one. If your cables look fine, unplug your hard drive and then plug it into the computer again. Then restart your PC using the instructions we provided above and check whether your hard drive is now visible.
Keep in mind that while most external drives get enough juice from a USB connection, some of them may need wall power to function. Such drives usually come with a wall charger, so make sure to check whether yours have one. If it does, ensure that the charger is connected to a power supply. If your hard drive comes with two USB cables, it is essential that both are plugged into your PC.
Method 3. Try a Different USB Port
If your hard drive is not showing up in Disk Management, there may be something wrong with the port it is plugged in. Try connecting your external hard drive into another USB port on your PC. If it’s plugged into a USB 2.0 port, try a USB 3.0 port instead. If you are using a USB hub, try attaching the drive to your PC directly.
Method 4. Connect Your Drive to Another Personal Computer
If the issue persists, consider plugging the drive into a different PC. The point is, a compatibility issue might be at play, preventing the external hard drive in question from showing up on your computer. In such a case, the best option is to use a PC running an operating system different from yours. For instance, if you are having issues connecting the drive to your Windows PC, check whether the problem appears when a Mac is involved. Your drive might be incompatible with your OS, in which case you could consider purchasing another HDD or even switching to an SSD.
Method 5. Update Your Drivers
Outdated drivers can cause multiple issues, including hard drives not showing up in BIOS, File Manager, or Disk Management. To avoid problems, you need to keep all your driver software in good condition. There are several ways you can keep it up to date.
Your first option is to manually download updates for your devices from their manufacturers’ websites. This is the most cumbersome and risky solution since it is extremely time-consuming and may result in you accidentally installing incorrect software and destabilizing your system. Another downside is that you must know exactly what updates your drivers require.
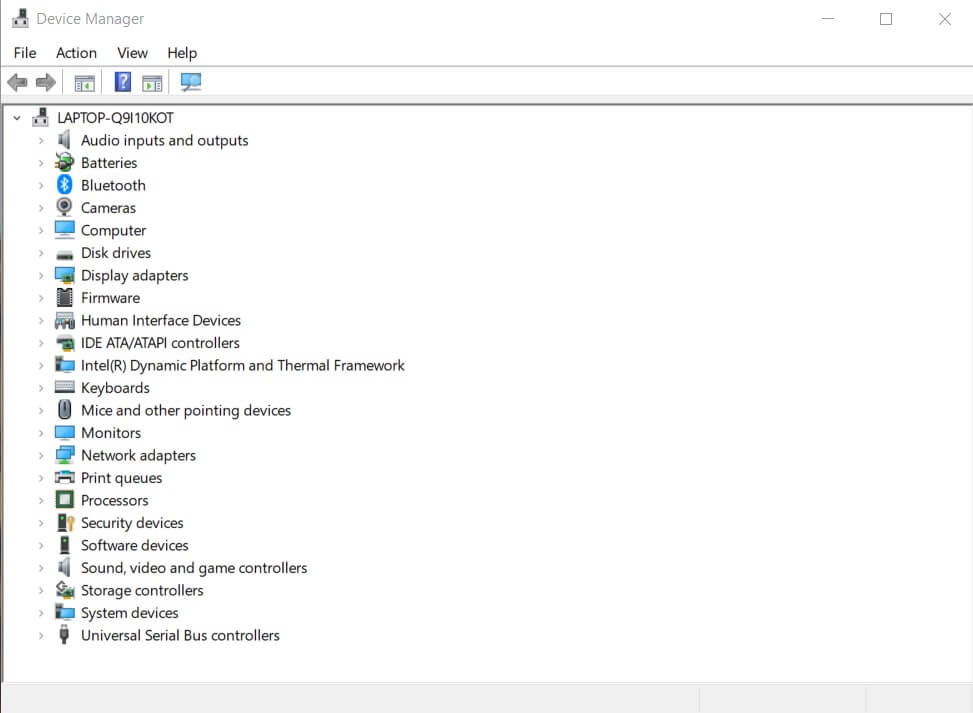
Another solution involves using Device Manager – a built-in Windows utility that allows you to manage and control all the hardware attached to your computer. You can use this tool to update drivers for all your devices.
Your Windows OS can automatically download suitable updates, yet it may fail to find the latest versions for your hardware. Another problem is that you have to update each of your devices manually.
To update a device using Device Manager, follow the instructions below:
- Right-click on the Start menu icon.
- Select Device Manager from the options.
- Expand the category housing the device whose driver needs updating.
- Right-click the device in question and select Update driver.
- Click Search automatically for drivers.
Update all your drivers one by one and restart your PC. If your hard drive issue is driver-related, it should evaporate after this.
If you want to save yourself some time and effort, your best bet could be using a dedicated software tool for updating all your drivers in one click.
Method 6. Initialize Your New Disk
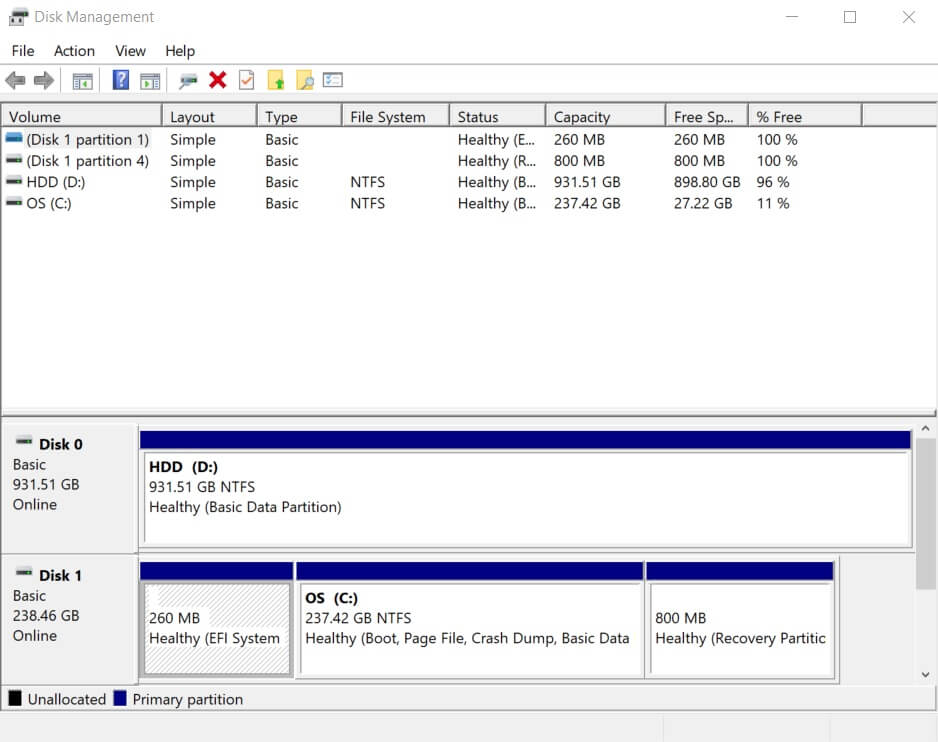
If your hard drive is not showing up on your PC, you may need to utilize Windows 10/11 Disk Management in order to initialize it.
Disk Management is a helpful Windows utility designed to assist you in managing hard drives connected to your PC and performing storage-related tasks, such as partitioning your drives.
Here is what you should do to get your issue fixed:
- On the taskbar, navigate to the Search box.
- Type Disk Management into the box.
- When the Disk Management option appears, select Run as administrator.
- If you can’t run the Disk Management utility with administrator privileges, type Computer Management into the Search box instead, click Run as administrator, and then select Disk Management under Storage.
- Locate the disk you want to initialize and right-click it.
- If the disk is offline, right-click it and select Online.
- Select Initialize Disk.
- Check whether the right disk is selected.
- Accept the default partition style and click OK.
- Choose and hold the unallocated space on the drive.
- Select New Simple Volume.
- Click Next.
- Choose the size of the new volume and click Next again.
- Select the file system you want (usually NTFS).
- Click Next and Finish.
After initializing your new disk, reboot the PC and check whether the volume is now detectable.
Method 7. Change the Assigned Drive Letter
When you attach a new drive to your computer, it is assigned a letter that helps you identify it. While it may not look very intuitive, changing the letter of a problematic drive that is not showing up in File Explorer could fix the situation in many cases. To do that, you need to make use of the Disk Management utility:
- Open Disk Management (use the instructions from the previous fix to run the tool).
- Locate your drive in the new window and right-click it.
- Select Change Drive Letter and Paths from the menu.
- A new window will open. Select Change.
- Assign a new letter to your drive.
- Click OK.
Hopefully, the new identification letter has made your new drive properly visible.
Method 8. Run the Hardware and Devices Troubleshooter
Your Windows system has a built-in troubleshooting tool called the Hardware and Devices Troubleshooter. It is designed to fix issues related to your hardware and devices.
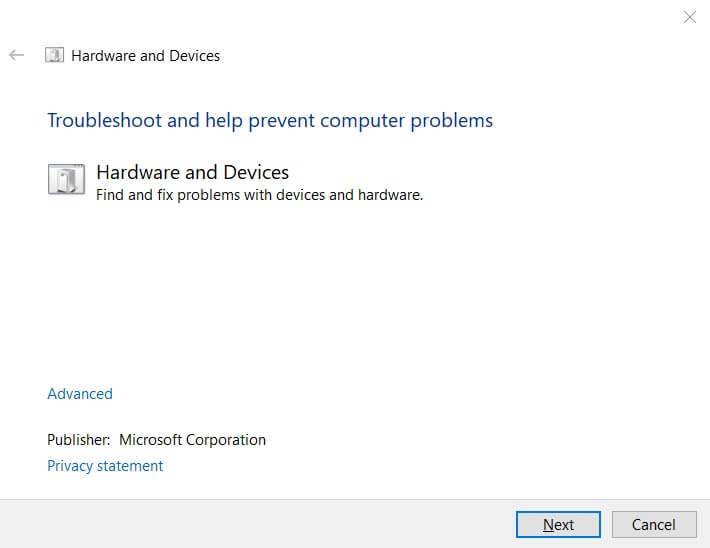
You can try and fix your hard drive problem using this utility:
- Hit the Win + R shortcut.
- Into the Windows Run dialog, enter msdt.exe -id DeviceDiagnostic.
- When the Hardware and Devices Troubleshooter opens, click Next.
The tool will automatically check your PC for hardware issues. Based on the results of the scan, you will be able to decide what to do next.
Method 9. Get Rid of Malware
Hard drive issues can be malware-related, so it makes sense to carefully scan your computer for malicious entities. One of the best ways to eliminate malware issues is to run Windows Security. It is a built-in Windows tool designed to purge malware from your system.
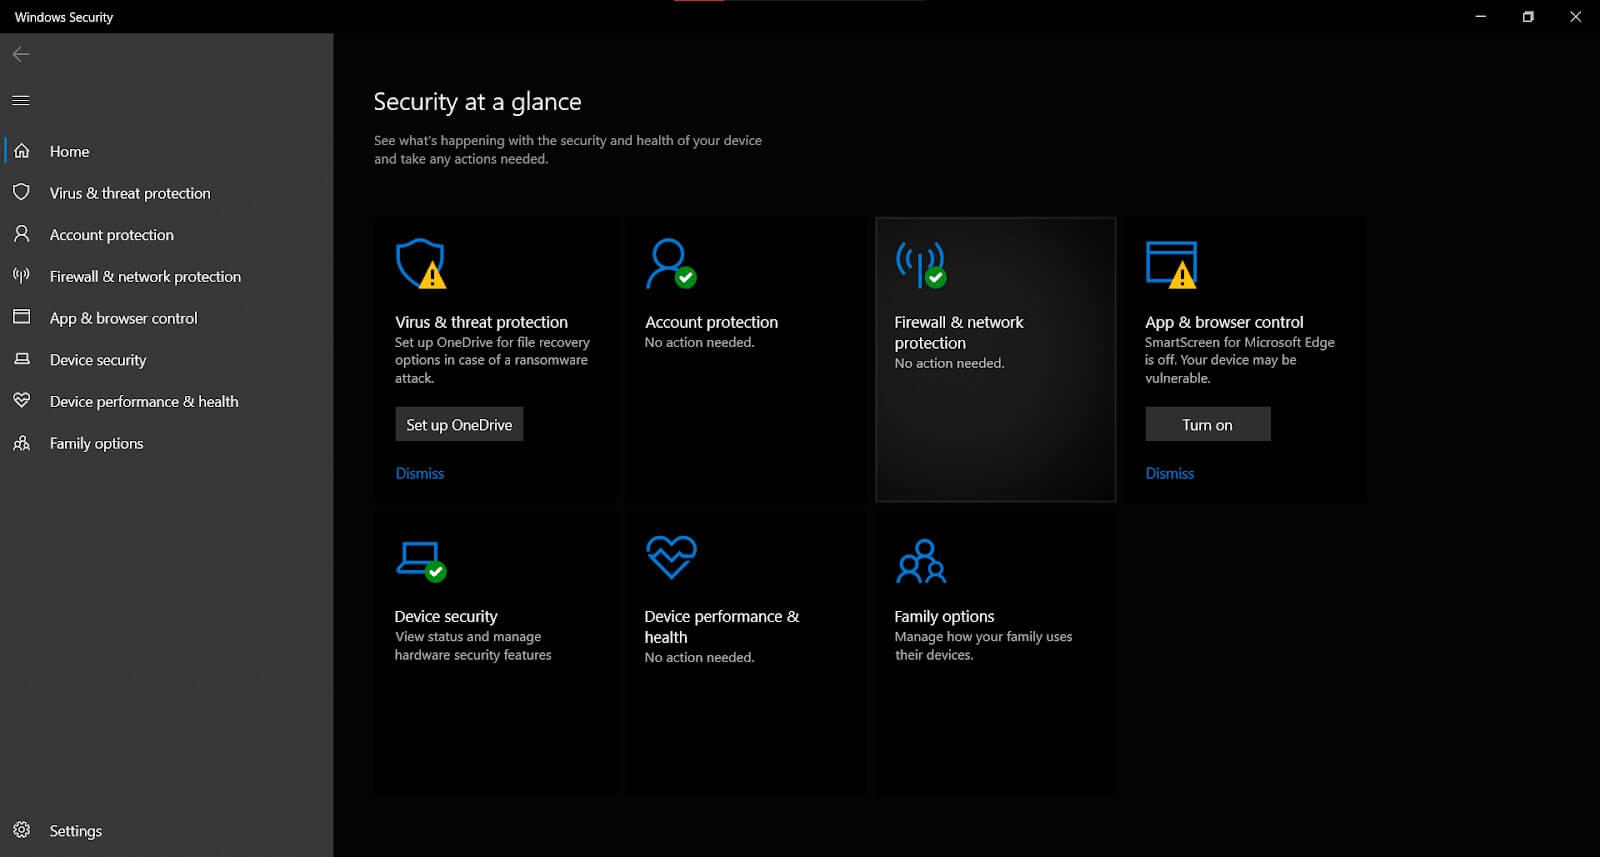
Here is how you can run a malware scan with Windows Security on your PC:
- Click on the Start button and select Settings.
- Navigate to Update & Security and select Windows Security.
- Click Open Windows Security.
- Select Virus & threat protection.
- Click on Scan options.
- Select the type of scan you want to run and click Scan now.
- Wait for the scan to finish and restart your PC.
While Windows Security is an effective tool, it may not be enough to detect the latest threats when scanning your system. We recommend fortifying your protection with a powerful anti-malware tool to make sure there is no trace of malware on your PC.
Method 10. Enable Your Hard Drive in BIOS
If your hard drive is disabled in BIOS, your system will not be able to detect it. To rectify this problem, you need to enter BIOS and enable the disk:
- Restart your PC and press F2 or Del until you are taken to BIOS. If this method doesn’t work, consult your PC’s manual to check how you can enter BIOS.
- Navigate to the Integrated Peripherals option using the arrow keys.
- Hit Enter on your keyboard to proceed.
- Select USB Controller and set it to Enabled.
- Save the changes and exit BIOS.
After taking the steps above, you need to restart your computer.
Method 11. Perform a Hard Reset
If you keep running into the “Boot device not found. Please install an operating system on your hard disk” error message, hard resetting your PC may be your last resort:
- Start by turning off your laptop and detaching it from any external power source.
- Disconnect all external devices from your PC.
- Remove the battery. If your laptop has a non-removable battery, refer to the manufacturer’s website to find out how to get rid of residual electrical charge using a keyboard combination.
- Press the Power button.
- Hold the Power button for about 15 seconds.
- Insert the battery.
- Connect your computer to a power source.
- Turn your computer on.
- In the window that appears, select Start Windows Normally using your keyboard’s arrow keys.
- Press Enter to proceed.
Final Thoughts
We hope our instructions have helped you resolve the issue of your external hard drive not showing up in Windows 10/11. If the problem is gone but you are displeased with how your hard drive operates, you may need to defragment the disk or fix bad sectors on it. There are also ways you can speed up your hard drive to improve your PC’s overall performance.


 Done! Great to see you among our subscribers!