
Multiplayer games are growing more popular daily as they allow you to play with friends or family, which is pretty exciting. Minecraft Realms is among the best and smoothest multiplayer games today. However, this has not been the case lately, as most gamers have been complaining about the “Minecraft Realms could not invite the provided name” problem. This error appears when trying to invite other gamers, which can be quite disappointing. Luckily, a few methods can help solve this issue.
What Causes the Could Not Invite the Provided Name Minecraft Realms Error?
Although the exact cause is still unclear, below are the most common culprits of this problem on Windows PCs:
- Entering the wrong username
- Child protection in Xbox
- Issues with the game or launcher
- An outdated Minecraft version
How to Fix Minecraft Realms Could Not Invite the Provided Name
Enter the Correct Usernames
Minecraft will likely pop up this error if you enter the wrong username when inviting other players. This is because the game can’t identify the strange username, hence showing an error. Therefore, relaunch the game and then carefully enter the usernames to avoid errors. If this does not work, then the following method might help.
Restart Your Game Launcher
Your game launcher might also have some minor issues that may trigger the error in question. A simple relaunch should help remove this error from your device and allow you to easily invite other gamers.
Update the Game
If you haven’t been updating your Minecraft Realms, then it probably has some bugs that could be causing “Minecraft Realms could not invite the provided name” on your device. Fortunately, installing the latest updates might resolve the issue.
Follow this guide to update the game on Xbox:
- Go to the app’s dashboard and choose “My Apps & Games”.
- Head to the left side of the window and choose “Games”. Then select “Minecraft”.
- Press the menu button on your Xbox controller.
- When the menu opens, choose “Manage Games & Add-ons”.
- Navigate to the left pane and select “Update”.
- The update should start downloading automatically. If it does not, press the A button on your controller to start the process manually.
- Verify the update and choose an installation region if prompted to.
- Wait for the update to complete, and then try inviting your friends to see if this tactic worked.
If you are on a PC, then follow these steps to update Minecraft:
- Visit the Mojang Studios page and log in to your Minecraft account.
- Click on the Redeem button under Minecraft for Windows.
- Sign in to your Microsoft account.
- Choose Next.
- Select Confirm.
- Open the Microsoft Store and search for Minecraft. Then install it to finish the update.
Update Your Drivers
If you usually play Minecraft on your PC, you need updated drivers to ensure a smooth gaming experience. Therefore, to prevent your game from running into issues because of obsolete drivers, always keep them updated.
These instructions will guide you through updating your device drivers in Windows 10:
- Press the Windows logo key + S combination to bring up the search bar.
- Type in “device” (without quotes) and click on the “Device Manager” search result. Or, click on the “Open” link on the right-side menu.
- The new page will display your drivers. To update a driver, double click on its section to expand it. Then right-click on the driver and choose “Update driver”.
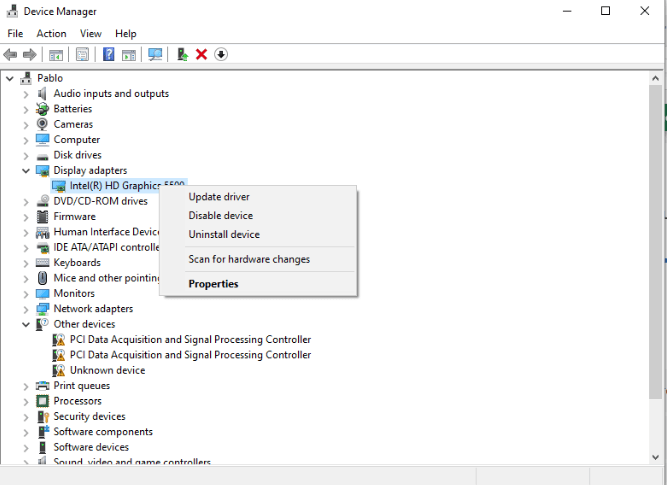
- Select “Search automatically for drivers”. The driver will be updated automatically.
- Do this for all the drivers you want to update.
- Once done, reboot your computer.
Updating your drivers manually can be quite tiresome since you must repeat the above steps for each driver. Fortunately, you can use an automatic driver updater to update drivers automatically. A great driver updater that we recommend is Auslogics Driver Updater. This software quickly scans your computer for outdated drivers and then lets you update them in one click. This saves you plenty of time and energy.
Conclusion
The “Minecraft java realms could not invite the provided name” error can be quite heartbreaking, but it’s not the end of the world. Applying the above workarounds should help you eliminate the issue. Hopefully, they helped you do so on your Xbox or Windows PC. If you are still having issues resolving this error or have used other methods to successfully fix it, kindly comment below. Also, check out our blog for more solutions to common game errors.


 Done! Great to see you among our subscribers!