- Why Is SSD Faster than HDD?
- 8 Useful Methods to Optimize SSD Windows 10/11
- Method 1: Disable Startup Programs
- Method 2: Disable Fast Startup
- Method 3: Confirm TRIM Is Enabled
- Method 4: Make Sure the SSD Firmware Is Up to Date
- Method 5: Enable Advanced Host Controller Interface (AHCI) Mode
- Method 6: Turn on Write Caching
- Method 7: Schedule SSD Optimization
- Method 8: Set Your Power Plan to High Performance

Modern PCs running Windows 10 and Windows 11 now come with Solid State Drives (SSDs) rather than hard disk drives (HDD). SSDs have been gaining traction due to their fast performance, and Windows comes with built-in features to help these storage devices run at their peak.
But these features aren’t always enabled by default. That’s why we’ve prepared this guide about Windows 10 SSD optimization to help you get the best out of your SSD.
Why Is SSD Faster than HDD?
Unlike an HDD, which requires track seeking and latency time to read data, an SSD can retrieve and read data directly from any location of the flash memory. It basically takes under 0.1ms (random access time) for an SSD to read data. That’s almost no time at all.
It’s this fast response that makes it more favorable than the traditional HDD. It means you can open and run applications on your PC at lightning speeds. That said, SSDs are also affected by wear and tear, and it’s usually advisable to back up your data regularly to the cloud for safekeeping.
8 Useful Methods to Optimize SSD Windows 10/11
First things first. Make sure to use the SSD as the boot or system disk (the disk containing Windows OS). That way, you’ll have quicker boot time and increased system running speed.
On top of that, if you’re still using Windows 10, we highly suggest upgrading to Windows 11, as it’s one of the most advanced operating systems today. Apart from offering a wonderful experience, this system has plenty of features to optimize SSD, such as the TRIM command.
Below are SSD tweaks to ensure your SSD performs optimally:
Method 1: Disable Startup Programs
Your PC’s boot time is affected by the startup programs that are set to run when you turn on your machine. Luckily, the startup application manager shows which programs are slowing down the startup process the most.
Often, the programs you install add themselves to the startup process and automatically start every time you boot your PC. The good news is that you can quickly access the Startup applications manager in the Task Manager and disable these programs.
Here’s how:
- Use the Ctrl + Shift + Esc keyboard shortcuts to bring up Task Manager. Alternatively, press Ctrl + Alt + Delete and select Task Manager.
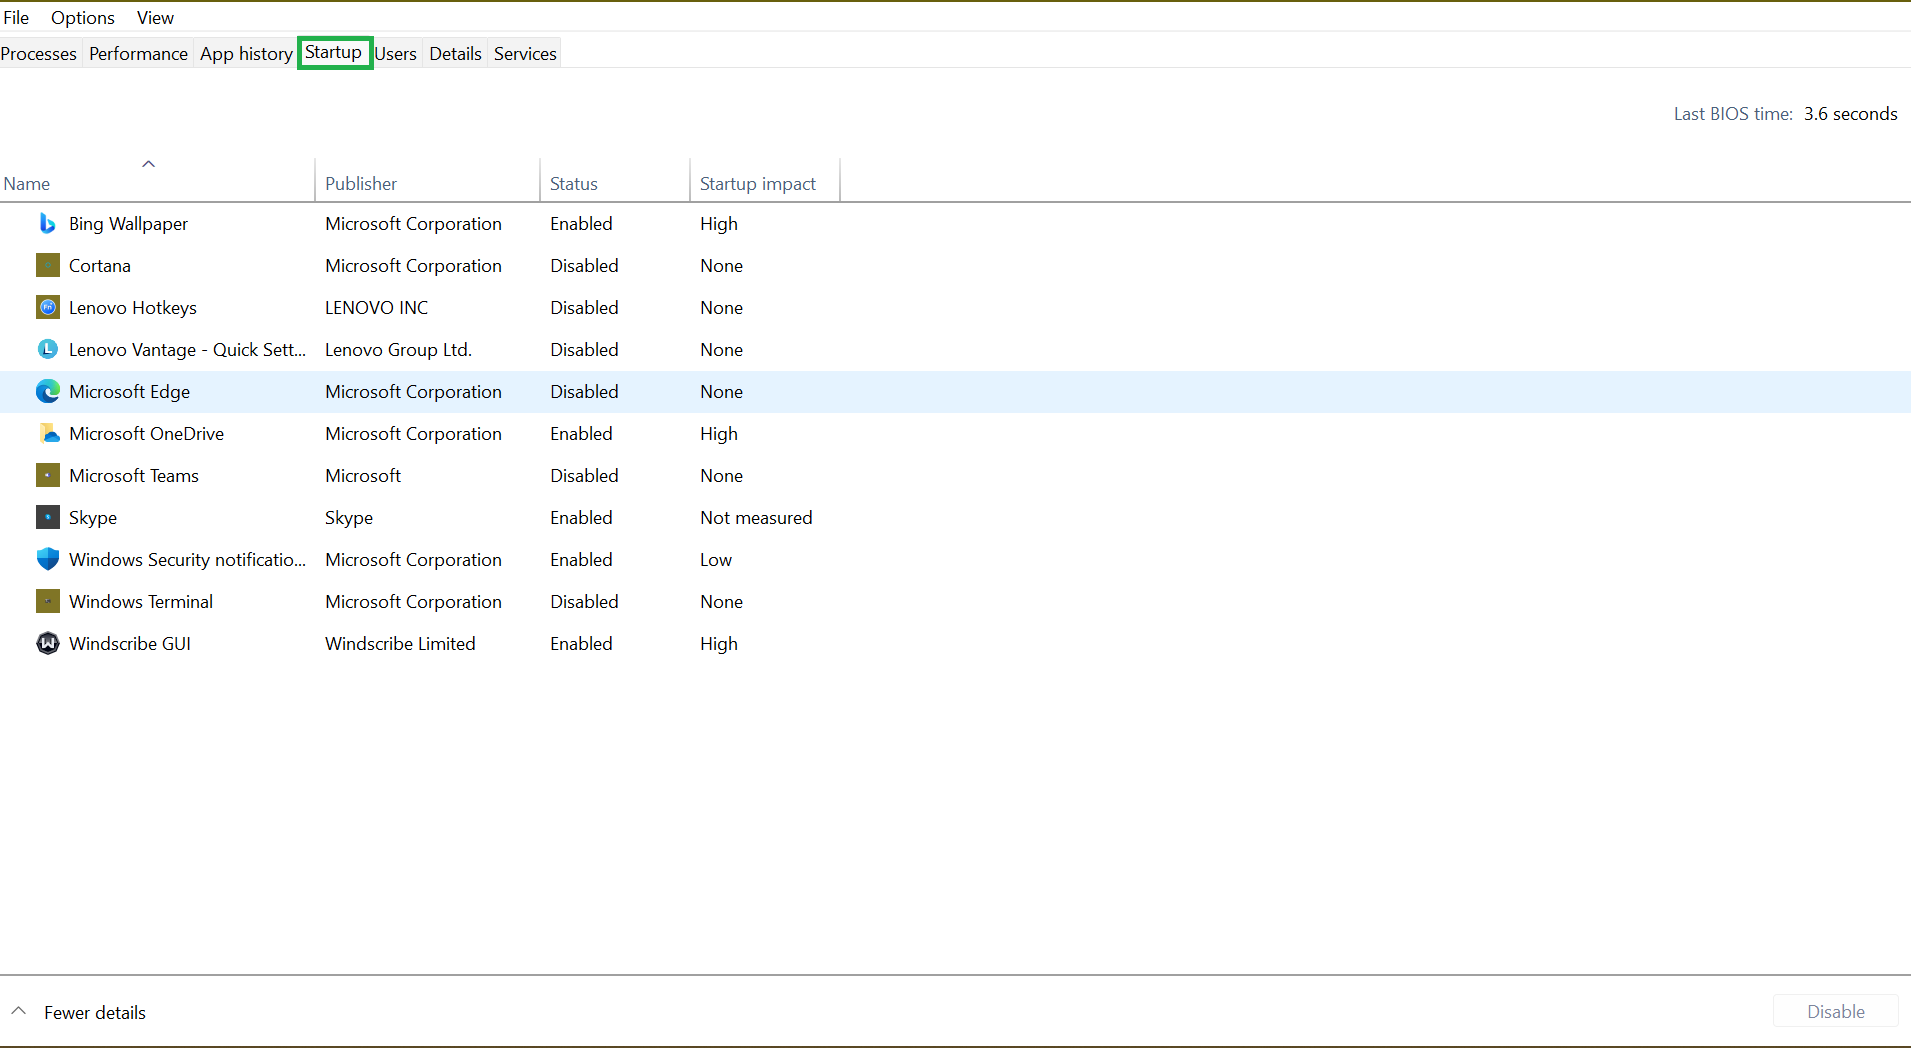
- From the Task Manager’s interface, switch to the Startup tab to see a list of startup programs and their impact on your computer’s startup. You may want to disable all applications with a “High” impact.
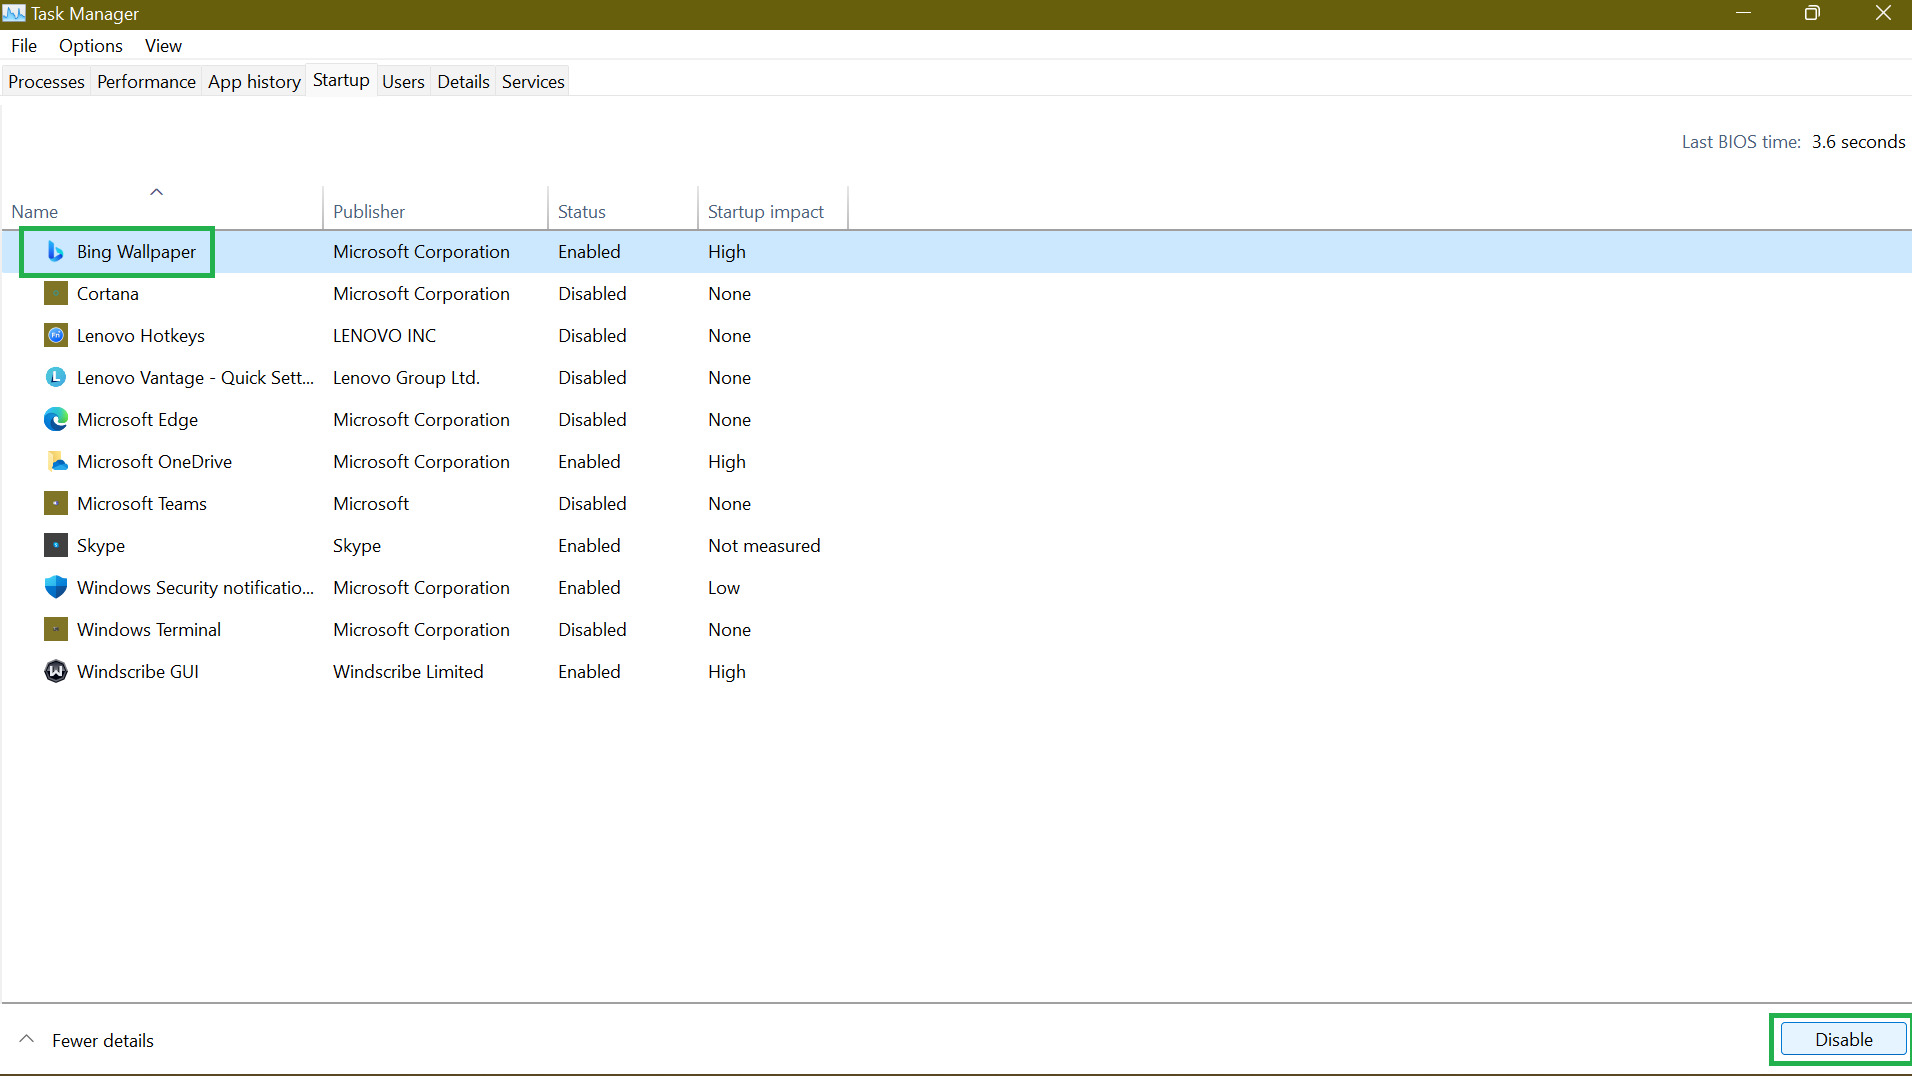
- To disable a program, select it and click Disable at the far-right bottom section of the page.
That said, disabling some programs can limit their functionality. Applications like OneDrive or Google Drive need to run at startup to keep your files synced. Thus, you want to leave them enabled so they can automatically sync your files in the background.
Method 2: Disable Fast Startup
The Fast Startup feature was solely designed to accelerate the boot process, particularly for machines with SSDs. So, you might be wondering, why disable it?
The thing is, an SSD is so fast that the time gained by enabling a fast startup is almost insignificant. In fact, disabling this feature may allow your Windows computer to get a clean full reboot. While disabling Windows Fast Startup may not make such a big impact, it could be useful.
- Access the Control Panel from your Start Menu.

- Open Power Options and click Choose what the power button does.
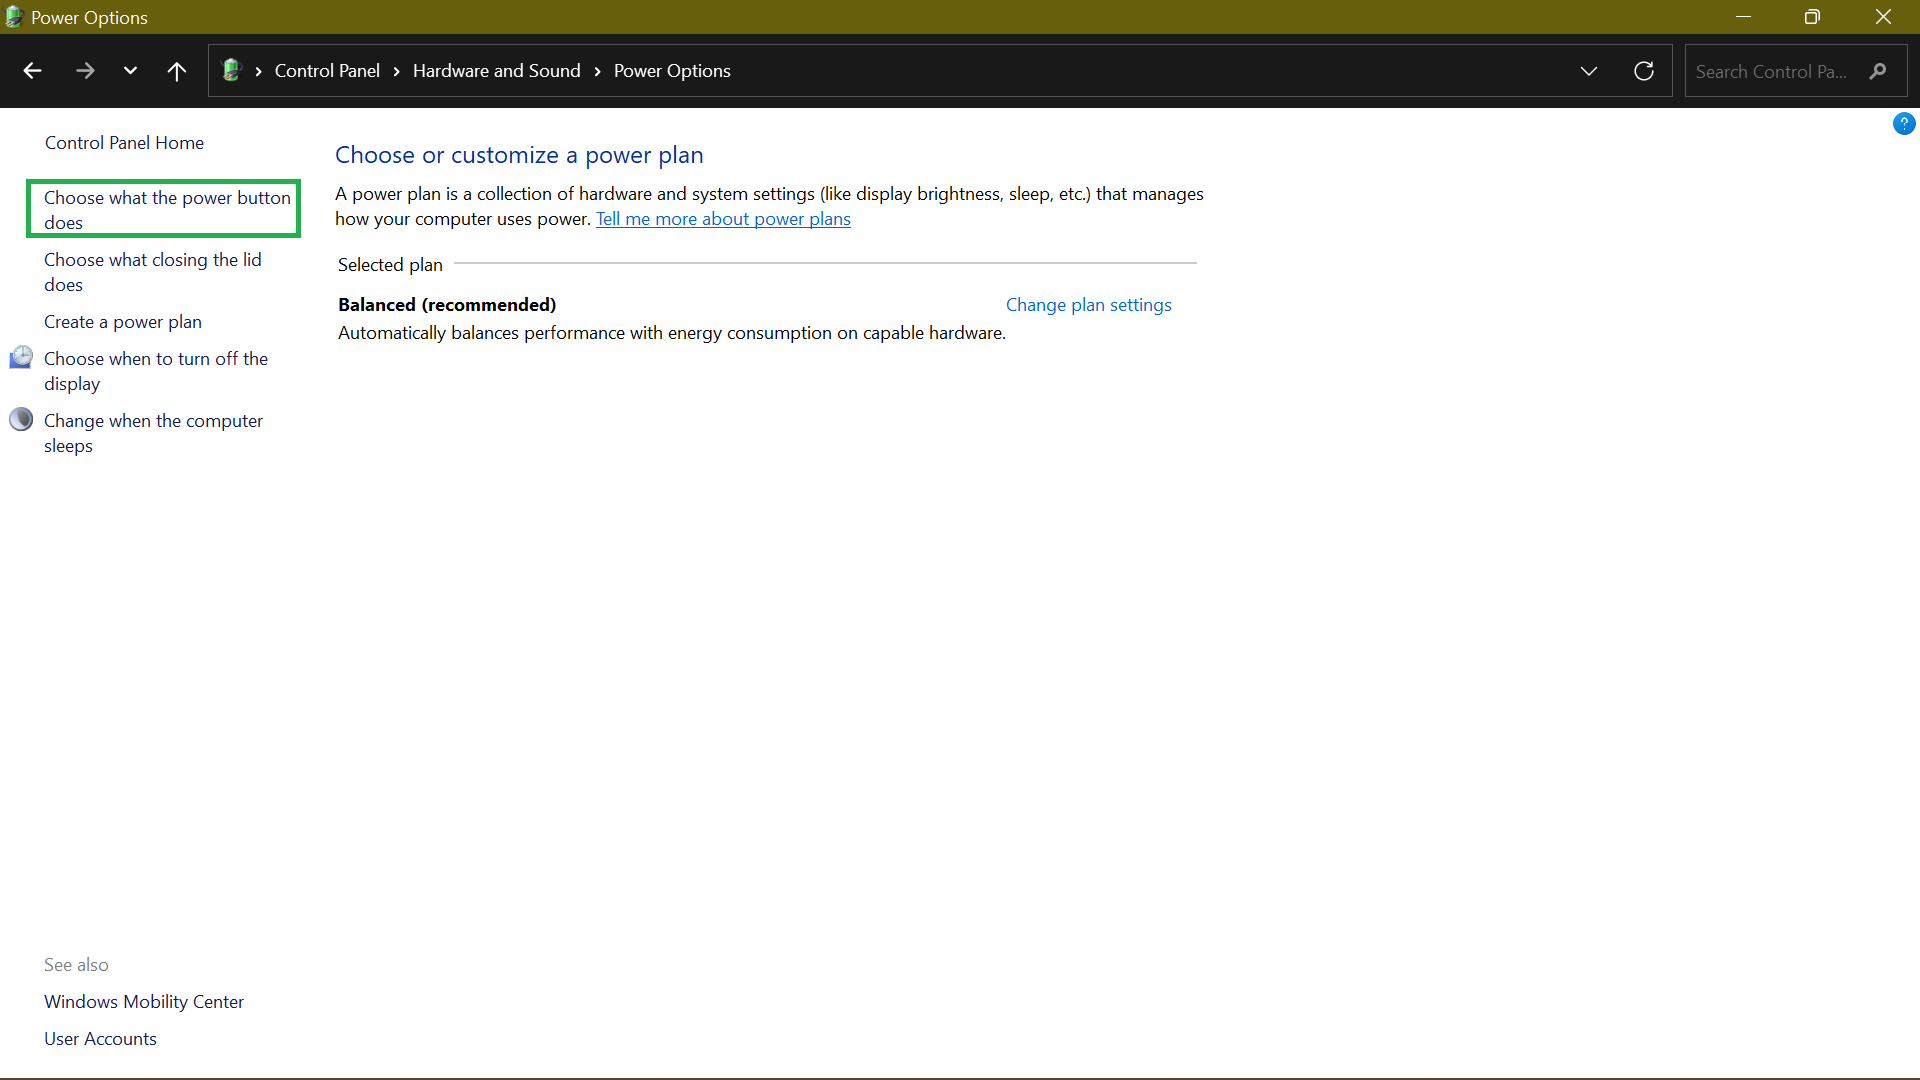
- If the Shut-down settings option is grayed out, click Change settings that are currently unavailable.
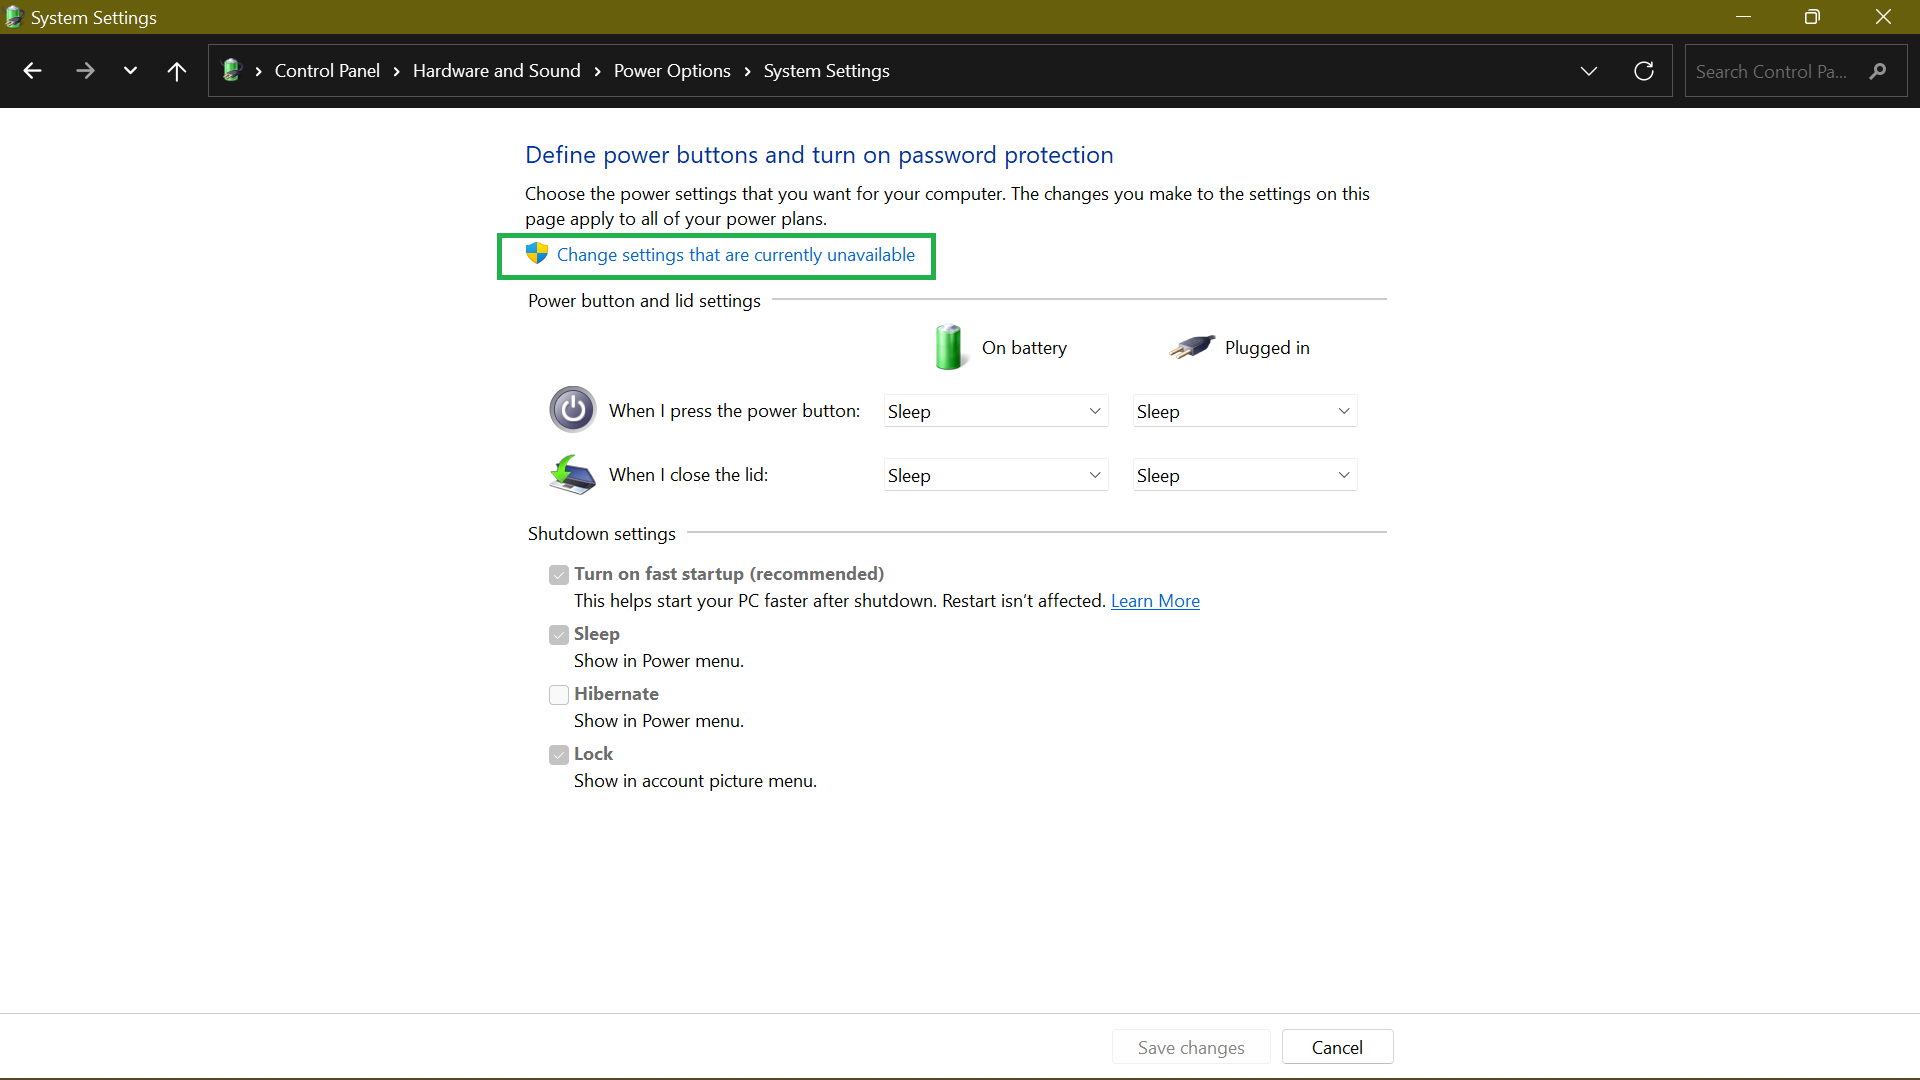
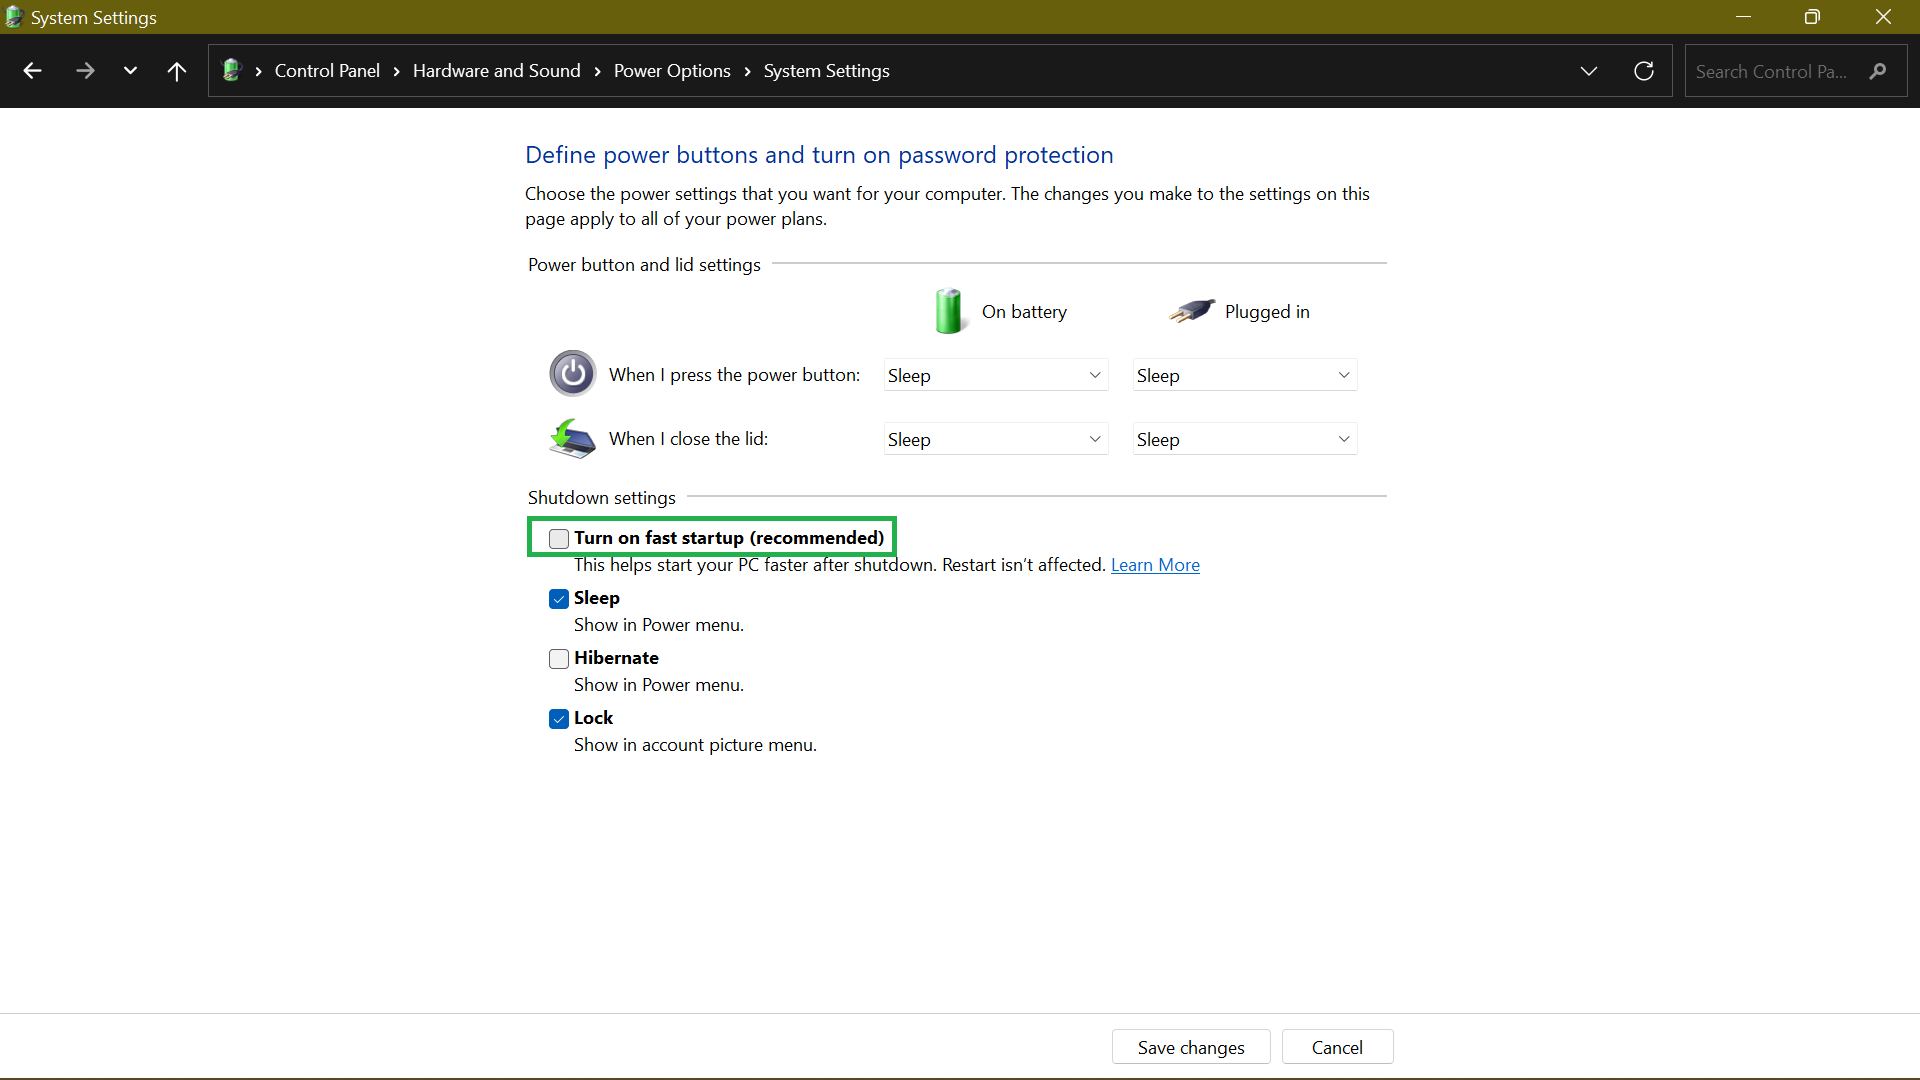
- Uncheck the Turn on fast start-up (recommended) box and click on Save changes.
Method 3: Confirm TRIM Is Enabled
TRIM ensures that the SSD wipes data from blocks that are no longer in use. Doing so reduces the write speed and helps maintain optimum performance throughout the SSD’s lifespan.
TRIM should be enabled by default on your Windows 10/11 machine. However, sometimes that’s not the case. That’s why it’s worth checking and ensuring that it’s functioning.
To do so, perform the following steps:
- Hit the Windows Key on your keyboard and type CMD. On the right sidebar, select Run as administrator.
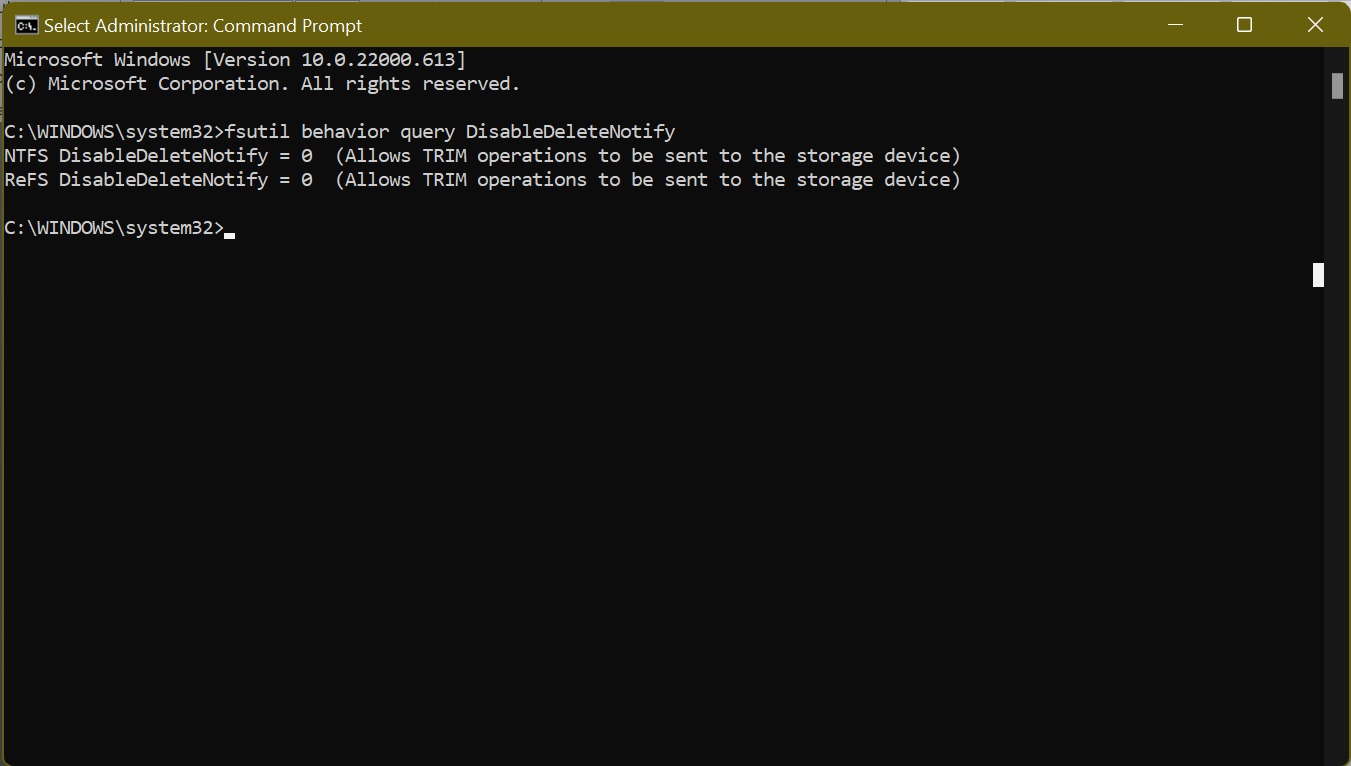
- Next, execute the command fsutil behavior query DisableDeleteNotify. If it is set to “0”, TRIM is enabled. If it is set to “1”, TRIM is disabled, and you need to enable it.
Method 4: Make Sure the SSD Firmware Is Up to Date
The SSD can only run efficiently if the SSD firmware stays updated. Unfortunately, the process isn’t automated, and you must do it manually.
Nonetheless, it’s not a complex process. All you have to do is visit your SSD’s manufacturer’s website and find the SSD firmware upgrades that are available. Usually, you’ll find a step-by-step guide there on how to update your SSD firmware.
Method 5: Enable Advanced Host Controller Interface (AHCI) Mode
Setting the SATA controller to run in AHCI Mode ensures your SSD performs better. AHCI is essential in keeping all the features that support running an SSD on your machine, particularly TRIM, which gets rid of data that is no longer necessary, running smoothly.
Here’s how to enable AHCI:
- You’ll need to access the BIOS of your computer by pressing the corresponding key specified on your PC’s user manual. If you’re using a modern computer, the feature should be enabled by default. For an older machine, you’ll have to find your way to the BIOS to enable it.
- Once in the BIOS, locate the SATA Configuration or Type or Mode setting.
- Change from IDE to AHCI mode.
- Save the changes and exit the BIOS.
Method 6: Turn on Write Caching
Enabling write caching may not always be the best idea since, in case of a power outage or device malfunction, it might result in data corruption or loss. Therefore, use this feature with caution.
If you wish to proceed, follow these steps to enable write caching:
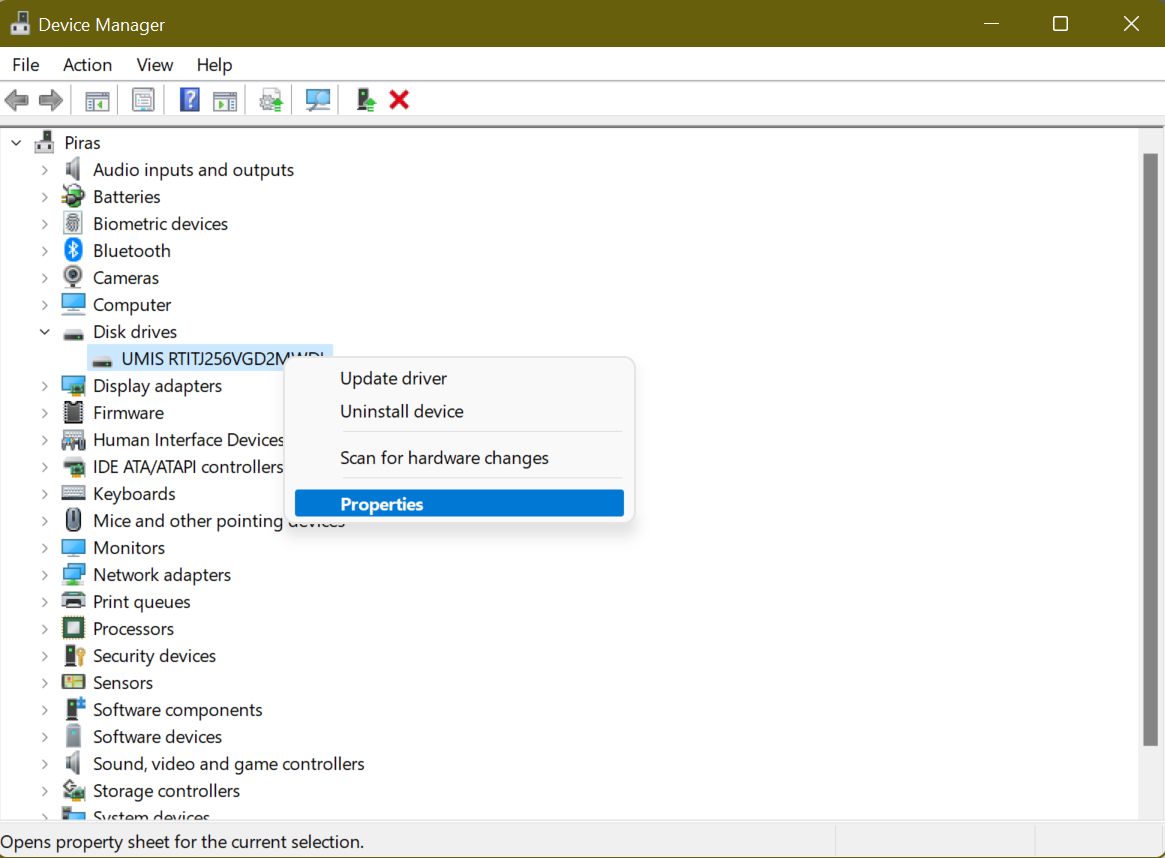
- Right-click your Start Menu, or press the Win + X key combination and select Device Manager.
- Locate Disk Drives, expand it, and open Properties. Alternatively, double-click your SSD to open its properties window.
- On the next screen, go to the Policies tab and find the Write-caching policy section.
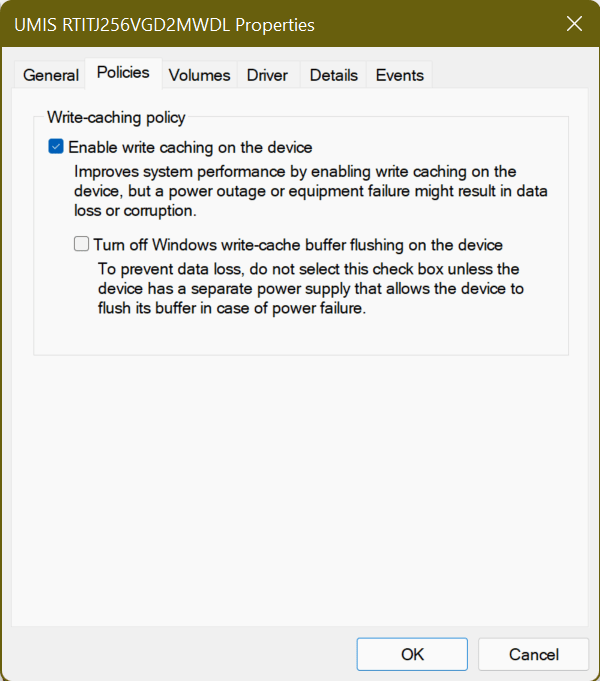
- Under it, you’ll see an option labeled Enable write caching on the device. Check the box next to it and select OK.
Now, use your SSD as you normally would and check for performance behaviors. If it’s improved, keep the option on. If not, follow the process and disable it.
Method 7: Schedule SSD Optimization
You may have noticed that modern computers using SSDs don’t have the option to defragment an SSD. On Windows 10 and Windows 11, you can only “Optimize” your drives. You see, the purpose of defragmenting a drive is to ensure that large files are stored in one contiguous section of a hard disk for faster access.
It’s applicable for mechanical drives, which have a relatively long seek time of around 15ms. So, every time a file is fragmented, you lose 15ms as it tries to find the next one. Over time, this can add up, resulting in longer read times.
That’s not the case with SSDs since the seek time is approximately 0.1ms. This speed, and the fact that SSDs move data that’s already on your disk to other areas on the disk, usually storing them in a temporary position first, means there’s no performance advantage of defragmentation.
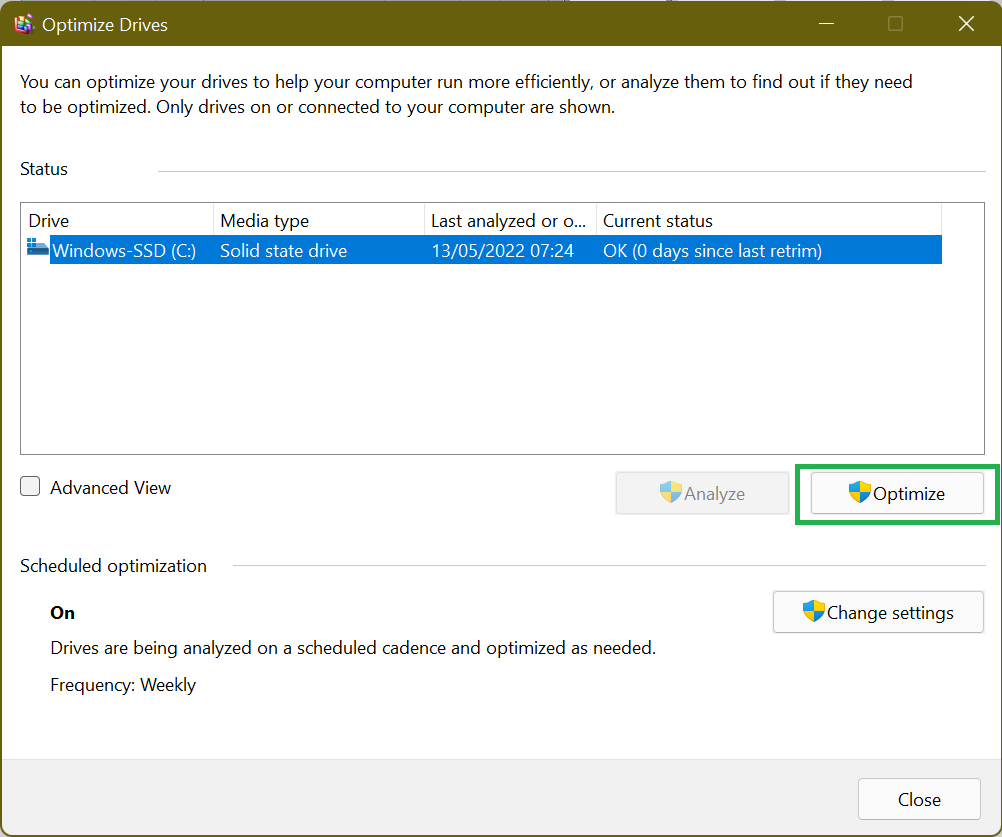
But Windows already knows this, no wonder there isn’t an option to defrag your SSD on modern versions of Windows. In its place is the option to “Optimize” your SSD. Among other things, the process will “retrim” the SSD, which forces the deletion of data that’s no longer deemed necessary, a task usually handled by TRIM.
Therefore, make sure you configure a schedule to allow Windows 10 SSD optimization on a regular basis, thus keeping its performance optimal.
While Windows performs the necessary optimization on your SSD, it doesn’t always resolve speed-reducing issues like junk files, corrupt keys, invalid registry entries, or duplicate files. That’s where a tool such as Auslogics BoostSpeed comes in.
The program automatically scans and detects PC junk like unused error logs, web browser cache, user temporary files, and so on. It then deletes them, reclaiming the much-needed space on your SSD. By freeing up this space, your SSD can perform much better than when it’s almost out of space.
Additionally, BoostSpeed checks your registry and fixes anything that’s damaged or corrupt. As you are aware, your registry is crucial to your system’s core functioning, and if there are corrupt keys or invalid entries, you might start experiencing system glitches or even crashes.
Generally, BoostSpeed identifies issues that slow down your computer’s performance, tweaks non-optimal system settings, and ultimately enhances your PC’s operations.
Method 8: Set Your Power Plan to High Performance
By default, Windows sets your system to the “Balanced” power plan that automatically kills power to your drives when they aren’t in use. This is useful for laptops as it helps prolong battery life.
Switching to “High Performance” means the drives remain powered on all the time and will eliminate the lag you notice after your PC has been idle for a while.
To change the power options:
- You’ll need to access the Control Panel via the Start Menu.
- Once there, locate Power Options from the S ettings. A quick way to do that is to use the search function. Simply type “power options” in the “Search Control Panel” text field and select Power Options.
- Choose the High Performance option, which will speed up your system’s performance. However, this power plan will consume more energy, and your battery may drain faster.
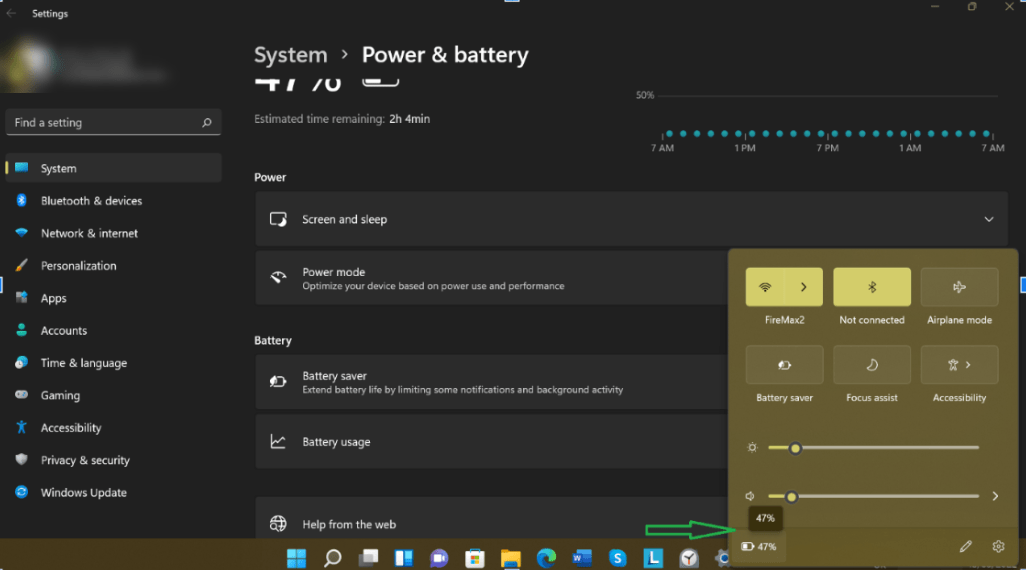

- On a Windows 11 machine, click on the battery icon at the far-right corner of your taskbar and select the battery icon on the window that pops up. On the Settings page, click the drop-down menu next to Power mode and choose Best performance.
There you have it! These SSD tweaks will ensure your Windows 10/11 PC boosts faster and runs efficiently every time you use it.


 Done! Great to see you among our subscribers!