- Make Sure Your System Satisfies the Game’s Requirements
- Disable Overlay
- Reinstall Your Graphics Card Driver
- Update Your Driver
- Use Windows Update
- We will be showing you how to use Auslogics Driver Updater in the steps below:
- Using the Device Manager
- Run the Game as an Administrator
- Increase Your Paging File
- Scan and Repair the Game’s Files
- Tweak the Game’s Graphics Settings
- Go to the NVIDIA Control Panel and Disable G-Sync
- Disable Full-Screen Optimizations

Call of Duty: Modern Warfare, like every other PC video game, has its fair share of glitches and errors. One category of errors that seem to be common in the game is Dev Errors.
These issues show up in dialog boxes, with different codes and error messages. Common Dev Errors include the following codes:
- Dev Error 6606
- Dev Error 1110
- Dev Error 6065
- Dev Error 6071
- Dev Error 6165
- Dev Error 5758
- Dev Error 5476
- Dev Error 740
- Dev Error 5624
- Dev Error 6036
We’ll be showing you all the fixes you can apply to get rid of these errors.
Make Sure Your System Satisfies the Game’s Requirements
Gamers often overlook official system requirements for games because they consider their computers good enough to run any game. If you’re one of such gamers, you are mistaken. Your PC could be lacking one system specification or the other that the game requires to run smoothly. Many players who experienced different Dev Errors realized that they needed to perform one upgrade or the other.
We will be showing you the minimum and recommended requirements of the game below, as well as how to check if your computer’s specifications are up to par.
Minimum Requirements
Operating System: 64-bit Windows 7 SP1; 64-bit Windows 10
Processor: Intel® Core™ i3-4340; AMD FX-6300
System Memory (RAM): 8 GB
Graphics: NVIDIA® GeForce® GTX 670; NVIDIA® GeForce® GTX 1650; AMD Radeon™ HD 7950
DirectX: Version 12
Network: Broadband Internet connection
Storage: 175 GB available space
Recommended Requirements
Operating System: 64-bit Windows 7 SP1; 64-bit Windows 10
Processor: Intel® Core™ i5-2500K; AMD Ryzen™ R5 1600X
System Memory (RAM): 12 GB
Graphics: NVIDIA® GeForce® GTX 970; NVIDIA® GeForce® GTX 1660; AMD Radeon™ R9 390; AMD Radeon™ RX 580
DirectX: Version 12
Network: Broadband Internet connection
Storage: 175 GB available space
How to Check Your PC’s Specs
- Go to the Settings application by right-clicking on the Start button and selecting Settings or by pressing the Windows and I keys simultaneously.
- Once you see the homepage of Windows Settings, click on the System icon in the first row.
- After the System page of the Settings app appears, head over to the left pane, scroll to the bottom, and then click on About to open the About tab.
- Switch to the right pane and find information such as your CPU’s make and model, your RAM size, and your CPU’s architecture (whether it’s 32 or 64 bits) under Device Specifications.
- To find details about your graphics card, follow the steps below:
- Go to your taskbar and click on the magnifying glass to open the search bar beside the Start button. You can also use the Windows + S keyboard combination to summon the search function.
- Once the search bar appears, type “dxdiag” (without the quotes) into the text box, and then click on the first result that shows up.
- The DirectX Diagnostic Tool will now appear.
- Under the System tab, you’ll find info about your PC and your DirectX version in the System Information section.
- To check the details of your graphics card, head over to the Display tab.
Disable Overlay
If you’re using programs with overlay features, they might be the reason for the Dev Error you’re experiencing. Certain programs like Nvidia’s GeForce Experience, Steam, Overwatch, and Game Bar provide overlay features that help you extend your in-game capabilities. You get to take screenshots, record game footage, chat, and even use a browser, amongst other things.
As nice as these offerings sound, they won’t be worth it if they’re impeding your gameplay. Some gamers were able to continue playing after disabling their overlay programs. As we’ve mentioned, there are different programs out there that provide overlay features. We’ll be showing you how to disable the overlay feature in these programs.
GeForce Experience
The steps below will walk you through the process of turning off In-Game Overlay if you use an NVIDIA Card and have GeForce Experience:
- Go to the rightmost part of your taskbar and click on the Show Hidden Icons arrow.
- Once your System tray shows up, right-click on the Nvidia icon, then click on GeForce Experience.
- Once the program opens, go to the left hand-side of the window and click on the General tab.
- After the options appear on the right side, scroll down and toggle off the switch for IN-GAME OVERLAY.
- Save your changes, then close the program.
- Launch Call of Duty: Modern Warfare, and then check for the error.
Turn off In-Game Overlay in Discord
Discord is a voice and text chat app that allows gamers to communicate during gameplay. As many COD gamers found out, the overlay feature in the app is responsible for the Dev Error. Try disabling it and check if the problem goes away. You can either disable the overlay feature for just one game or you can disable it entirely. The steps below will show you what to do:
- Click on the magnifying glass icon on the taskbar to open the search function beside the Start button. You can also press the Windows and S keys simultaneously for the same result.
- After the search utility shows up, type “discord” (no quotes) into the text box and click on Discord in the results.
- Once Discord opens, navigate to your User Settings environment (usually by clicking on the cogwheel icon).
- After the User Settings page opens, go to the left pane, scroll down, and then click on Overlay.
- Switch over to the Overlay tab and toggle off the switch beside “Enable In-Game Overlay.”
- If you want to switch off the feature for a specific game, such as Call of Duty: Modern Warfare, without turning it off for other games, switch to the Games tab, locate CODMW, and then disable overlay for it.
- Once you’re done, save your changes, then launch the game and check for the issue.
Disable Game Bar
Game Bar is a Microsoft feature that was introduced to give gamers more capabilities during gameplay. The app allows players to record game footage, make live broadcasts, and take screenshots. Like other overlay programs, it can also cause conflicts with Call of Duty: Modern Warfare that might result in the Dev Error that you’re facing. The steps below will show you how to turn it off:
- Summon Settings by opening the Start menu and selecting the cog icon above the power icon. You can also use the Windows + I keyboard combination to launch the Settings application.
- Click on Gaming once the home screen of the Settings app shows up.
- After the Gaming interface appears, turn off the switch under “Record game clips, screenshots, and broadcast using Game Bar.”
- Go to the left side of the window and click on Captures to switch to the Captures tab.
- Now, turn off the option that reads, “Record in the background while I’m playing a game.”
- You can now relaunch the game and check for the error.
Turn off Spotify Overlay
Spotify is one of the most popular streaming services around. It has an overlay feature that gives it the ability to draw over your apps, and this overlay feature has been known to cause gaming problems. Try turning it off and check if the problem goes away. Follow these steps:
- Go to the Start menu and launch Spotify or use the desktop shortcut if you have one.
- After Spotify opens, go to the top of the window and click on Edit.
- Click on Preferences in the context menu that drops down.
- Once the Preferences interface appears, scroll down to Display Options, then turn off the switch for “Show desktop overlay when disabled.”
- You can now run the game and check for the problem.
Reinstall Your Graphics Card Driver
Graphics card drivers are responsible for many gaming issues. In fact, they are always the primary suspect whenever any gaming problem occurs. You have to take a look at your graphics card driver because it is the main piece of software that dictates how your GPU renders your game. If it has any glitch or it’s experiencing any bug, you will definitely experience problems while gaming.
Many users were able to resolve their Dev Errors by tending to their graphics card drivers. The first troubleshooting step you should take is reinstalling the driver. This is because, most times, conflicts and other minor bugs might be plaguing the driver and restarting your computer might not work in this case.
If you don’t know the process involved in reinstalling the driver, follow the steps below:
- Open the search utility beside the Start button by clicking on the magnifying glass icon on the taskbar. You can also summon the search function by pressing the Windows and I keys together.
- Once the search bar opens, type “device manager” (without the quotes) into the text field and click on Device Manager once it shows up on the results list.
- After the Device Manager window opens, expand the Display Adapters drop-down.
- Right-click on your graphics card and choose Uninstall Device once the context menu drops down.
- After the Uninstall Device confirmation box opens, leave the checkbox beside “Delete the driver software for this device” and click on the Uninstall button.
- Windows will now begin the installation process.
- After the operating system uninstalls the device, reboot your PC.
- Once your computer comes up, Windows will attempt to automatically install the graphics card driver.
- If it fails to reinstall the driver automatically, go to the Device Manager and click on Actions, then select Scan for Hardware Changes. You can also click on the magnifying glass icon hovering over a monitor.
- You can now Run the game and check if the problem persists.
If the Dev Error still occurs after reinstalling the driver, then you might be facing an issue related to a corrupt, missing, incompatible or outdated graphics card driver. Move on to the next guide to find out how you can fix this problem by carrying out an update the proper way.
Update Your Driver
Updating your driver will be the next ideal step to take if reinstalling it doesn’t work. Outdated drivers don’t play nice with games in general. This is one of the reasons why graphics card manufacturers release regular updates. These updates are normally aimed at fixing universally experienced bugs and improving the overall performance of the graphics card.
If you recently updated your driver but are still facing the Dev Error, you might have installed the wrong release. We’ll be showing you different sure-fire ways to update your graphics card driver.
Use Windows Update
Windows Update does more than just download and install updated Microsoft software. You can also get to update third-party drivers through this channel. From time to time, Microsoft publishes updated drivers for devices such as your network adapter, your sound card, and your display card, amongst others.
Using Windows Update is one of the best methods for updating your graphics card driver because every driver that comes through the channel is verified by Microsoft. One caveat that you should note is that drivers might not be available as and when released by device manufacturers. This is because they have to go through extra verification.
That said, when you get to download and install your driver from Windows update, you’ll be sure you’re installing a compatible driver for your machine and your operating system.
If you have forgotten the processes involved in carrying out an update via the Windows update utility, the steps below will walk guide you:
- Go to the Settings application by right-clicking on the Start button and selecting Settings or by pressing the Windows and I keys simultaneously.
- Once you see the homepage of Windows Settings, click on the Update & Security icon in the bottom row.
- Once you see the Update & Security interface, click on the Check for Updates button under Windows Update.
- If there are no available updates for your PC, you’ll see a checkmark beside a message that reads, “You are up to date.” You’ll have to move on to the next guide in this case.
- If there are pending updates for your system, however, the utility will begin to download them. In some cases, though, you’ll have to click on the Download Now button for the utility to begin the download process.
- After the updates are successfully downloaded, you have to click on the Restart Now button to allow Windows update to reboot your system and install the downloaded updates.
- Your computer will now reboot to the installation environment and will restart several times until the installation is complete.
- Once your computer is updated, it will boot up normally.
- You can now relaunch the game and check if the problem presents.
Update the Driver Automatically
Windows Update is a great driver-updating tool but it’s not perfect. As we mentioned, you’re not guaranteed that your graphics card driver will be covered when you carry out an update. Microsoft does not release updated drivers unless they have gone through the regular process of verification even if the device manufacturers have thoroughly tested them.
You’re better off using a dedicated third-party program that guarantees you updates once they are released by their manufacturers. One of the programs that you should go for is Auslogics Driver Updater. This particular tool is trusted by millions of global users and industry professionals. It works by scanning your entire device drivers and fishing out those that are out of date, missing, or corrupted. Once it detects these drivers, it will allow you to automatically update them.
Auslogics Driver Updater brings a lot to the table. It only downloads and installs manufacturer approved drivers. It also helps you cover your bases by saving a backup of the old driver in case you want to reinstall it after the update.
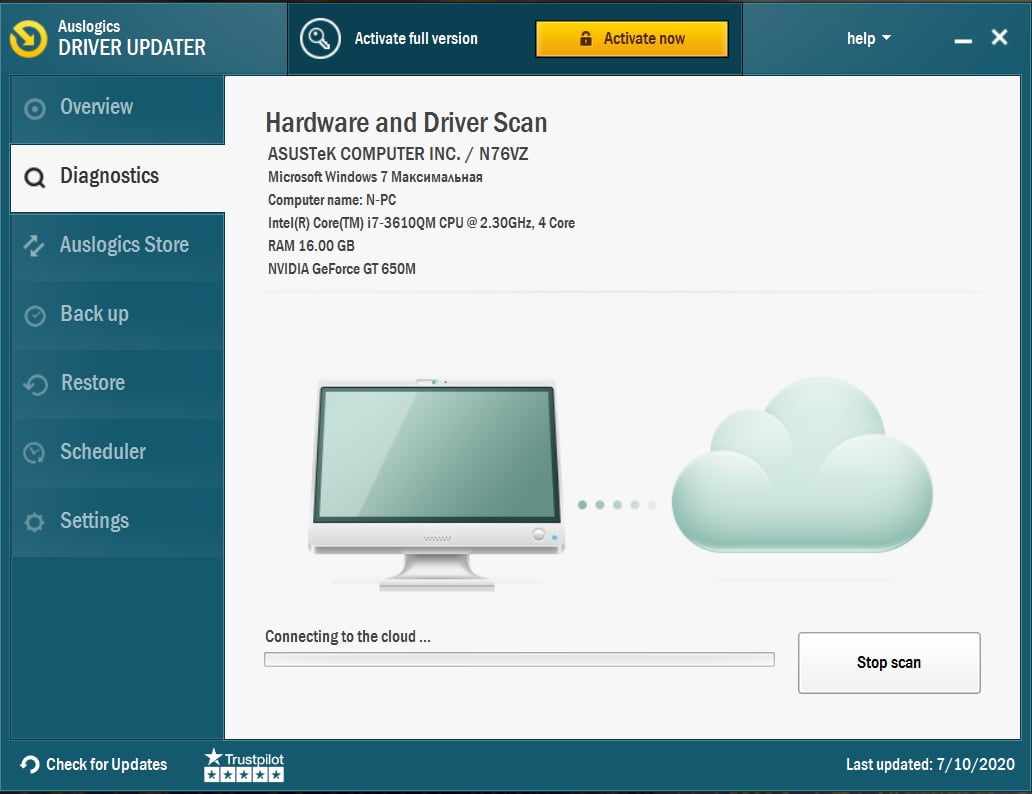
We will be showing you how to use Auslogics Driver Updater in the steps below:
- Navigate to the download page of the program by clicking on this link. If you are on your computer’s web browser, open the link in a new tab.
- Once you get to the download page, click on the Download button and prompt your web browser to save the installer.
- The file is less than 20 megabytes, so your browser should only take a couple of seconds to download it.
- After the download completes, click on the run button to launch the installer directly from your browser. You can also navigate to the folder where you downloaded the file and double-click it.
- The user account control dialogue will now pop up and ask if you want to allow the setup to make changes to your computer. Click on the Yes button when this happens.
- The setup wizard will now show up.
- Use the first drop-down menu to select your preferred language, then indicate where you would like the program to be installed under Installation Directory. Note that you would have to click on the button with three dotted lines to browse to your preferred path.
- Next, use the checkboxes that follow to decide whether you want to create a desktop shortcut, whether you want the program to launch automatically whenever Windows starts, and whether you want the application to send anonymous reports to its developers.
- Once the installation process completes, the app should launch and begin to check your system for problematic device drivers. If it doesn’t launch on its own, you can double-click on a shortcut (if you created one) or go to the Start menu to launch it. Once it opens, click on the Start Scan button to initiate the scanning process.
- Once the scan is complete, you’ll see a list of outdated, missing, and damaged device drivers. If your graphics card driver has any of these issues, it will appear on the list.
- Click on the Update button to prompt the tool to download and install the latest driver for your graphics card.
- Once the update process is complete, restart your computer and open Call of Duty: Modern Warfare to check for the Dev Error.
Using the Device Manager
Some gamers have reported success after using the Device Manager. While the tool doesn’t guarantee an update, you can try it out if you want. However, it’s worth mentioning that if you have Auslogics Driver Updater, you won’t need the services of Device Manager when it comes to updating any driver.
The steps below will show you how to update your display driver, using the Device Manager:
- Open the search utility beside the Start button by clicking on the magnifying glass icon on the taskbar. You can also summon the search function by pressing the Windows and I keys together.
- Once the search bar opens, type “device manager” (without the quotes) into the text field and click on Device Manager once it shows up on the results list.
- After the Device Manager window opens, expand the Display Adapters drop-down.
- Right-click on your graphics card and choose update driver once the context menu drops down.
- After the Update Driver window appears, click on “Search automatically for updated driver software” to prompt windows to search for the driver online and download and install it.
- Once the installation process completes, reboot your system and check for the problem.
Run the Game as an Administrator
There might be important system resources that Windows is blocking the game from accessing due to a lack of permissions. These resources could include protected files and folders, and if the game doesn’t have access to them, it’ll likely crash and produce the Dev Error. To resolve the problem here, try granting the game the required permissions by running it as an administrator.
To run the game as an administrator, right-click on its Desktop shortcut or Start menu listing and click on Run as Administrator whenever you want to open it.
If you don’t want to always right-click on the game’s shortcut or Start menu entry, follow these steps to change its properties:
- Double-click on any folder on your Desktop or click on the folder icon on your taskbar to launch a File Explorer window. Pressing the Windows and E keys simultaneously is an easier way to summon the window.
- After the File Explorer window opens, go to the left pane and click on This PC.
- Navigate to the right pane and double-click on your Windows volume (which should be the Local Disk C) under Devices and Drives.
- After the drive opens, locate the Program Files folder and double-click it.
- Once you get to the Program Files folder, navigate to the Activision folder and open it.
- Now, locate the game’s folder and open it.
- The steps above will only help you locate the game’s installation folder if you installed it in its default installation directory via Battle.net. If you bought it via Steam, follow the steps below:
- Launch the Steam client via the Start menu or by clicking on its Desktop shortcut.
- After the application opens, go to the top of the window and click on Library.
- If you see a context menu, select Games.
- Once the list of games attached to your account shows up, right-click on Call of Duty: Modern Warfare and select Properties from the context menu.
- Go to the right pane (Properties page) and click on Local Files.
- Click on the Browse Local Files button once the options in the Local Files tab open.
- The game’s folder will now appear.
If you use the Battle.net app but installed the game in a location other than its default installation folder, follow these steps
- Launch the Blizzard Battle.net app.
- Once the app opens, locate Call of Duty: Modern Warfare and click on its icon.
- Once the game’s page opens, click on the Options drop-down under the game’s title and select Open in Explorer.
- The game’s installation folder will now show up.
- After the folder shows up, go to the game’s executable file, right-click it, and then click on Properties.
- Navigate to the Compatibility tab of the Properties dialog window.
- Check the box beside “Run this Program as an Administrator,” and then click on the OK button to save your changes.
- You can now run the game and check for the problem.
Increase Your Paging File
The Paging File is Windows’ way of extending your system memory on those occasions when it’s packed. The Paging File is created in your hard drive to help keep some process in memory. It’s also called the swap file or virtual memory.
The Dev Error might be showing up because you don’t have enough swap file. Try increasing the allowance for the file and check if the issue persists. Follow the steps below:
- Launch a File Explorer window, using the Windows + E keyboard combination.
- After File Explorer shows up, go to the left pane of the window, right-click This PC, and then click on Properties.
- After the System window shows up, go to the left sidebar and click on the Advanced System Settings link.
- Once the Advanced tab of the System Properties dialog shows up, click on Settings in under Performance.
- When you see the Performance dialog, navigate to the Advanced tab and click on the Change button under Virtual Memory.
- Under the Virtual Memory tab, uncheck the checkbox beside “Automatically manage paging file size for all drives,” then go to Custom Size and increase the size of your Paging File.
- Click on the OK button to save your changes, then launch the game to check for the error.
Scan and Repair the Game’s Files
If anything is wrong with your game’s files, you’ll experience different kinds of problems. Any Dev Error you’re facing could be the result of a broken or missing game file. Game files become corrupted due to antivirus interference, abrupt shutdown in the middle of gameplay, and malware infection.
To resolve the problem, you will need to find out which files are missing and replace them. Thankfully, the process for doing this is simple and straight-forward. Since Call of Duty: Modern Warfare is a product of Blizzard Activision, you have two options: using the steam client or using Blizzard battle.net. Not to worry: we will be working you through the process of using each of these apps.
Using Steam:
- Launch the Steam client via the Start menu or by clicking on its Desktop shortcut.
- After the application opens, go to the top of the window and click on Library.
- If you see a context menu, select Games.
- Once the list of games attached to your account shows up, right-click on Call of Duty: Modern Warfare and select Properties from the context menu.
- Go to the right pane (Properties page) and click on Local Files.
- Click on the Verify Integrity of Game Files button once the options in the Local Files tab open.
- The Steam client will now begin to check the game’s files on your computer, comparing them to those on its servers. If there are missing or corrupt files, the client will automatically replace them.
- The duration of the process will depend on the size of the files being checked and redownloaded.
- Once the process completes, Steam will notify you.
- Exit the client and relaunch the game to check for the issue.
Using Battle.net
- Launch the Blizzard Battle.net app.
- Once the app opens, locate Call of Duty: Modern Warfare and click on its icon.
- Once the game’s page opens, click on the Options drop-down under its title and select Scan and Repair from the context menu.
- Click on the Begin Scan option.
- The program will now scan your game’s files and redownload any that it finds to be corrupt or missing.
- After the process completes, relaunch the game and check for the problem.
Tweak the Game’s Graphics Settings
Some of the game’s graphics settings might be taking a toll on your CPU and GPU. Try applying the settings below and relaunch the game to check for the problem:
- Open Battle.net or the Steam client and launch Call of Duty: Modern Warfare.
- Once the game opens, navigate to Options >> Graphics.
- Locate Render Resolution and set it to 100.
- Go to Display Mode and select Full-Screen.
- Next, navigate to Sync Every Frame (V-sync) and choose Disabled.
- Save your settings, and then relaunch the game to check for the Dev Error.
Go to the NVIDIA Control Panel and Disable G-Sync
This fix is only applicable to NVIDIA card users. The G-Sync feature was introduced by NVIDIA to eliminate screen tearing that occurs when your GPU puts out so much frames that your monitor cannot handle. It acts as an alternative to the Vertical Sync feature, which is native to Windows.
While G-Sync comes with its own advantages, it can cause instability issues in games like CODMW and trigger Dev Errors, especially the Error Code 6178.
To fix the problem, in this case, you have to launch NVIDIA Control Panel and switch off G-Sync for Call of Duty: Modern Warfare. The steps below will show you what to do:
- Go to the right side of your taskbar, open the system tray (click on the Show Hidden Icons arrow), right-click on NVIDIA’s icon, and then click on NVIDIA Control Panel. You can also right-click on your Desktop and select NVIDIA Control Panel from the context menu.
- Once the program opens, switch to the left pane and click on Manage 3D Settings under the 3D Settings section.
- Next, go to the right pane and navigate to the Program Settings tab.
- After the Program Settings tab shows up, click on the drop-down menu under “Select a Program to Customize.”
- If you don’t see Call of Duty: Modern Warfare in the menu, click on the Add button.
- Once the dialog window shows up, navigate to the game’s installation folder and double-click its EXE file.
- Once you’ve selected the game, scroll down and switch off Vertical Sync.
- Now, click on the Apply button to save your changes, then relaunch the game to check for the problem.
Disable Full-Screen Optimizations
The Full-Screen Optimizations option is another feature that can clash with the game and produce the error. Try disabling and check if the Dev Error stops showing up. Follow the steps below:
- Double-click on any folder on your Desktop or click on the folder icon on your taskbar to launch a File Explorer window. Pressing the Windows and E keys simultaneously is an easier way to summon the window.
- After the File Explorer window opens, go to the left pane and click on This PC.
- Navigate to the right pane and double-click on your Windows volume (which should be the Local Disk C) under Devices and Drives.
- After the drive opens, locate the Program Files folder and double-click it.
- Once you get to the Program Files folder, navigate to the Activision folder and open it.
- Now, locate the game’s folder and open it.
- The steps above will only help you locate the game’s installation folder if you installed it in its default installation directory via Battle.net. If you bought it via Steam, follow the steps below:
- Launch the Steam client via the Start menu or by clicking on its Desktop shortcut.
- After the application opens, go to the top of the window and click on Library.
- If you see a context menu, select Games.
- Once the list of games attached to your account shows up, right-click on Call of Duty: Modern Warfare and select Properties from the context menu.
- Go to the right pane (Properties page) and click on Local Files.
- Click on the Browse Local Files button once the options in the Local Files tab open.
- The game’s folder will now appear.
If you use the Battle.net app but installed the game in a location other than its default installation folder, follow these steps:
- Launch the Blizzard Battle.net app.
- Once the app opens, locate Call of Duty: Modern Warfare and click on its icon.
- Once the game’s page opens, click on the Options drop-down under the game’s title and select Open in Explorer.
- The game’s installation folder will now show up.
- After the folder shows up, go to the game’s executable file, right-click it, and then click on Properties.
- Navigate to the Compatibility tab of the Properties dialog window.
- Check the box beside “Disable Full-Screen Optimizations,” and then click on the OK button to save your changes.
- You can now run the game and check for the problem.
Are there other solutions we missed?
Share them in the comments below!


 Done! Great to see you among our subscribers!