
Kiosk mode: How to set up Assigned Access in Windows 10
Users can set up Windows 10 Pro, Windows 10 Enterprise, and Windows 10 Education editions as a device in the Kiosk mode in order to run a single Universal Windows Platform (UWP) app using the Assigned Access feature. When you set up an account with the Assigned Access feature, the user doesn’t have access to the desktop, Start Menu, or any other part of the computer. He or she can only access and use the selected UWP app.
Here’s a quick guide on how to set up Assigned Access in Windows 10 and properly configure this feature on your computer.
What is Assigned Access in Windows 10?
The Kiosk mode is useful for creating a lockdown environment and setting up a Windows system in a general public area. It gives access to a user to use any single app for a specific function, such as an information kiosk or a kiosk for getting weather updates.
In order for a kiosk device to run a UWP app, the Assigned Access feature is key. Assigned Access forces the user to interact with a single app to help eliminate the risk of compromising the system.
How to turn on or off Assigned Access?
You must be signed in as an administrator in order to turn on or off assigned access for a local standard user account. Here are the steps:
- How to turn on this feature – Through these steps, users will only have access to the selected app whenever they sign in to the selected account.
- Add a new local account as a standard user to be used for assigned access.
- Sign in to the new account. Afterwards, open the Store app and install the app to be used with assigned access.
- Sign out of the new account and sign back in to your admin account.
- Open Settings. Click on the Accounts icon.
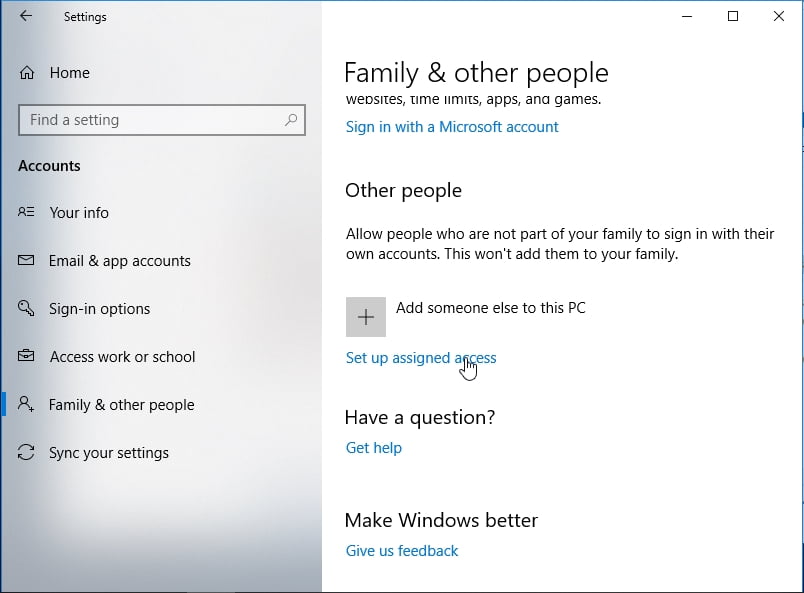
- Click on Family & other people located on the left side and then click on the Set up assigned access link found on the right.
![Click Set up assigned access.]()
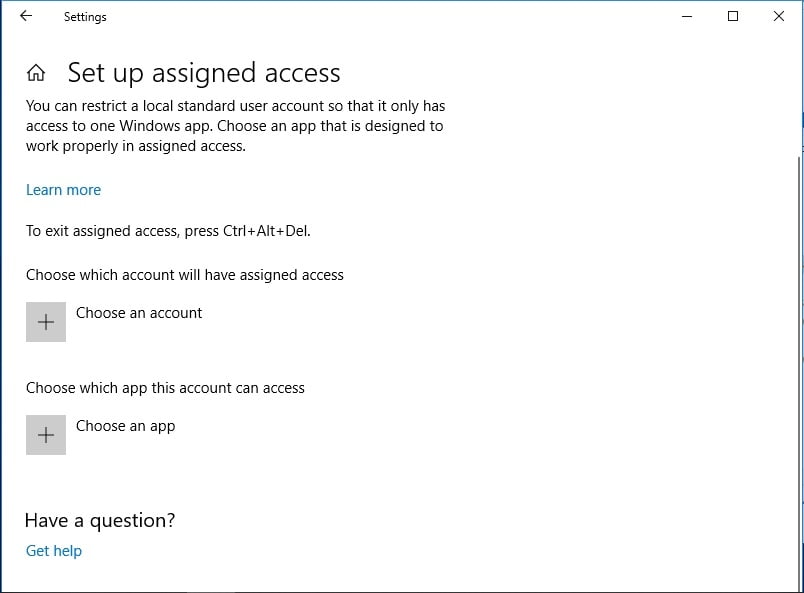
- Click on Choose an account. Select the local standard user account created earlier.
- Click on Choose an app. Select an available app you want set up and used with assigned access.
![Select Choose an app.]()
- Assigned access is now turned on for the particular account. Close Settings as you like.
- How to turn off this feature– Simply open Settings, and then click on the Accounts icon. Click on Family & other people on the left and click on the Set up assigned accesslink on the right. Click on Turn off assigned access and sign out the selected account. You may now close Settings as you please.
Note: Use Ctrl+Alt+Del to exit assigned access since you may not have access to the Start menu.
How to set up a kiosk using Windows PowerShell?
You can use Windows PowerShell cmdlets for setting up a single-app kiosk. All it takes is creating the user account on the device and installing the kiosk app for that account.
You can also use a PowerShell cmdlet to establish assigned access on multiple devices. Before running the cmdlets, log in as administrator and create the user account for Assigned Access. Log in as the Assigned Access user account, and then install the Universal Windows app, following the above guidelines. Log out as this user account and return to being an administrator.
Open PowerShell on Windows 10 by searching for Windows PowerShell Desktop app in the results when you search for PowerShell. Afterwards, run PowerShell as administrator. From here, you can configure assigned access such as by AppUserModeID and user name:
Set-AssignedAccess -AppUserModelId<AUMID> -UserName<username>

To remove assigned access via PowerShell, run this cmdlet:
Clear-AssignedAccess
How to run Chrome in Kiosk mode?
Enabling Kiosk mode and creating a secondary user profile provides a guest with a full-screen browser without any of your personal data. By the way, do you know how to protect your privacy and security?..
The steps are also fairly simple:
- Open up Settings in Chrome.
- Under Users, click Add new user.
- Provide the new profile with a name and picture. Leave Create a desktop shortcut for this user checked and then click Create.
- Right-click the newly formed shortcut. Select Properties.
- In the Target field, add –kiosk to the end.
- Click Apply.
Launching this shortcut opens Chrome into a dummy user account in full-screen mode. It’s enough to prevent the user you’re sharing the computer with from prying into your PC desktop stuff – if he or she isn’t highly tech-proficient, that is. This is because a simply Alt+F4 will exit the app and give the guest access to your entire computer.
These steps should be enough to learn how to set up Assigned Access in Windows 10, enabling or disabling the feature. Good luck and keep your eyes peeled for more tutorials!


 Done! Great to see you among our subscribers!