
Remote Desktop Connection has undergone several name changes since it debuted on Windows. At separate occasions, it has been referred to as Microsoft Terminal Services Client, mstsc, Remote Desktop, or tsclient. Nowadays, the name that has stuck with IT spheres is Remote Desktop or RDP. RDP is a special protocol that enables remotely controlling a computer or virtual machine connected to the same network.
In IT terms, the device being remotely controlled is called the ‘client device’ while the device making the connection is the ‘administrator’. Remote connection is only possible when both machines are on the same WiFi network or connected to the Internet. The administrator can remotely take control of the client computer. The user may be able to remotely control everything or only have access to the client PC’s mouse, keyboard, etc., depending on the specific RDP configuration.
Casual computer users utilize a form of RDP when they connect their mobile devices and PCs to the same network and control the former through the latter. However, standard RDP is mostly used by IT professionals, customer support representatives, managed service providers, or MSPs. RDP is widely used in corporate environments where individuals constantly access, transfer and modify resources and data on client machines.
However, what if the option to enable Remote Desktop is greyed out in Windows 10? This article provides you with the solution for this problem.
Why Is Remote Desktop Not Working?
Usually, setting up RDP on Windows 10 is pretty straightforward. Depending on whether the connection is through a local network or through the Internet, you only need to enable a few settings and you’re home and hosed.
Just to refresh your memory, here are the quick methods to initiate an RDP on a local network, and over the web.
RDP over local network:
- Launch the Control Panel and click System and Security.
- Select System on the System and Security screen.
- Click “Advanced system settings” on the left pane.
- Switch to the Remote tab in the System Properties dialog.
- Under Remote Desktop, tick “Allow remote connections to this computer”.
- Select the “Allow connections only from computers running Remote Desktop with Network Level Authentication” checkbox to connect remotely through a local network.
- Click the OK, Apply, and OK buttons successively to save your modifications.
Follow these steps for Windows 11 (Windows 11 Pro):
- Open the Settings application by tapping Win + I.
- Once the Settings window shows up, scroll down under the main Settings page and click on Remote Desktop.
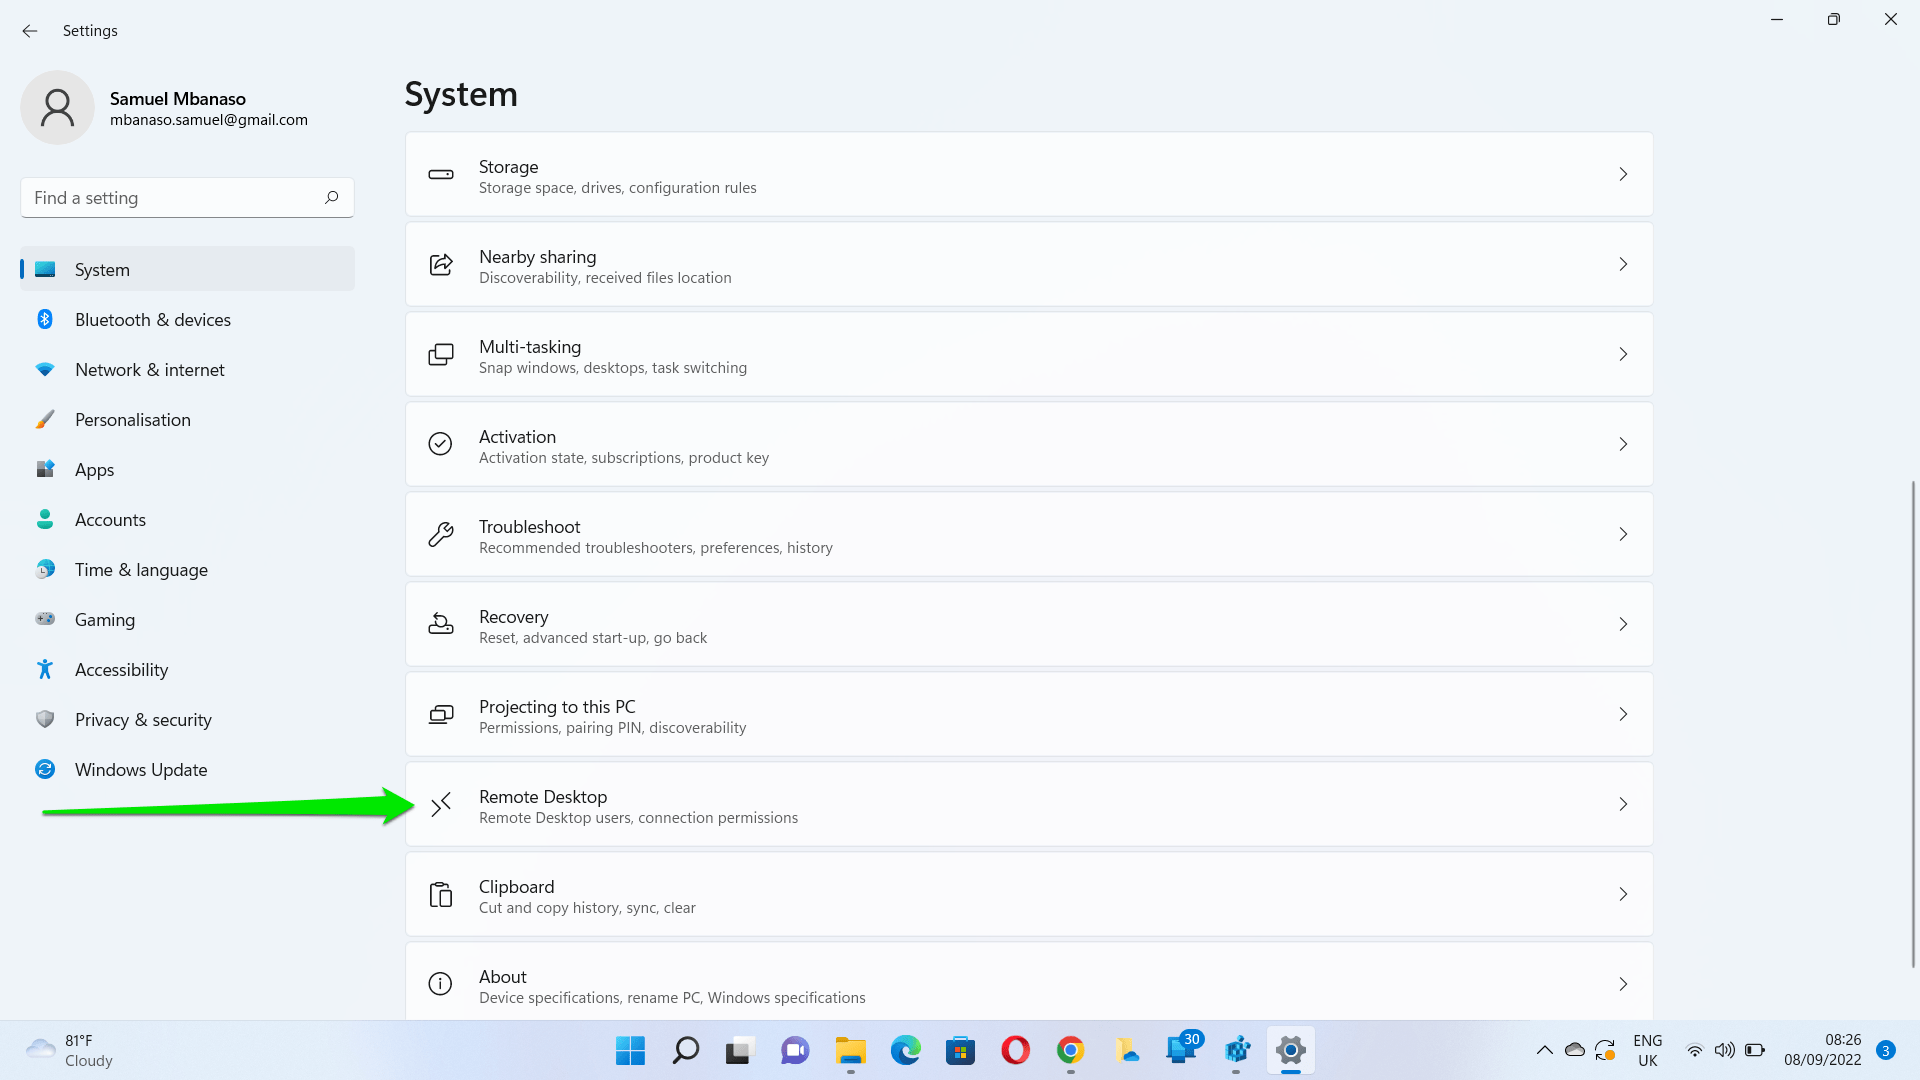
- Toggle on the Remote Desktop switch and confirm your decision.
Note: The feature isn’t available on the Home edition of Windows 10.
RDP over Internet connection:
- Launch the Remote Desktop app on Windows 10. Get it from the Microsoft Store if it isn’t already installed.
- Click the Add (+) button and select Desktop.
- Under the PC Name section, enter the TCP/IP address of the client computer or its local IP address if it is within a private network.
- Click the + button next to User Account and enter the username and password for the client PC.
- If you wish, click the + button next to “Display name” and specify the various settings.
- Click Save to add the remote computer.
- When you want to connect to the client PC remotely, select it from the Saved Desktops section and click Connect.
Of course, the “Allow remote connections to this computer” option in System Properties must be enabled for remote connection to work over the Internet or a local network.
However, there has been lots of complaint lately that the option to enable RDP on the computer is both greyed out and disabled. This means that users are unable to enable the option and start Remote Desktop. If you are one of the affected users, you can use the steps below to fix the Remote Desktop option greyed out issue on Windows 10.
How to Fix the ‘Remote Desktop Option Is Greyed Out’ Issue on Windows 10
To make the “Allow remote connections to this computer” option selectable if it is greyed out, you need to change some registry settings. The registry isn’t something you can handle with kid gloves as making mistakes can cause system failure.
Before you go ahead with the tips here, it is recommended to create a system restore point. Another good idea is to back up your registry. Did you know that Auslogics Registry Cleaner automatically creates a registry backup each time you use it to clean up the registry?
Once you’ve taken the needed precautions, go ahead and follow these steps to fix the Remote Desktop greyed out issue in Windows 10.
- Press the Windows Logo and R keys at the same time to open the Run box.
- Type “regedit” (without quotes) and hit the Enter key or click OK.
Go to the following location in the registry. You can also paste it in the path bar to quickly jump there:
Computer\HKEY_LOCAL_MACHINE\SOFTWARE\Policies\Microsoft\Windows NT\Terminal Services
- With Terminal Services selected in the left pane, double-click fDenyTSConnections on the right and change its value.
If the fDenyTSConnections DWORD isn’t available, you can create it. To do that, right-click on the blank area in the right pane and select New > DWORD (32-bit) Value. After the new DWORD shows up, rename it to fDenyTSConnections.
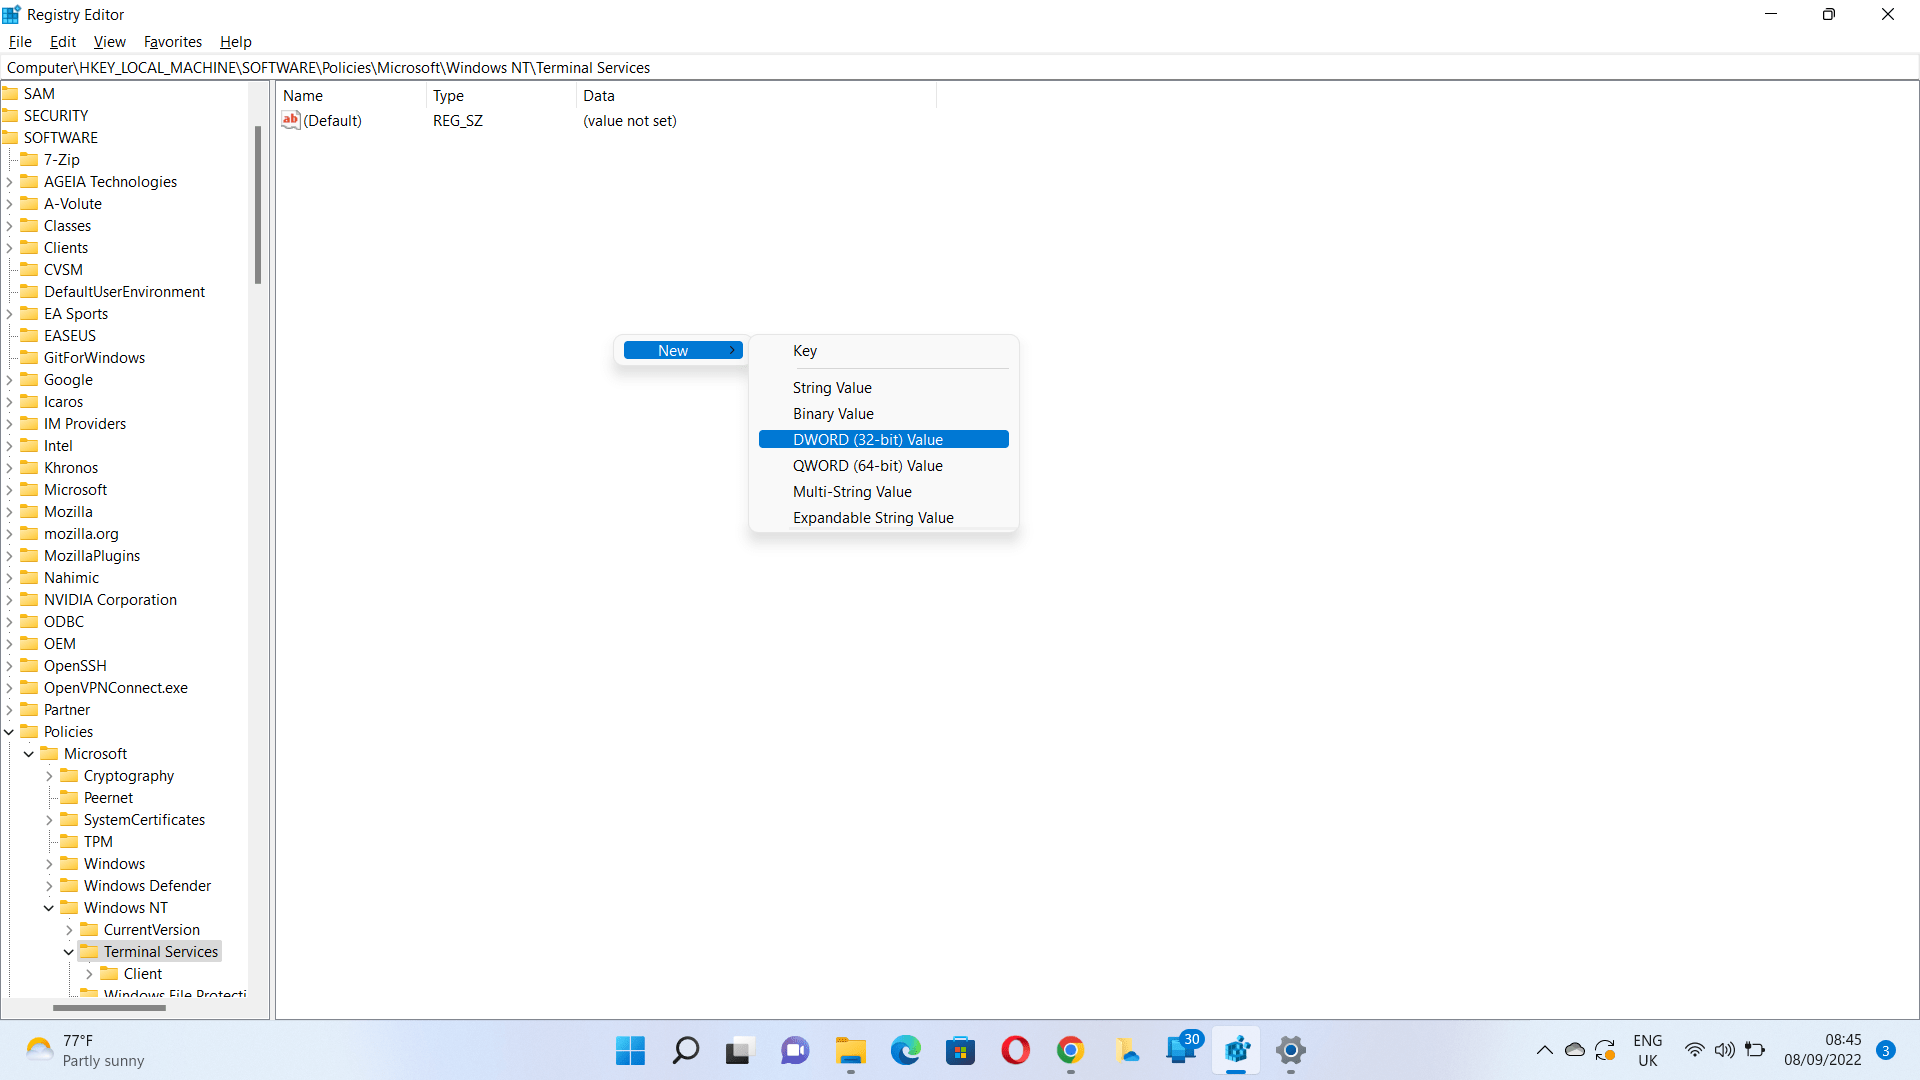
The options for the fDenyTSConnections Value data value are:
0 – Allow users to connect remotely using Terminal Services / Remote Desktop
1 – Disallow users to connect remotely using Terminal Services / Remote Desktop
- To make the “Allow remote connections to this computer” field become selectable, change the value in the Value data field to 0 and click OK.
Reboot the PC now and check the Remote tab in System Properties or the System page in Settings (Windows 11). You will find that the greyed-out option can now be selected.
Rarely, additional registry issues can prevent the option from appearing even after making the above fix. To ensure that no registry setting is interfering with Remote Desktop, you can scan the registry for errors. A recommended program for this is Auslogics Registry Cleaner. It will analyze safe areas of the registry for broken, empty and invalid keys and clean them out.
We hope this article taught you how to enable RDP on Windows 10 and also how to get the “Allow remote connections to this computer” option back when it is greyed out. After successfully applying the fix, you can go ahead to remotely connect to your devices.


 Done! Great to see you among our subscribers!