
These days, people perform a variety of essential tasks and errands over the Internet. Technology has made it easier and convenient for us to pay our bills, communicate with people overseas, and shop for items that we need. However, if you learn about the various ways your computer can be hacked, you will definitely be alarmed. Needless to say, in today’s dangerous digital age, you wouldn’t use your PC without a reliable antivirus program.
System updates typically bring improvements and better features. However, many users have complained that Windows 10 stops antivirus installation processes. In most cases, third-party software should work fine with this operating system. On the other hand, it is possible for you to experience the following problems with installing antivirus software:
- You’re unable to install antimalware or antivirus software on your Windows 10 computer. It is possible that the program is not compatible with your PC.
- Malware or viruses might block the installation process. A rescue disk should be used on a different computer to get rid of the issue.
- Corrupted files might be preventing you from installing your antivirus. This can be resolved by running SFC and DISM scans.
- Third-party applications may also be blocking the installation process. In this case, removing such programs would fix the problem.
If you’re experiencing the aforementioned, don’t worry because we will teach you how to fix Windows 10 prevents antivirus issue. Just follow the methods below so you can get the protection that your computer needs.
Method 1: Remove other Antivirus Programs
Most antivirus programs work well with Windows Defender. However, if you have multiple third-party antivirus products installed on your computer, they might interfere with each other. It is also possible that you were not aware that you had installed the program in the first place. So, we recommend that you remove all other antivirus tools on your computer. With that said, follow the instructions below:
- Click the Search icon on the tray.
- Type “control panel” (no quotes), then hit Enter.
- Go to Programs, then click Programs and Features.
- Look for unwanted antivirus software.
- Right-click the program, then click Uninstall.
- Install the antivirus software you prefer.
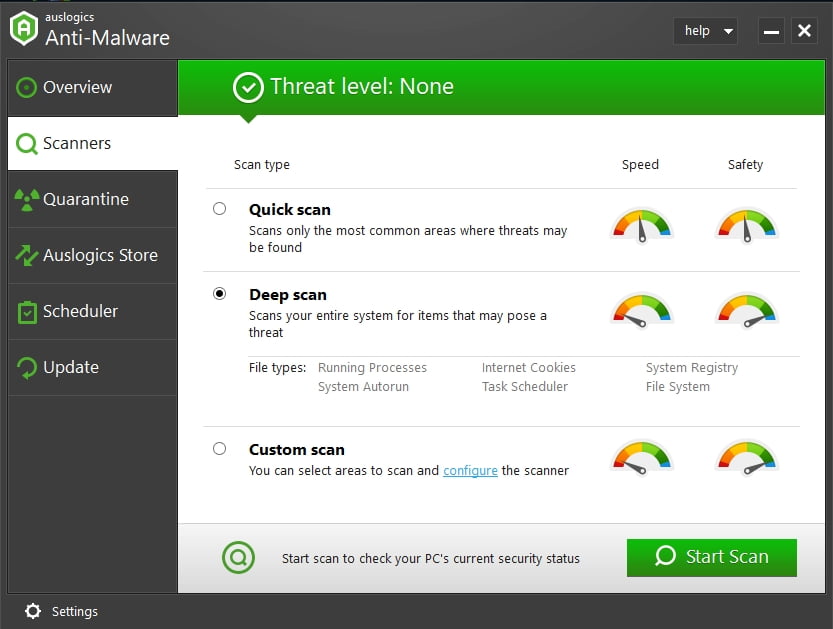
We also advise you to choose an antivirus program that offers comprehensive features and yet compatible with Windows 10. With that said, opt for Auslogics Anti-Malware. This useful tool will protect your computer from malicious programs and files that may threat your personal data’s safety. What’s more, it won’t interfere with your built-in antivirus software.
Method 2: Disabling Windows Defender
As we’ve mentioned, Windows Defender should not be the reason behind your problems with installing antivirus software. On the other hand, your third-party security tool might have features that may come in conflict with Windows Defender. As such, we recommend turning off this built-in program first, then try installing your preferred antivirus program. Simply follow the instructions below:
- Go to the Search icon on the tray.
- Type “settings” (no quotes), then press Enter.
- Go to Update and Security.
- On the left bar menu, click Windows Defender.
- Click the Open Windows Defender Security Center button.
- Select Virus & Threat Protection.
- Scroll down, then click Virus & Threat Protection Settings.
- Turn off ‘Real-time protection.’
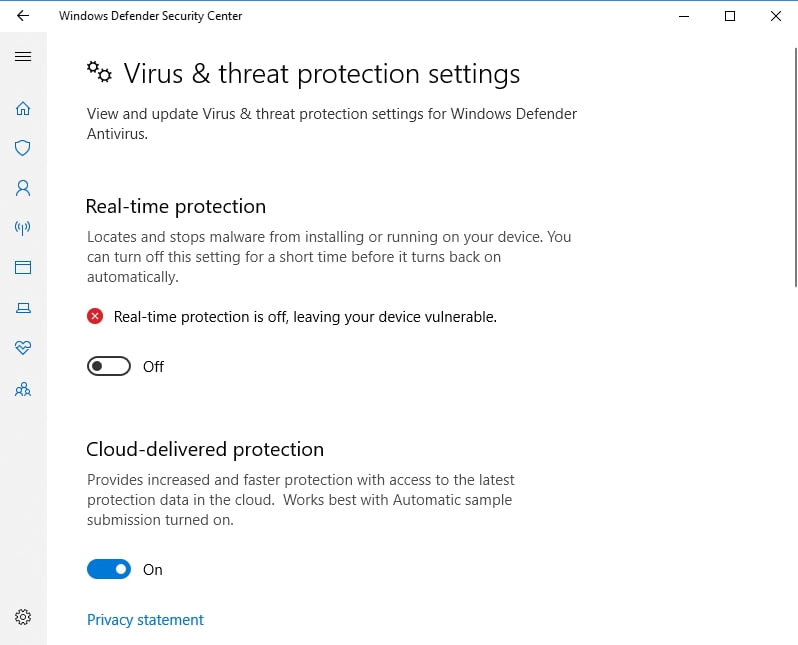
Now that you’ve disabled Windows Defender, you can try installing your preferred antivirus software.
Method 3: Running an SFC scan
If Windows 10 stops antivirus installation processes, it is possible that there are corrupted system files in your computer. The good news is, there are many ways to fix this problem. One of the easiest ways to do so is to run an SFC scan. This program is specifically designed to repair corrupted system files. With that said, follow the steps below:
- Click the Search icon on the tray.
- Type “command prompt” (no quotes).
- On the results, right-click Command Prompt, then select Run as Administrator.
- Inside the Command Prompt, type “sfc /scannow” (no quotes), then press Enter. This should launch the SFC scan.
- It may take a couple of minutes for the scan and repair process to complete. It is important that you do not interrupt it.
Once the SFC scan is complete, try installing the antivirus again and check if the issue has been resolved. However, if you’re still unable to install antimalware, you’d have to run a DISM scan too. Here are the instructions.
- Go to the Search icon on the taskbar.
- Paste “command prompt” (no quotes).
- Right-click Command Prompt from the results, then choose Run as Administrator.
- Once Command Prompt is up, type “DISM /Online /Cleanup-Image /RestoreHealth” (no quotes), then hit Enter.
- This process may take several minutes. Just wait for it to complete and do not attempt to interrupt it.
Method 4: Performing a Clean Boot
It is possible that certain third-party startup applications on your computer may be preventing you from successfully installing your antivirus. You can resolve this issue by performing a clean boot. You can easily do this by following the steps below:
- On your keyboard, press Windows Key+R.
- Inside the run dialog box, type “msconfig” (no quotes), then hit Enter. This should bring up the System Configuration window.
- Go to the Services tab, then click the box beside ‘Hide all Microsoft services.’
- Click the Disable All button.
- Go to the Startup tab, then click Open Task Manager.
- You should be able to see the list of startup applications.
- Right-click the first application on the list, then select Disable. Repeat this process for all the items on the list.
- Once you’ve disabled all the startup applications, exit Task Manager and return to the System Configuration window.
- Save the changes by clicking Apply and OK.
- Restart your computer, then check if the issue has been resolved.
- Once you’ve successfully installed your antivirus, enable all startup services and applications.
Method 5: Removing Junk and Temporary Files
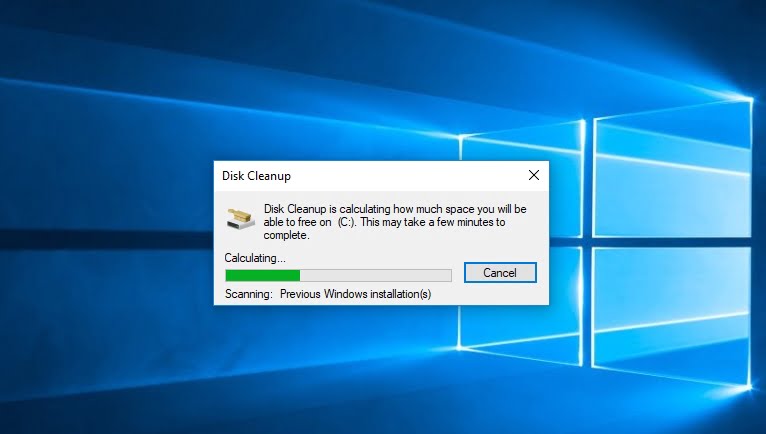
Many users have reported that temporary and junk files are some of the reasons why the issue occurs. To resolve the problem, you have to remove these files. You can easily do this by using Disk Cleanup, which is a built-in Windows tool. This will let you remove unnecessary files and free up space on your hard drive. Simply follow the steps below:
- Click the Search icon on the taskbar.
- Type “disk cleanup” (no quotes), then hit Enter.
- Select the drive you wish to clean, then click OK.
- The program will calculate the amount of space that can be freed on your drive.
- Select all the temporary and junk files you want to remove, then click OK.
Disk Cleanup can efficiently remove temporary and junk files. However, if you want a tool with comprehensive features, we recommend using Auslogics BoostSpeed. Aside from cleaning out unwanted files, this program will also identify problems that may affect the speed of your computer. What’s more, Auslogics BoostSpeed protects your privacy by eliminating traces of your activities. As such, you can resolve issues with installing your antivirus while improving the speed and security of your PC!
Method 6: Restarting the Windows Audio Service
When learning how to fix Windows 10 prevents antivirus issue, you will discover that the methods available are plenty. It may seem odd, but one of the ways to resolve this problem is by disabling the Windows Audio service. Several users have reported that this method worked for them. As such, we advise you to try the steps below:
- On your keyboard, press Windows Key+R.
- Inside the run dialog box, type “services.msc” (no quotes), then hit Enter.
- Once the Services window is up, look for the Windows Audio service.
- Right-click it, then select Stop from the options.
- After a few seconds, right-click Windows Audio, then select Start from the options.
- Once you’ve restarted the service, try to install your antivirus and check if the issue has been resolved.
Which of these methods do you think works best?
We’re looking forward to reading your thoughts on the comments below!


 Done! Great to see you among our subscribers!