
There are people who always want to be the first to try the latest innovations. Some are even willing to try beta versions of apps and provide feedback to improve the features and usability. If you’re one of those who want to constantly be at the bleeding edge of technology, you might want to join the Windows Insider program. Users who take part in this have the privilege to be one of the first people to test the new features of the latest Windows 10 updates before they are released to the general public.
You may have fun trying out new and unfinished builds of this operating system. However, you should also be ready to face issues along the way. One of the problems you may encounter is the error message which says, ‘A component of the operating system has expired.’
How to fix a component of the operating system has expired error
Before you can effectively learn how to fix “a component of the operating system has expired error”, it is important to know what causes the issue. This error message comes in various forms, including the following:
- Component of operating system has expired winload.efi – Most of the time, this error has something to do with your BIOS clock. Learninghow to fix component of operating system has expired winload.efiis simple. All you have to do is set the correct date and time in your BIOS clock.
- Windows 10 preview a component of the operating system has expired – If you’re using a preview version of Windows 10, this error might show up. Switching to the final version of the operating system should resolve this problem.
- A component of the operating system has expired Bootcamp, Virtualbox – This applies to users who are utilizing Bootcamp or Virtualbox. Make sure you try our solutions below to resolve this issue.
Method 1: Correcting the date
If you want to learn how to fix component of operating system has expired winload.efi, all you have to do is change the date on your computer. Here are the steps:
- Right-click the Windows Key, then select Settings from the menu.
- Go to Time & Language.
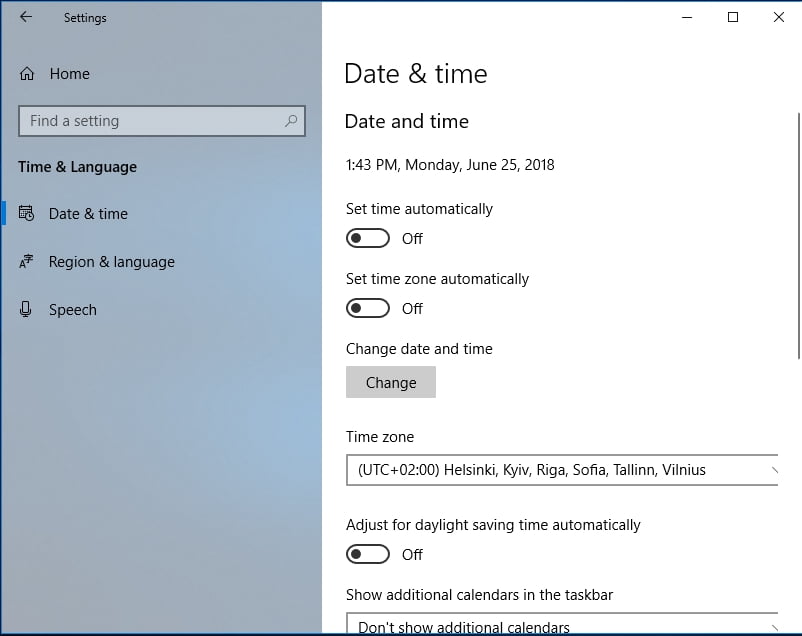
- Go to the left bar menu and click Date & Time.
- Make sure that the ‘Set time automatically’ option is switched off.
![Make sure to disable the Set time automatically option.]()
- Click the Change button.
- Enter the correct date, then save it by clicking Change.
If you can’t boot into Windows 10, you can modify the date from Safe Mode. Simply follow the instructions below:
- During the boot sequence, restart your computer a couple of times until the Automatic Repair feature shows up.
- Select Troubleshoot, then click Advanced Options.
- Go to Startup Settings, then click the Restart button.
- Once your computer restarts, you will see the list of options. Choose any version of Safe Mode.
- After booting into Safe Mode, change the date by following the previous set of instructions.
Some users got rid of the error by changing the date from BIOS. If you want to try this method, make sure that you review your motherboard manual to get the detailed instructions. You might also want to try setting an earlier date to eliminate the problem. You can even prevent it from happening again by turning off automatic time syncing.
Method 2: Removing the motherboard battery, then changing the date in BIOS
It is also possible that the motherboard battery is causing the error. If it is not functioning properly, the date might change whenever you turn off your computer, causing the problem to reappear. As such, you have to check whether the date keeps on changing whenever you switch off your PC.
If this is the case, then it is likely that you have a faulty motherboard battery that has to be replaced. The process involved in replacing it is simple. You just have to turn off your computer, unplug it from the power outlet, then open the case. Look for the battery on your motherboard, then gently remove it. After that, you can insert the new battery and resolve the issue.
Make sure to open your computer case only after the warranty has expired. Touching the internal components of your PC can void your warranty. So, if your computer is still under warranty, it would be ideal to bring it to the official repair center.
A virus or malware may also cause the date to constantly change whenever you restart your PC. So, once you’ve gotten rid of the error, use a trusted tool like Auslogics Anti-Malware to prevent it from reoccurring. This program detects malicious items, keeping your computer safe and secure. It even catches threats that your regular antivirus may miss.
Method 3: Using Command Prompt
For this method, you will need Windows 10 installation media. You can either use the installation disc or download the Media Creation Tool and create a bootable USB flash drive. That said, follow the instructions below:
- Insert the bootable media to your computer.
- Enter BIOS, then set an earlier date.
- Choose the bootable media as the primary boot device.
- Save the changes, then exit.
- Once you see the Windows 10 installation window, press Shift+F10. This should bring up Command Prompt.
- Once Command Prompt is up, enter the following:
cd c:\windows
attrib -r -h -s bootstat.dat
rename bootstat.dat bootstat.old
exit
- Remove the bootable media from your computer, then restart it.
- Once you boot into Windows 10, you will be able to download and install the latest build.
- Set the correct date to resolve the issue.
Method 4: Installing the missing updates
It is worth mentioning that changing the date can only temporarily fix the error. However, if you want to get rid of it permanently, we recommend installing the missing updates.
In most cases, the updates are automatically downloaded in the background. However, due to certain issues, the automatic download might miss an update or two. On the other hand, you can manually check available updates by following these steps:
- On your keyboard, press Windows Key+I. This should open the Settings window.
- Go to the left bar menu, then type “check for updates” (no quotes) inside the search box.
- Click the Check for Updates button.
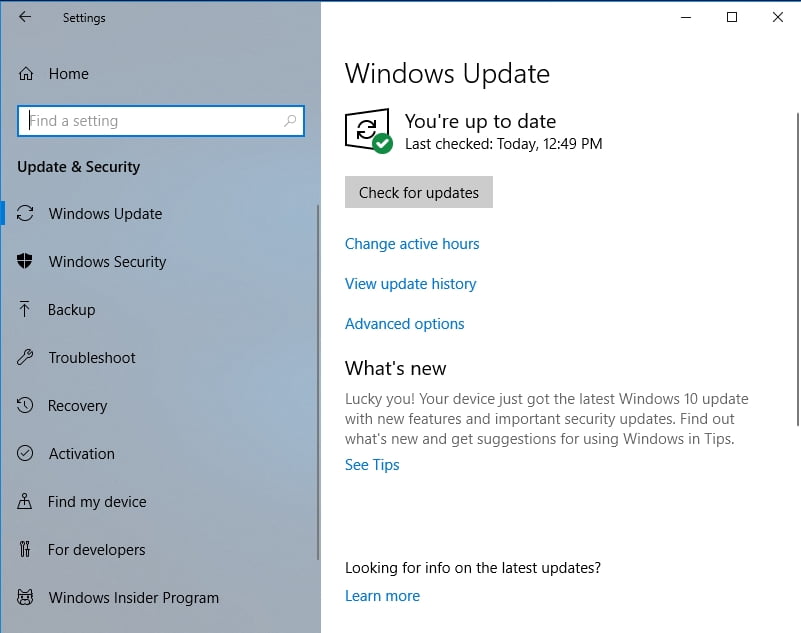
If there are available updates, they will automatically be downloaded in the background. Moreover, they will be installed as soon as you restart your computer. You should be able to resolve the issue completely by ensuring that everything is up to date.
Do you have other suggestions for resolving this error?
We’d love to read your ideas in the comments below!


 Done! Great to see you among our subscribers!