
We can accidentally delete files in different scenarios. For example, you may have deleted a folder without moving some important files or selected a batch and included files you still need. Even worse is when you press the Shift button while deleting or clearing the recycle bin without double-checking.
You could also lose files to a virus attack or systems crash.
But not to worry. You can revive your files using a third-party or Microsoft application, and we’ll show you how.
How to Recover Deleted Files
There are different ways to recover files on Windows, from using built-in recovery tools to standalone Microsoft and third-party applications. This article will show you how to use Microsoft’s Windows File Recovery tool and third-party software. You’ll also see how to use the File History and Folder Versions options.
Using Auslogics File Recovery
Auslogics File Recovery is a reliable and affordable recovery tool that revives deleted files from SD cards, USB flash drives, SSDs, and mechanical drives. It supports every major file system and can recover different file types.
It allows you to recover files in a straightforward manner unlike the Windows File Recovery tool that involves entering somewhat complicated commands and switches.
The tool also comes with other features such as:
- Recovering files from lost partitions
- Secure file shredding
- Advanced sorting
- Disk image creation
Follow these steps to use the program:
- Head to https://www.auslogics.com/en/software/file-recovery/ and click on the Download Now button. You can click on the Today’s Price button to buy the pro version.
- Open the setup file and click on Yes in the UAC prompt.
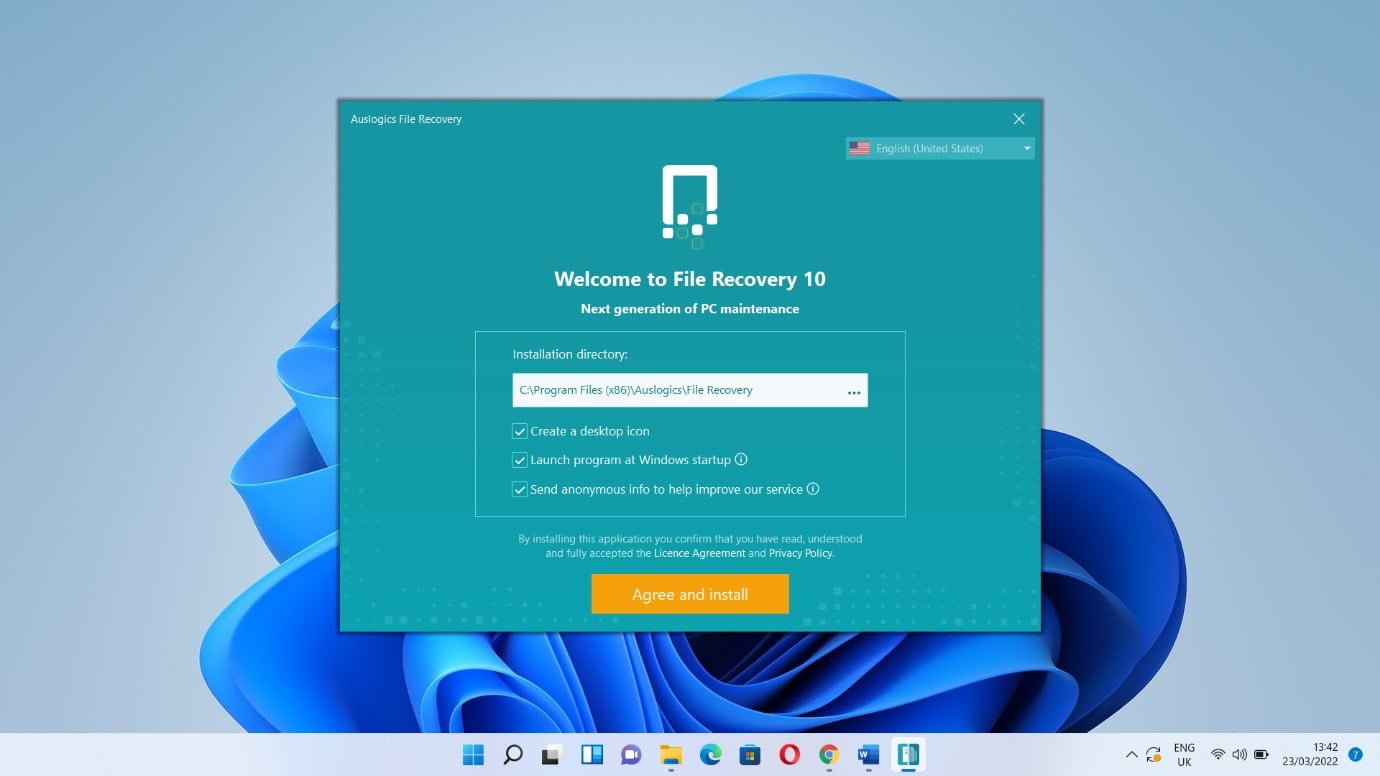
- On the first page of the installation wizard, select your preferences and click on “Agree and Install.”
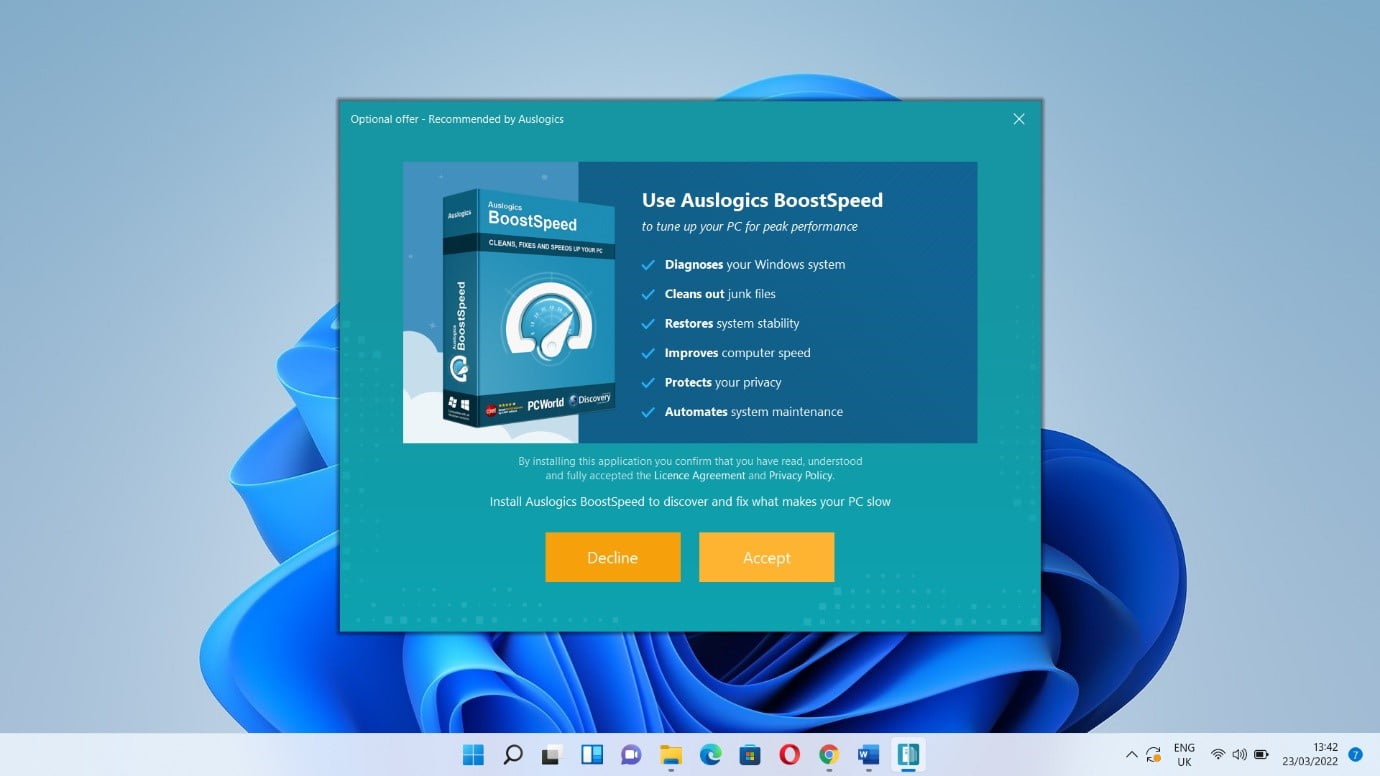
- Click on Accept.
- Click on Finish and allow the tool to launch.
- Once the program opens, select the drive where the files were deleted. You can search for deleted files in more than one drive at a time.
- Next, select the types of files you want to recover and click on Search.
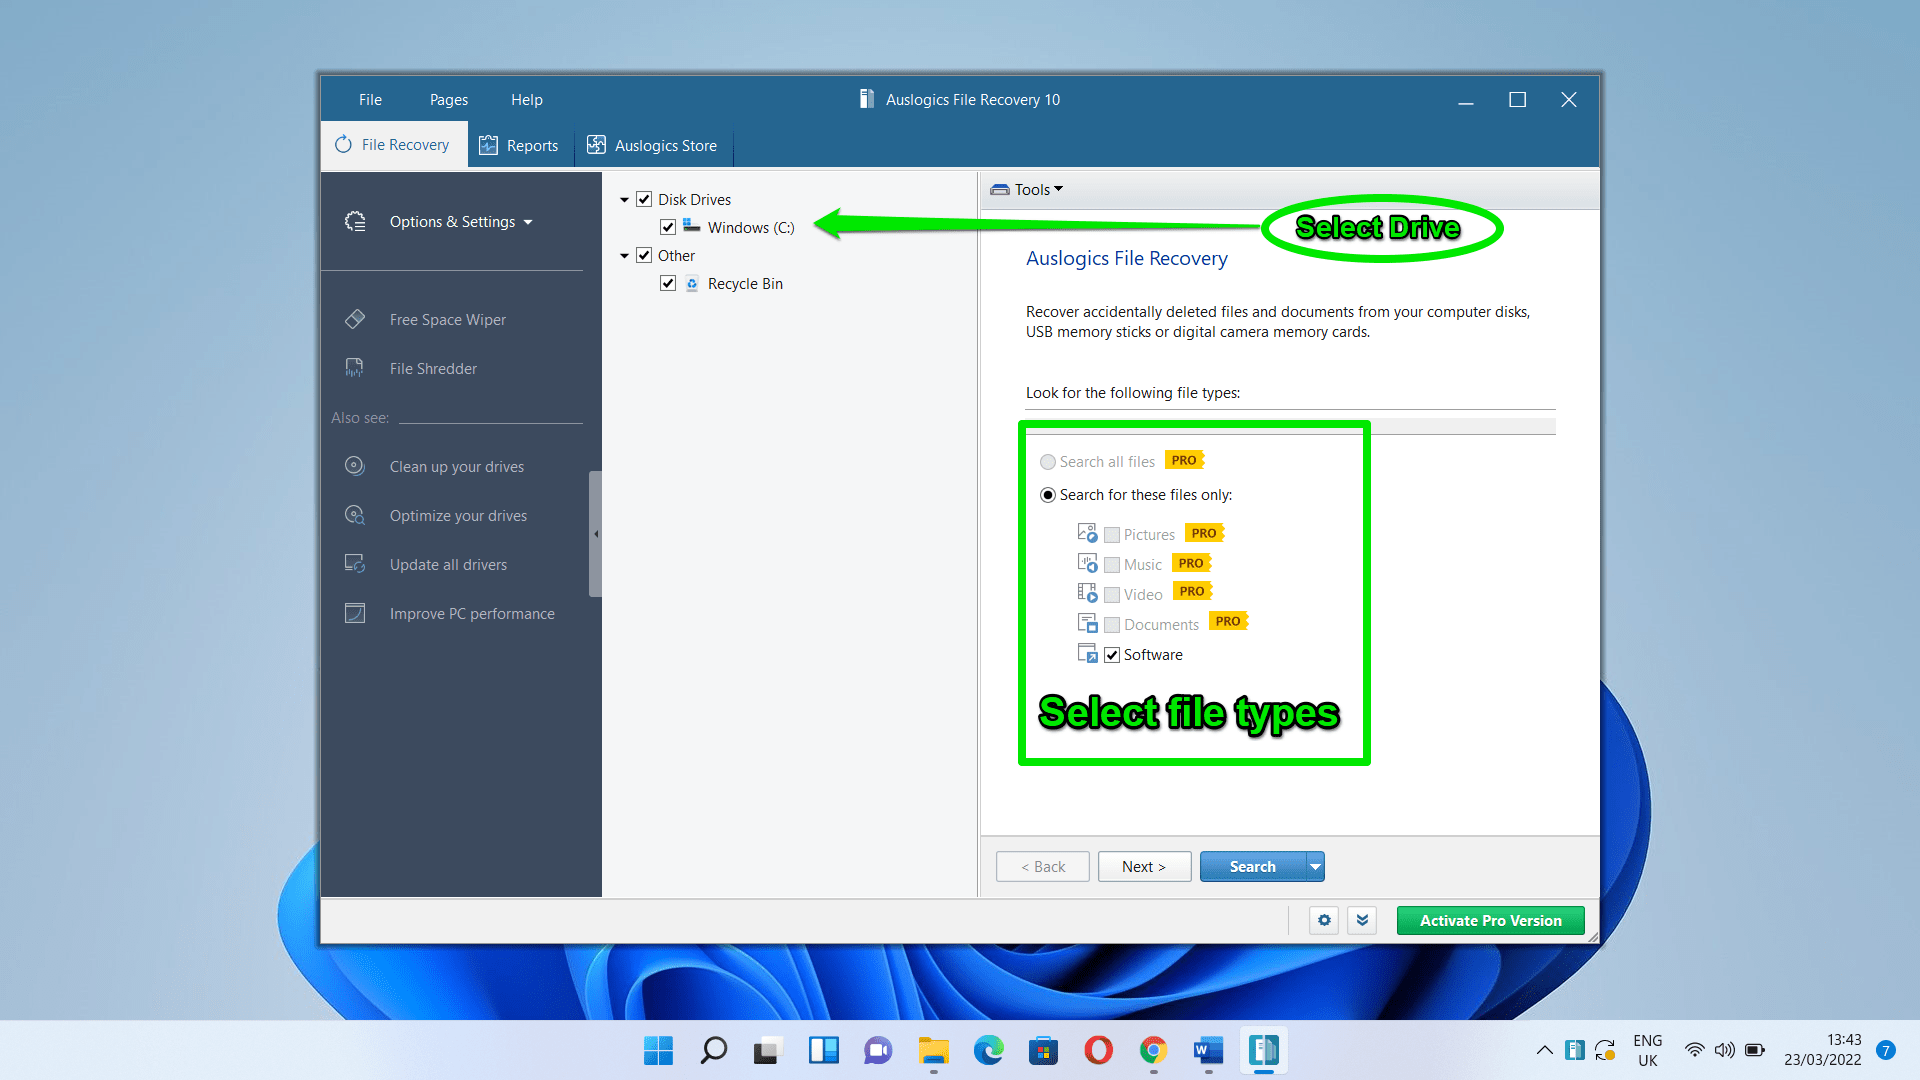
You can go to the left side of the window to check out other options.
How to recover deleted files using Windows File Recovery
Windows File Recovery is a command-line application that restores permanently lost files from USB devices (like a thumb drive), external drives, and internal drives. The tool can recover different types of files, from application and system files to photos, videos, and documents. It supports different file systems, including NTFS, exFAT, and FAT.
Note that the FAT and exFAT file systems are typically used for flash drives and memory cards that typically have less than 4GB of storage. On the other hand, hard disk drives (mechanical drives), SSDs, and external drives usually use NTFS.
The Windows File Recovery tool uses different modes when recovering files. You’ll have to specify which mode to use when you launch the utility. They include:
Regular Mode: This is the suitable mode for NTFS drives that haven’t suffered corruption. While it has the advantage of being fast, it may not revive the file you’re looking for, especially if you lost it a long time ago.
Extensive Mode: The extensive mode is suitable for every drive and file type. It typically takes longer as it tries to revive files that may have been deleted long ago. It also works on corrupt drives and storage devices that have been reformatted.
Note: Using the Windows File Recovery tool may seem overwhelming because of the commands you’ll have to type. If you’re not comfortable operating your computer through the Command Prompt, you can ask an expert for help or head to the next method, which shows you how to use a third-party tool with a GUI.
Installing the tool
The Windows File Recovery app does not support Windows 10 builds earlier than the May 2020 version. So, make sure you’re using the May 2020 (2004) build or later. It would be best to install Windows 10’s latest version. If you’re using an older version, search for Windows Update in the Start menu, click on “Check for updates,” and allow your computer to download and install the latest updates.
The tool also works on Windows 11.
Now, follow these steps to install the tool:
- Launch the Microsoft Store. If you don’t have the icon pinned to your taskbar, open the Start menu and search for it.
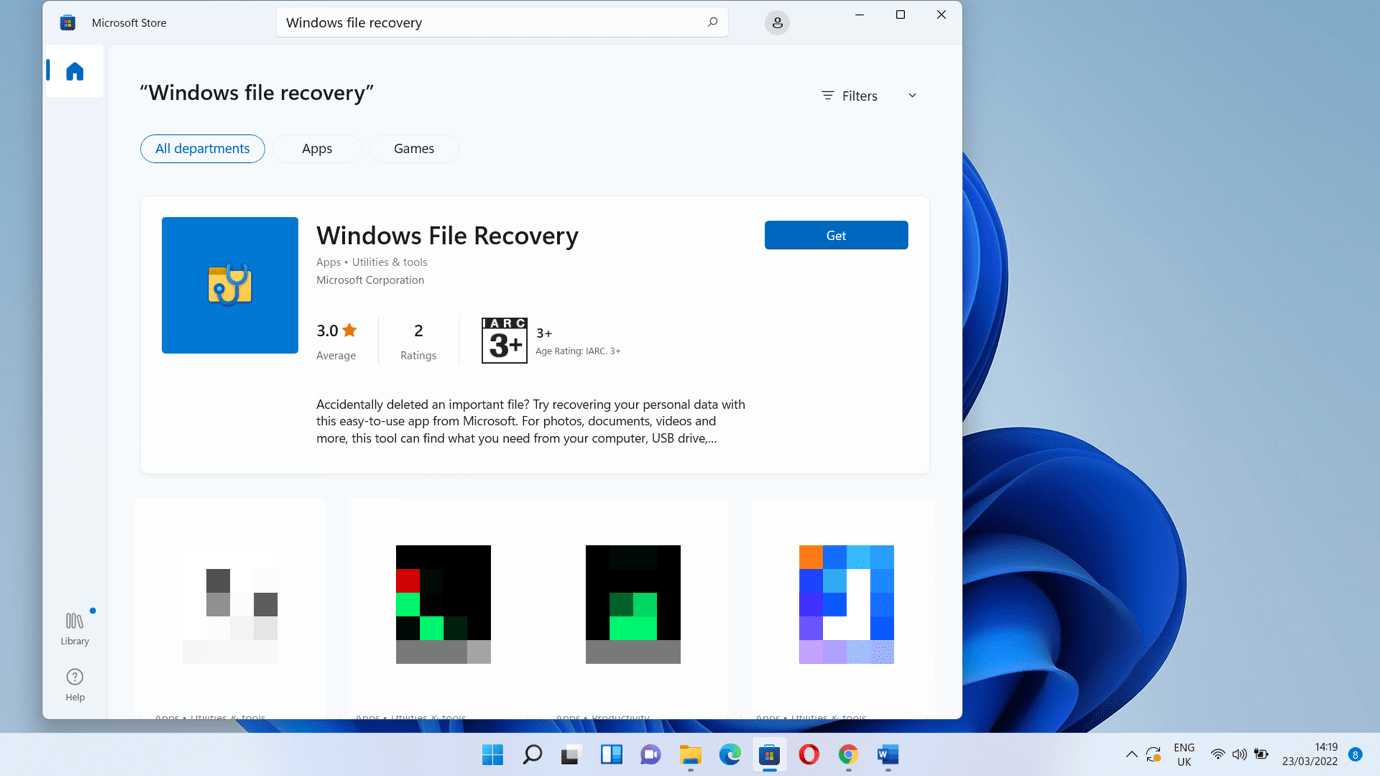
- After the store opens, go to the search bar and enter “Windows file recovery.”
- Click on the Get button once the application appears.
Clicking on the Open button will launch a Command window, but you’ll have to click on yes in the UAC pop-up before that. You can also open the All Apps section in the Start menu (Windows 11) or search for the app to open it.
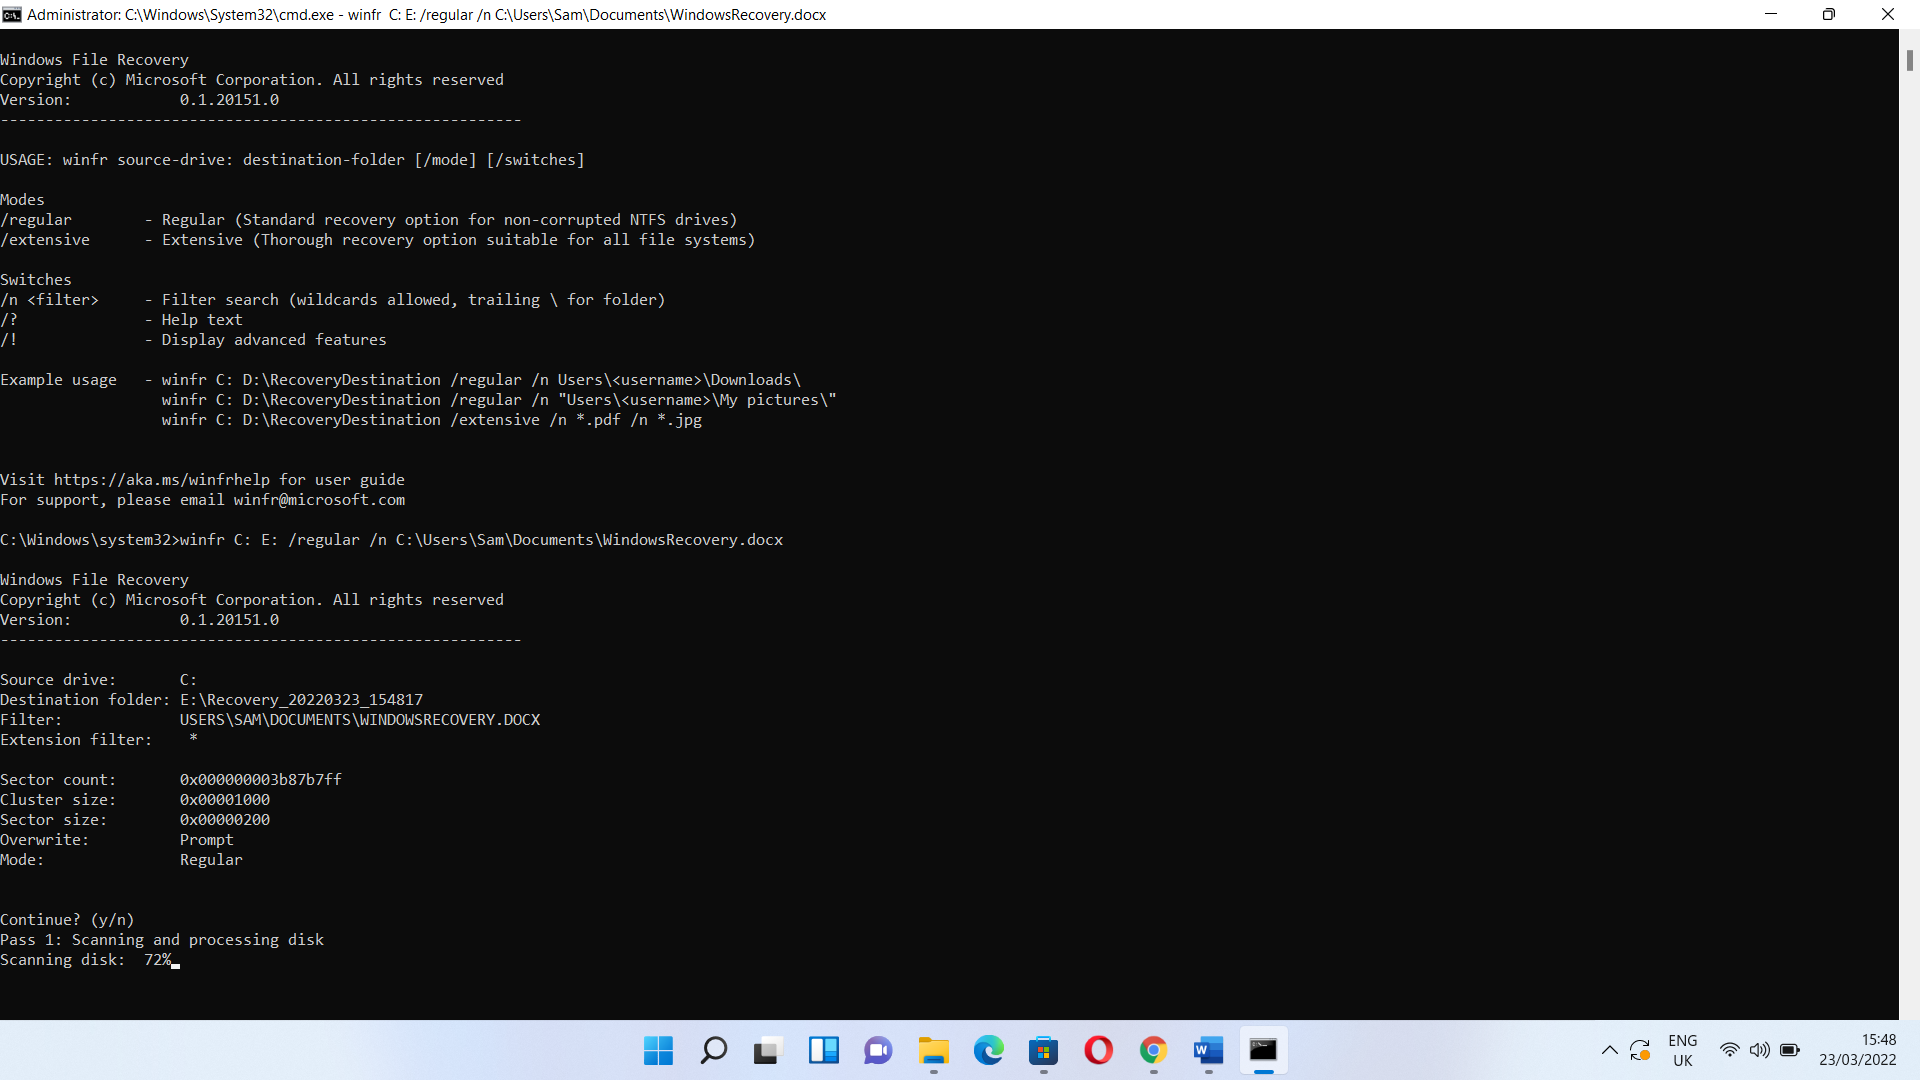
Once the Command Prompt window appears, you’ll see a list of commands and syntaxes to guide you on how to use the tool. This is the basic command:
winfr source-drive: destination-drive: [/mode] [/switches]
![Enter winfr source-drive: destination-drive: [/mode] [/switches]](https://www.auslogics.com/en/articles/wp-content/uploads/2022/03/winfr-source-drive-destination-drive-mode-switches.png)
Understanding the basic syntaxes
There are different syntaxes in the basic command. Let’s break them down.
source-drive: – this represents the drive where you lost the files. For example, if you’re trying to recover a file you deleted on your main drive, you’ll use C: in place of source:drive:. It must not be the same as the destination drive.
destination-drive: – this represents the drive where the tool will send the recovered file. For example, if you want the recovered file transferred to a USB drive, use E: (if the drive’s letter is E) in place of destination-drive:.
[/mode] – this is the placeholder for the mode you want to run. Type /regular to run the regular mode and type /extensive to run the extensive mode.
[/switches] – this is where you’ll type different switches that tell the tool what to do. For example, you can use the /n switch to tell the tool to recover a specific file type from a specific folder. For example, the following switch tells the tool to find a document in the Documents folder:
/n \users\<nameofuser>\Documents\WindowsRecovery.docx
Notes:
- Make sure to place a backslash at the end of a folder name if you want to search for all the deleted files in a folder. For example /n \users\<nameofuser>\Documents\
- If there are spaces in the path to the file or folder, make sure the path is enclosed with quotes. For example /n “\users\<nameofuser>\Documents\Windows Recovery.docx”
Running a regular search
Now, let’s run a regular search for a recently deleted file named WindowsRecovery.docx in my documents folder. I’ll open the Windows File Recovery tool and enter the following command:
winfr C: E: /regular /n C:\Users\Sam\Documents\WindowsRecovery.docx
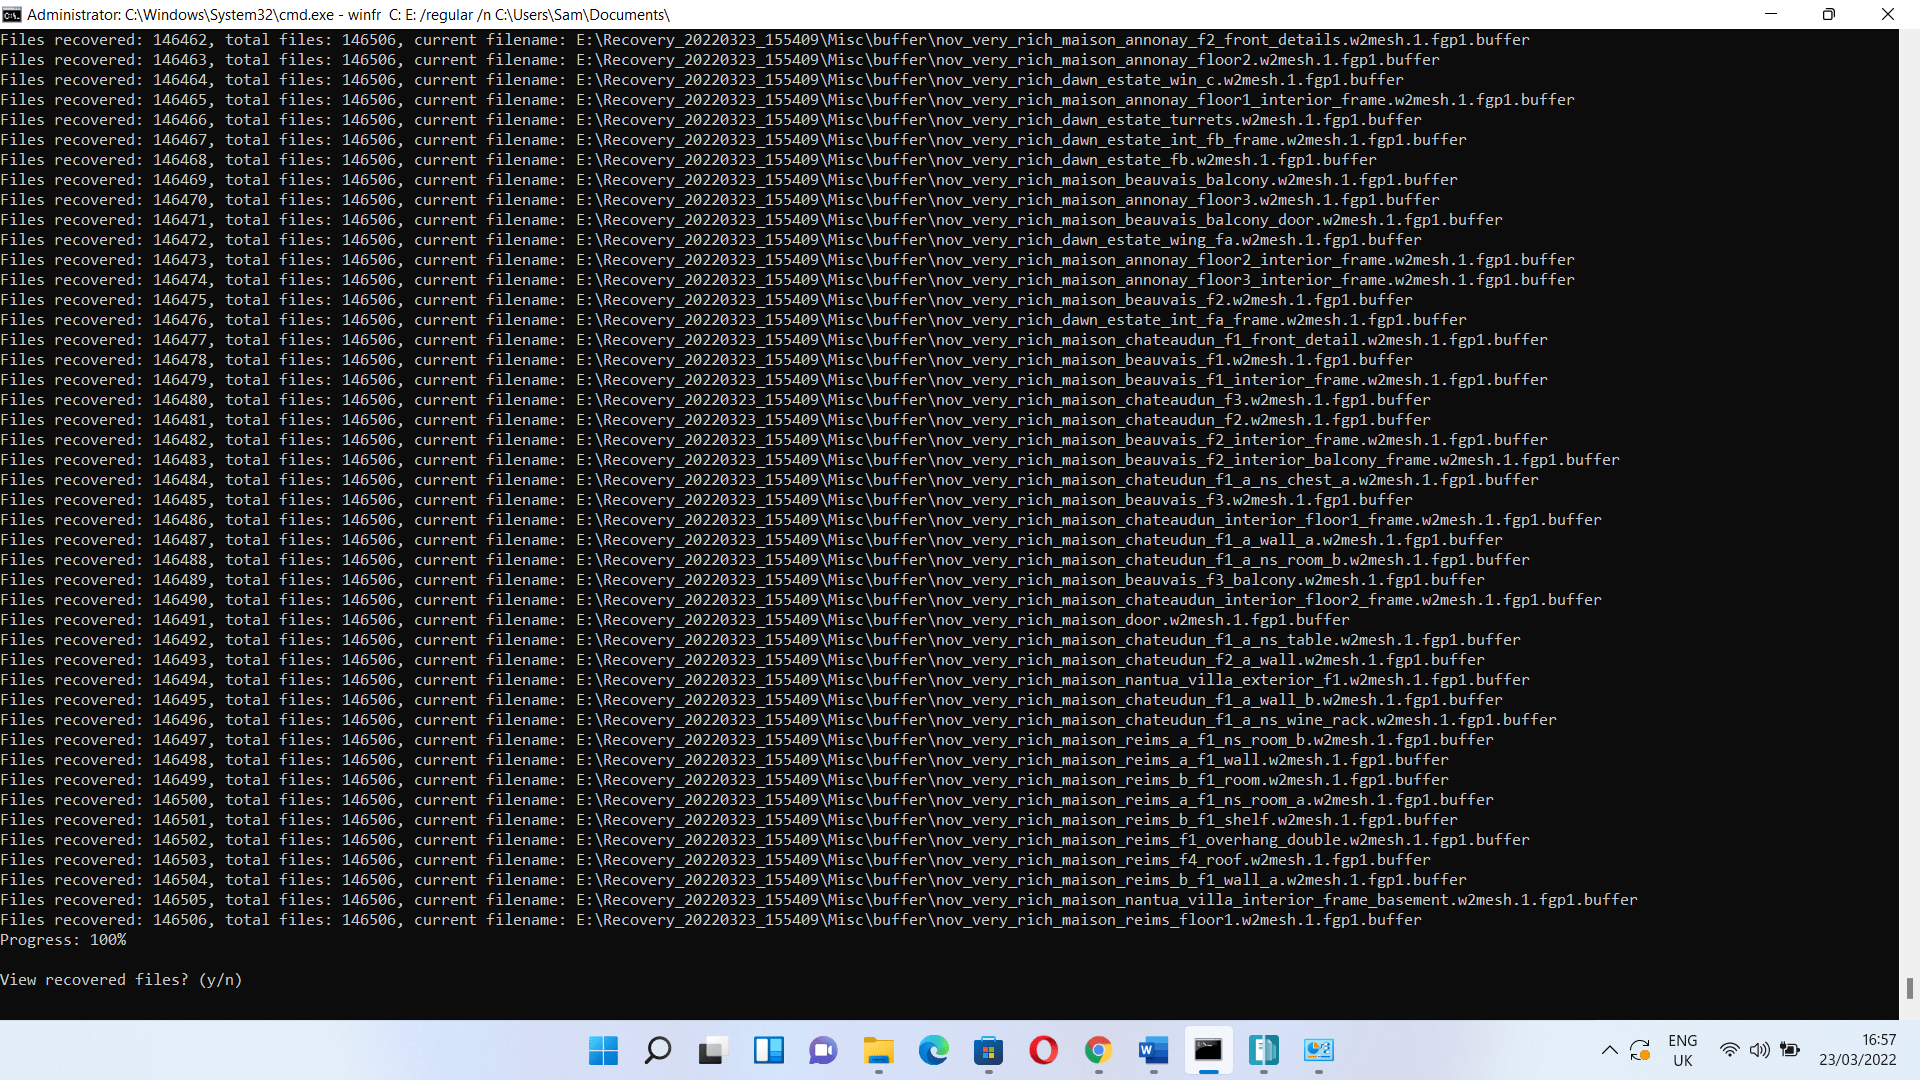
After pressing the Enter key, the tool will show a prompt. Type Y to continue. It will now scan your drive to search for the file. The app will try to recover the file if it finds it. If the process is successful, the file will be sent to a newly created folder – Recovery_<time and date> – in the destination drive.
If you can’t find the file, run a search of the entire folder instead using a command like this:
winfr C: E: /regular /n C:\Users\Sam\Documents\
If a file already exists, you can skip, overwrite, or keep both by entering the letter in the brackets.
Click on Y if you want to view the recovered file.
Running an extensive search
To run an extensive search, you only have to replace “regular” with “extensive.” So, the command should look like this:
winfr C: E: /extensive /n C:\Users\Sam\Documents\
Use the Restore Previous Version option
If your Windows version is earlier than Windows 10, you can use the Restore Previous Versions option in Windows’ File Manager. Follow these steps:
- Open This PC or my computer and navigate to the folder where you lost the file.
- Right-click the folder and select the Restore Previous Versions option.
- The Previous Versions tab of the folder’s Properties dialog will now show up.
- You’ll find the previous versions under Folder Versions.
You’ll now see a list of versions that include files from restore points or a Windows backup you made.
Use Windows’ File History utility
The File History utility allows you to recover files, provided you have a backup saved. However, you can’t turn it on unless you connect an external drive.
Launch Control Panel (you can search for it in the Start menu), then click on System and Security. After the System and Security page opens, click on “Restore your files with file history” under File History.


 Done! Great to see you among our subscribers!