
Microsoft offers different ways to upgrade your Windows OS to the latest version. Since the introduction of Windows 11, users have been making the move to the new OS in numbers.
That said, some Windows 7 users are still making the switch to Windows 10 after Microsoft ended support for the former.
You can upgrade through the Windows Update client, the Windows Update assistant or by using the Windows ISO file.
However, one of the common ways to upgrade Windows, especially from Windows 7 to 10, is using the Media Creation tool.
Related: How to get and use Windows 10 Media Creation Tool
But users have been complaining about seeing error code 0x80072f8f-0x20000 when trying to use the tool.
What Causes the Windows Media Creation Tool Error Code 0x80072f8f – 0x20000?
The common cause of the error code, especially in Windows 7, is the lack of support for TLS 1.1 and TLS 1.2.
In other cases, the error could be showing up because of the software distribution folder or application conflicts.
How to Fix Error Code 0x80072f8f 0x20000 on Windows 10/11 or Windows 7
While the issue mostly occurs on Windows 7, you may also experience it on Windows 10 when upgrading to 11.
Follow the guides below to get rid of the problem for good.
Enable TLS 1.1 and TLS 1.2
We are putting this solution at the top because it helped many users get rid of the error.
The Media Creation Tool communicates with servers that use TLS (Transport Layer Security) 1.1 and TLS 1.2. That’s because the tool has to download the setup files required for the upgrade from Microsoft’s servers.
But as it turns out, these security protocols might be disabled by default on your current Windows version.
So, the error code 0x80072f8f 20000 could be showing up because your PC can’t properly communicate with Microsoft’s servers.
Thankfully, you can enable TLS 1.1 and TLS 1.2 by making changes to the system registry.
Important: Before you begin, note that the system registry is a sensitive part of your operating system and applying the wrong changes could cause permanent damage. So, make sure you follow the steps in this guide carefully.
You can create a backup of the entire registry to be on the safe side. Here’s how to back up the entire registry:
- Click on the Start button.
- Go to the search box and type “regedit.exe.”
- You can also open the Run dialog box (Win + R), type “regedit.exe,” and hit the Enter key.
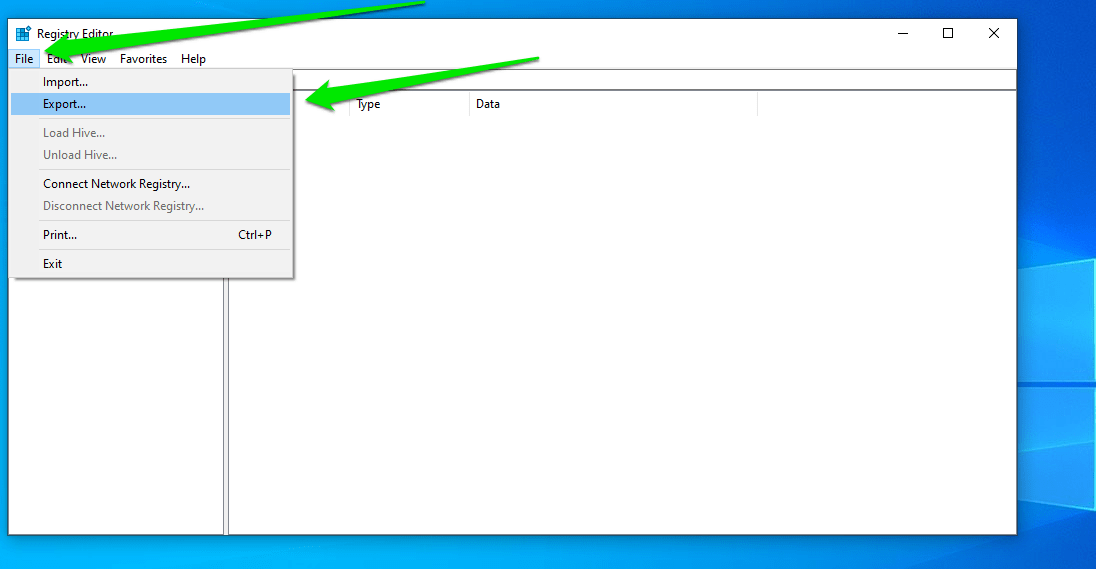
- After the Registry Editor opens, click on File in the top-left corner and select Export.
![]()
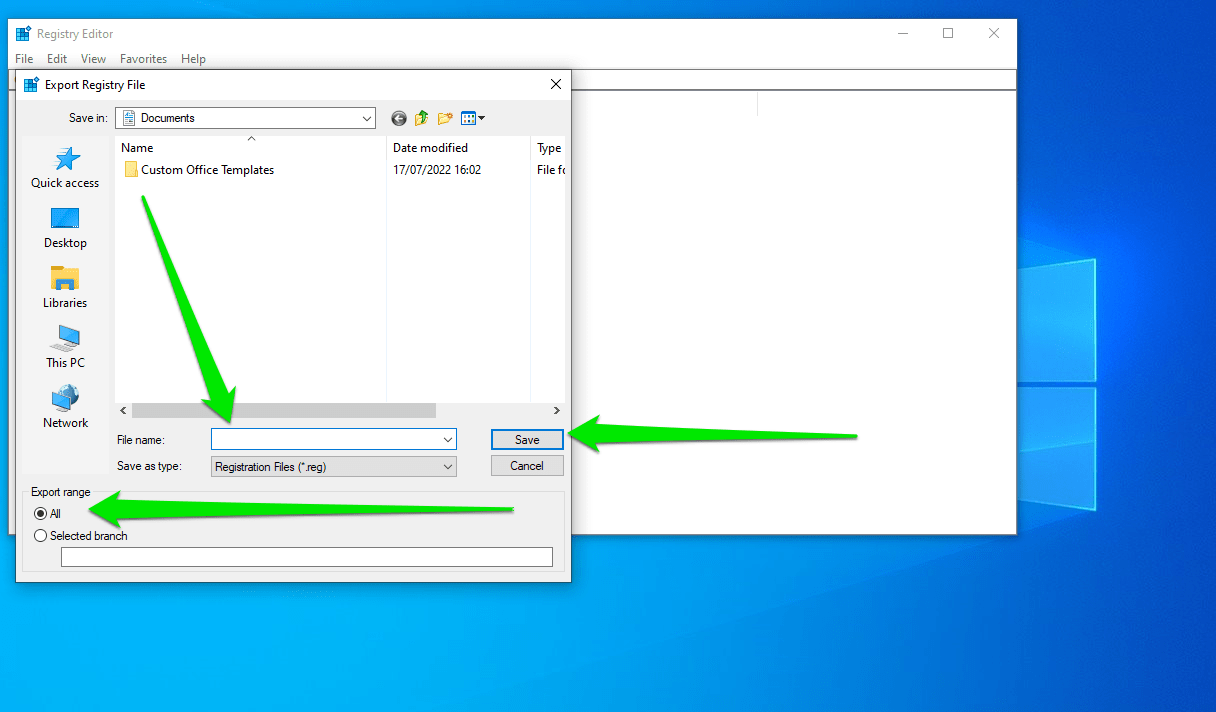
- When the Export Registry File dialog window shows up, choose a location to save the backup, enter a name for the backup file in the File Name box, and select All under Export Range.
- Click on the Save button.
That’s how to backup the registry. Now, follow these steps to enable TLS 1.1 and TLS 1.2:
- Open the Registry Editor.
- To enable TLS 1.1, head to this registry location and follow the subsequent steps:
HKEY_LOCAL_MACHINE\SYSTEM\CurrentControlSet\Control\SecurityProviders\SCHANNEL\Protocols\TLS 1.1\Client
Now, go to the right side of the window and create the DisabledByDefault DWORD. To do that, right-click the empty field and select New > DWORD (32-bit) Value. Change the name of the new DWORD to DisabledByDefault.
Next, double-click the DWORD and set its value to 0.
3. Go to this registry location and follow the subsequent steps to enable TLS 1.2:
HKEY_LOCAL_MACHINE\SYSTEM\CurrentControlSet\Control\SecurityProviders\SCHANNEL\Protocols\TLS 1.2\Client
Note: If the tree ends at Protocols, create the TLS 1.2 and Client keys under the Protocols key.
Create the DisabledByDefault DWORD and set its value to 0.
4. Restart your computer and run the Media Creation Tool again.
Delete the Software Distribution Folder
The software distribution folder is used by the Windows Update client to temporarily store files required for Windows updates. These files are stored when an update is pending for installation or download.
Sometimes, the file in the folder causes conflicts and prevents the client from completing an update.
Since the Media Creation Tool has to download setup files required for upgrading Windows, the issue might be related to the software distribution folder. That’s because Windows may want to install pending updates before moving forward with the upgrade.
As such, deleting the folder may fix the problem.
Follow these steps:
- Open your file explorer and go to C:\Windows\SoftwareDistribution\Download.
- Select every file and sub folder in the folder and delete them.
- Next, launch the Command Prompt and enter the following command: wuauclt.exe /updatenow
- Hit the Enter key and try running the setup again.
Perform a Clean Boot
Windows error code 0x80072f8f – 0x20000 may also be appearing due to application conflicts. Some programs and services that launch during startup may be responsible for triggering the error when you run the Media Creation Tool.
You can resolve the problem by disabling those applications and running only minimal programs at Windows startup. This process is called a clean boot.
Follow these steps:
- Open the Start menu and search for “msconfig.”
- Click System Configuration in the search results.
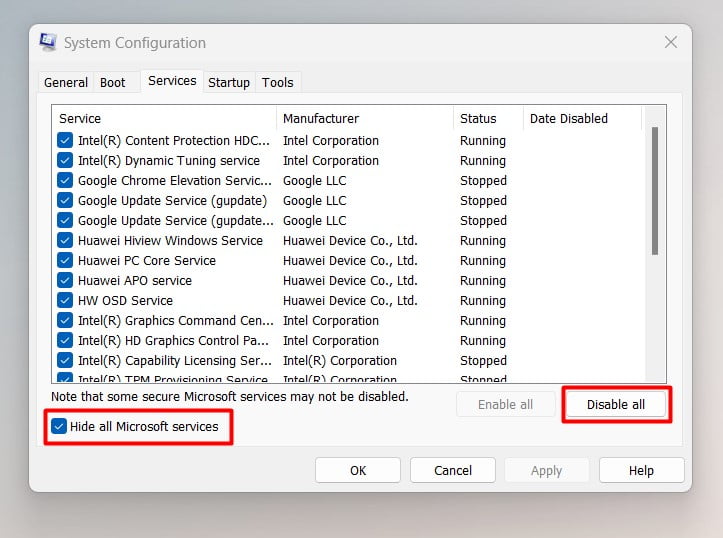
- Once the System Configuration dialog window appears, head to the Services tab.
- Check the “Hide all Microsoft services” box and click on the Disable All button.
![]()
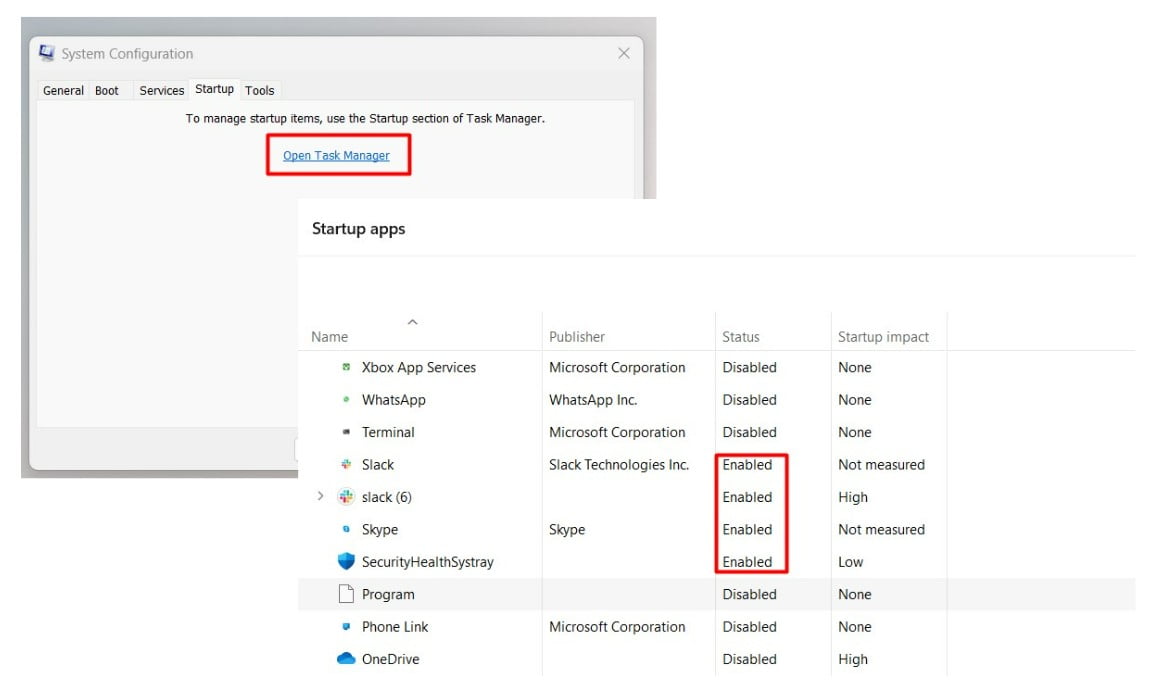
- Next, switch to the Startup tab and select Open Task Manager.
- Once the Startup tab of the Task Manager opens, select each enabled program and click on Disable.
![]()
- Return to the System Configuration dialog and click on the OK button.
- Restart your computer and try upgrading your operating system.
Related: How to perform a clean boot in Windows 10?
Use the Windows ISO File
As we mentioned earlier, the Media Creation Tool has to download the setup file to upgrade your PC. But for some reason, it keeps showing error code 0x80072f8f – 0x20000.
If none of the methods above helped you fix the problem, another alternative is to download the Windows setup file yourself and run the upgrade.
You should also consider downloading the ISO (Windows setup) to your mobile device and transfer it to your computer. This way, the process won’t be botched by the error.
So, follow these steps:
1. On your mobile browser, go to the Microsoft download page and download the ISO for Windows 10. A simple Google search will take you to the page.
Note that you need at least 6 GB of free storage on your mobile device and computer.
2. After downloading the ISO file, transfer it to your computer and extract it using a program such as WinZip or 7zip. Some Windows versions can mount the ISO file as a virtual DVD.
3. Next, open the extracted – or mounted – folder and double-click on the Setup file.
4. Follow the subsequent instructions to complete the upgrade.
You can choose to keep your files and applications during the upgrade or remove everything.
If you still see an error after choosing to keep your files and programs, consider the “Remove everything” option. But before you do that, backup your important files to an external drive.
Conclusion
With the error code 0x80072f8f – 0x20000 Windows 10/11 or Windows 7 fails to upgrade and you may be left with the option of installing Windows from scratch.
However, the guides above will help you get rid of the error for good.
You can also use a PC repair tool to find and fix errors that may be triggering the problem. The tool also helps you prevent issues from occurring in the future.


 Done! Great to see you among our subscribers!