- What Is the Halo 4 UE4 Fatal Error?
- What Causes the Halo 4 UE4 Fatal Error?
- How to Fix the Halo 4 UE4 Fatal Error Crash on Windows 10
- 1. Check for Updates
- 2. Install the Latest Microsoft Visual C++
- 3. Run Halo 4 in Windowed Mode
- 4. Update Your Graphics Card Driver
- 5. Check for File Corruption
- 6. Run Halo 4 on the Dedicated Graphics Card
- 7. Disable Steam Overlay
- 8. Disable the GeForce Experience In-Game Overlay
- 9. Disable Overclocking

Halo: The Master Chief Collection recently launched on Steam, and for a while, gamers were enjoying the shooting video game with very few errors and bugs. Unfortunately, this didn’t last long, and some users started reporting running into the UE4 fatal error crash. Game crashes on Windows PCs are not uncommon, and we know how frustrating that experience can be.
In our post today, we focus on how to remove the UE4 fatal error from your Windows 10 PC so that you can get back to enjoying your game.
What Is the Halo 4 UE4 Fatal Error?
The Halo 4 UE4 fatal error appears when playing the Halo game on the Steam platform on a Windows 10 machine. According to several players, they get different error messages, like UE4 Crash, D3D Device Lost, and Fatal Error, which appear randomly during gameplay.
The error stops the game completely, taking users back to the desktop. In some cases, the Halo game freezes at the startup screen, and the error pops up.
What Causes the Halo 4 UE4 Fatal Error?
One of the most likely reasons that could trigger the Halo 4 UE4 fatal error is an outdated graphics card. If you’ve not updated your graphics card driver for a long time, your graphics card may become unstable, thereby causing issues.
Another reason that could cause the Halo 4 UE4 fatal error is file corruption. It could be caused by a malware infection or incomplete installation of game files.
Additionally, if your GPU is overclocked, it means you’re putting too much load on the GPU and it gets overwhelmed.
The good news is that these are temporary issues that can be resolved using the various solutions provided below.
How to Fix the Halo 4 UE4 Fatal Error Crash on Windows 10
1. Check for Updates
While some errors can be resolved by simply restarting Windows, others can be fixed by installing the latest version of Windows 10. We know that Microsoft releases system and security updates periodically, but not everyone installs them as required. So, whether you have pending updates that require installation or you’ve paused Windows updates, it’s advisable to update your system without further delay.
Apart from fixing vulnerabilities, Windows updates may help to get rid of various PC errors. Checking for updates is simple. Here is what you need to do:
- Press the Windows logo key on your keyboard.
![Open the Start menu.]()
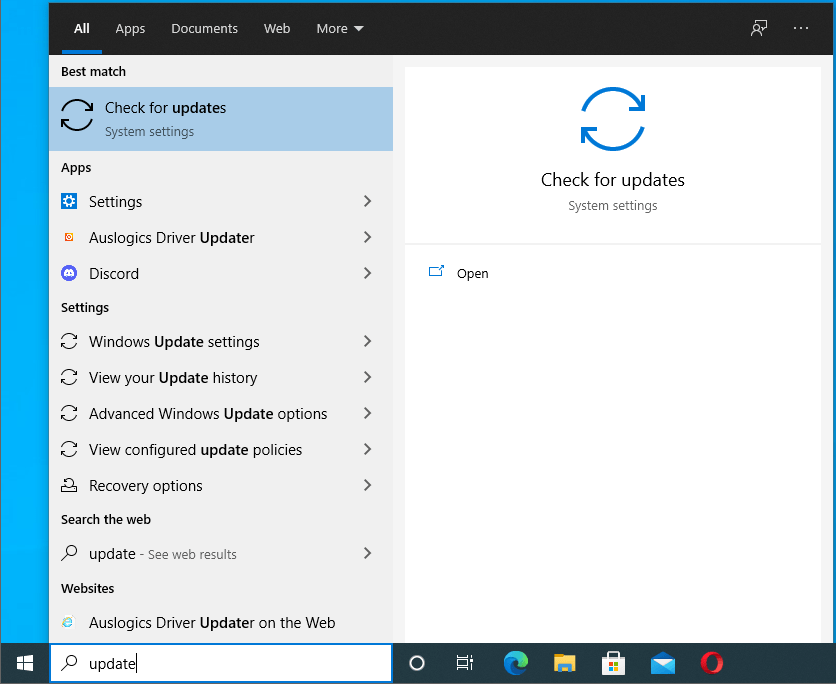
- Type “update” (without quotes), and press “Enter”.
![Type Update into Search and press Enter.]()
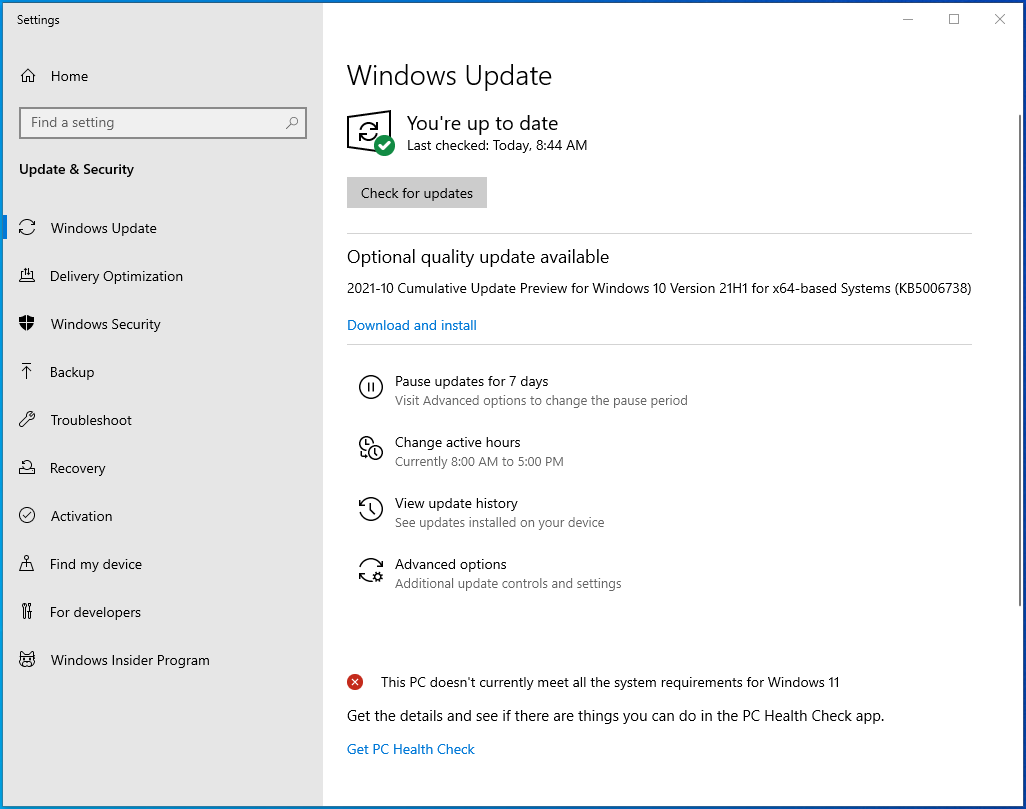
- This opens the Windows Update screen in the “Settings” app.
![You will be taken to the Windows Update screen.]()
- If updates are available, you’ll see the “Download and install” button. Simply click on it to install the updates.
![Click "Download and install" to install available updates.]()
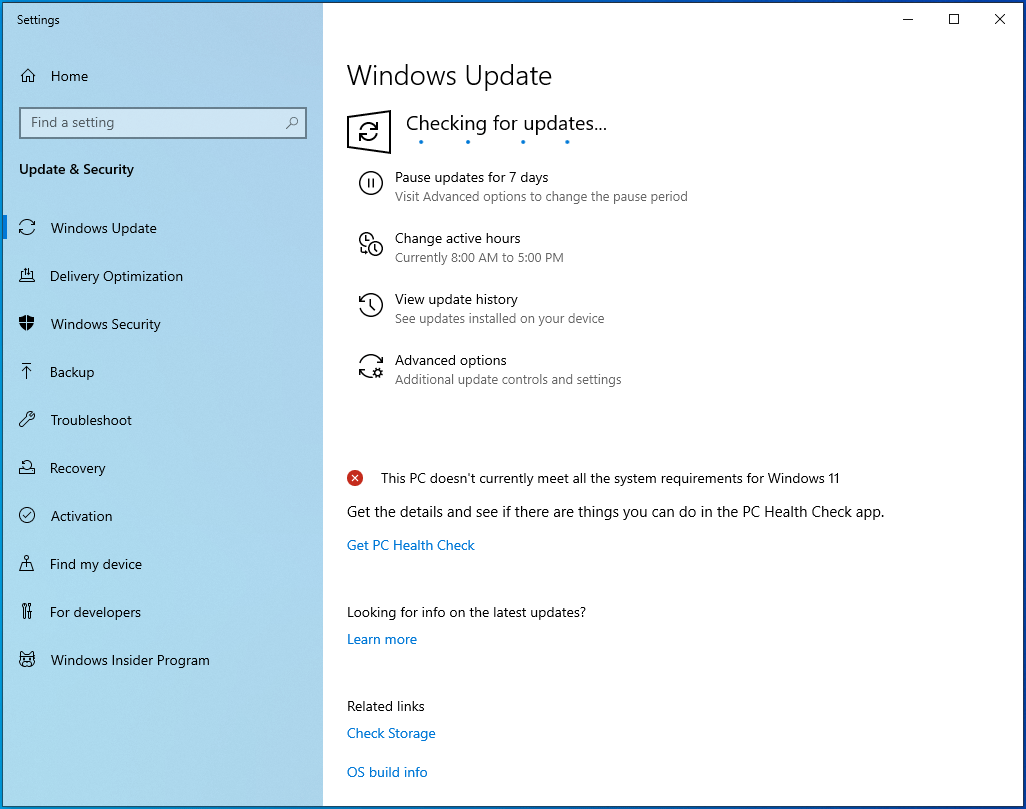
- You can also check for updates by clicking on the “Check for updates” button.
![Click “Check for updates” on your screen.]()


If Windows establishes that you have pending updates, it will automatically install them on your PC.
If you are required to reboot your computer, do so and check if you can play Halo: The Master Chief Collection without running into the Halo 4 UE4 fatal error.
2. Install the Latest Microsoft Visual C++
Most games require your computer to run the latest version of Microsoft Visual C++ to work properly. If your version is outdated or some of the Visual C++ Redistributables are missing, it could be the reason why the game is crashing out of the blue.
To fix this, try downloading and installing the latest supported Visual C++.
3. Run Halo 4 in Windowed Mode
Most users choose to play their games on PCs in Fullscreen display mode. While this makes gaming more appealing, your game gains full control over the screen output, and your PC gives it the highest priority. This is known to cause games to crash from time to time.
You can try switching to Windowed display mode to see if you can play the game flawlessly. To do so, follow the guide below:
- Launch your Steam client and select the “Library” tab.
- Locate “Halo: The Master Chief Collection”, right-click on it and open its “Properties” window.
- On the next screen, under the “General” tab, click on the “Set launch options…” option.
- Type –windowed (with the hyphen) into the input field and click “OK” to apply the changes.
Now, try launching the game to see if you’ll still run into the fatal error.
4. Update Your Graphics Card Driver
Device drivers play a crucial role in the proper functioning of your hardware. So, if any one of your device drivers is outdated, programs associated with that particular driver will become unstable and may crash or freeze.
To determine whether or not your graphics card driver is behind the Halo 4 UE4 fatal error, you can try updating it. You can do this manually via the website of your graphics card manufacturer, which in most cases is either NVIDIA or AMD. You’ll need to find the version, model, and type of the graphics card driver currently installed on your PC and look for the corresponding updates on the relevant website.
Once you’ve found the necessary updates, download and install them on your PC. If you’re using an NVIDIA graphics card, you can use the GeForce Experience tool to check for available driver updates.
The truth is that trying to manually update your graphics card driver can be a waste of time, not to mention you run the risk of installing the wrong driver version or model. But you don’t have to second-guess. Auslogics Driver Updater makes things easier for you. The program performs a thorough scan of your entire PC, detecting the OS version and the installed drivers.
After the diagnostics process is complete, Driver Updater checks for the latest official versions of all the outdated drivers on your PC. Since your PC has dozens of drivers, this program speeds up the process and allows you to update all of them at once, with just one click. But you don’t have to install all of them if you don’t want to. You can only install the device drivers that you need, like the graphics card driver.
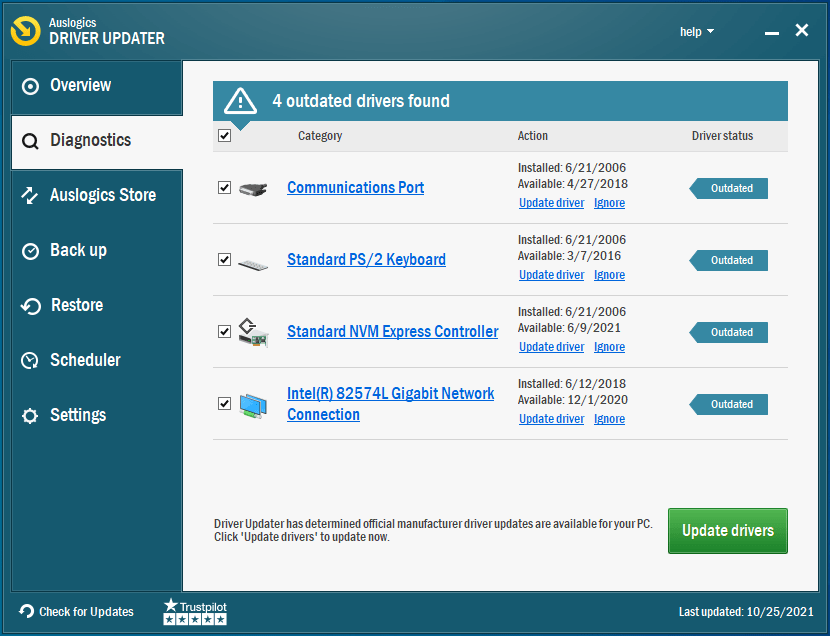
Auslogics Driver Updater also comes with a backup option that allows you to revert the changes if the new drivers don’t function well.
Once all the updates have been installed, restart your computer and try launching Halo. If the error persists, try the next fix below.
5. Check for File Corruption
For one reason or another, your game files could be corrupted or missing, leading to issues when trying to launch or play the game. To fix this, you could try verifying the integrity of the game’s files via the Steam client.
First, you’ll need to empty the contents of the MCC (The Master Chief Collection) folder. Here’s how:
- Open the “Run” dialog box using the Win + R key combination.
- Type in%userprofile%\AppData\LocalLow and press “Enter” or click “OK”.
- Find the “Halo: The Master Chief Collection” folder and open it. The aim is to clear all the contents of this folder. But before you do, it’s safe to create a backup in case things go south. You can create a new folder on your desktop and copy all the contents there, or you can save the files to a new folder on a removable storage device.
- To delete all the files, use the Ctrl + A shortcut to select everything and hit “Delete” or “Backspace”.
- Now, once you’ve deleted all the files in this folder, launch your Steam client, go to the “Library” tab and find the Halo game. Once you do, right-click on it and open its “Properties” window.
- Open the “Local Files” tab, and click on the “Verify Integrity of Game Files…” button.
The process may take a while. So, wait patiently for it to complete successfully. Now check if you can play the game without triggering the error.
6. Run Halo 4 on the Dedicated Graphics Card
Most laptops come with an integrated graphics chipset built into the system. While in most cases, the integrated GPU can work well, especially if you’re just using your PC to run low-impact programs or tasks, you’ll need a more powerful GPU to run high-impact applications like games.
That’s where a dedicated GPU comes in. Apart from being equipped with advanced RAM that supports video processing better, it has dedicated RAM designed specifically to handle resource-hungry programs.
If you aren’t sure that your computer has more than one graphics card, you can check via Device Manager:
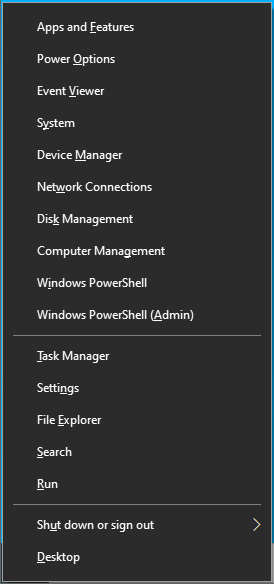
- Press the Windows key + X shortcut.
![Press Win + X to open the Power User menu.]()
- Open “Device Manager”.
![Click Device Manager from the menu.]()
- Expand “Display adapters”.
![Expand "Display adapters" in Device Manager.]()

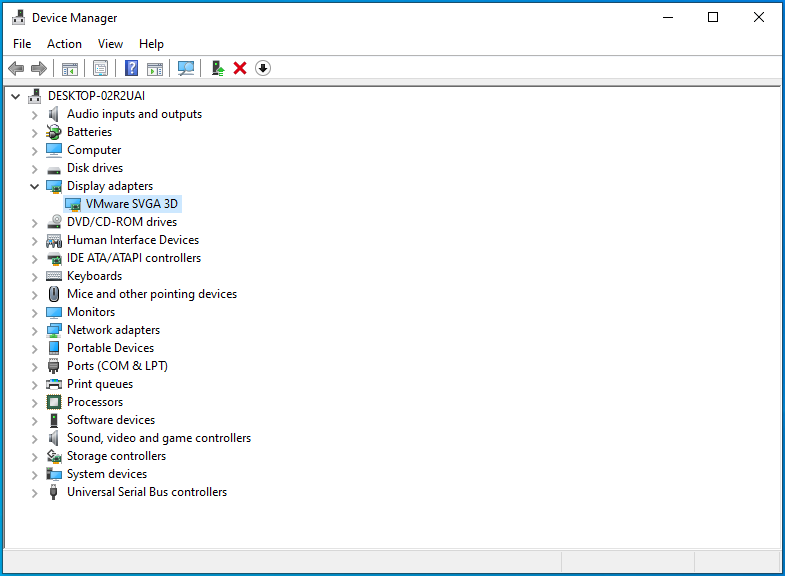
If you notice more than one GPU, you can switch to the dedicated GPU.
For NVIDIA users:
- Right-click on an empty space on your desktop and open the NVIDIA Control Panel.
- Click on “Manage 3D Settings” on the left pane, select “Program Settings” and click “Add”.
- Find your game’s .exe file and click on “Add Selected Program”. If you can’t find your game on this list, use the “Browse…” option to find the .exe file in the game’s installation directory.
- With the game selected, click on the “Select the preferred graphics processor for this program:” drop-down list and select “High-performance NVIDIA processor”.
- Next, click “Apply” and launch the game to see if this fix worked.
For AMD users:
- Right-click on an empty space on your desktop, open “AMD Radeon Settings” and go to Preferences > Additional Settings > Power Switchable Graphics Application Settings.
- Next, select the Halo game from the list. If you don’t see it here, click “Add Application” and select the game’s .exe file from the installation folder.
- Now, with the game selected, go to the “Graphics Settings” column and choose “High Performance”.
Try launching the game once again to see if the Halo 4 EU4 fatal error is still there.
7. Disable Steam Overlay
If Steam Overlay is enabled, it could be causing your game to crash. The solution could be as simple as disabling this option. Here are the steps:
- Run the Steam client, open the “Library” tab and find your game (Halo: The Master Chief Collection).
- Right-click on it and select “Properties”.
- When the “Properties” window opens, check under the “General” tab if the “Enable the Steam Overlay while in-game” option is checked. If it is, uncheck it and close the Steam client.
8. Disable the GeForce Experience In-Game Overlay
If this doesn’t fix the error, try disabling the GeForce Experience In-Game Overlay:
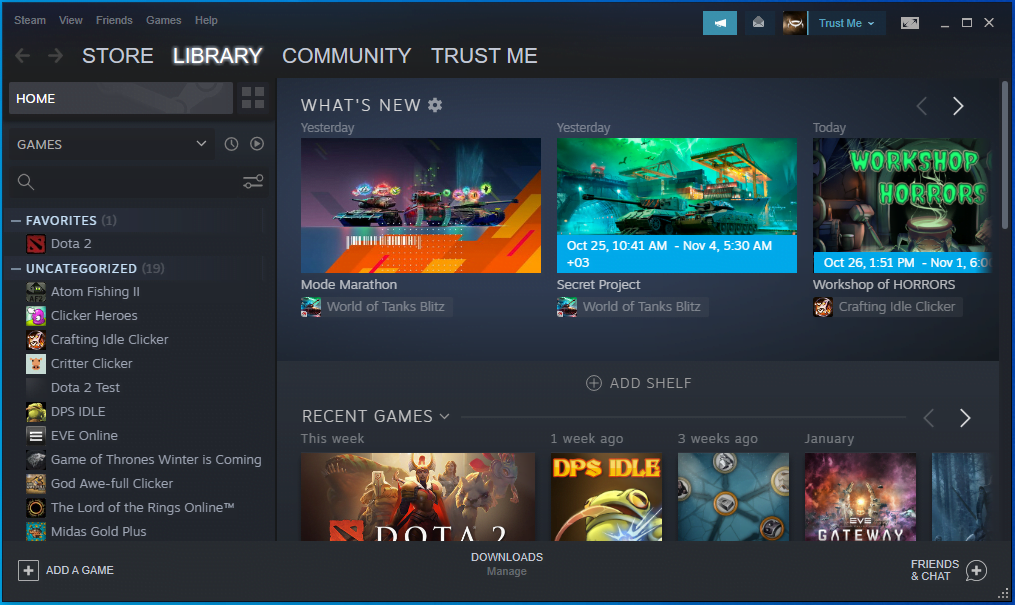
- Open Steam.
![Launch Steam on your PC.]()
- Click on the “Settings” option from the menu.
![Click on the Settings option.]()
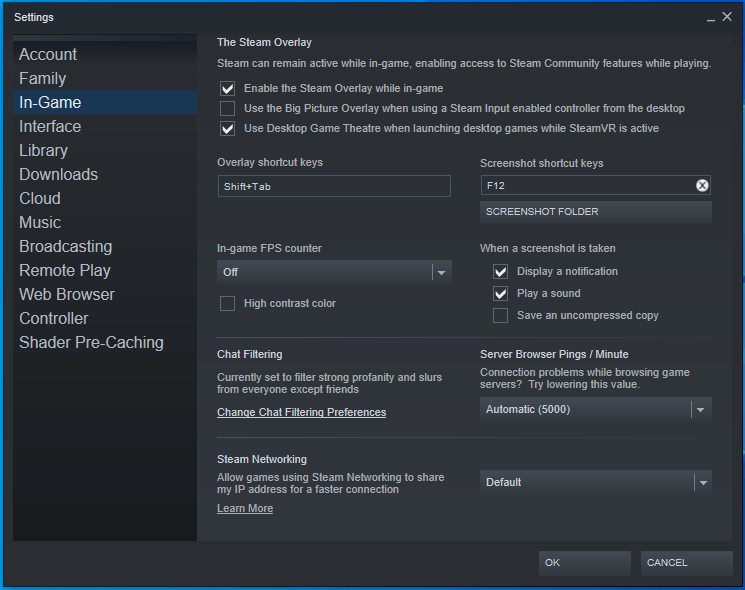
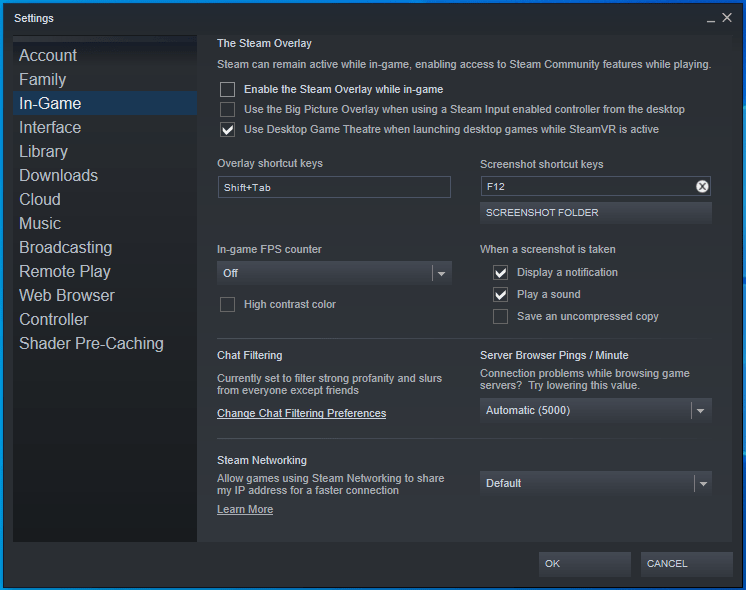
- Click on the In-Game tab on the left pane.
![]()
- Disable the in-game overlay option.
![Disable "Enable the Steam Overlay while in-game".]()
9. Disable Overclocking
If your GPU is overclocked, you can have issues playing games on your PC. Overclocking tends to cause game instability, which could lead to crashes. If the GPU is overclocked, restoring it to its factory defaults might get rid of the error.
That’s all on how to remove the UE4 fatal error message. Hopefully, one of these solutions works for you. If you have additional information about this topic, feel free to comment below.


 Done! Great to see you among our subscribers!